
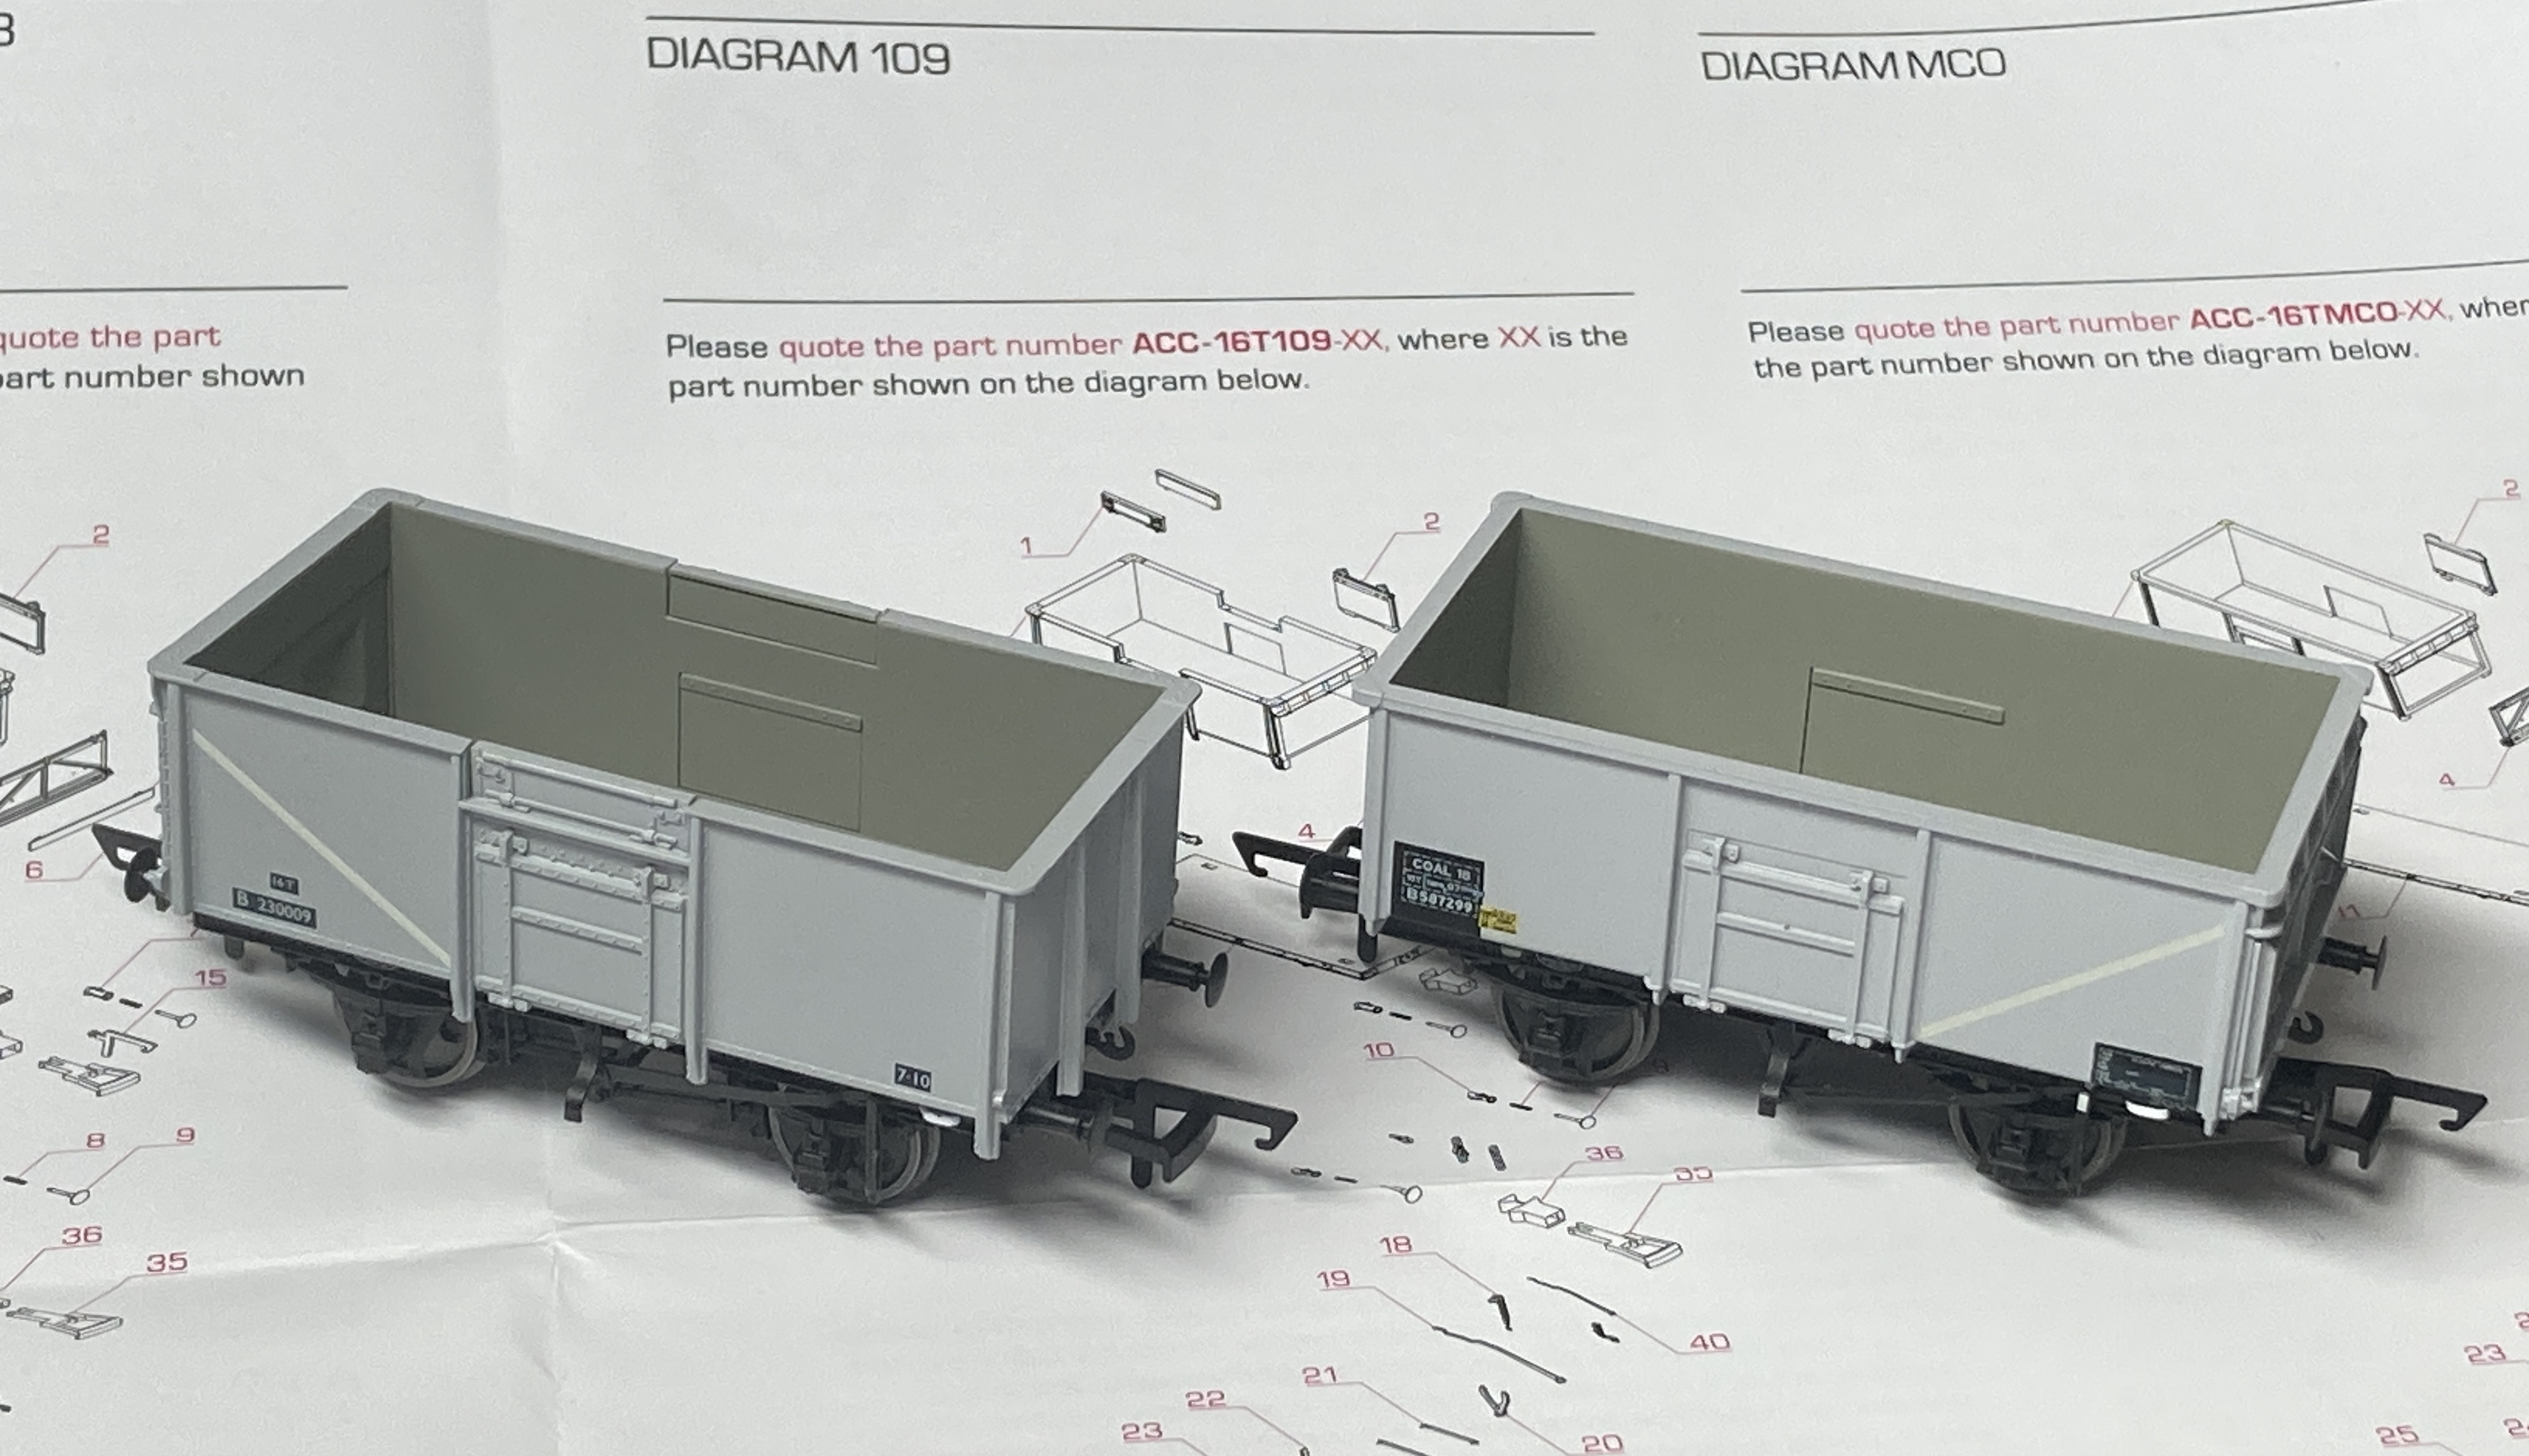
Into the man cave this past week or two Accurascale’s 16Ton minerals have rattled across the doorstep. Two varieties have arrived a set of Diagram 108 re-body, and a set of Diagram 109 riveted body vehicles.


They are packaged in the Accurascale house style of a classy sturdy carton and vacuum formed trays, both sets of mine had no faulty or loose components. Within the carton is an information leaflet and spare sets of couplings including three link chains. As with all the previous Accurascale releases that have arrived the immediate appearance and feel is one of quality.

In Accurascales information leaflet for these 16 Ton mineral wagons they pose the tollowing thought: Mundane? Certainly. Boring? Possibly? But thats the thing when an object becomes familiar, its demise is not noted until it has gone.. I can relate to that, I used to commute into Kings Cross every day, how I wish I’d taken more pictures of the 313’s 312’s and 317’s and just the infrastructure that now is long gone. That very much sums up this prototype, with 221,123 examples built they were everywhere. Look at an image of a British Rail era goods siding from the late 1950’s through to the late 1970’s there’s a good chance a 16T mineral will be in the mix. The packs ACC1049 J, and ACC1062 O I’ve got in the man cave are different to those we have seen supplied in ready to run format previously. The well regarded Bachmann model, introduced in the early 2000’s has always represented a welded construction wagon, the most common body type produced under diagram 1/108. The wagons here represent the diagram 1/108 rebodied wagon and the 1/109 design which was a riveted construction, and neither have been available before in 4mm scale ready to run models.

Doing the old school thing of taking a measuring stick to the models they match published data in the books illustrated above. The appearance is excellent for both types they capture the look of these wagons very well. The diagram 109 is not quite as good as the rebody version due to an error that was unfortunately not sighted with the EP’s, but a bit more on that later, stuff happens!

It’s probably a good time to tip a nod of acknowledgment to the venerable Bachmann 16 Ton mineral wagon (above), that has served us so well since the early 2000’s, a brilliant development at the time, immediately knocking back the over length wheelbase and relatively coarse models of the era, and rapidly selling quickly with each production run. Unsurprisingly there were comments regarding prototype wagon duplication when Accurascale announced the 16T mineral family, was it worth it? Well here’s a spoiler, in a word yes, but there’s no need to throw the Bachmann varieties out, they’re still worth holding onto. Anyway, 3,2,1, we’re back in the room.
Chassis Construction
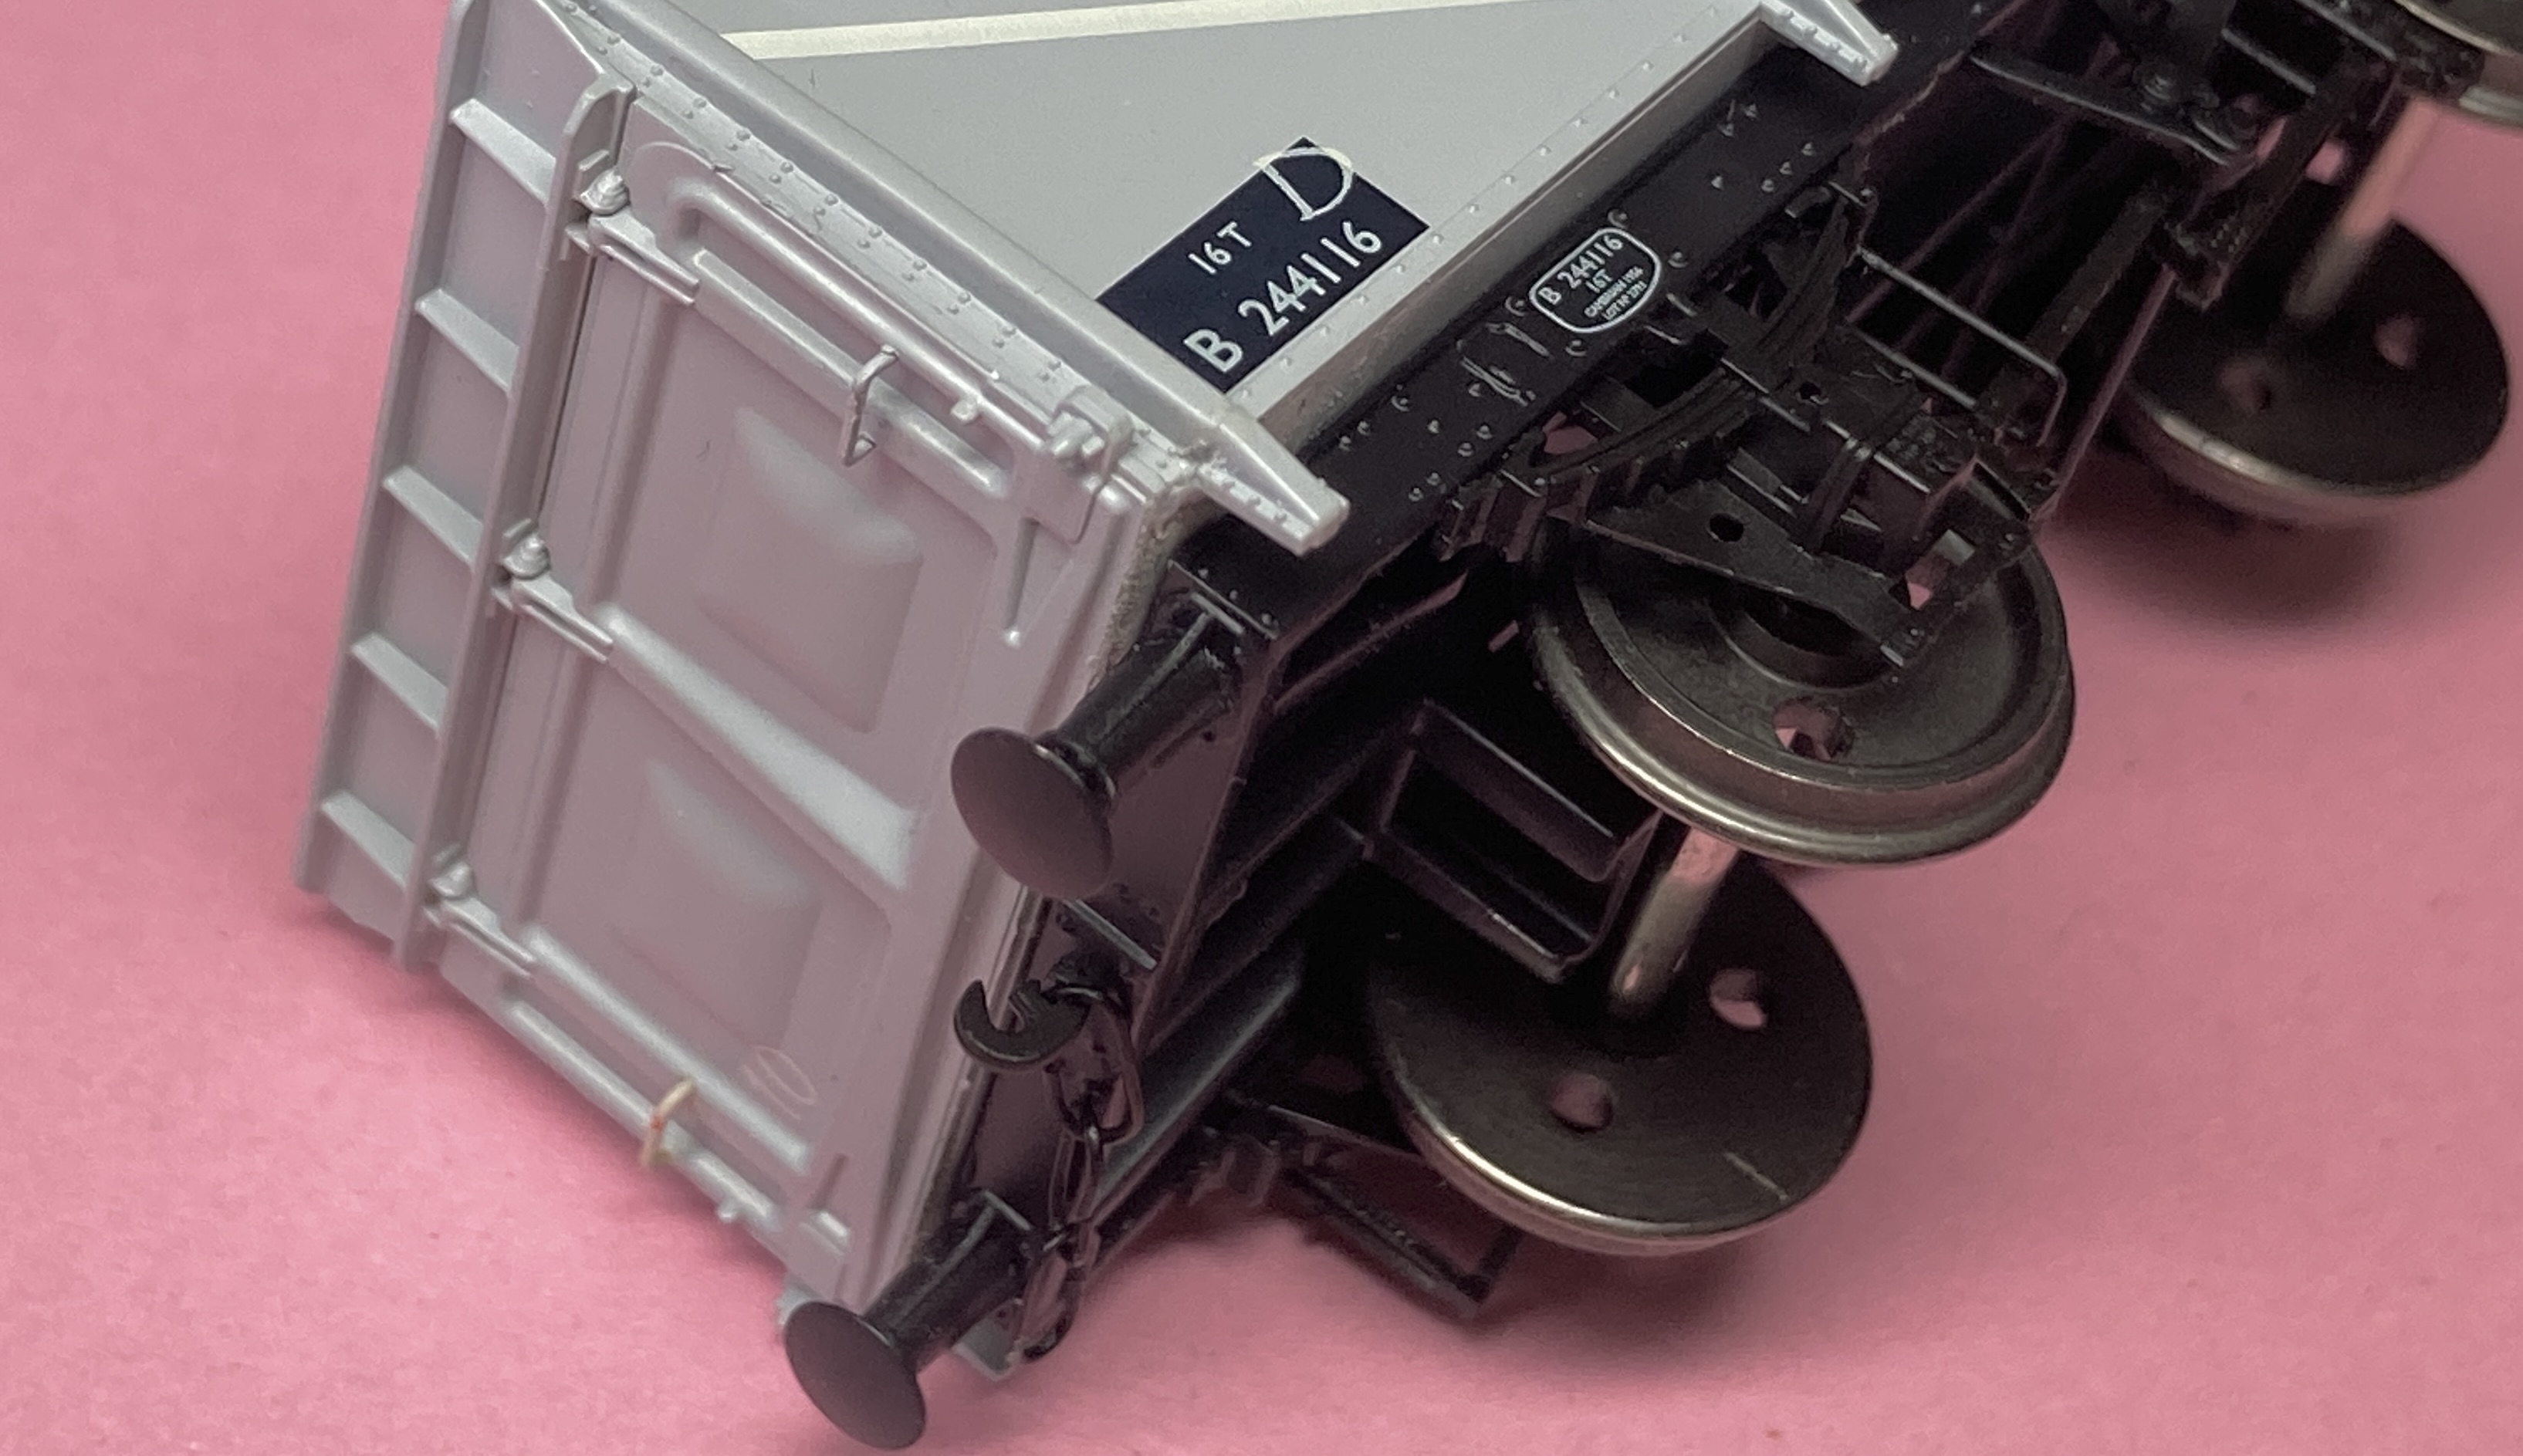
The model is quite different in its construction to other ‘simple’ open RTR wagons. It differs principally in the chassis is metal and in this first tranche of releases looks to be specific to the unfitted versions. There are many separate detail and functional pieces to these wagons with roughly 40 or so components to each wagon varying on body and door type, roughly double the number in a Bachmann version. As the chassis is a casting, there is good evenly distributed weight across the chassis. This chassis is common to both types under review here.

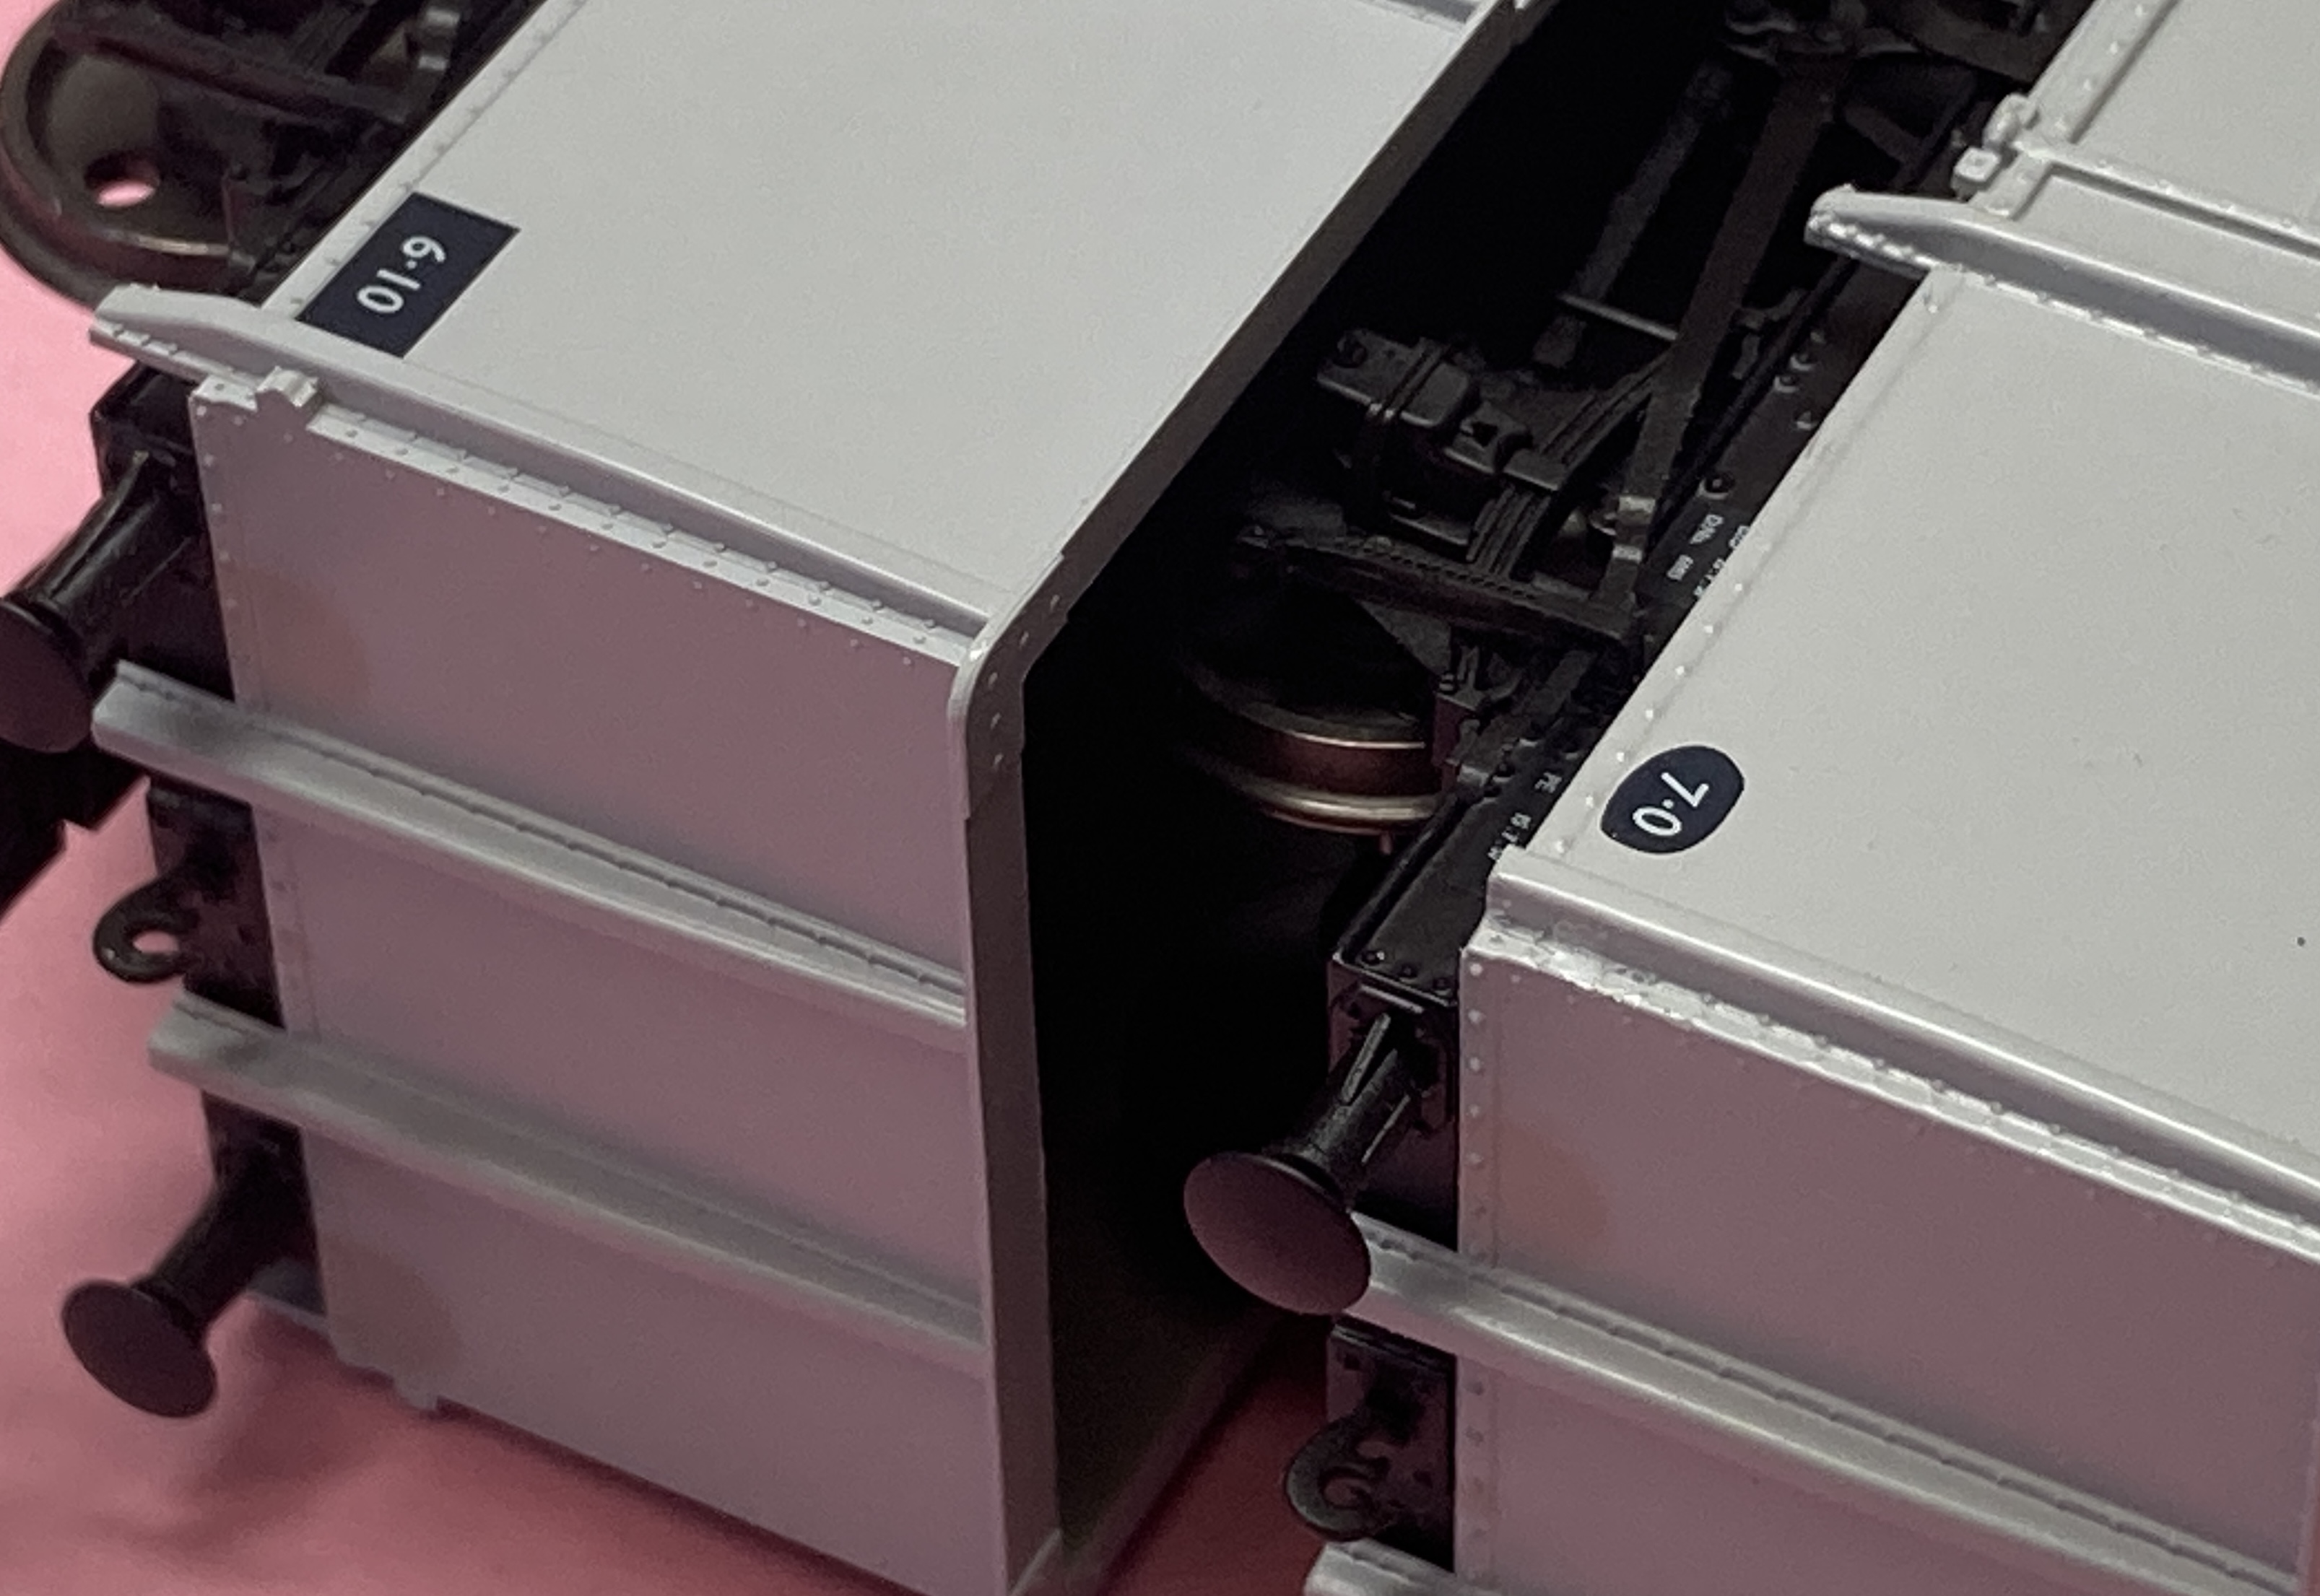
NEM coupling pockets sit in an integral chassis mount which is hidden behind the wheels from most viewing distances. if you use three links and want an unobstructed view between the wheel end on or at oblique angles this will need to be removed with a saw. For the moment for me, they are unobtrusive enough to leave in situ.

One of the features of these wagons is that there are extra couplings supplied with a socket extender. If you need to run with RTR tension lock couplings and want a bit of extra distance between the wagons the replacement couplings and extender are a simple plug and play fitting. Three link couplings are also supplied which easily slot into the hooks on the chassis, ideally for me this means no extra costs in buying chain links!

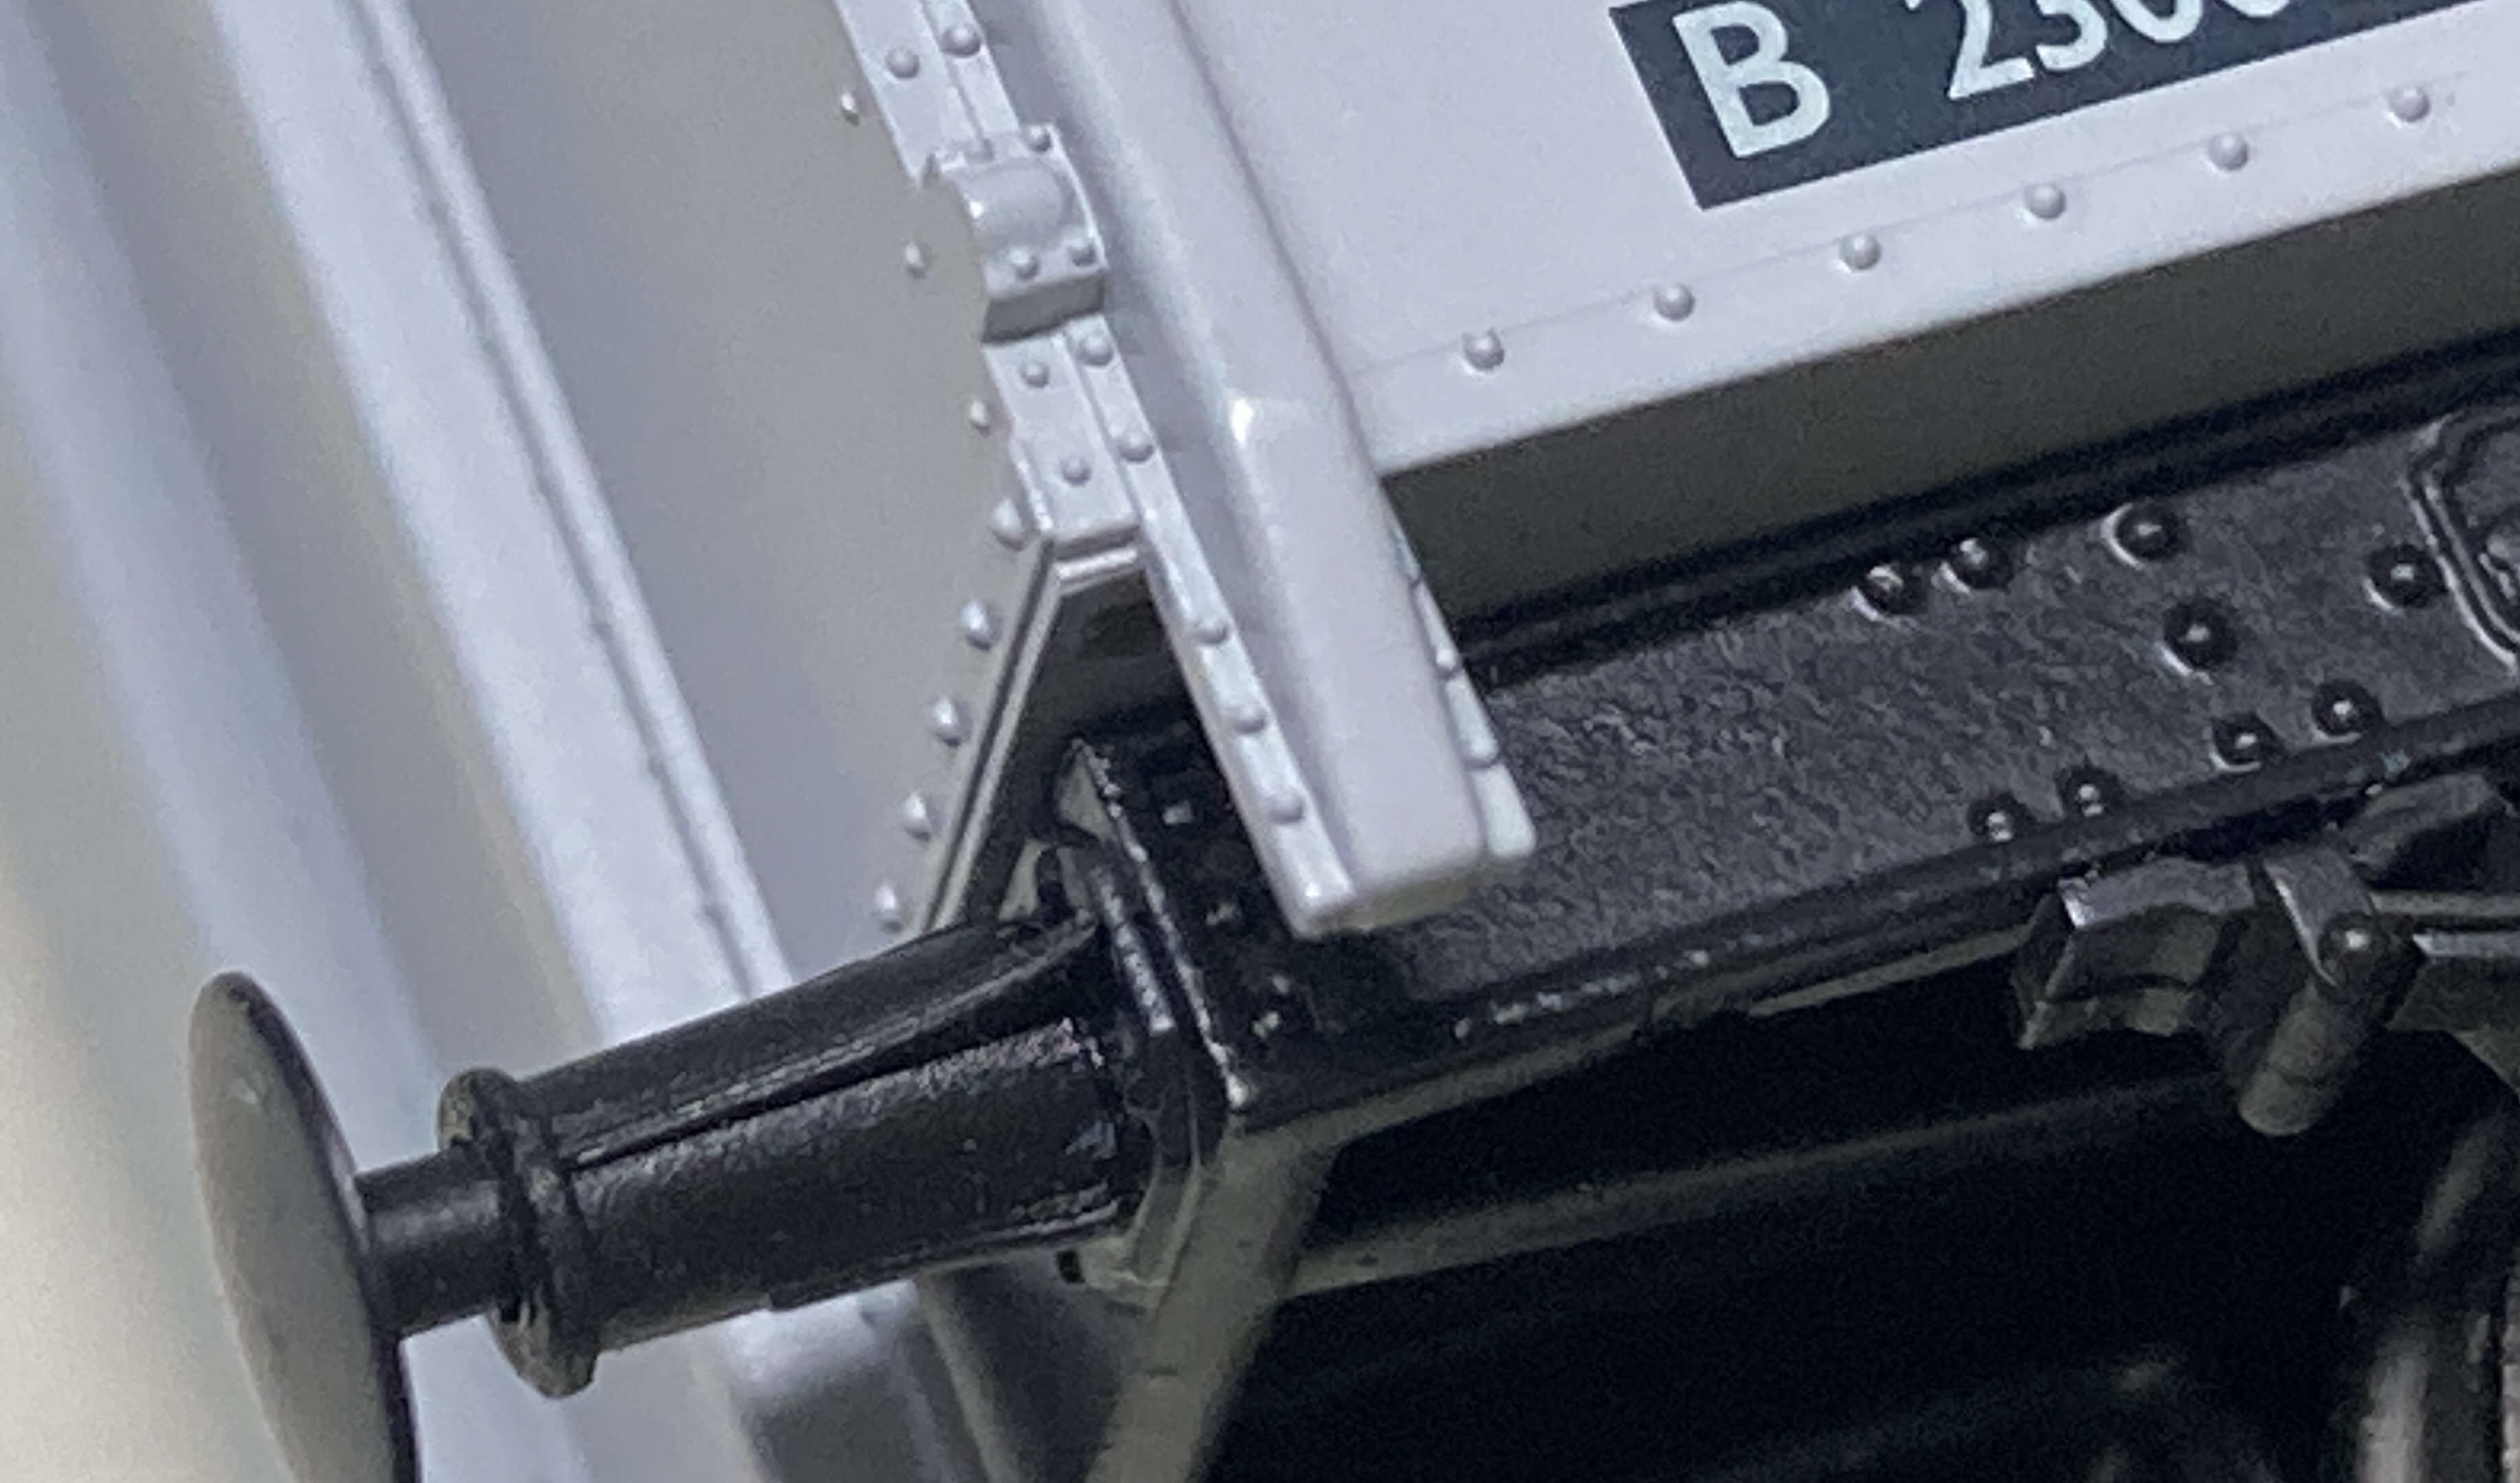
The outer ends ends of the chassis headstocks are part of the body mouldings (similar to Bachmann’s), and this allows the variations in headstocks to be included in the body moulding. Buffers are functional and very softly sprung. Varying types will be represented across the range, for these types on the desk the correct 1’6″ spindle RCH design is fitted.

All of the iron work which we previously have associated with solid mouldings on RTR wagons on these chassis’ are on another level with these wagons. Starting with the brake levers, these are incredibly fine plastic, fitting through the equally fine brake lever guards.

Two different brake levers are in evidence for the types on reviewing both exhibit the correct cam mechanism at the V hanger.

The push rods are separate bars including the adjustment pin location holes at the inner ends, and are enclosed by open push rod stirrups. Those features have previously only been seen on modified RTR, kit or scratch built vehicles. W irons are separate plastic fittings including brass pinpoint bearings, the W iron thickness is very thin giving a real look of plate steel. This gives excellent free running qualities. The axle box is integral with the W iron so undoubtedly there will be variations on the theme as the range expands..


The brake shoes have a very close tolerance to the wheel tread, the wheel profiles are RP25-110 and look far better than many others available. These wagons have been tested through Peco Cd75 Bullhead, streamline and Kato uni track with no problems at all, back to back measurements varied between 14.32mm and 14.47mm across the six wagons.

Looking at the W irons there is a peculiar look to the springs, giving the appearance of three leaves whereas the prototype has six. This isn’t particularly noticeable for me but does detract slightly from the rest of the brilliant under frame.

The closed end headstock needs the same work however this is more noticeable so 4mm U shaped plastic channel, once both in place they need painting black to match the rest of the under frame.
Dia 1/108 Rebody
Both the 108 and 109 diagram bodies are well moulded and meet published dimensions The top rails are a bit wide, but no doubt this is to ensure the shape is retained once moulded. The end door is a welded type door as appropriate and includes separate wire hand grab rails.

The rebody version is an example of the very subtle differences that could be seen across the fleet. The new bodies had no top door flap, and a curved tumblehome at the bottom of the sides. This curve was introduced to help prevent corrosion at the bottom edges of these wagons.
This curve is quite visible as the side doesn’t have that crisp lower edge that the earlier versions have, and despite it being perhaps a couple of inches radius in real life it’s quite easy to see and hasn’t been reflected in an RTR model previously.
Diagram 1/109 Rivetted construction
Accurascale’s dia 1/109 represents the base forms of the common or garden British Rail standard mineral wagon, there were roughly 25,000 built so whilst as not as common as the dia 1/108 they were not uncommon.

Whilst checking against references and simultaneously with comments on RMweb I noted an error on the body moulding of the 1/109. It appears that in the design and production process the end stanchions were swapped and unfortunately made it through to production. The fix for this error is easy and will be covered further down. The rest of the body is excellent the riveted construction is well captured with the steps and rivet heads subtly moulded and will undoubtedly ‘pop’ with weathering.

The Easy Fix
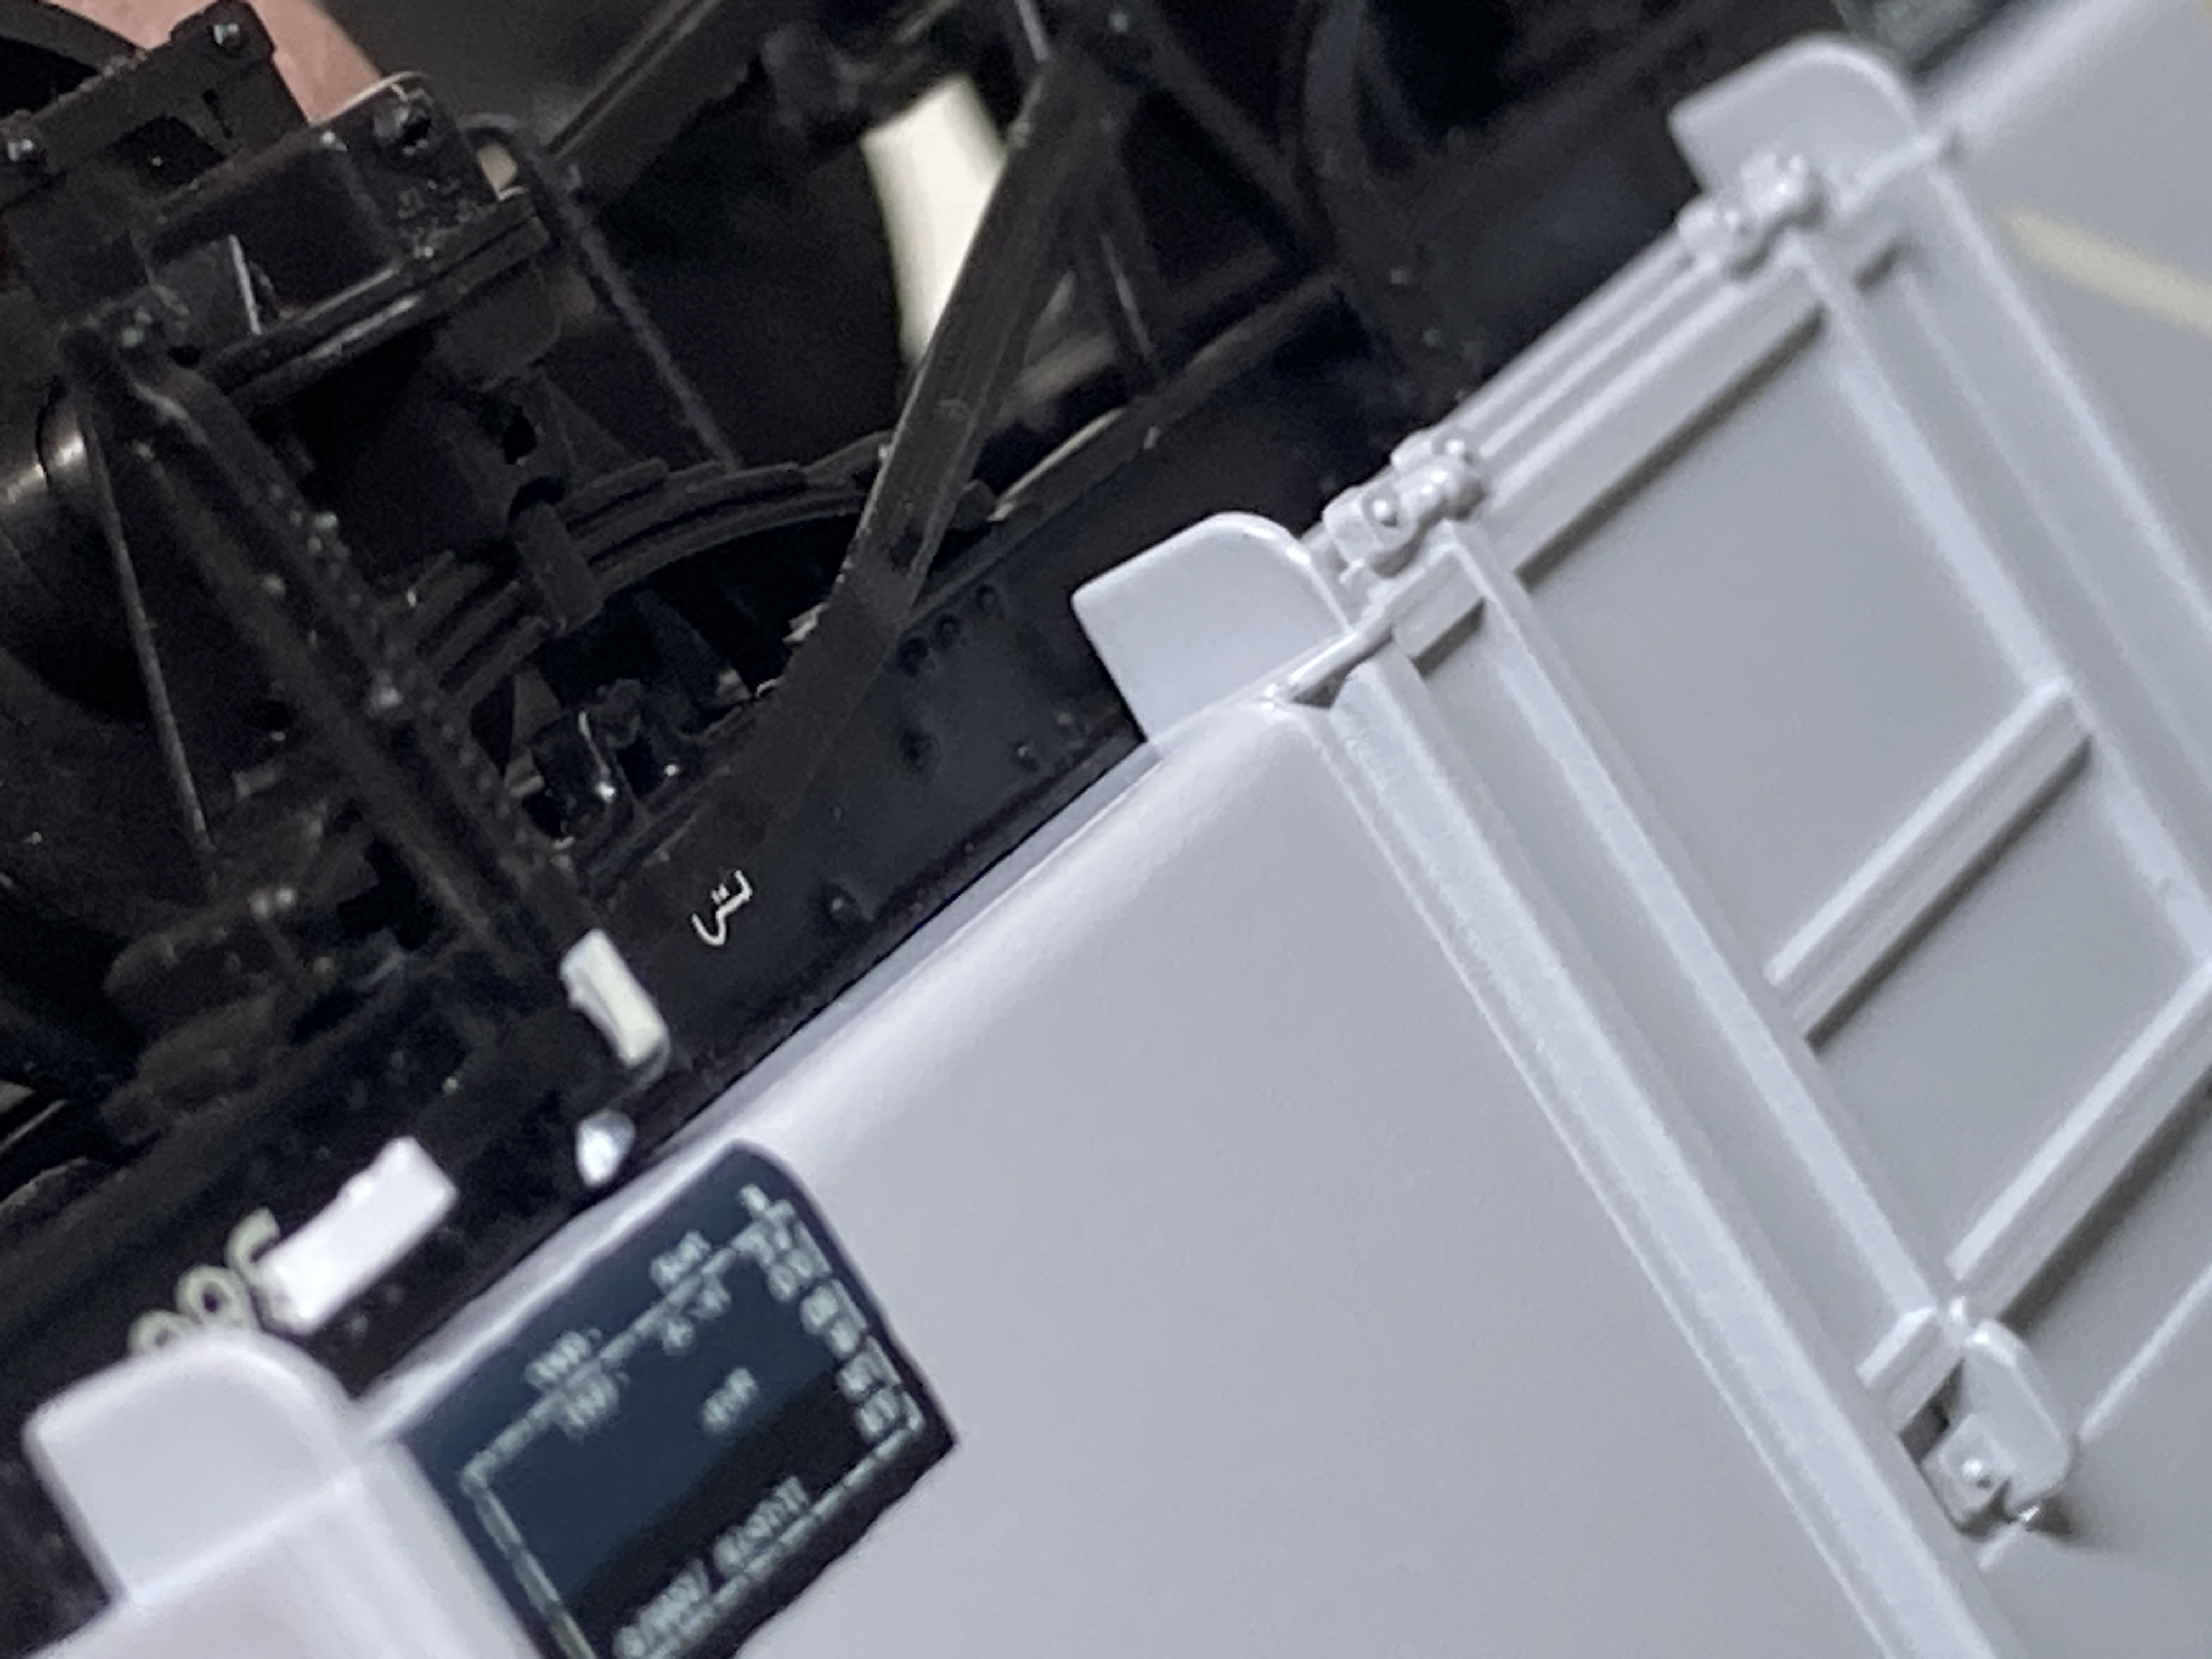
So to look at the stanchions and fix them is literally a ten minute job. At the door end the stantion is too short, and part of the door closing pin mechanism is missing, as seen below. The top picture shows the door end. The side stanchion of the wagon should extend below the body to the base of the sole bar, and there should be the housing for the door closing mechanism. This can be seen on the lower image which shows the opposite end of the wagon, where the stanchion has been transposed.

The chassis is held in place by four clips at each corner of the wagon. Gently press on these and the chassis releases from the body as a single assembly.


The stanchion can be cut off with a knife or as I have done with a razor saw. The razor saw held flat against the base of the wagon will give a flat cut, the knife can leave an angle. Make sure you retain this removed section as it’ll be refined at the door end.


The three steps above show the modifications to the closed end of the wagon. The extra section of the door mechanism is cut away and the area is touched in later when detail painting. At the door end the section of stanchion is simply aligned with the existing stanchion and glued in place.


I use thin viscosity cyanoacrylate type glue, this gives a fast drying time but also acts as a filler for any gap. The headstocks also need extending and with the door end I just use a small section of plastic strip. This is aligned to the end of the headstock and again fixed with CA glue. Ive not bothered with filling the section for the door mechanism, as the area will be weathered in due course.


The joint is easily masked with a coast of paint. To match this Accurascale colour I’ve mixed two Vallejo colours, 071.050 light grey and 071.119 White Grey. This gives an almost invisible join close up and certainly works at a normal viewing distance.

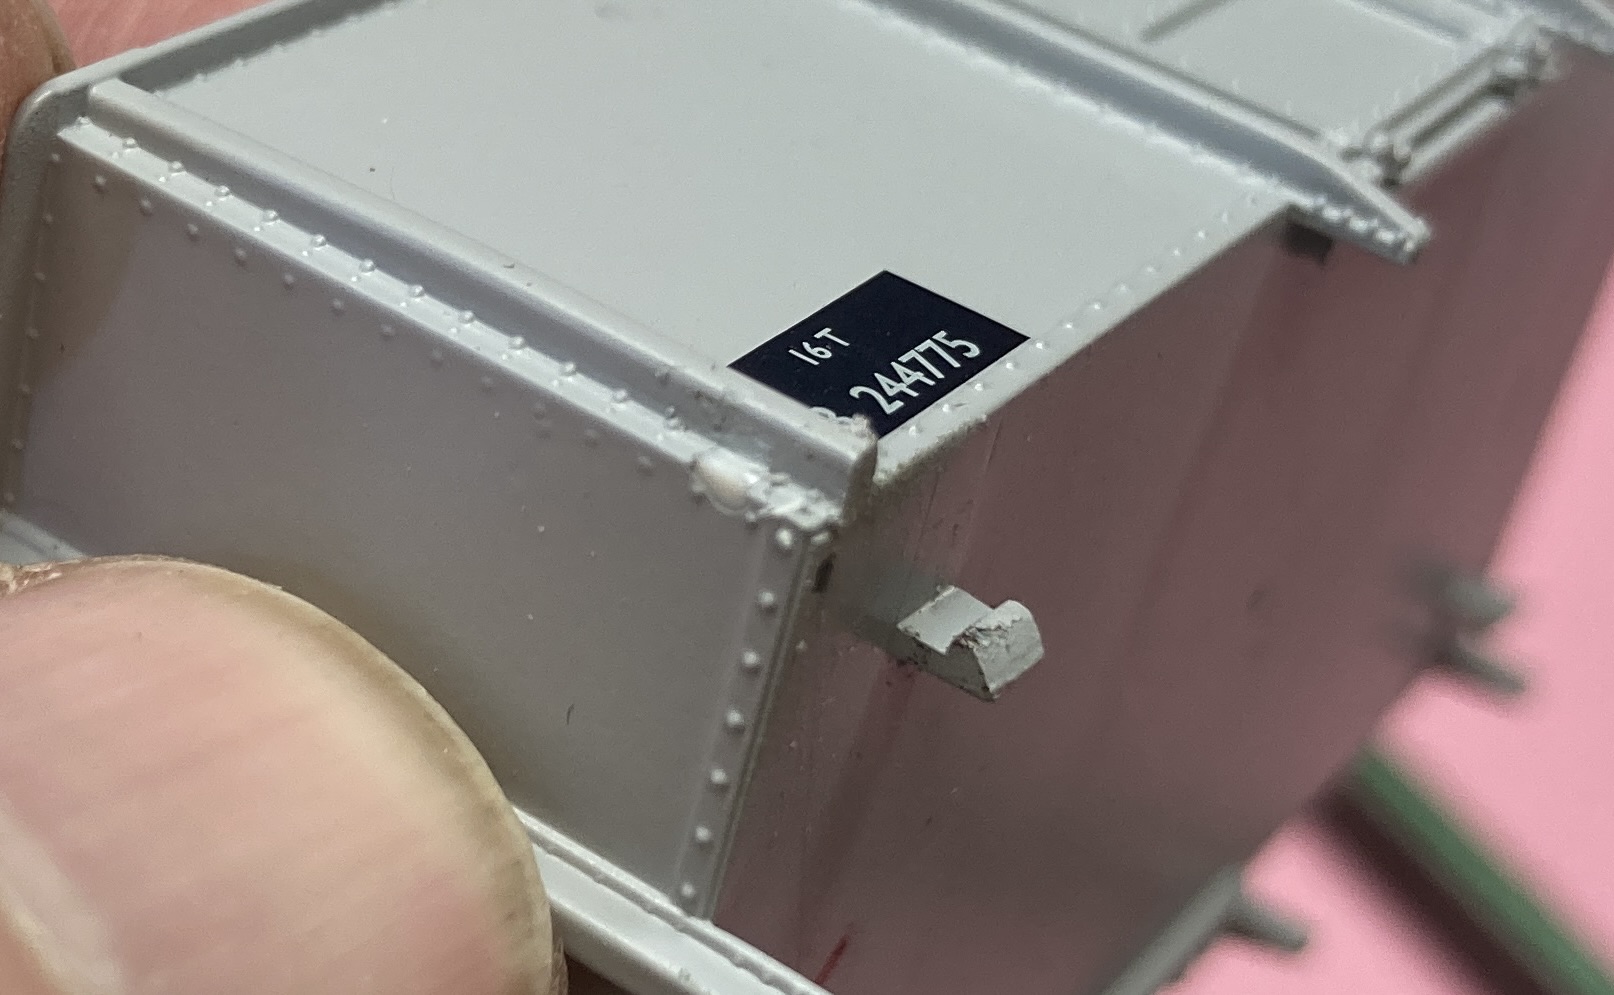
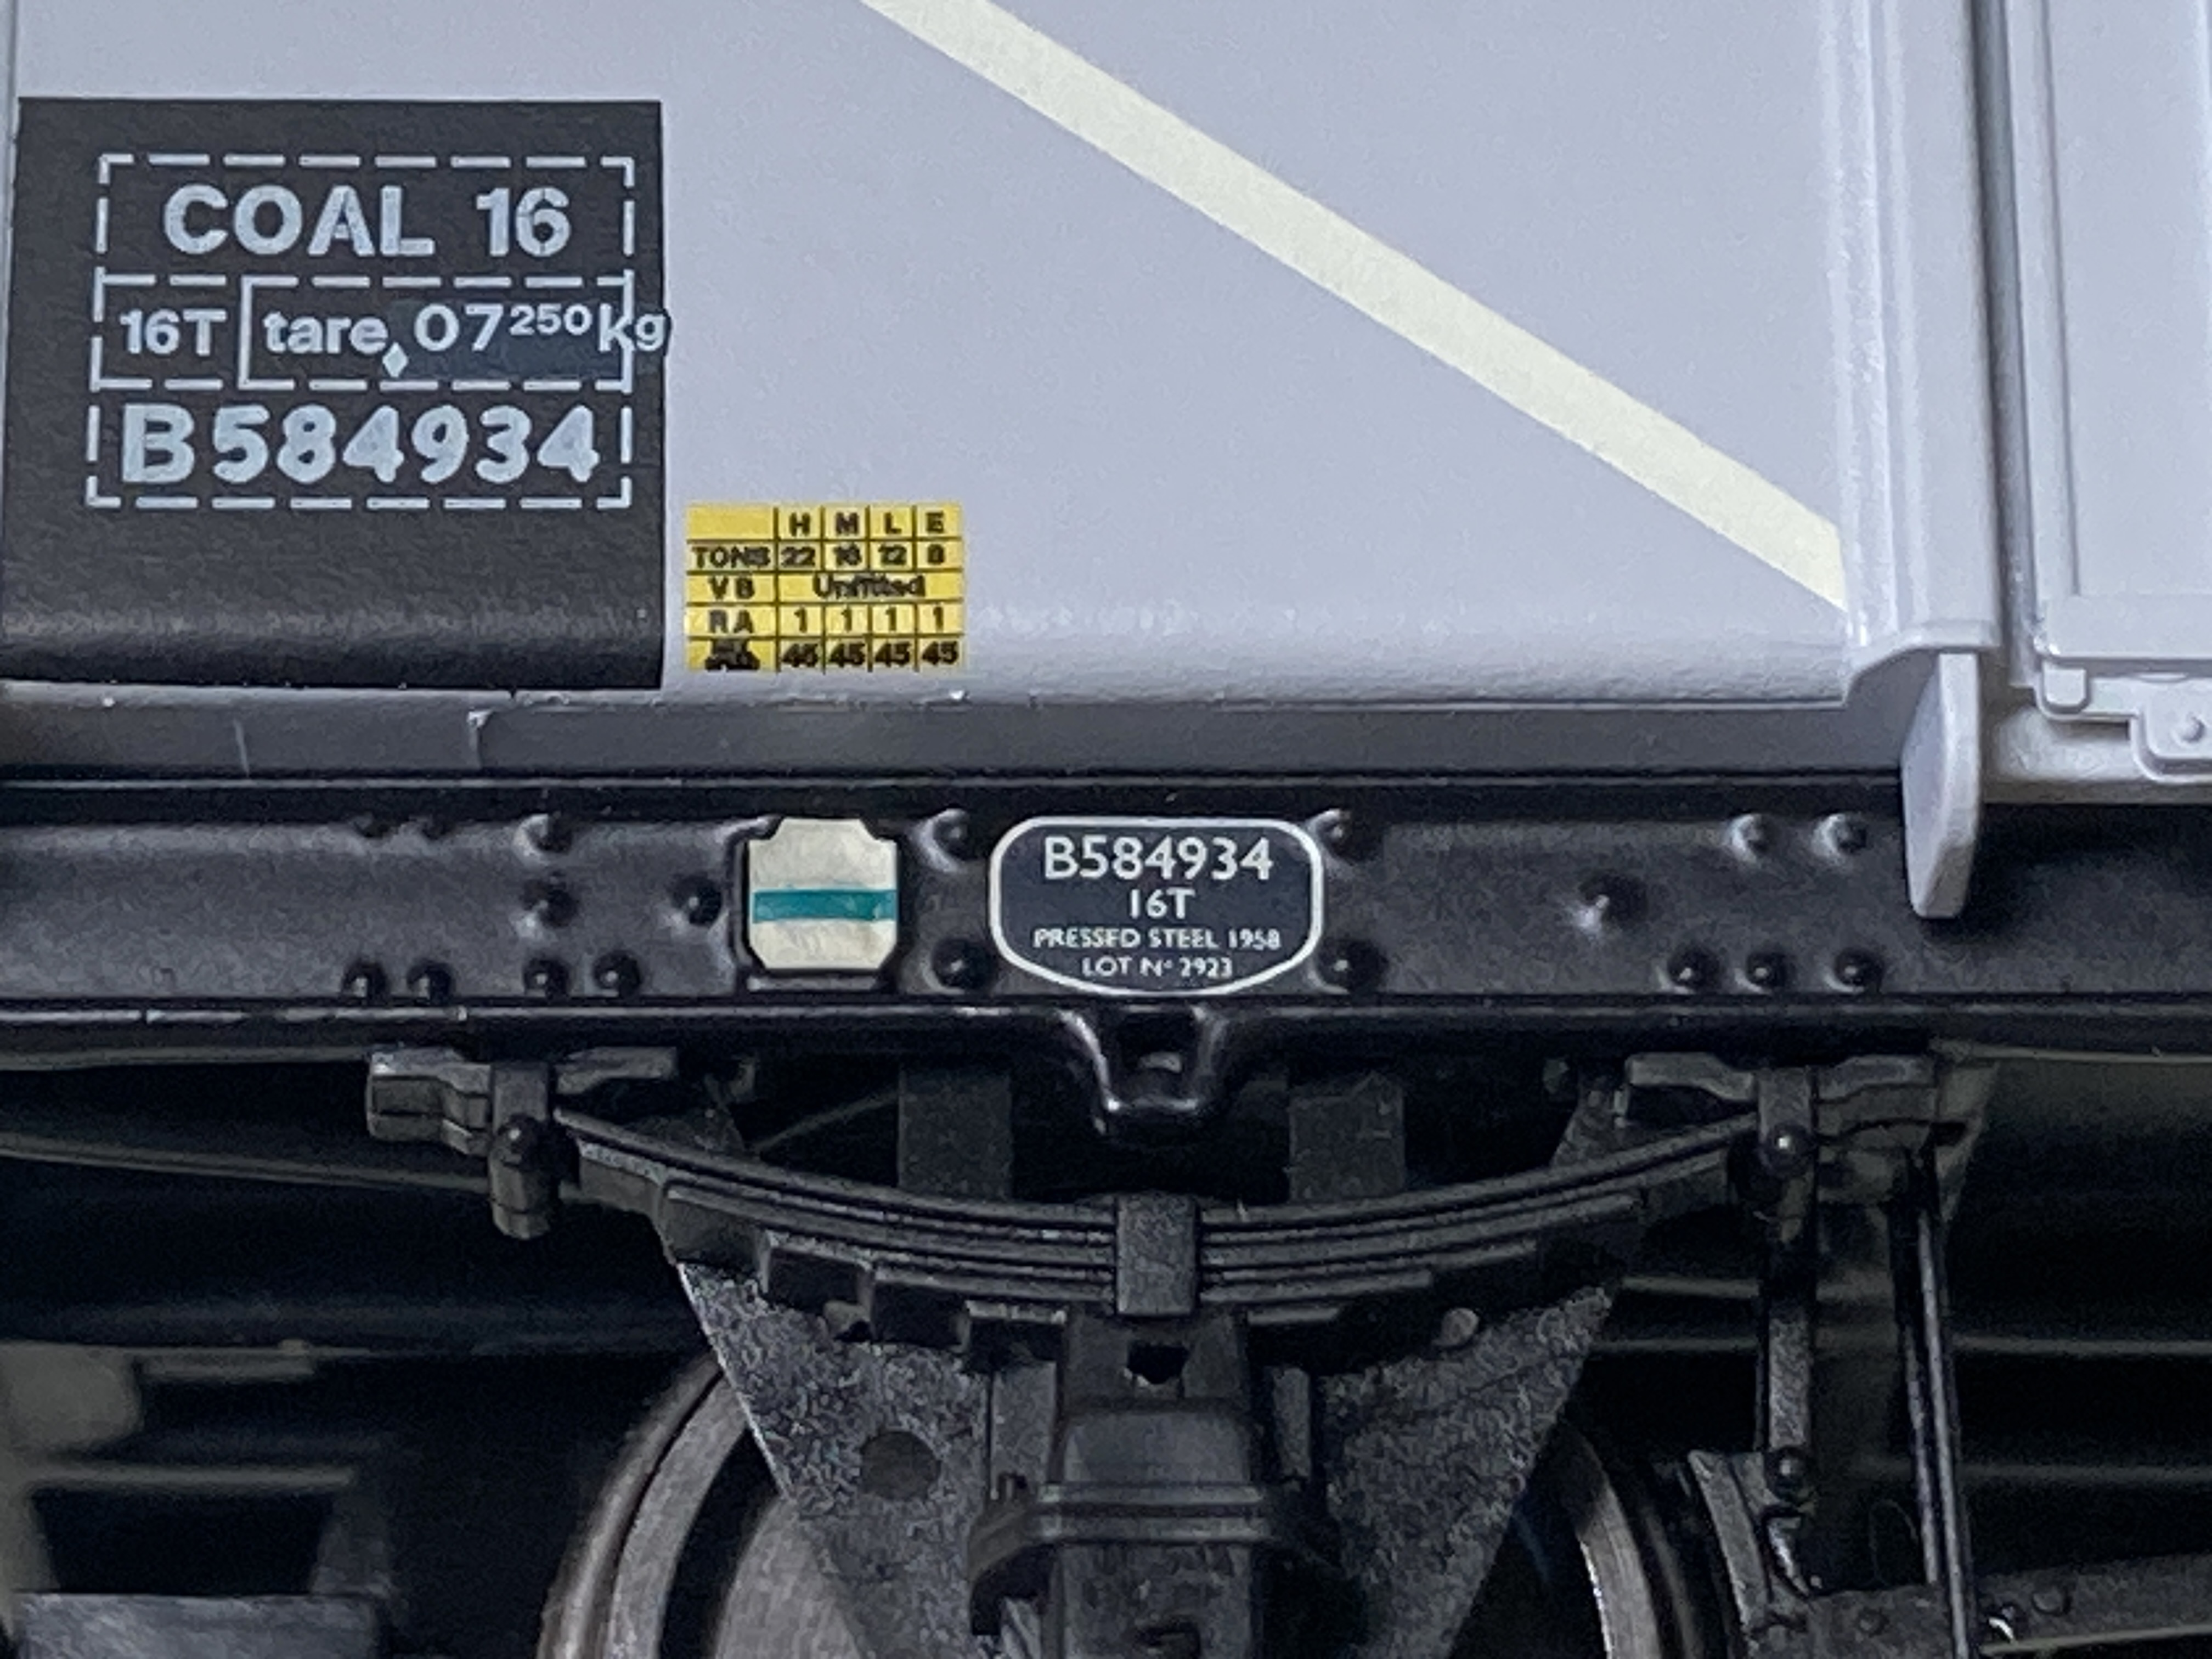
The liveries are well applied, the paint is opaque and doesn’t mask any of the fine detail of these wagons. Markings are also crisp and the numbering of the bodies matches those of the under frames. This includes the makers plate with the correct wagon builder legible for each respective number and the 108 has representations of wagon labels within the wagon label clips.
These wagons are sold in packs of three, at time of release at just under £75.00 per pack. For me this is very good value, they are without question the best representation in RTR format of the 16T mineral wagon. These are a ‘duplication’ in some respects of the excellent Bachmann wagon that has served us so well these past twenty years or so. However as with the two types reviewed here there are types we’ve not seen released before, and with real improvements at a competitive price. Regarding the tooling error it is very unfortunate, but with ten to fifteen minutes this error can be resolved. Accurascale are aware of it and have mentioned that any new run of the 1/109 the matter will be looked at, to assess if the moulds can be revised economically and technically to resolve the issue.
I’d argue that these aren’t boring wagons at all, They are excellent reproductions of one of the most common types of standard wagon. I have mixed them with Bachmann versions and the two different manufacturers complement each other really well. Does that mean that the improvements aren’t visible? Well no it doesn’t, but that reflects well on the older model which we know is very good. The thing for me is that if I now want to expand my 16T mineral wagon fleet, these will be the ‘go to’ source. As supplied they have everything I want, quality and just the three link chain supplied makes the difference for me, I don’t have to do anything with them, just enjoy them straight out of the box. Roughly a quarter of a million of these 16T mineral wagons of various diagrams were built by British Rail and its sub contractors. Will Accurascale end up selling a similar number!
A final thought occurs, these fit into the Accurascale “Powering Britain” range, with more steam types coming on line in their range how long before we see an earlier wooden body RCH type mineral to this standard? One that I hope is in their target sights…

Thank you. A top quality review, clearly with a lot of knowledge and expertise behind it. These wagons look fantastic in their detail, another well deserved triumph for Accurascale.
Very comprehensive and good close-up images. The necessary alterations to the Diagram 1/109 also seem to be explained and illustrated well.
The poor representation of the springs seems a fairly measure faux pas, especially when you see the level of detail on something like the brake push rods, which are hidden in the shadows anyway.
On the Diagram 1/109 should there be something connecting the vertical members either side of the door where they extend over the solebar? From your pictures I don’t see anything on the model but the rivets represented here perhaps suggest that on the real thing there is perhaps some sort of bracket connecting the vertical member to the solebar?
Finally, one minor jarring point in your otherwise excellent summary is that where you use “stantion” I think the spelling should be “stanchion”?
Not sure regarding the door details, I’ll check, thanks for the spell check il sort that out 🙂