
R3325 Hornby J50
(R3324 R3326)
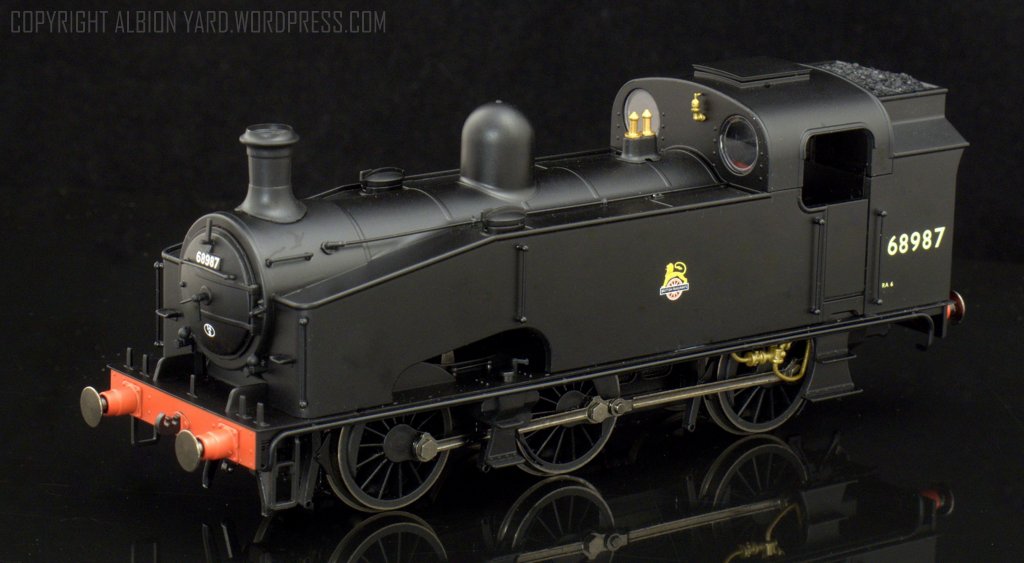
Announced in December 2014 and delivered December 2015, the OO gauge, 4mm scale, J50 from Hornby has arrived. The example reviewed here is the early BR Crest J50/4 catalogue number R3325. Packaged in the typical outer sleeve and cardboard inner box, the model arrived with no damage. The locomotive sits in a vacuum moulded plastic tray with outer sleeve, also included is the detailing pack and NEM pockets and tension lock couplings, The detail kit comprises brake pull rods, which when fitted don’t foul the carrying tray!, and vacuum/steam heating pipes correct for the J50/4. It will be down to the purchaser to fit the couplings and NEM sockets, unusual, for a small tank engine. How the section of the modelling community that seems to require models to be designed for those who wear boxing gloves react, remains to be seen.
R3325 Hornby J50
(R3324 R3326)
Straight from the box the first impressions are good, it’s certainly ‘big boned’, tipping the scales at 278 grams, I get the feeling empty coaching stock up Holloway bank will be well within its grasp. As mentioned, no bits had fallen off during shipping and the quality matt finish and printing of the emblem and numbers are all clear and legible. On DC the locomotive runs smoothly and very quietly, with no evidence of cogging or quartering problems. I’ve not done any DCC running with this model, (I rarely use it), but the DC running properties bode well for a DCC installation.
R3325 Hornby J50
(R3324 R3326)
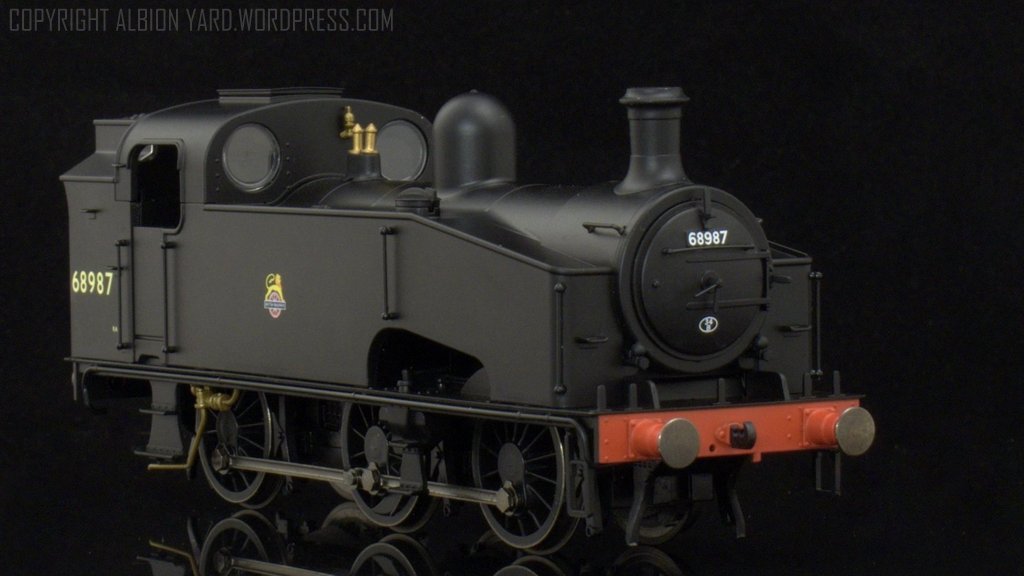
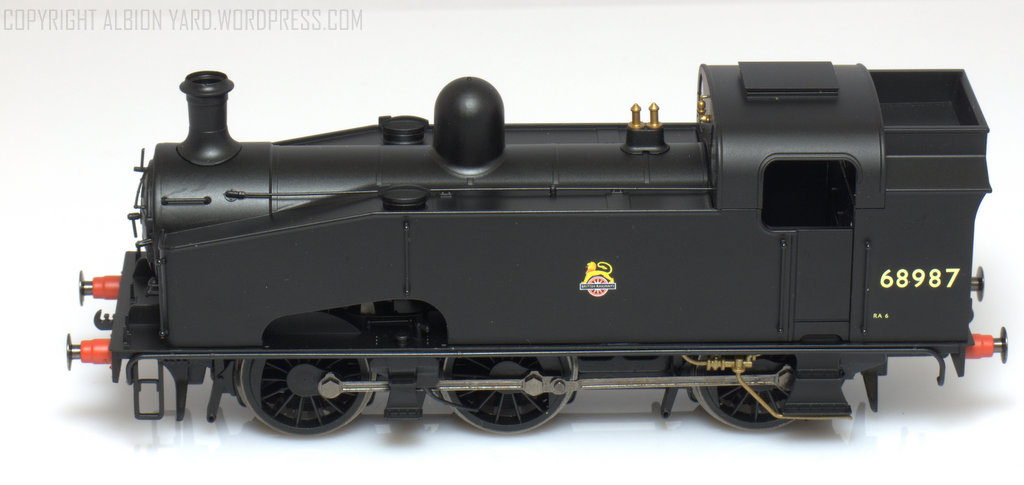
The model depicts one of the last batch of J50’s built. The locomotive was built at Gorton Works in Manchester in 1939, just before the Second World War. Several other batches were ‘on order’ in wartime but subsequently cancelled due to other suitable types becoming available. This locomotive 68987 (8987 & 585 under LNER numbering), falls into the classification of a J50/4. Built in May 1939 with Vacuum brakes and withdrawn in April 1962 the details as modelled by Hornby correctly reflect this variant of the J50. Easy to identify features of this sub class are the large bunker almost to roof height, fluted coupling rods, balance weights on the wheels, steam injectors ahead of cab foot steps, Ross pop safety valve on the higher boiler seating, a cut away under the smokebox for the valve chest covers and LNER Group Standard (sprung) buffers.
R3325 Hornby J50
(R3324 R3326)
The detail additions on the model are all well fitted with a good deal of finesse to them, however there is a bit of a throwback to ‘design clever’ with the bunker lamp irons being moulded on in relief. For me that’s acceptable, being able to produce and fit neatly separate lamp irons would be a nightmare, and it at least gives us something to do! The front buffer beam has five lamp irons, which initially seems odd as they all face forward, however it is a configuration seen on the prototype. I’d be interested to know why some engines had this variation.

R3325 Hornby J50
R3324 R3326
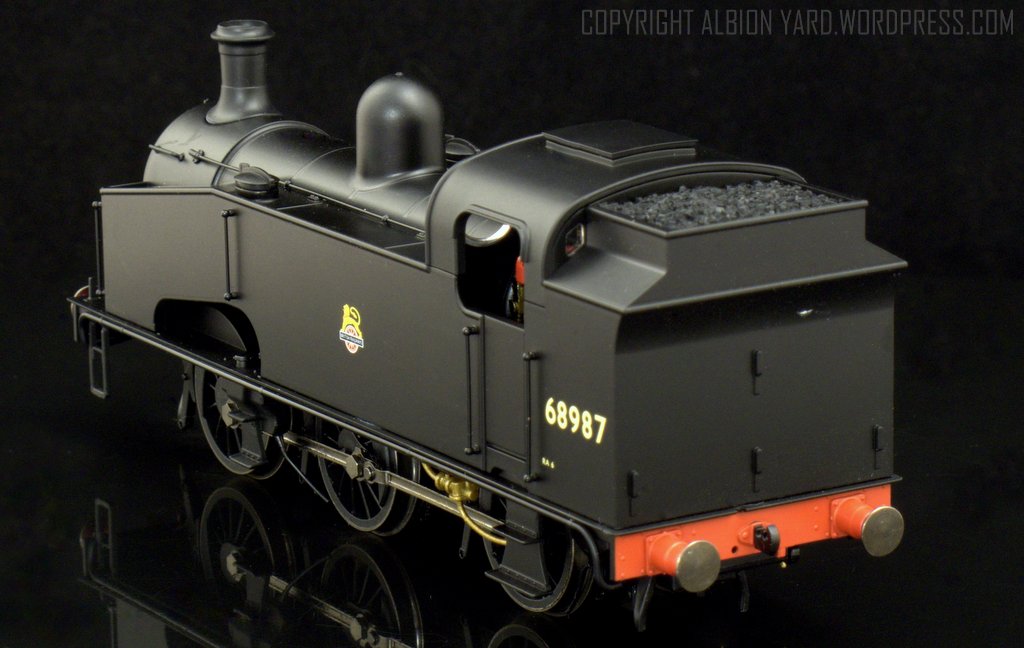
On this high bunker version the coal moulding can drop out easily, leaving a 5mm or so recess to a flat floor which looks a little odd (see above), I may open up the bunker as I do on my Pannier locomotives. There is a discrete but noticeable joint line at the front and rear of the cab level with the side tank top, this is likely to be the split to allow the different cab types of other variants of the class to be fitted. Internal cab detailing is good including the crew brake standard. The large front spectacle lenses are separate pieces, and commendably thin with little refraction due to edge thickness. With the prototype being pretty utilitarian there is little in the way of ‘fittings’ on the superstructure. The curved cab roof profile reflects the later LNER Group composite rolling stock gauge, the early batches had a different profile and interestingly weren’t subsequently modified.
R3325 Hornby J50
(R3324 R3326)
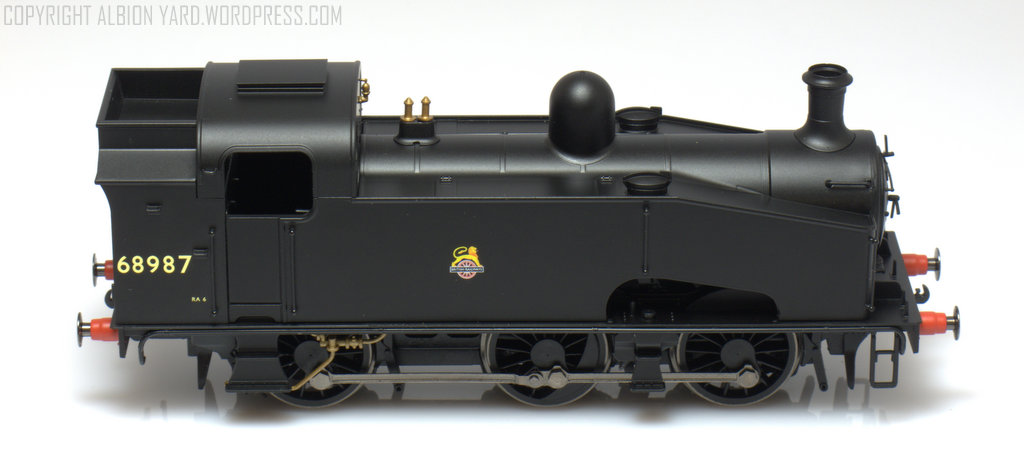
The side tanks reflect the sloping front design to improve crew visibility. The handrails are blackened wire and good scale sized handrail knobs, including those against the mainframe, set inside the tank cutaway. The tank cutaway was a design feature to aid access to the locomotive motion for maintenance staff, there is a basic representation of part of the motion on top of the chassis, highlighted by daylight visible from underneath the boiler. Sandbox fillers are well formed and the actuating gear represented too, as indeed are the unusual profile sandboxes. The centre footplate steps wrap round these sandboxes and Hornby has represented them very well, the footstep thickness in fact are noticeably thin (across all the footplate steps), whilst still retaining reasonable handling strength. One problem I did have was that the sandpipes adjacent to the central steps are very fragile, one of mine breaking during handling. Once you have the body off make sure it’s supported and not resting on these pipes! However, for me it’s going to be a repair with a bit of brass wire! The face of the locomotive is captured well, the smokebox door including separate smokebox darts of a scale appearance and fine wire handrails. This version exhibits the cut away valvechest covers underneath the smokebox correct for this batch of locomotives. One detail missing is the lift ring holes in the top of each side of the mainframes, like the Sentinel lift rings this will be an easy job to drill out to improve the look. Boiler fittings are good overall, the chimney and dome look well shaped and in proportion. The cast iron stand for the Ross pop valves looks good but the valves themselves lack the crispness of the rest of the mouldings, like the injectors and whistle for example.

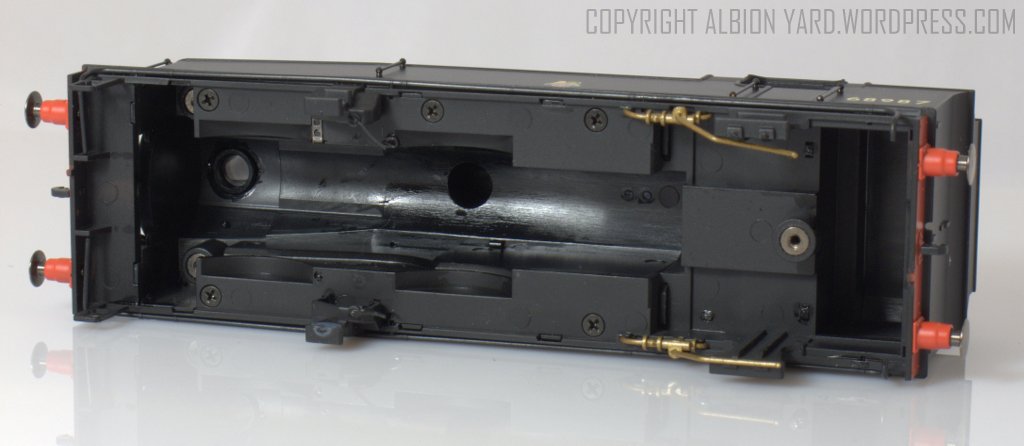
R3325 DCC Decoder Compartment
The assembly of the body and chassis is a simple three screw fitting and the body easily separates from the chassis. If fitting a DCC chip one side of the tanks has a removable section, held in by a cross head screw. Undo the screw, turn the body the right way up and the weight will fall out. If the body is upside down it doesn’t. Don’t ask. Its ten minutes of my life I won’t get back. The DCC socket is an 8-pin fitting and there may be room to fit a small chip without removal of the side tank weight. The instructions recommend the Hornby decoder R8249. Fitting a sound speaker and keeping it discrete may be a challenge in this model, the chassis includes a moulded weight which sits inside the bunker, so a sugar cube fitted into the cab may be a suitable option.

R3325 R3324 R3326
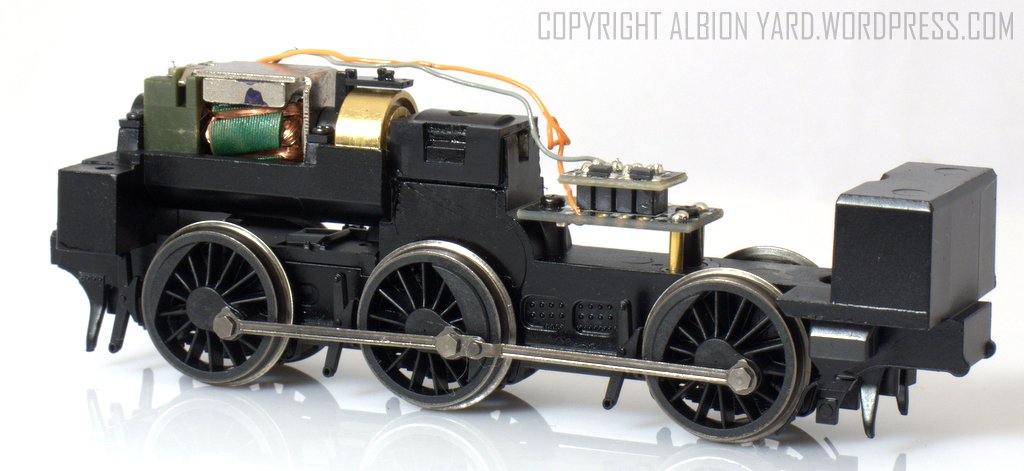
Hornby J50 Chassis
The chassis is powered by a five pole motor fitted to a flywheel with a vertical gear tower to the central axle. Assembly was very neat and no problems with clearances for wiring or looms.

R3325 R3324 R3326
Hornby J50 Chassis
R3325 R3324 R3326
Hornby J50 Chassis
Electrical pick up is through phosphor bronze wipers bearing on the back of all driving wheels. The driving wheels are correct diameter with the balance weights correctly placed slightly proud of the rims themselves, and a nice flare from the boss to the rim on the spokes.
R3325 Hornby J50
R3324 R3326
Clearance looks a little restricted for EM/P4 wheelsets, particularly around the wheel splashers for a drop in replacement, but there’s nothing in either body or chassis design that looks like it’ll cause major problems for the wide boys.
So another good, timely release from Hornby. On the mark with the dimensions, overall shape, finish and performance. The one thing I’ve not mentioned is the price, late 2015 at £80.00, that for me, is pretty good value for money. There’s no doubt that prices are going up in the ready to run sector, but on the strength of this and other similar releases like the Bachmann 64xx, ‘we’ are still getting value for money.
Hornby J50 R3325 BR Early Crest ‘68987’
R3325-47-078
LOT01-P91812


I can see a few tantrums from the boxing glove wearers over the couplings, “I didn’t take up a craft based hobby only to be told to do something as difficult as plugging a coupling into a box!!!” Queue lots of moans about old eyes and fingers.
The moulded lamp irons, I don’t have a problem but then if I was bovered, I could replace them and touch up the livery as required. Most people won’t be fussed but I look forward to the, “SEPERATE LAMP IRONS ARE A HUMAN RITE WHATIS WRONG WITH HORNBY THIS IS A THIRD WORLD COUNTRY” style postings. Trouble is I like a moulded smokebox dart too as it’s easy to change and lifts my model up easily.
Those pipes might be fragile, but they should give another manufacturer pause for thought…
Coming to hands and eyes near you real soon kid.
“Queue lots of moans about old eyes and fingers”
I’m sure they are but I’m also sure that a lot of those complaining seem to have good enough eyes and and fingers to work a keyboard.
I suspect that a lot of people are using this as an excuse for not trying, not because they really are unable to do things (I know there are people aflicted and I feel sorry for them, but not those who try to ficticiously appropriate problems. I’m sure those who really ill would happily hand this over to those who want the excuse!)
Reblogged this on sed30's Blog and commented:
Review of Hornbys J50
Hi, Just bought a damaged body J50/4 , which has a very bad bodged glue repair to the front footplate area, despite removing all obvious screws the body refuses to budge. Is there a screw I am missing on the underneath somewhere ? The only screws not removed are the three tiny ones holding the chassis plate on. Looking at you photos there is a obvious mounting screw (larger?) at the rear of the body , does the front of the chassis clip in on a “ledge” or not ? thanks for any advice.
Mick
Hi mick, I dug mine out and checked. It is just three screws and the whole chassis will pull vertically out of the body. Just check the sand box pipes aren’t fouling and preventing the chassis ‘dropping’.