A bit late to the party with this one, life has had its twists and turns in January including down into the Med on another mission, getting called out whilst at the excellent Define modeller’s day in Risley.
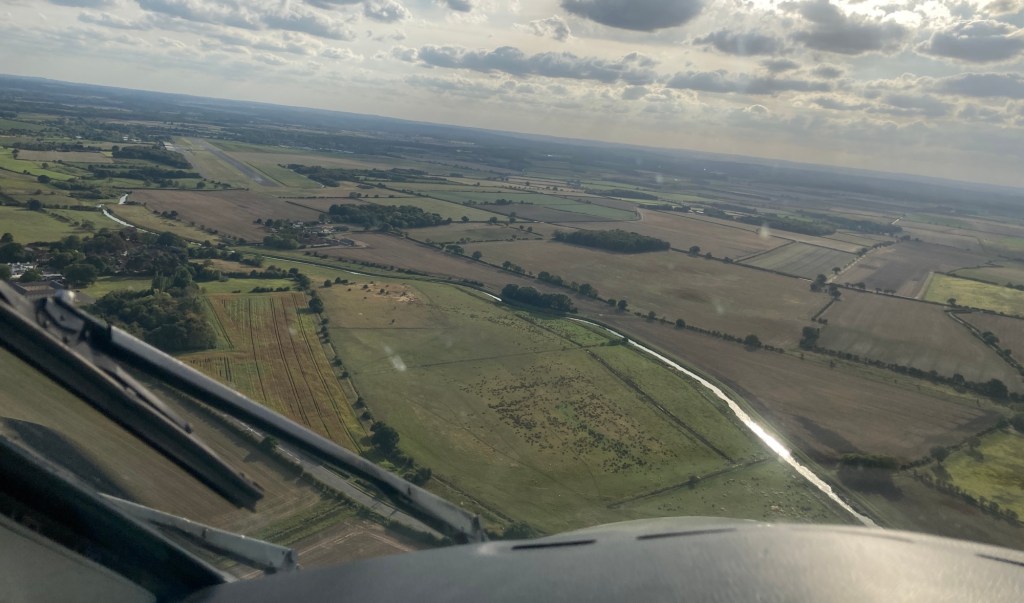
Lampedusa
I’m there again today, writing this one from Malta..
On his most readable blog Phil Parker recently noted he’s been writing his blog for 20 years, quite an achievement to provide that content so consistently and as far as I know daily over the years, that’ll make him an influencer. Probably.
It got me thinking about my blogs, my first posting being just on 19 years back, on Norven Munky. That post looked at the Heljan Western, which was interesting for its time. Better than the previous post holders, but not quite there. I often get asked is Munky going to wake up and write some more? Well there’s plenty of material to consider… This blog has been ticking over now for a good few years too, obviously not with daily posts as per Phil’s efforts, he has my respect for that level of commitment!
Commitment…
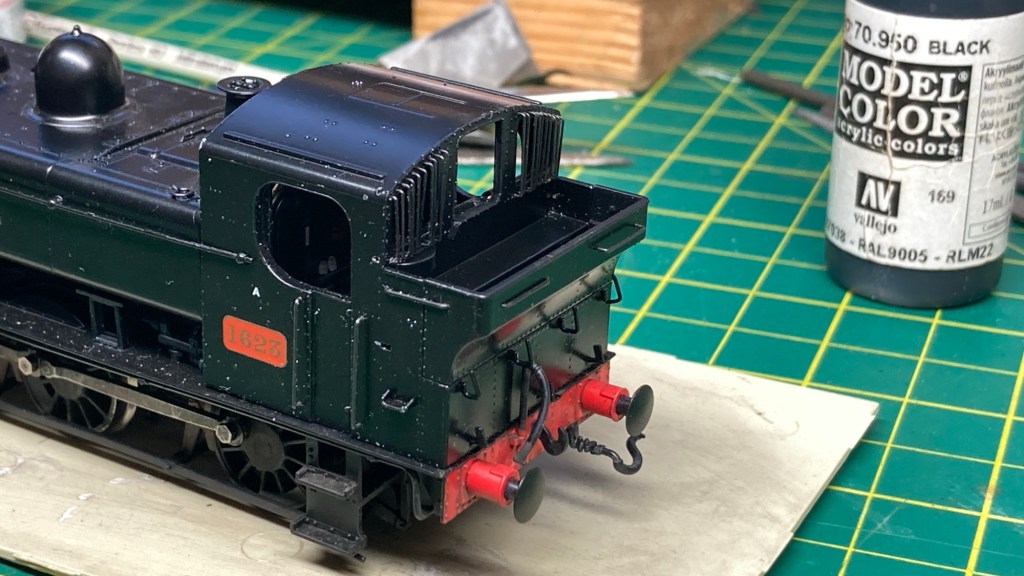
On the subject of commitment there’s evidence above of just that, in a different format. This is a Rapido/Model Rail 16xx that is on the receiving end of some commitment.
Model Rail / Rapido 16xx
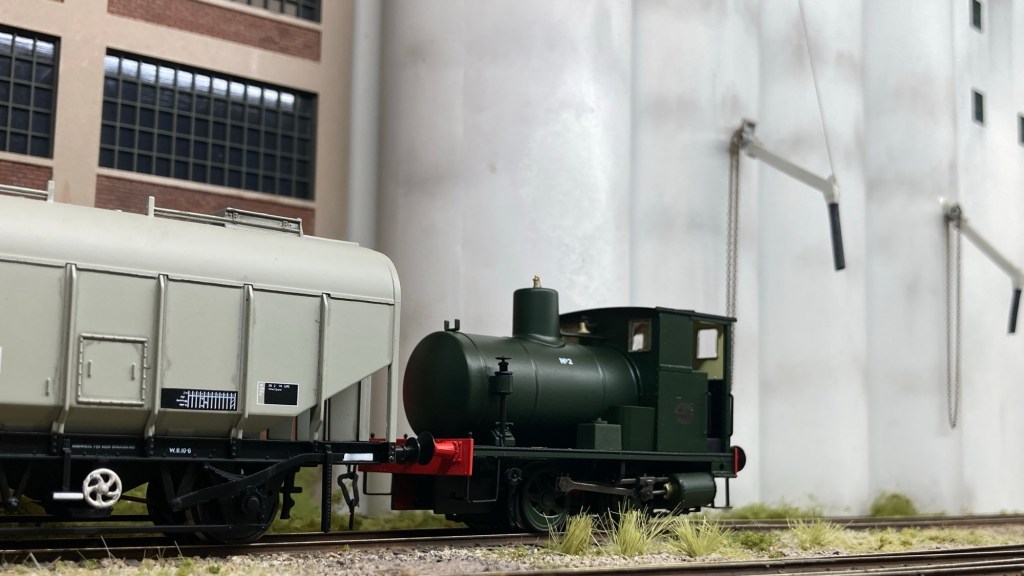
This particular commitment was sparked up when revising plans for the Forest of Dean project I’m aiming to do. 16xx’s were quite prominent in the forest, and two of these have been sitting on the ‘shelf of waiting for something to happen’ for a while. Neither had had much use either so no extra work had been done to them. The opportunity of an empty garage, and empty day meant that I dug them out of storage and took a good look at them again. One thing they both needed was being ‘run in’, and that was achieved with the pair of them circulating a loop of Kato HO set track.
This is it above, it’s really robust and well built track, brilliant for plug and play. There’s something serene about just watching a train circulating, and with the moulded base a far reduced chance of any carpet fluff etc getting in a mechanism if used indoors. You can see it’s good for messing about outdoors too, and brings back memories of seeing Triang System3 track and it’s TT3 equivalent of many years ago.
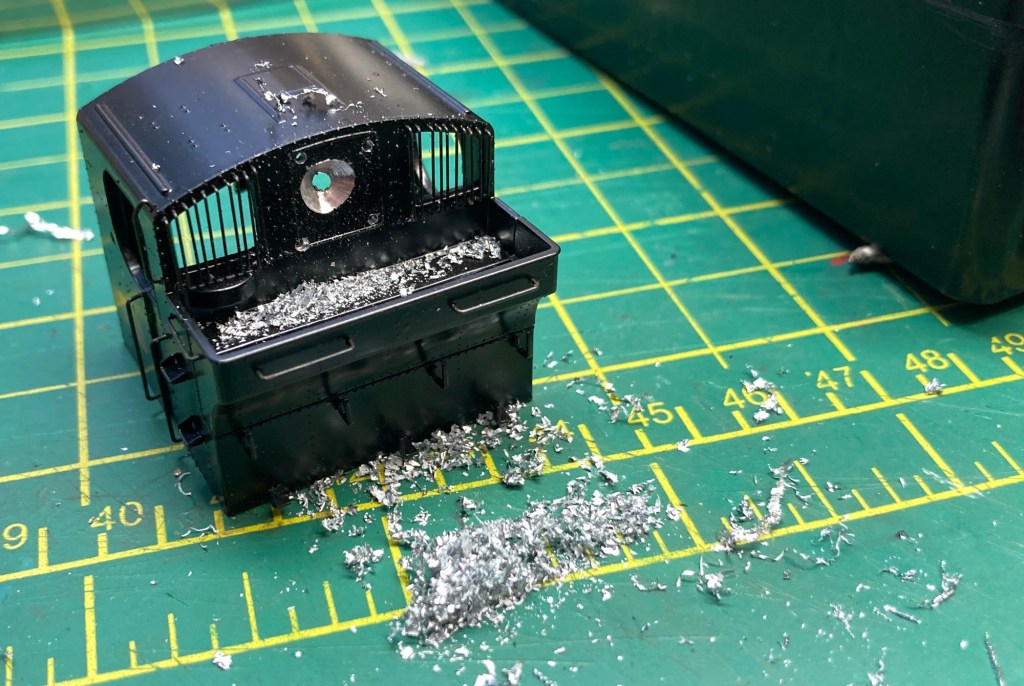
So after getting run in, they moved to the pending pile and basic disassembly took place, to see the decoder installation . And then it went to quite a lot of disassembly to start weathering and a renumber for both of them. As usual I wanted an in use look to them and having worked out how to get the cabs off I thought the rear cab shutters would be good opened up on one of them.
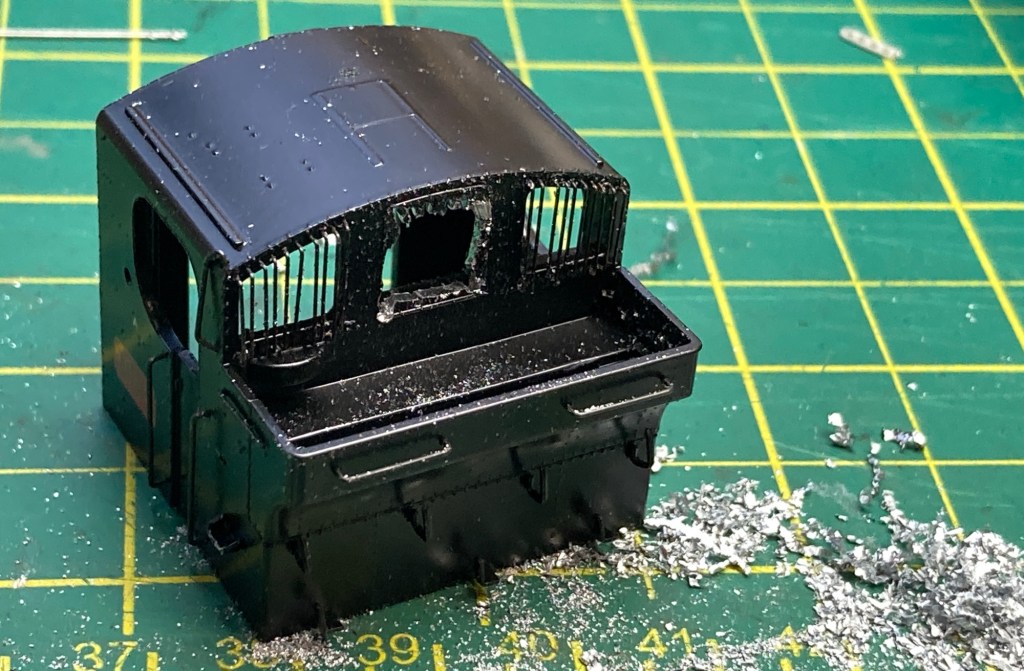
The commitments
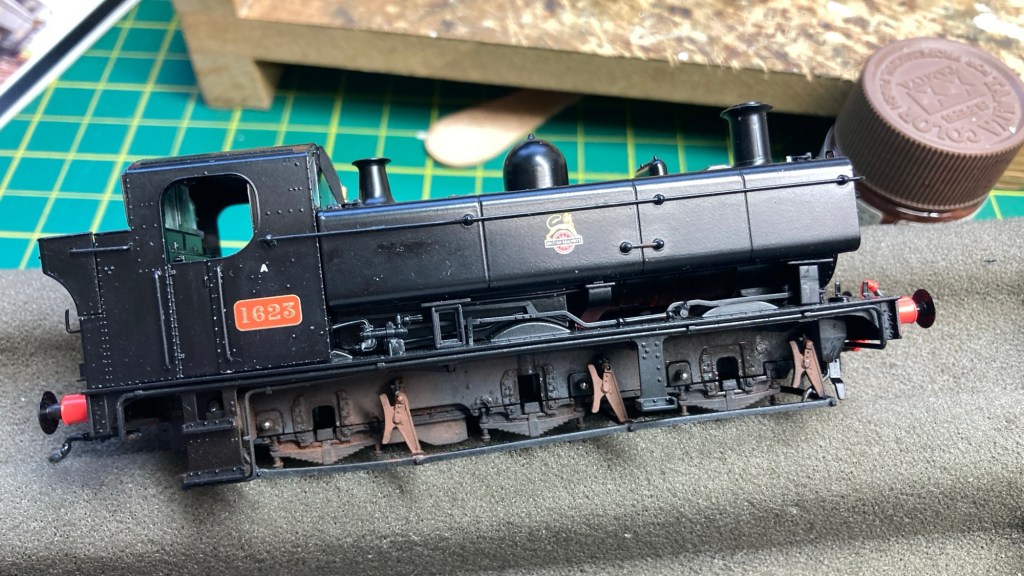
That’s where the commitment takes place. Once you start, that’s it, you’re in for the hard yards. This looks a bit crude and brutal but it achieves a possibly unique version. I’ve seen weathered examples which have retained an unmodified body so this one or pair will look different. New shutter doors will be needed, probably brass or nickel silver, and will capture a working locomotive and critically add more character to it. The other thing I’ve done is painted the LED light for the firebox brown. That has made it far less obtrusive, and when you do notice it it’s a far more realistic colour.
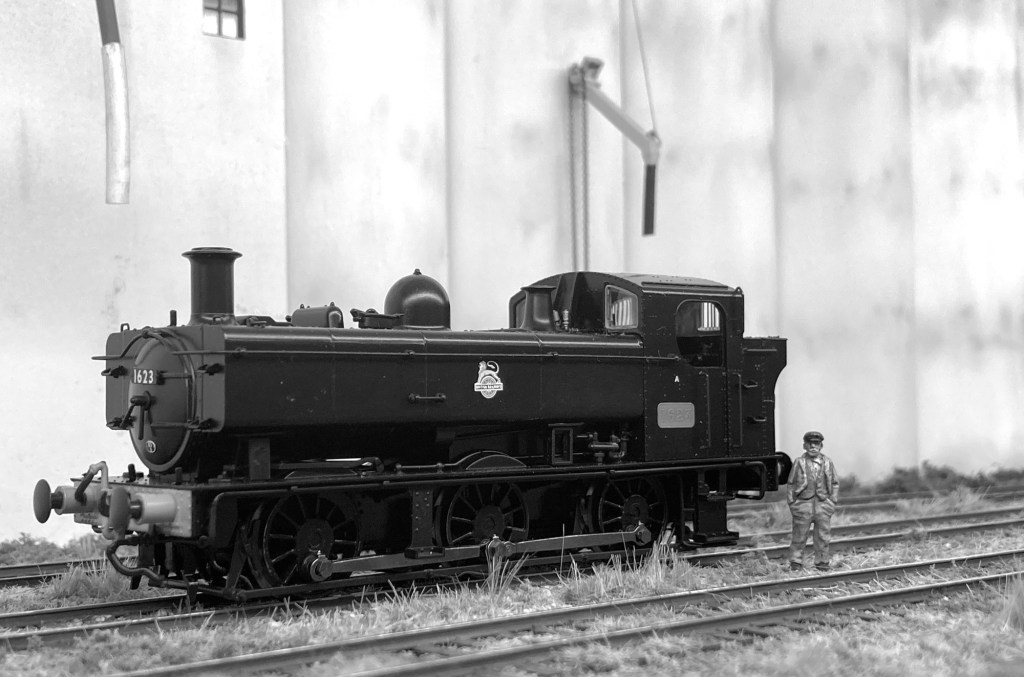
Model Rail Rapido 16xx
So this has now reached the stage where Fox numberplates will be fitted, and then there’s the coupling choice. Dinghams look favourite, but recently myself and a friend have been trying DG couplings, as they show potential for the Forest project. There’s a few other tweaks in mind not least of which is ensuring a well matched decoder for good running qualities and controllability.
That’s of course unless I get distracted. We’re back to the commitments again…
Today I have mostly been tidying up. Making room for stuff, and theoretically getting rid of stuff, which mainly means making a tidier pile of stuff. I bought into MRJ immediately I saw it and have every copy since 0, and today I dipped into the drawers where they are kept and randomly dug one out, #46 of 1991.
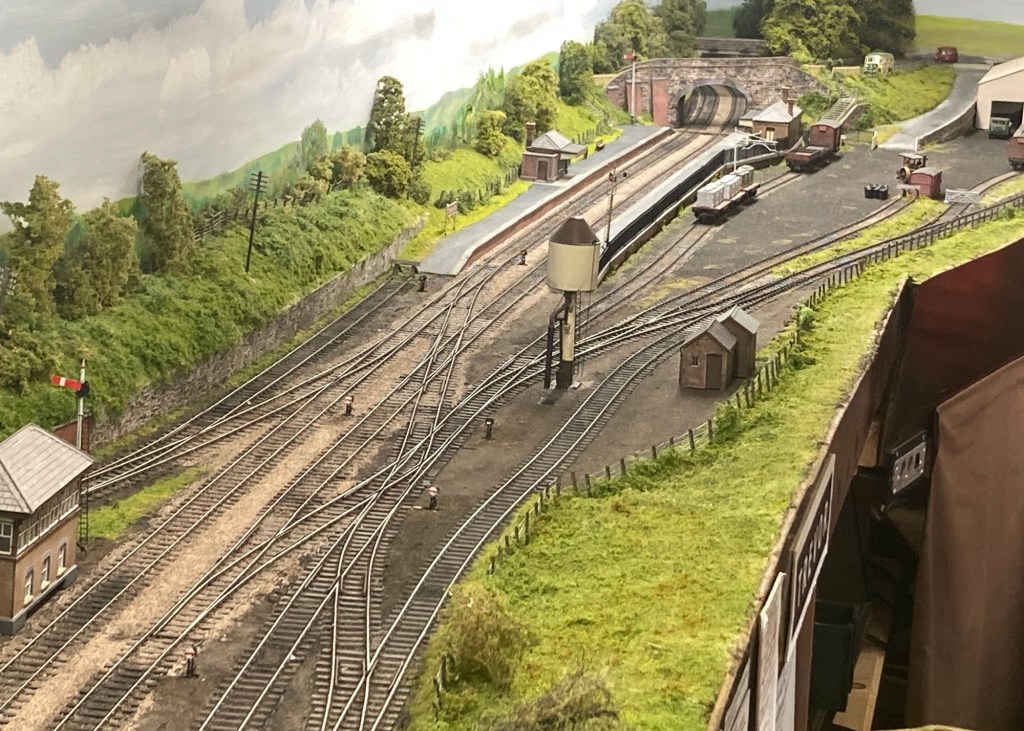
Buckingham EM gauge
Published 34 years ago it by pure chance has a resonance to me, today. I’ve relatively recently found that the operating aspect of a model railway holds a real attraction, rather than a sequential shuffle of a fiddle yard stock. The connection to this edition is Peter Denny’s Buckingham layout, featured in edition 46 with a piece about the operation. And the connection? Well it’s only about 20 miles from me under the custodianship of a good friend Tony Gee, and it was operating it that sort of lit the fire.
Trevor Denbighshire
More recently I’ve written about the engagement I get when being part of an operating team on Geoff Taylor’s Ruabon to Barmouth layout. Re-reading Peter Denny’s account and dipping into my Forest of Dean books is certainly getting the mind churn going.
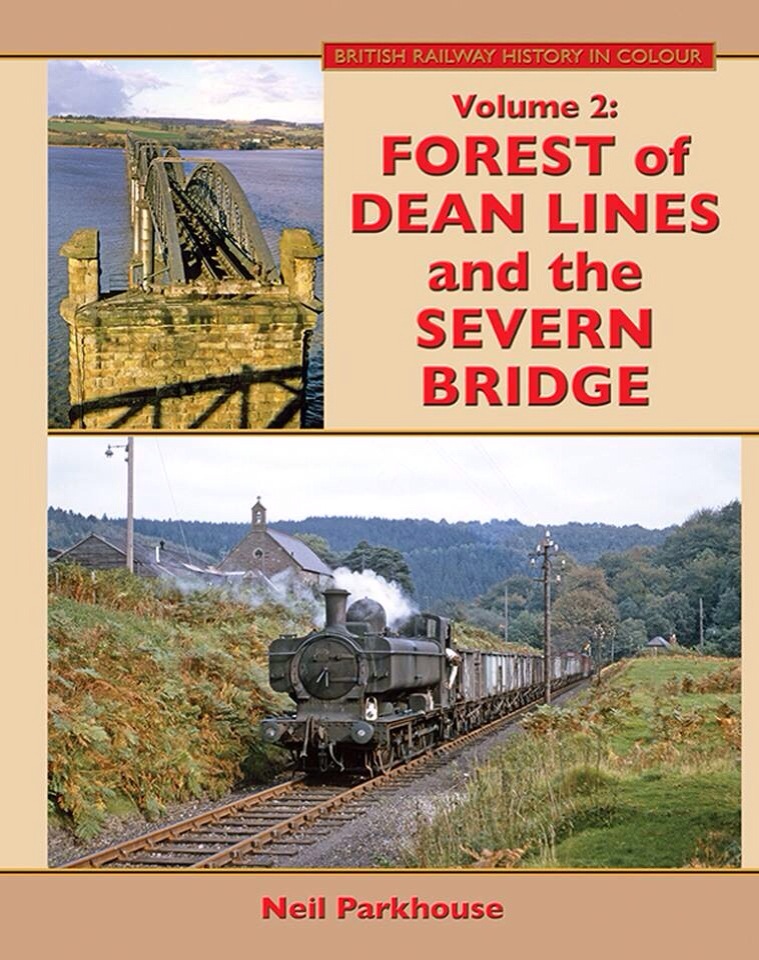
Forest of Dean
This one is also on the coffee table at the moment. It’s off the shelf to try and pick through details of how I can work a realistic timetable up, and I’m still endeavouring to work out which locations will work in my space. So we’re back to shifting stuff round in the man cave!
TT120
One of the projects that hasn’t really grabbed me this year is the TT120 test piece. Wanting to make a small plausible shunting layout has been frustrating, ideally a few 16T minerals and a standard 20T brake for the 08’s to push about would have been perfect, and floated the boat but none so far!
However it did introduce me to a range of 3D printed buildings from MS models which are superb and well worth a look. On the subject of worthy looks the linked blogs and websites from fellow bloggers are always worth reading, please have a look when you get the opportunity.
Left base finals
What’s the plan over the new year? Well I’m on call, theoretically there’s still time to get another down range trip in, six so far since August including Albania, Sicily and Malta, all good fun to keep wheels turning! Modelling wise there’s a few untidy ends that need tieing down.
Shelfie 3
No exhibitions planned (yet), and Shelfie3 I anticipate will take its final form. The development of S3 has taken quite a while, some four years! A number of reasons for that, but primarily the viewing of it from both operators and spectators aspects.
Heljan class 104
The simplicity of the plan needs to be emphasised and I’ve not yet settled on the optimum solution which will allow the most effective viewpoint. It’s likely to be ‘different’.
Shelfie 4 Maple River
Shelfie 4 I’m not sure where I m going with this one. Like most of the Shelfie family it has performed well, and taught me what I needed from it. There’s a conversion potential which I may explore, but it won’t be a priority. As I lean further into DCC however, it may well become a test track.
So, as we close for the new year, thank you for reading the blog and watching the YouTube channel. It was partly a sad year with the loss of some friends Mike Romans whom was a source of accurate information and an invaluable sounding board for modeller’s like myself and an invaluable source for manufacturers.
Andy York
The really difficult and sudden loss of Andy York, whom set up RMweb in 2005. So much of the content and contacts within the hobby for me have been formed or influenced by the vehicle that the forum is. All the more remarkable when you see how digital media has grown since then, and the forum still thrives while most others have withered and gone. All credit to the BRM team whom have taken up the thread left by Andy so well. He was a true and positive influencer that I miss the opportunity to ping a message to, or pick up the phone and talk bollox to for half an hour or so. Even now some days I think I wonder what Andy would have said/thought about that.. Writing this there’s a bit of dust in the atmosphere, sorry (not sorry), about that.
Thanks also to the friends and colleagues in the exhibition, trade and publishing communities whom have been supportive and given us opportunities to assist or share products and developments, it means a lot.
Have a great new year, and see you on the other side!
Firstly, to all readers, have a good Christmas and best wishes for the season, especially if Christmas isn’t your thing for whatever reason! In the usual carnage and chaos that is the run up to Christmas Day, tidying is done. What that actually means is stuff is put somewhere and other stuff replaces it for about three weeks.
Albion Yard
In that swapping around, and making space for a car in the garage, I know, I know, trust me this time it’s a good idea, I dug out the above. Some may recognise it.
High level view of Albion Yard headshunts
Yup it’s the last bit of Albion Yard that’s in existence. It’s one of those bloke things, I’ll keep it just in case. Just in case you want to add more shite to an already impressive pile you may think, and I’d have to concede you have a valid point. But, here’s the get out of jail card! Recently with a couple of good friends the Forest of Dean project has been making headway with thoughts being kicked around of optimising space, and critically determining what the project will give me.
Trevor (not the bloke you went to school with)
A week or so back we had the opportunity to operate Geoff Taylor’s Cambrian Ruabon to Barmouth system, and I was signalling Trevor. Trevor is an interesting location and you can see why Geoff chose it. Adjacent to Wrexham it had two industrial sources for traffic, the chemical works and the brickworks, both providing a source of inbound and outbound traffic. Previously the concept of trains doing something, rather than circulating had been emphasised in Geoffs earlier layout. This was the first time I’d a had an opportunity to see how the goods traffic ‘played’ into the sequence, and it really does bring an extra dimension. You can see why the American card systems are so popular.
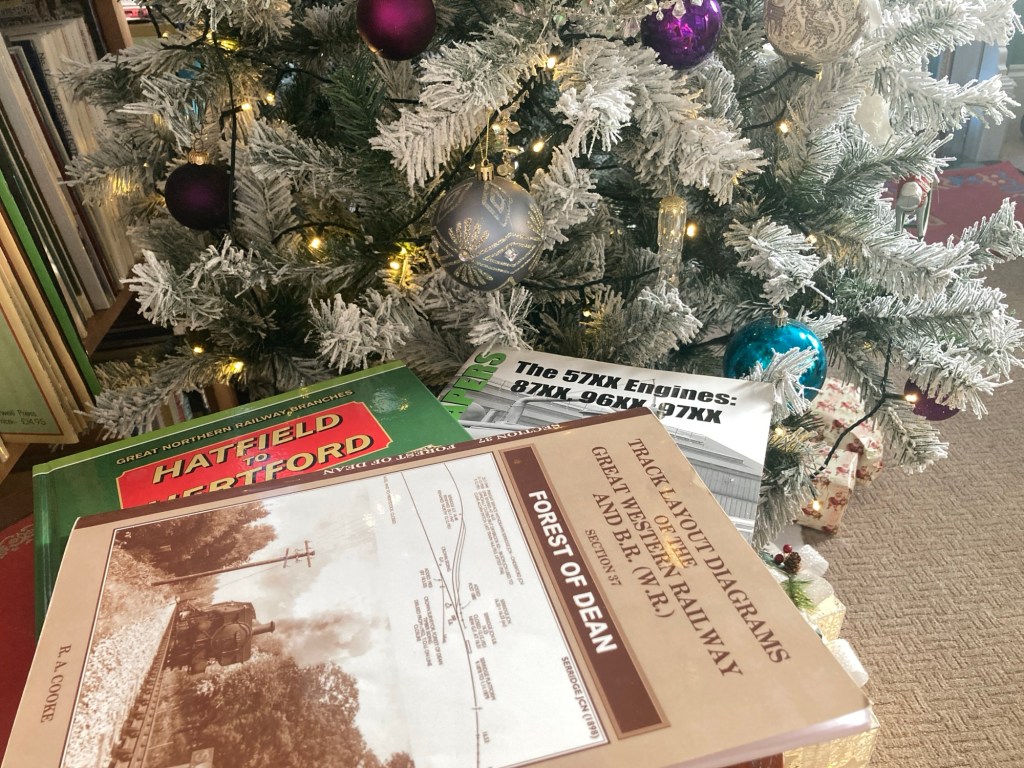
Christmas reading
So with the mind churning and discussion on the journey back with Ben, the question of what do I want from a layout was properly kicked from end to end of the pitch, and today the time to sit back and reflect is invaluable. The books above provide inspiration, the Hatfield to Hertford book soon to be reviewed here, (spoiler, it’s excellent) has a direct connection to me and the hobby, so while not Forest of Dean related it’s part of that determination to replicate something.
Ben Charlton’s eye opener
So back to the future, having shown Ben Chapman a copy of a Barry Norman plan for Serridge Junction, the sketch above appeared in my in box. And what was interesting was his interpretation of how it could fit in my space with the parameters I have. It was a completely different plan, but I can immediately see alternative benefits and challenges in that configuration. What is clear is with the festive movement of assorted ’stuff’ perhaps a new path has been highlighted. And that bit of Albion Yard, what of that? Well it’s potentially a drop in yard throat, so a tester, which will fire up the fiddle yard section. I can see a man cave shelf section just to design the fiddle yard and get optimum play and operating value of that part to start. It worked well on Albion Yard and perhaps there’s a nod back to it, not needed, but nice to have…
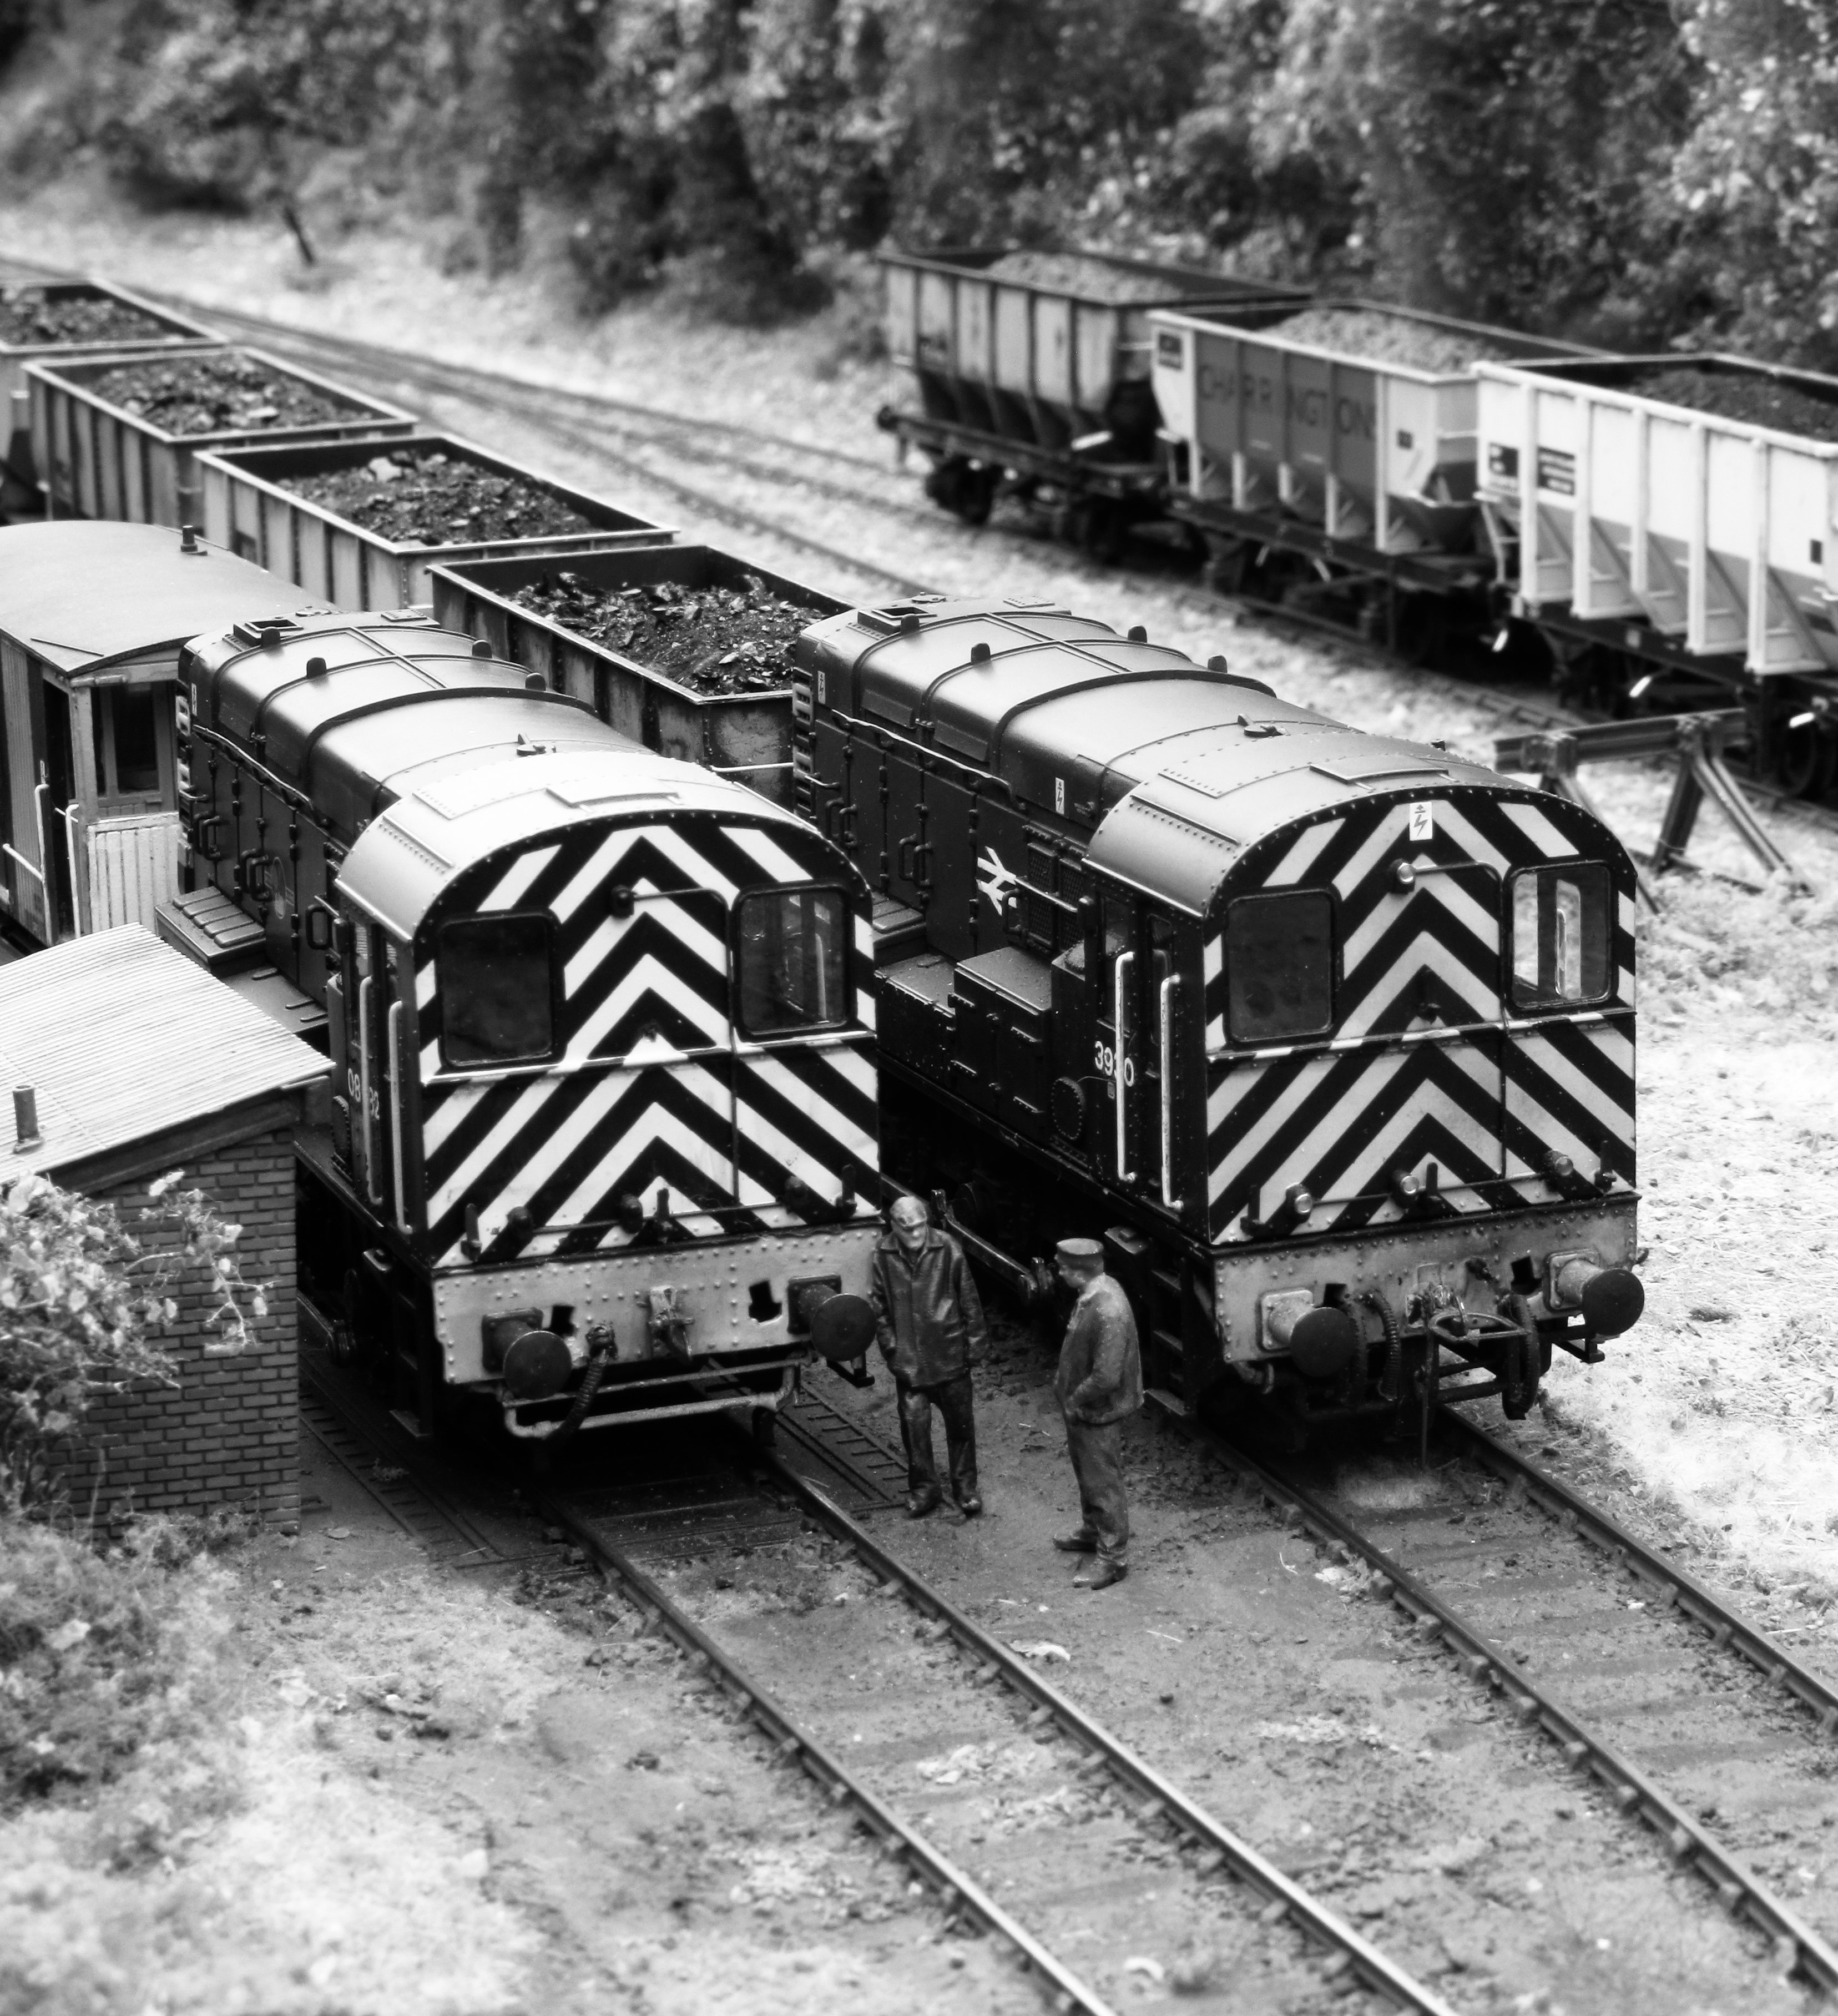
08402 shunts Albion Yard
So to close, wishing you all a great festive season. If you can take the time to sit back, and just enjoy the moment and maybe take a plan, turn it on its head, and let your imagination wander. It might just fire up something completely unexpected.
You can step out any time you like, but you can never leave.
Thats branch or short line modelling for me. A brief chat with a viewer at the NEC in late November brought that thought forefront. They chatted for a few minutes and mentioned they’d been following the blog from its early days. Day one came from wanting to write specifically about Albion Yard away from the other online content I was writing. I knew Albion would have a story, it was already shape shifting, quite literally with interchangeable buildings that allowed a completely different appearance to be generated quickly, particularly useful for capturing peoples imagination with a different take on the same footprint and track plan. I didn’t realise that story would be a constant though.
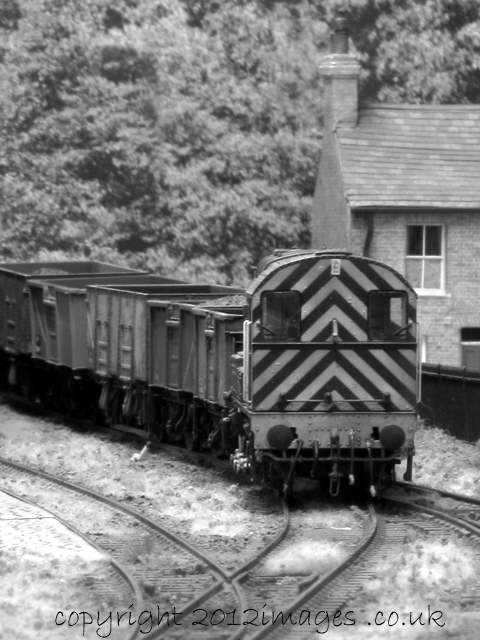
Albion Yard
The picture above was a popular one, the background a mix of Howard Scenics houses, and an HO scale Berlin apartment block. But the core layout was a small, out of the way yard that only local people would know was there, the sort of thing that was hidden in plain sight behind a factory unit or row of houses. Shelfie2 at the NEC drew similar comments, it caught viewers imagination that it was a plausible small coal disposal yard tucked away down a rural back lane in Northumberland. That was my intention of course, but looking at the picture above and the one below there’s a common theme, even though they’re ten years or more apart. OO, off the beaten track, a backwater, 08’s, the dying embers of a railway system, once busy, now becalmed before the final closure.
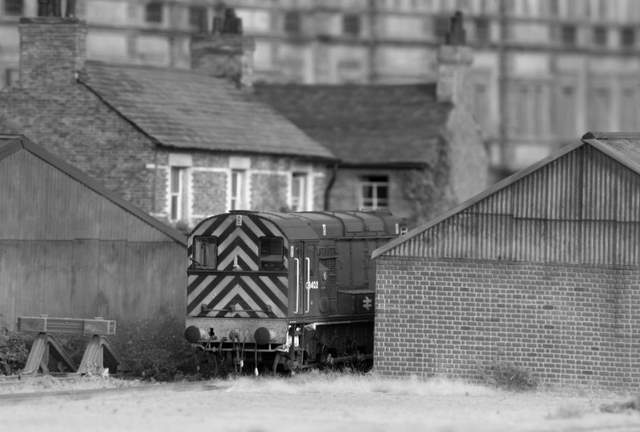
Guyzance Shelfie 2
I look at future plans, Shelfie2 above has a broken promise. Do I spin the viewing side 180 degrees, why not? It is a view I know works better than the one I ended with. The lighting rig and the control system can all be changed, relatively easily. While it will be the same layout I do wonder if it will ‘give’ me a second layout. Being so used to seeing it from the existing viewpoint will it light any fires seeing it in reverse? The thing is, I know it looks better in some aspects that way round. Some copicing will need to be done, the back wall of trees will need attention with gaps built into them to open views down into the yard. And thats an interesting bit, looking down the hill instead of up it, blocking the shadows onto the backdrop trying to capture the depth of the landscape and the Cheviots in the middle distance. How to get that Housman ‘Blue remembered hills’ feel quoted by Iain Rice and so effectively captured in Geoff Forsters Welsh Marches layouts.
Shelfie 2 Guyzance
The layout can of course evolve, its one that I’d considered ‘finished’, its done what I needed it too. Thoughts are that it can drop into a Forest of Dean system I want to build. Not as a location as such, but as a ready to run section to run trains to and from to start with. A planned visit later this week to a good friends rail system will no doubt provide further inspiration for its future.
If I spin it I still haven’t left the Hotel of course, just swapped the room furniture..
Well it’s here, the Accurascale 57xx, and spoiler alert, its definitely been worth the wait. This release really brings the Pannier family up to date with a contemporary high quality and detailed model of this iconic and promiscuous family, nearly 900 of them! A question that might be asked is what’s taken so long for an updated model to arrive over and above Bachmann’s 2004 release. An answer maybe that Bachmann in fairnesss to them actually got the 57xx varieties they tooled very right indeed all that time ago, with a well detailed and mechanically sound model. So much so that the kit manufacturers like Malcolm Mitchell and Martin Finney would have had a job getting people to buy into building a kit whilst the Bachmann version was extant, I’ve got fourteen of them….
Accurascale 57xx ACC2890-EXLDCC
Well some twenty two years later Accurascale have taken the next step with their version, and has set the standard which is unlikely to be surpassed for a considerable time to come. They also have tooled versions not previously available, riveted tanks, boilers without top feeds immediately spring to mind, and have tooled the bodies in such a way that the ability to produce a mainstream version of any member of the class is just a tool slide change away. Whilst not as detail varied as their other recent model the J67/8/9 classes, there are plenty of subtle variations to capture both in locomotive details and livery variations.
Accurascale 57xx ACC2890-EXLDCC
Accurascale have kindly lent a DCC sound fitted model for review, from the production batch, not an EP or decorated sample. As Shelfie2 was at the NEC show and running in its normal DC configuration we wondered how well it would work running on DC as its bimodal so to speak. Well the answer was surprisingly well. Using a Gaugemaster model W controller the sound worked and the locomotive works as expected. It does need turning up to maximum speed to activate the decoder, once. it starts moving turn the speed down and the model moves prototypically and has a bit of a momentum feel to it. It rapidly became second nature, and the exhaust beat matches the wheel revolutions even in DC operating mode. There’s no volume control operating like this, but in the environs of the NEC the relative loudness wasn’t in any way obtrusive. Subsequently at home it was loud, but thats not really a problem, If I were buying a sound fitted version, I’d bite the bullet and buy a DCC system anyway.
The initial look over the model at the NEC certainly captured the look and mass of the 57xx class. Some models just don’t look like they capture the mass of the real locomotive, but this one does, adding subtley to its prescence on or off the layout. Getting it home means that a more relaxed look at the model can take place, and this has just confirmed the accuracy and attention to detail of this class act.
Arriving in the standard Accurascale packaging the model had no major defects and one lamp bracket missing from the bunker top. No superficial glue marks or assembly errors were evident and the paint and printing is all crisp and legible. The model comes fitted with standard tension lock couplings and NEM pockets on the chassis, they were removed for photos and video. The model was literally fresh off the aircraft so we received the same standard product that a regular purchaser will. Within the box is an outline of the class and its history with some interesting notes from their use in preservation, real lived life experience. Also is a detail package with a smokebox number plate and two locomotive lamps. There are tweezers to help replace the decoder, an instruction leaflet with spares listing and the DCC sound instructions with relevant CV’s and settings. So taking the measuring stick to it and dimensions published, it meets all of them without exception. Importantly the various shapes and radii of the fittings just pop, capturing the character of the prototype, possibly to perfection.
This was emphasised by the small delay in the production process when the dome top contour was changed, the original wasn’t bad by any stretch, (see above), but a change was made and definitely for the better. The above image actually shows some of the detail variation within the tooling suite too, note the injector through the running plate, the riveted tanks, no whistle guard and no top feed compared to the review sample.
Accurascale 57xx GWR Pannier
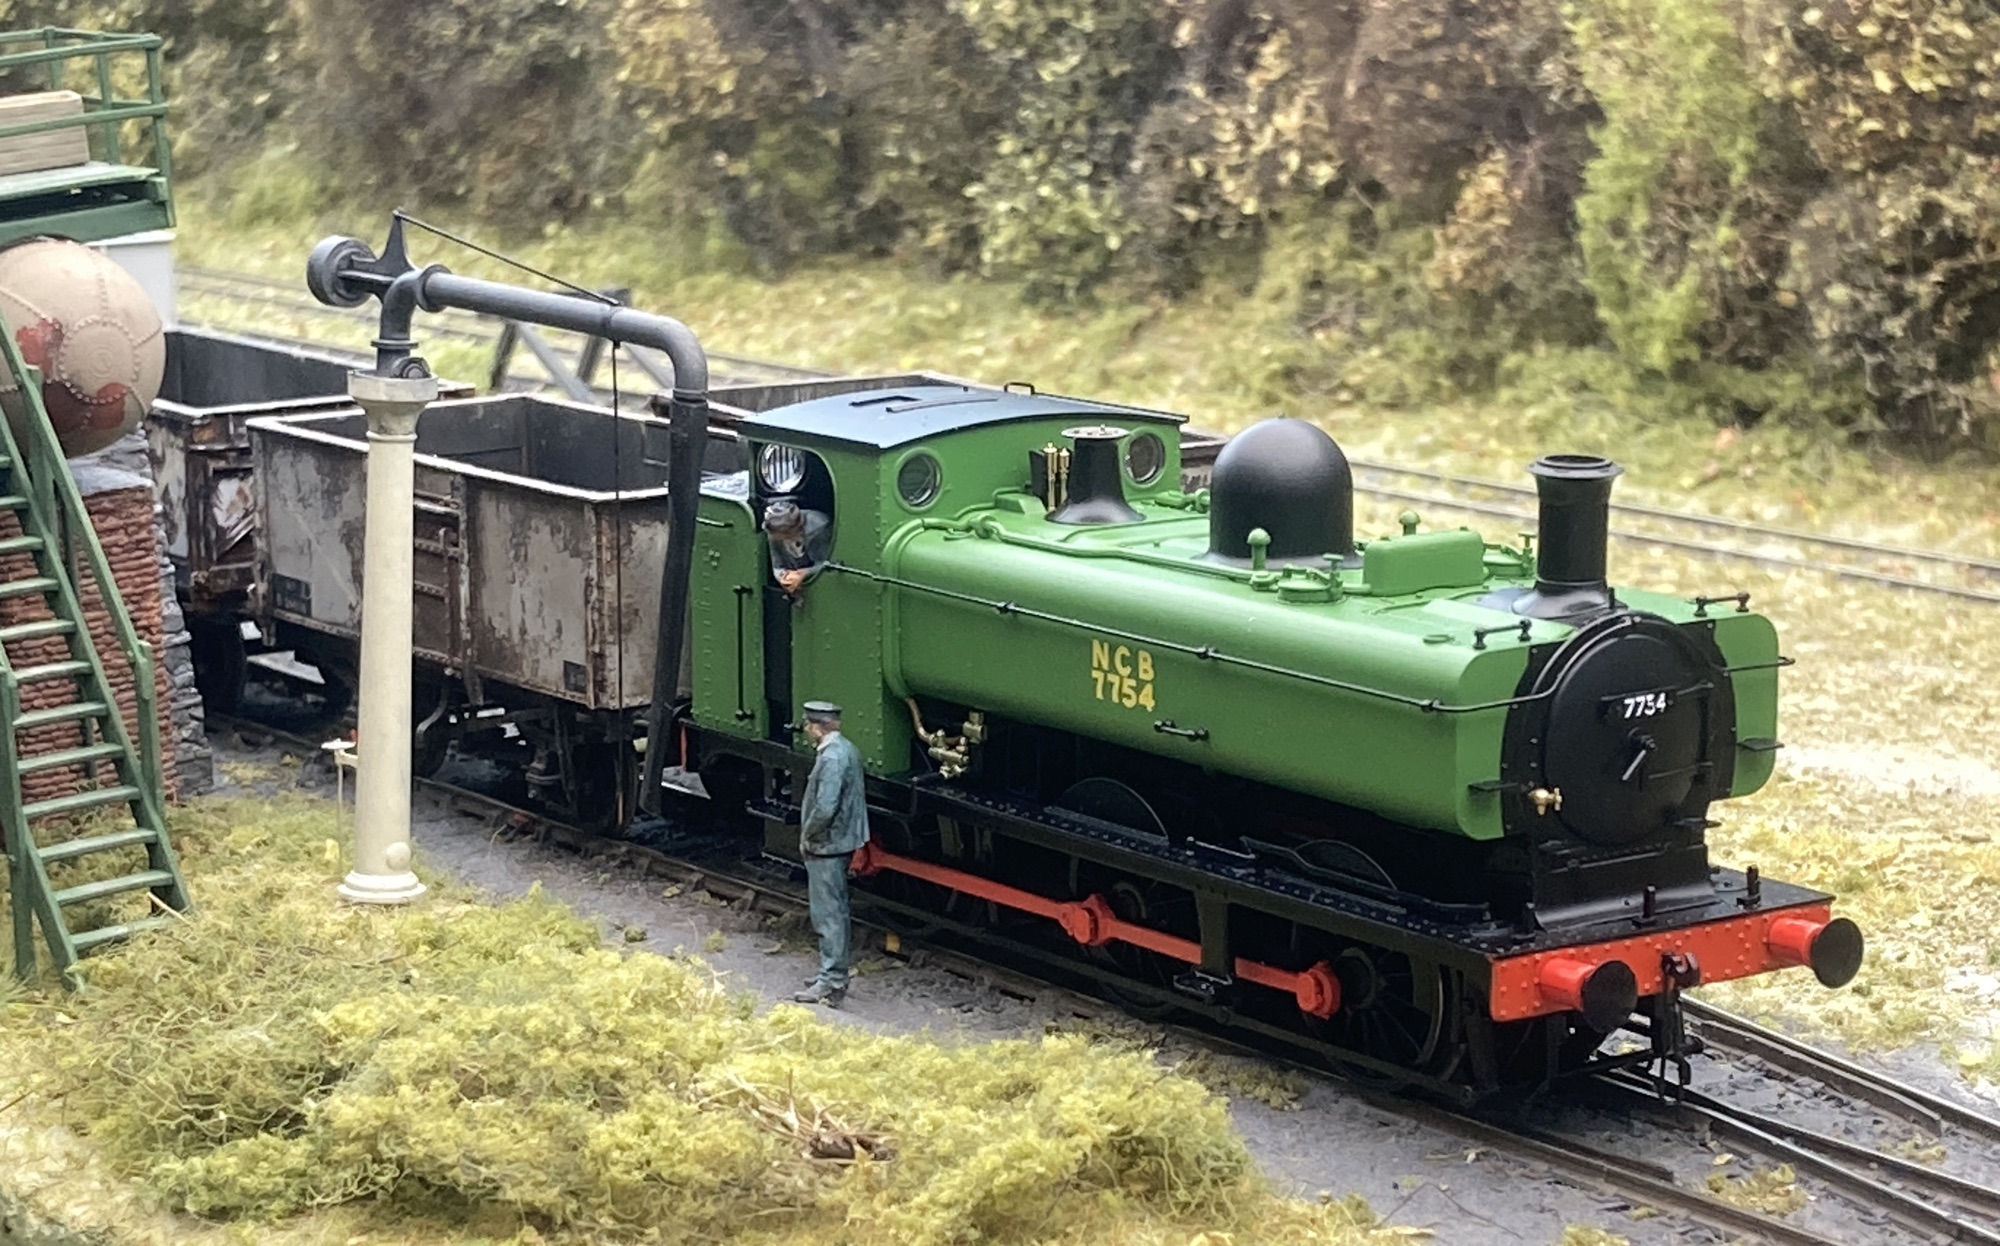
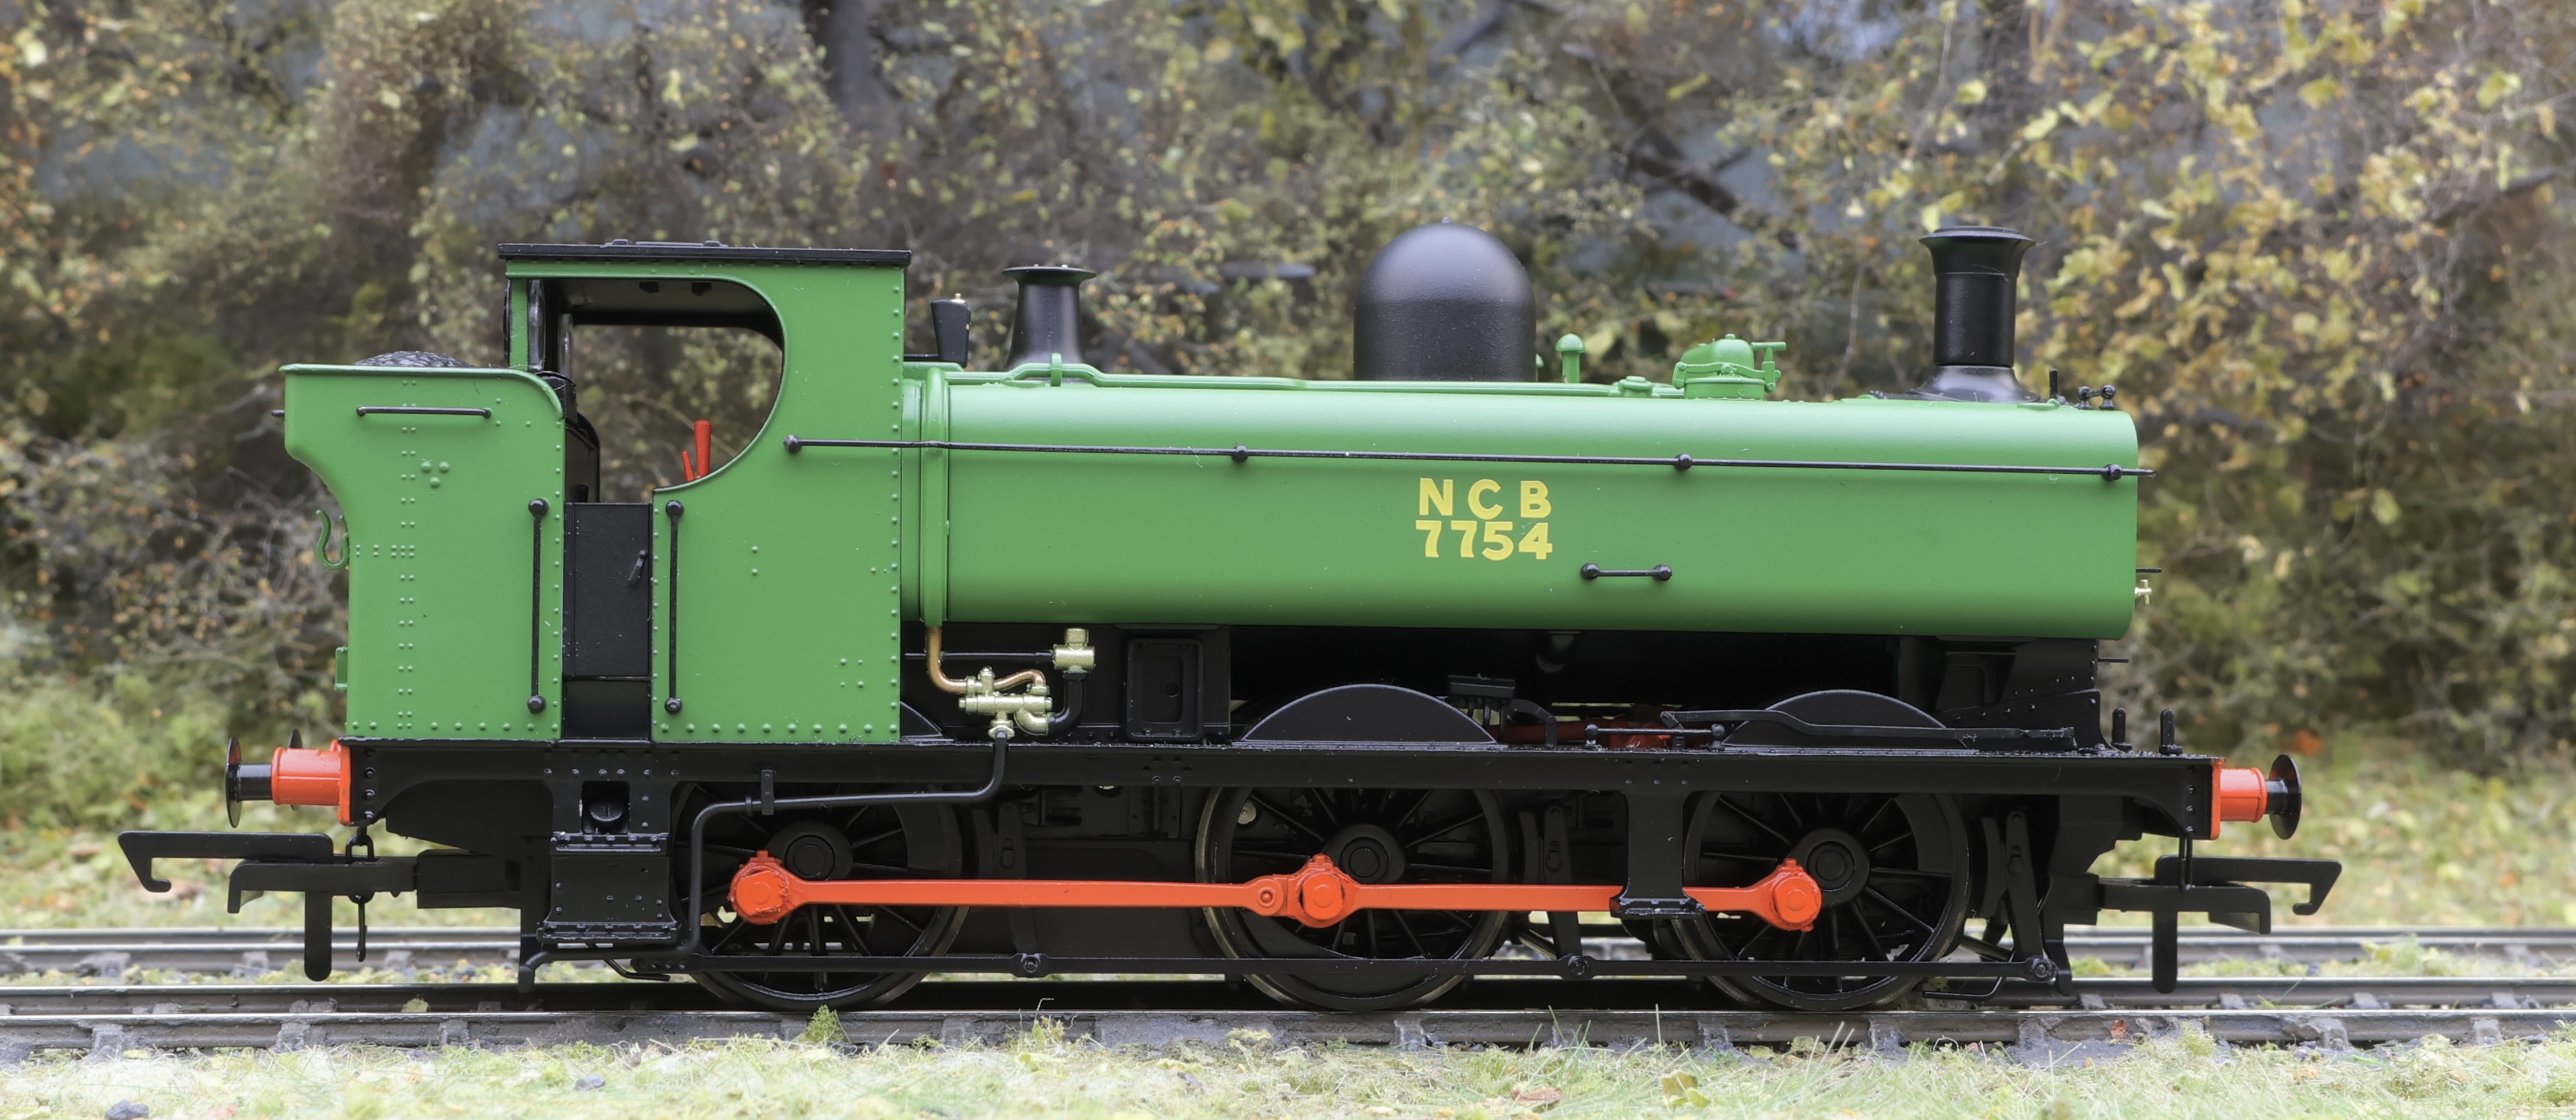
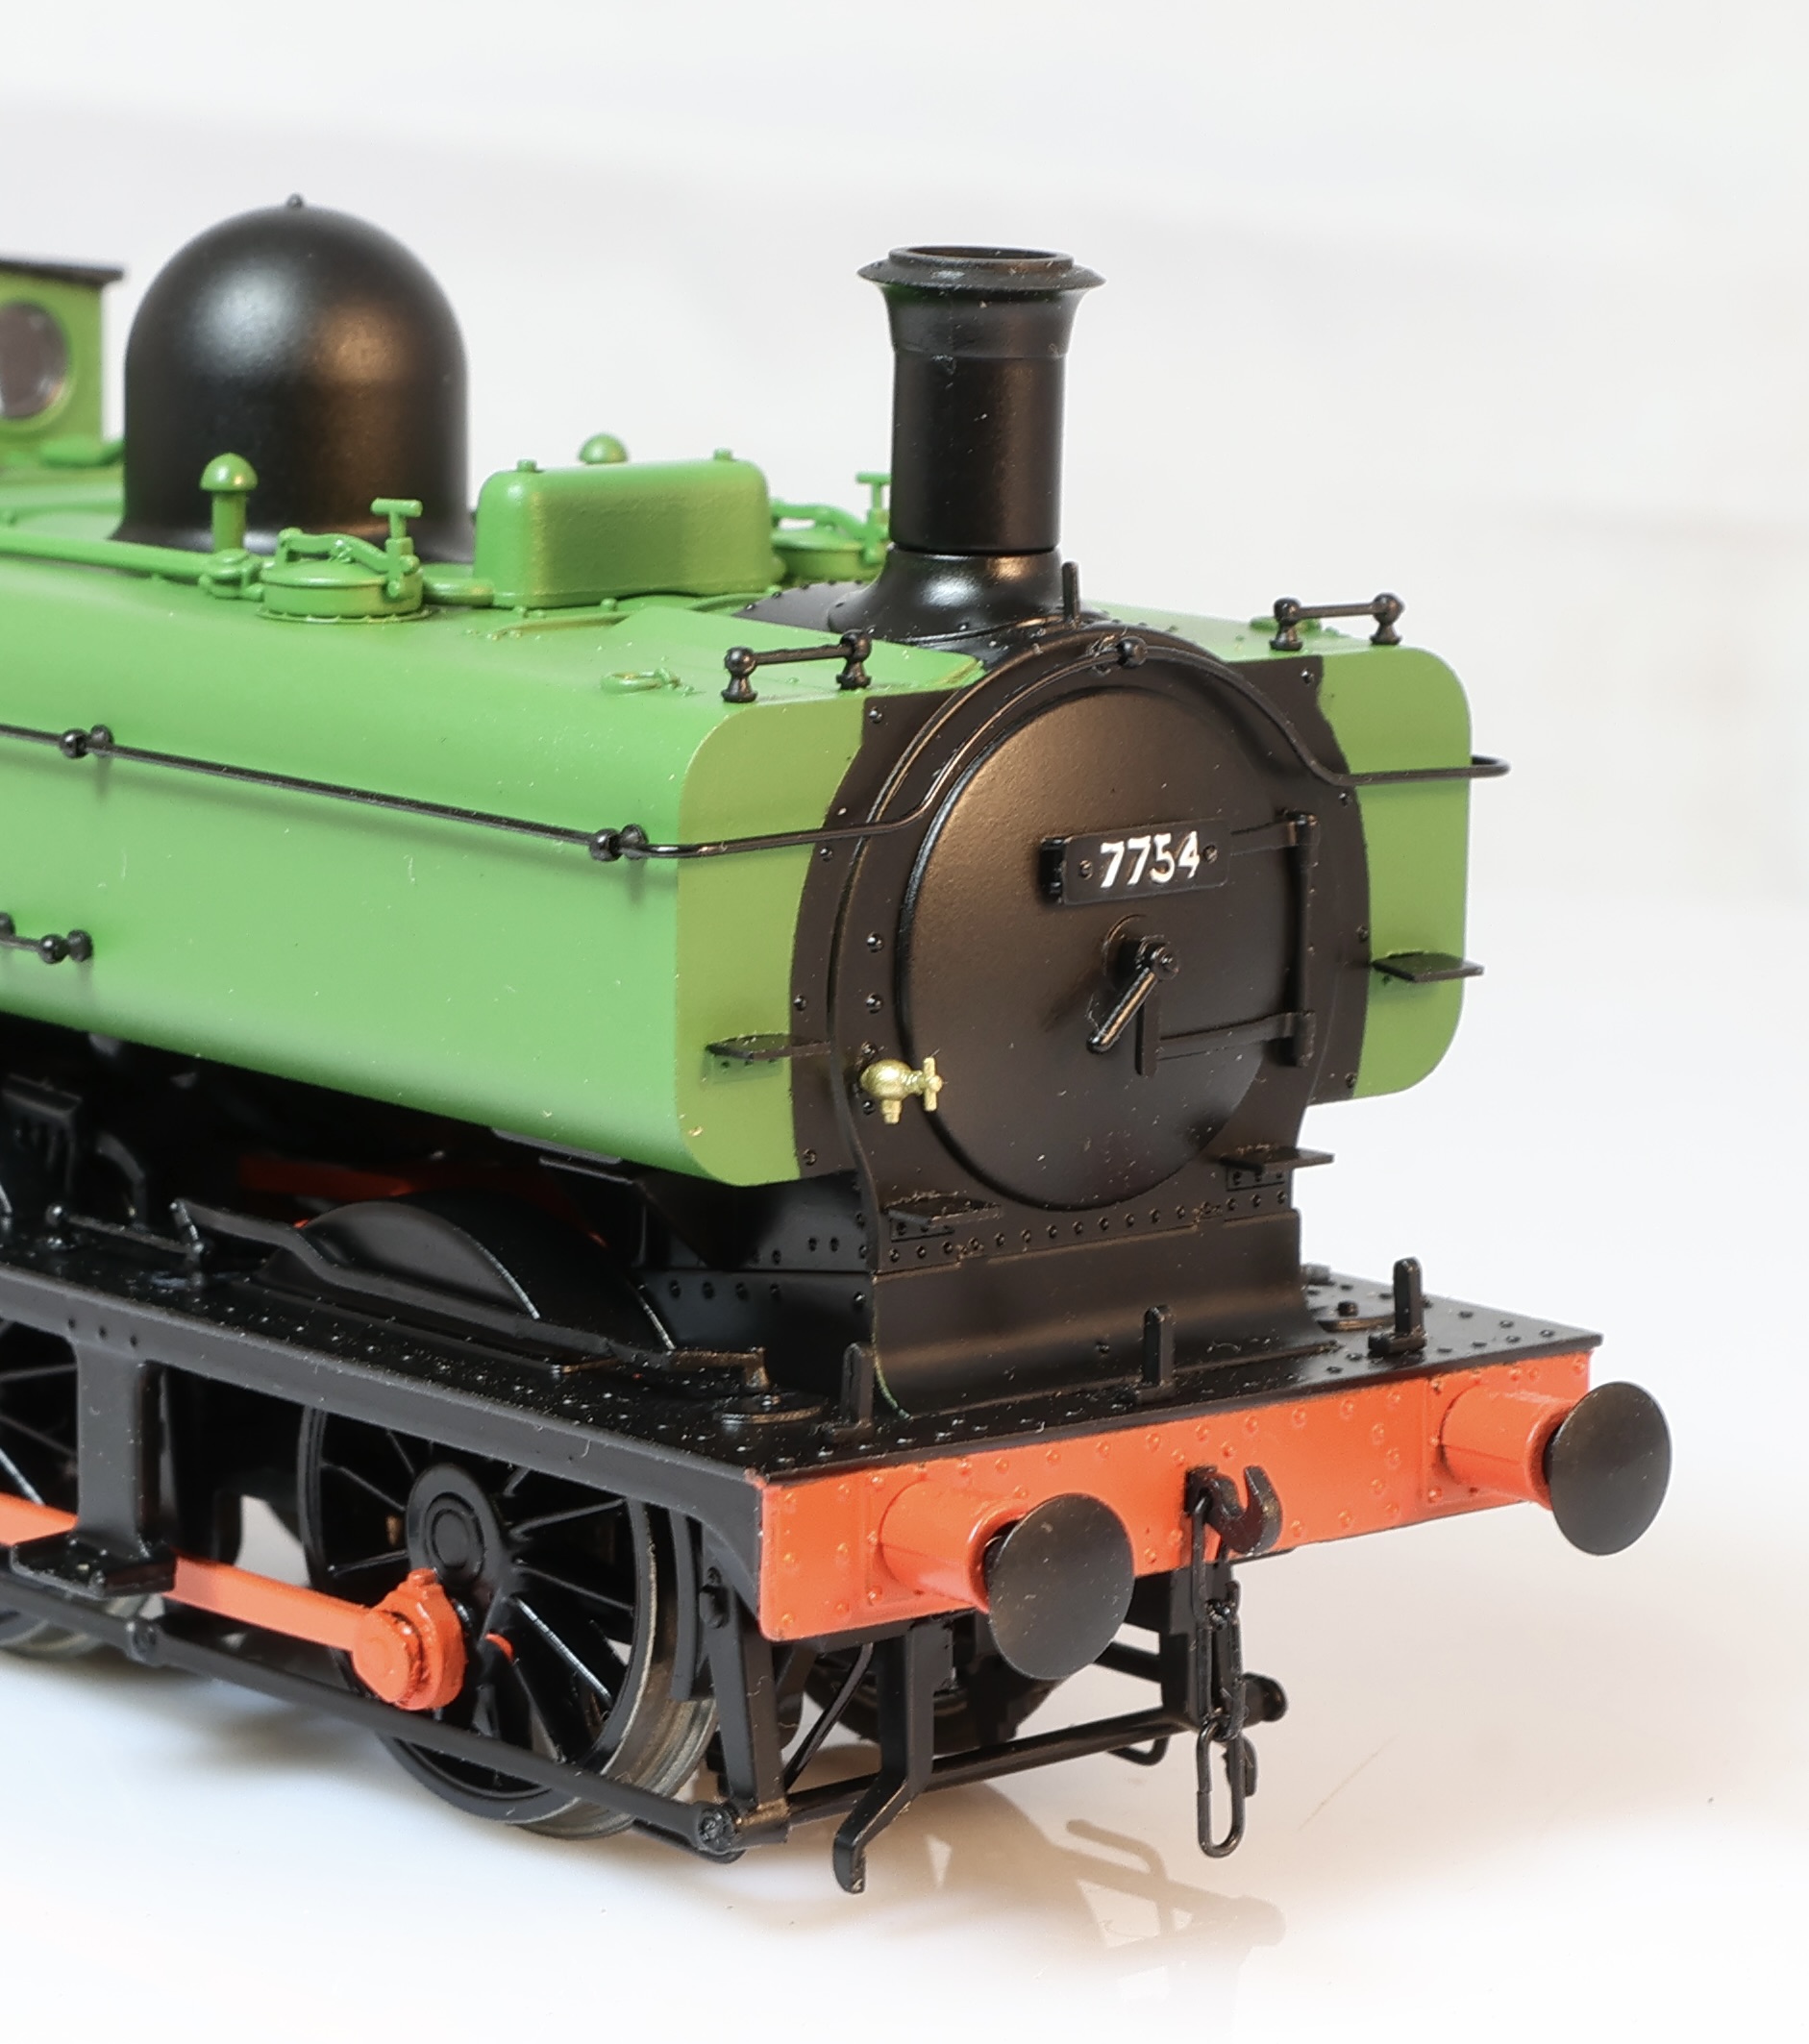
So what is on the man cave desk then? It’s an industrial version of the 57xx, and specifically 7754, which was sold from British Rail service with a few other panniers to the National Coal Board, and worked into the early 1970’s which is the detail and livery configuration this is portrayed in. Whilst many automatically associate the GWR Pannier with Swindon, this locomotive was built in a batch of 24 engines by the North British Locomotive Company in Glasgow in 1930. Does the detail on the model match published images of the locomotive? It does, I had thought the North British works plates should have been extant on the front splasher. After writing the review a friend advised his GW version had the NB works plates as a separate etched accessory. Leaving them off makes sense as the various builders had different shaped plates and this can accommodate those differences. A subsequent image search found this locomotive in 1970 without the plates fitted, so this is correctly reflected on the model. The other details for this are excellent with the correct type of whistle shield (short), injectors and pipe across the top of the running plate. At the front end of the welded tanks are the steps, these are correct angle plate types, others had a stirrup shape. The face is completed with the steam lance fitting and a convincing shape and diameter of the smokebox door, this being removable to allow easy access to the decoder.
Accurascale 57xx ACC2890-EXLDCC
The tank fillers are the correct screw type (another variation) emphasising the attention to detail that Accurascale have paid to these models, there is a slight error in the tank opening handles in that they should have a right angle bend in them which is missing. This version of the pannier has the top feed fitted and the separate pipework and topped casing look particularly good rather than folded as one piece integral with the body. Nestled underneath those tanks are the lubricators, another detail not featured on other models.
Accurascale 57xx ACC2890-EXLDCC
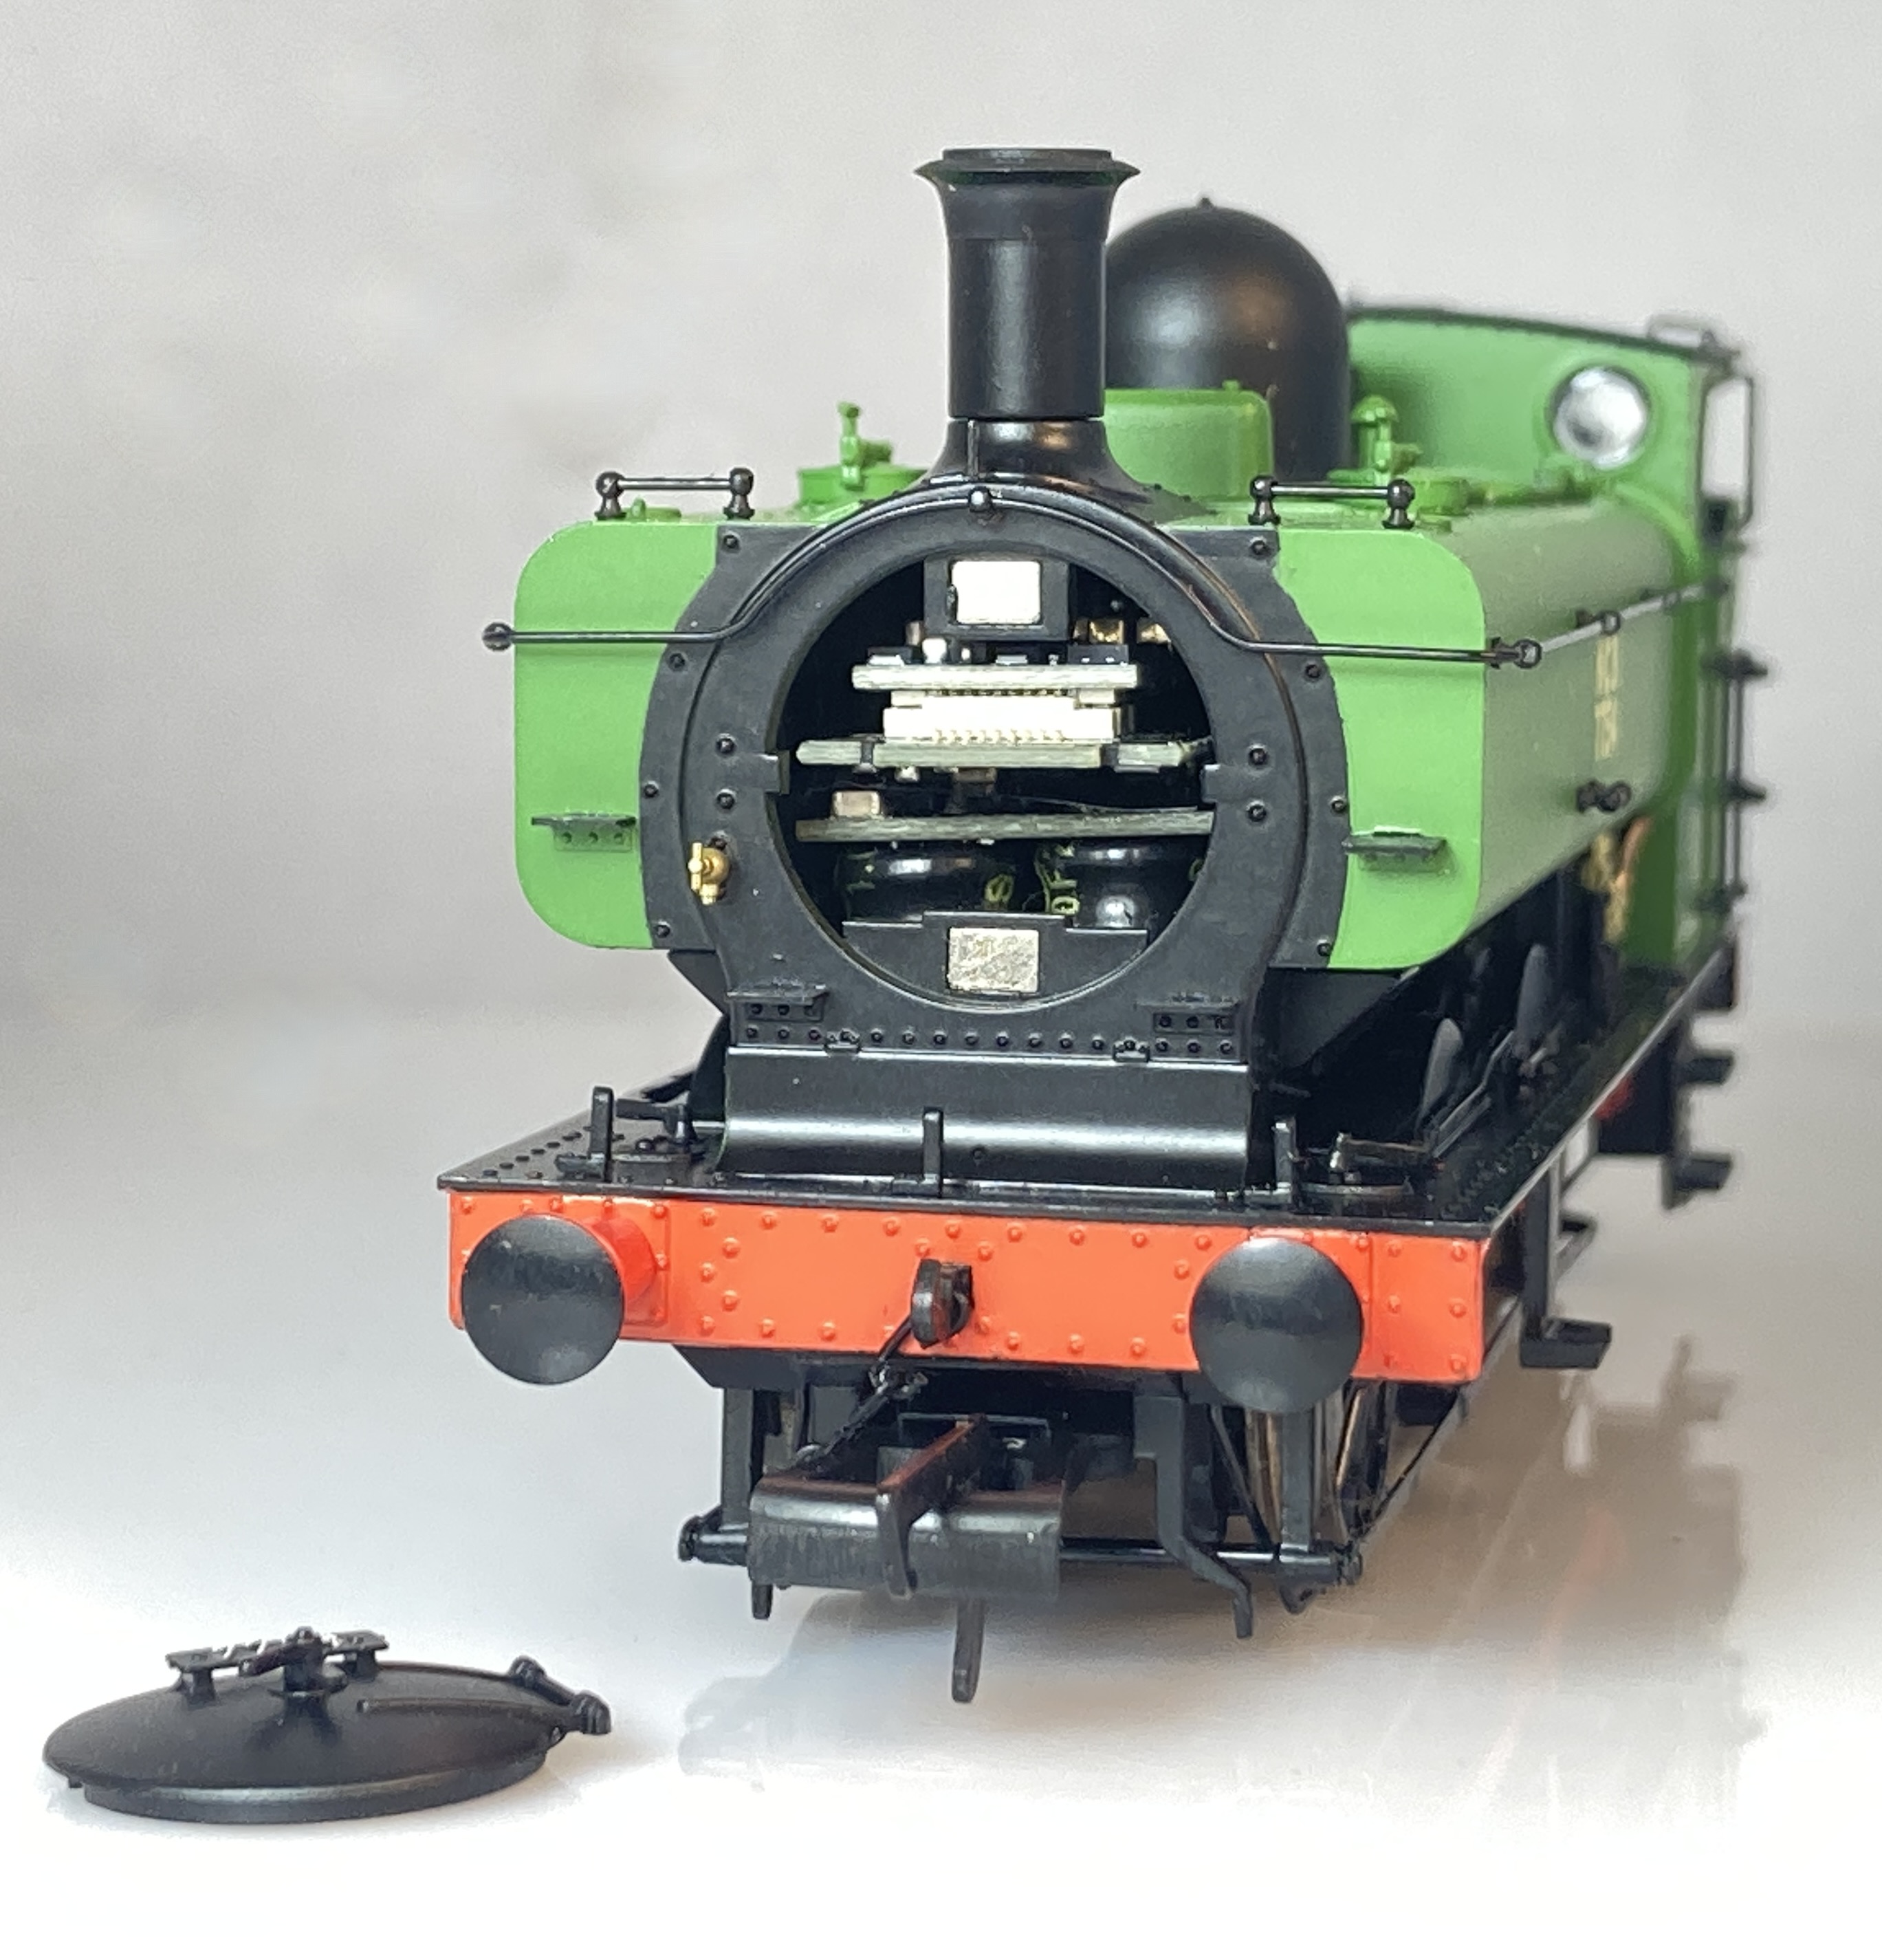
Handrails and tank lift rings are much finer than previous models like my Bachmann versions, and its this precision and detail variation that really lift this model and puts real distance between it and the (much) older Bachmann versions. The other big difference from previous models is the access to the decoder, seen below, the smokebox door is removable and tweezers allow access to to the decoder if required. The magnets are pretty strong so its unlikely that the door will drop off and go missing. Someone will though..
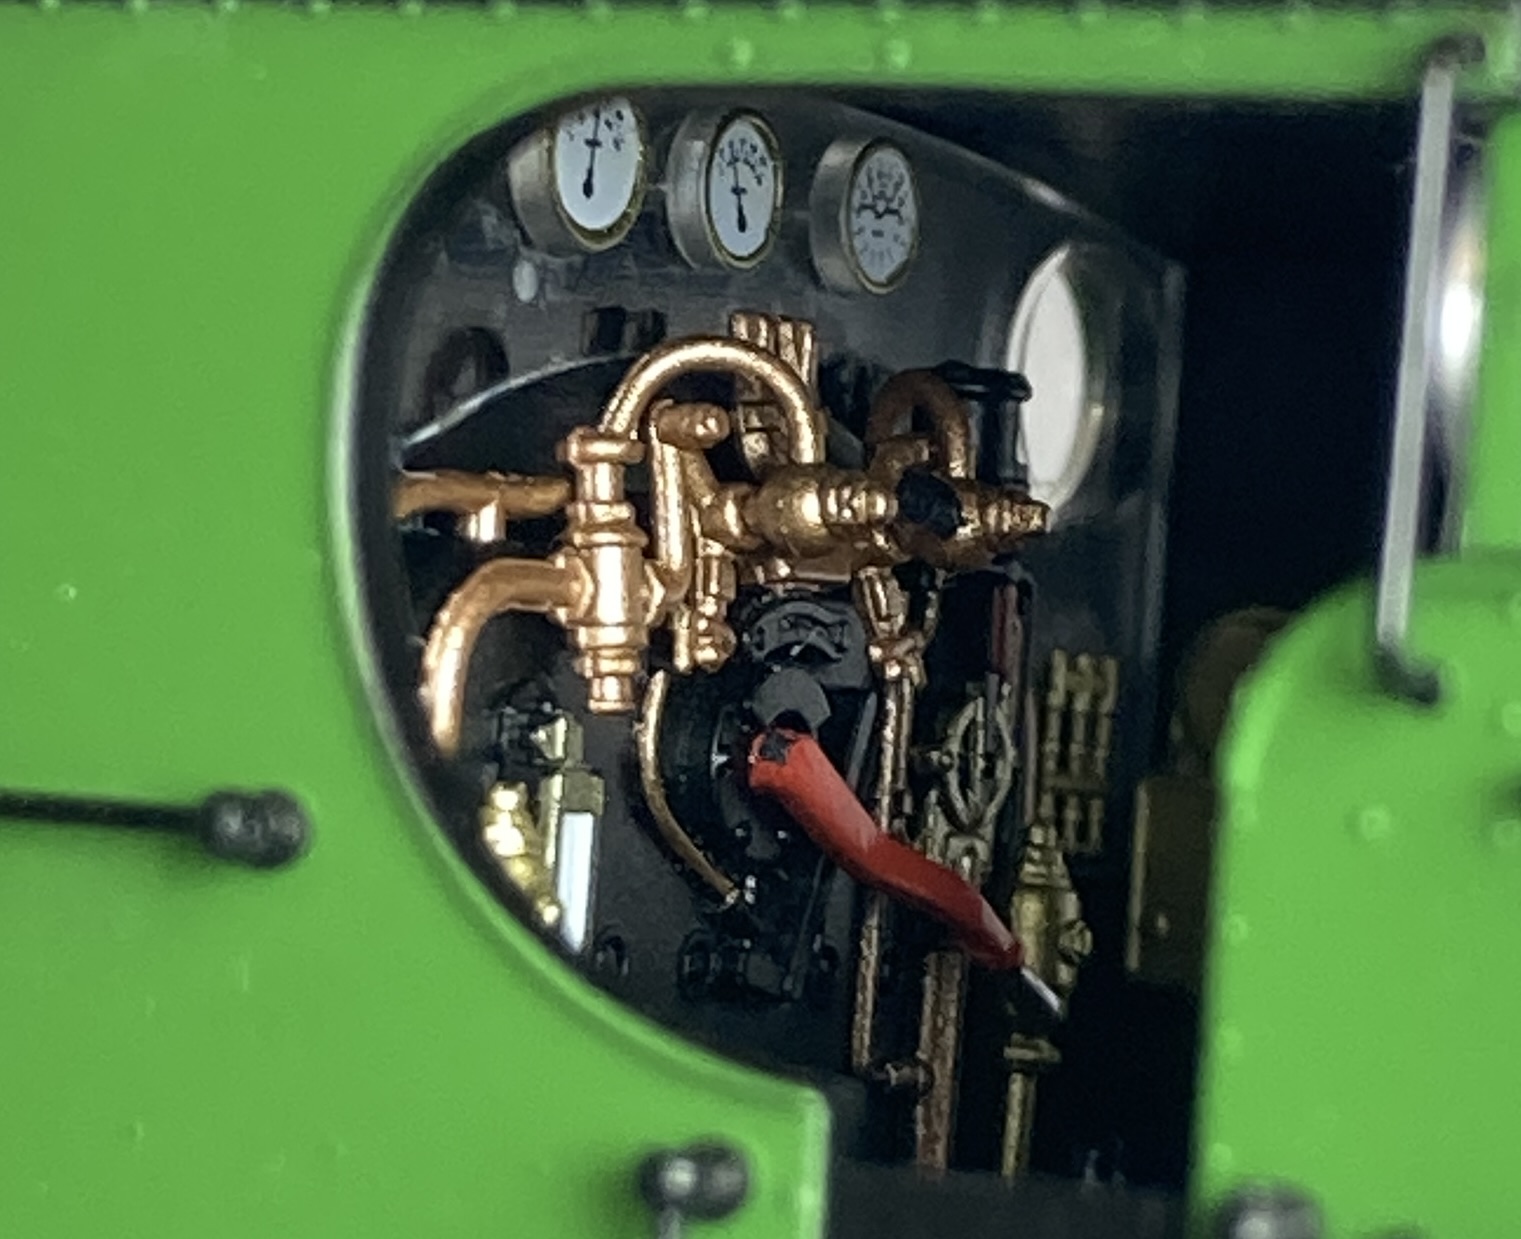
Other areas where there are significant improvements to previous models are the cab and its fittings. The models have sliding roof vents, but not separate cab roofs. This is because I understand making a viable component join across the tooling range wasn’t practical whilst keeping the fidelity of the models appearance. Different bunker step options are covered, this having the correct type for later in its life, early GWR versions will prototypically have them omitted. On the low cab version here the rear window looks a touch close to the edge of the cab sheet, but isn’t really noticeable.
Cab detail is excellent as illustrated, the bunker shape and panelling has the look of thin sheet metal and the characteristic GWR angled lamp brackets and fire iron hooks are fitted. The chassis is rigid with rigid coupling rods. My preference is for jointed rods, however both Accurascale and Rapid have released recent models with solid rods and there have been no adverse comments regarding their operation, so they’re not like to present any problems, certainly none were apparent in the tests I’ve done with this or other types. I’ve run this through Shelfie 2, and 3’s track which are Peco code 75 streamline and Bullhead (2 & 3 electrofrog) all work with no problems. The other types that I’ve tried are Peco set track 2nd radius points and Kato unitrack, where it has performed brilliantly. As its DCC with stay alive that makes sense, and judging from the J68’s performance over the same track I anticipate a similar result with a DC specification model.
Accurascale 57xx Chassis
The chassis is a tidy well designed and built assembly. It’s fixed to the body with two retaining screws, one at each end of the chassis. The chassis has all wheel pickup with wipers on the rear face of the tyre and the motor wirings hidden within the chassis assembly. Wheels are nicely profiled with the correct number of spokes and appearance. The metal chassis core has a plastic baseplate with separate ashpan and etched brake pull rod assemblies, the axles have enough lateral movement that they don’t foul the brake gear, and axles appear to be 2mm in diameter. The brake shoes are aligned with the wheel treads and the stretchers between then are plastic ensuring electrical insulation. It doesn’t look like there’s any significant hurdle to converting these to EM/P4 but without pulling this loaner apart (not going to), I can’t say for sure. The running plate is metal so there may be some work needed there to ensure clearances.
The drive is to the centre axle via a vertical gear housing. This has allowed excellent cab detail to be shown and left the area underneath the boiler open. Sitting on this is a representation of the internal valve gear and this is a notable feature as the area otherwise looks odd with no detail there.
Accurascale 57xx Chassis
Prominent at the front of the chassis are twin capacitors for the stay alive function, these are hidden from sight in the smokebox when assembled. On top of those lies the decoder, which normally is accessed by the front of the smokebox, and Accurascale provide tweezers to remove or replace the decoder if you wish to do so. immediately behind that are two vertically mounted sprung electrical connectors. These are the speaker pickups and compress against strips within the body that provide power to the factory installed speaker. The speaker is situated in the left hand side of the tank and is a neat and tidy installation.
Spinning the chassis round the rear of the gear housing has the LED for the firebox flicker which is subtle and not overpowering. The compact nature of the design and tidy wiring loom has left the room for the cab details too.
Accurascale 57xx speaker installation
So what does it sound like in DCC? Unmodified out of the box, in a word, eleven. See Spinal Tap, I’ve not altered any settings as this is a loan item, but it’s loud. At the NEC it wasn’t noticeable due to the size of the venue, at home in the mancave it’s loud, but having said that, the sound quality is excellent. The functions using an NCE power cab are easy to use and the controllability is excellent. This is the first model that I’ve had with F2 as the brake function, and I’ve been really impressed with it, it rapidly becoming intuitive. The difference between a heavy exhaust beat F5 and a light locomotive F6, is very marked and I really like the list engine sound. Several whistles are programmed too, it’d be nice to have a few more, for example dropping the shovelling coal sound. A retailer friend tells me the coal sound is one of the most popular functions, so I guess that isn’t going away any time soon.
The sound is unsurprisingly a very big improvement over the sound fitting I did way back in 2007 with a Bachmann 37xx and 57xx. They were good for the time, the difference of the sound files and speaker quality then compared to today is an immense leap for the better. The twin stay alive capacitors which give 4 seconds overrun on a fast speed setting, are also a very big factor in the running and acoustic qualities of this model.
Downsides? Well there are really very few, this particular model had a missing bunker top lamp bracket. The join at the base of the chimney could be tidier, this one isn’t quite flush. On the sides of the buffers the tooling slide join line is quite visible, it should be a smooth sided cylinder. On this example thats about it, and if all thats I’ve got to whinge about, thats excellent. None of those are insurmountable if I wanted to go crazy and do some modelling to resolve them.
So is this a worthy successor to the ubiquitous Bachmann 57xx? Undoubtedly, with an emphatic yes. Above you can see one of my modified sound fitted locomotives from 2007. Will I replace my shed full of Bachmann versions? Nope. Thats because over the years I’ve done quite a bit of work to them, and once you’ve spent that time they do stand up reasonably well against this release. That is a testament to the design team of the early 2000’s and the production values over the years. They do need quite a lot of work and I’ll cover that in the future. I did ask the Accurascale team if the etched details would be available, and they said they would be widely available, as an incentive to purchase them they would supply a free fitted painted body and working chassis included too. If starting today, then the Accurascale version would be the ‘go to’ model almost without hesitation. Within their range there are the core different detail differences, and with the opportunity to ring the changes with livery and detail variations across the lifespan of the class, what’s not to like? If you want a model of one of the last panniers working for a living, buy this! I do hope that perhaps in the future liveries they might consider one of the 96xx high cab versions that also ended up in the South Wales coalfield eaking out a living in the late 60’s.
Where can Accurascale go with this tooling in the future? My money is on the missing link in the late pannier family. A condensing London 97xx, and my cheque book is ready and waiting.
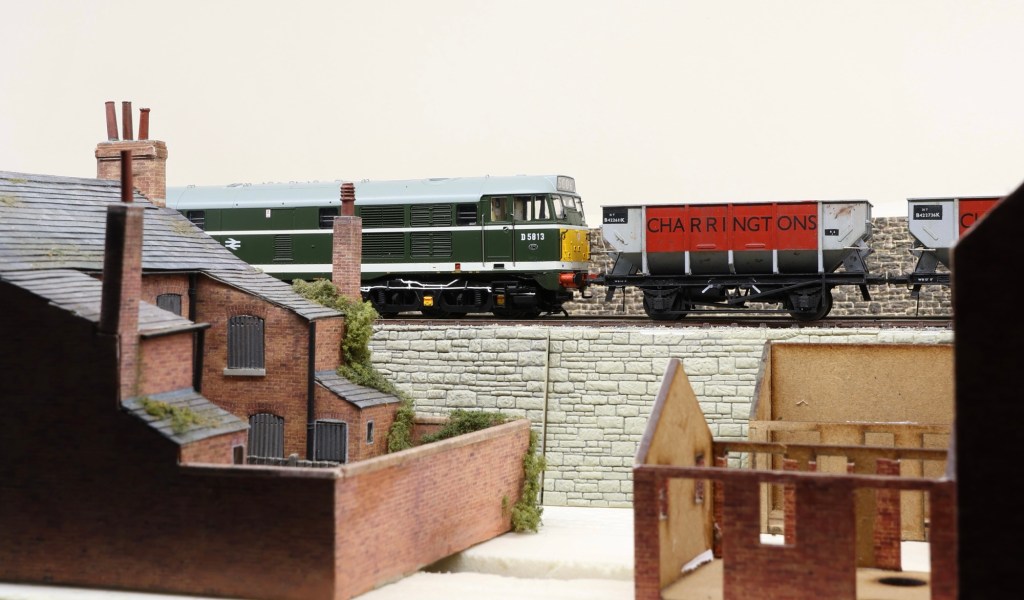
This time next Saturday I’ll hopefully be anticipating a cool one, it being the NEC model railway show hosted by Warners Publications. I’ll be taking Shelfie 2 there, Guyzance disposal point, and I’m thinking its only its fourth exhibition appearance, it having been to the Define show, Larkrail and Railex. Thats not really a surprise as I’m not a regular exhibitor, work life often taking weekends up.
Shelfie 2 Guyzance
This week will be concentrating on ensuring the layout is functioning and from Monday, checking that all the support equipment is packed, the tools and any spares required. Stock wheel cleaning will be a priority too, and coupling adjustments, ensuring as best I can to have a trouble free weekend, making it enjoyable for viewers and operators. There’s no new items of note for shelfie2, though it’s tempting to set an Accurascale 31 up with Dinghams to see how it performs.
Accurascale 31 on Shelfie2
When I say that I’m referring to the couplings, not the Accurascale model, which is the equal of anything else I have in terms of running qualities. As I write this and looking at the image above I’m thinking thats a good idea, I do like having something different at shows and this modified 31 fits the bill, It does need a bit of weathering though to drop into its 1968 guise effectively. What happens after next week for Shelfie2? I’m not sure, its had a life of modifications and I like the idea of turning the viewing aspect 180 degrees, it does literally look better from the other side. Much of that depends on how well it performs and if I want to keep exhibiting it. I have been looking at different elements of the layout scenery and may try a bit of enhanced forced perspective again, we’ll see.
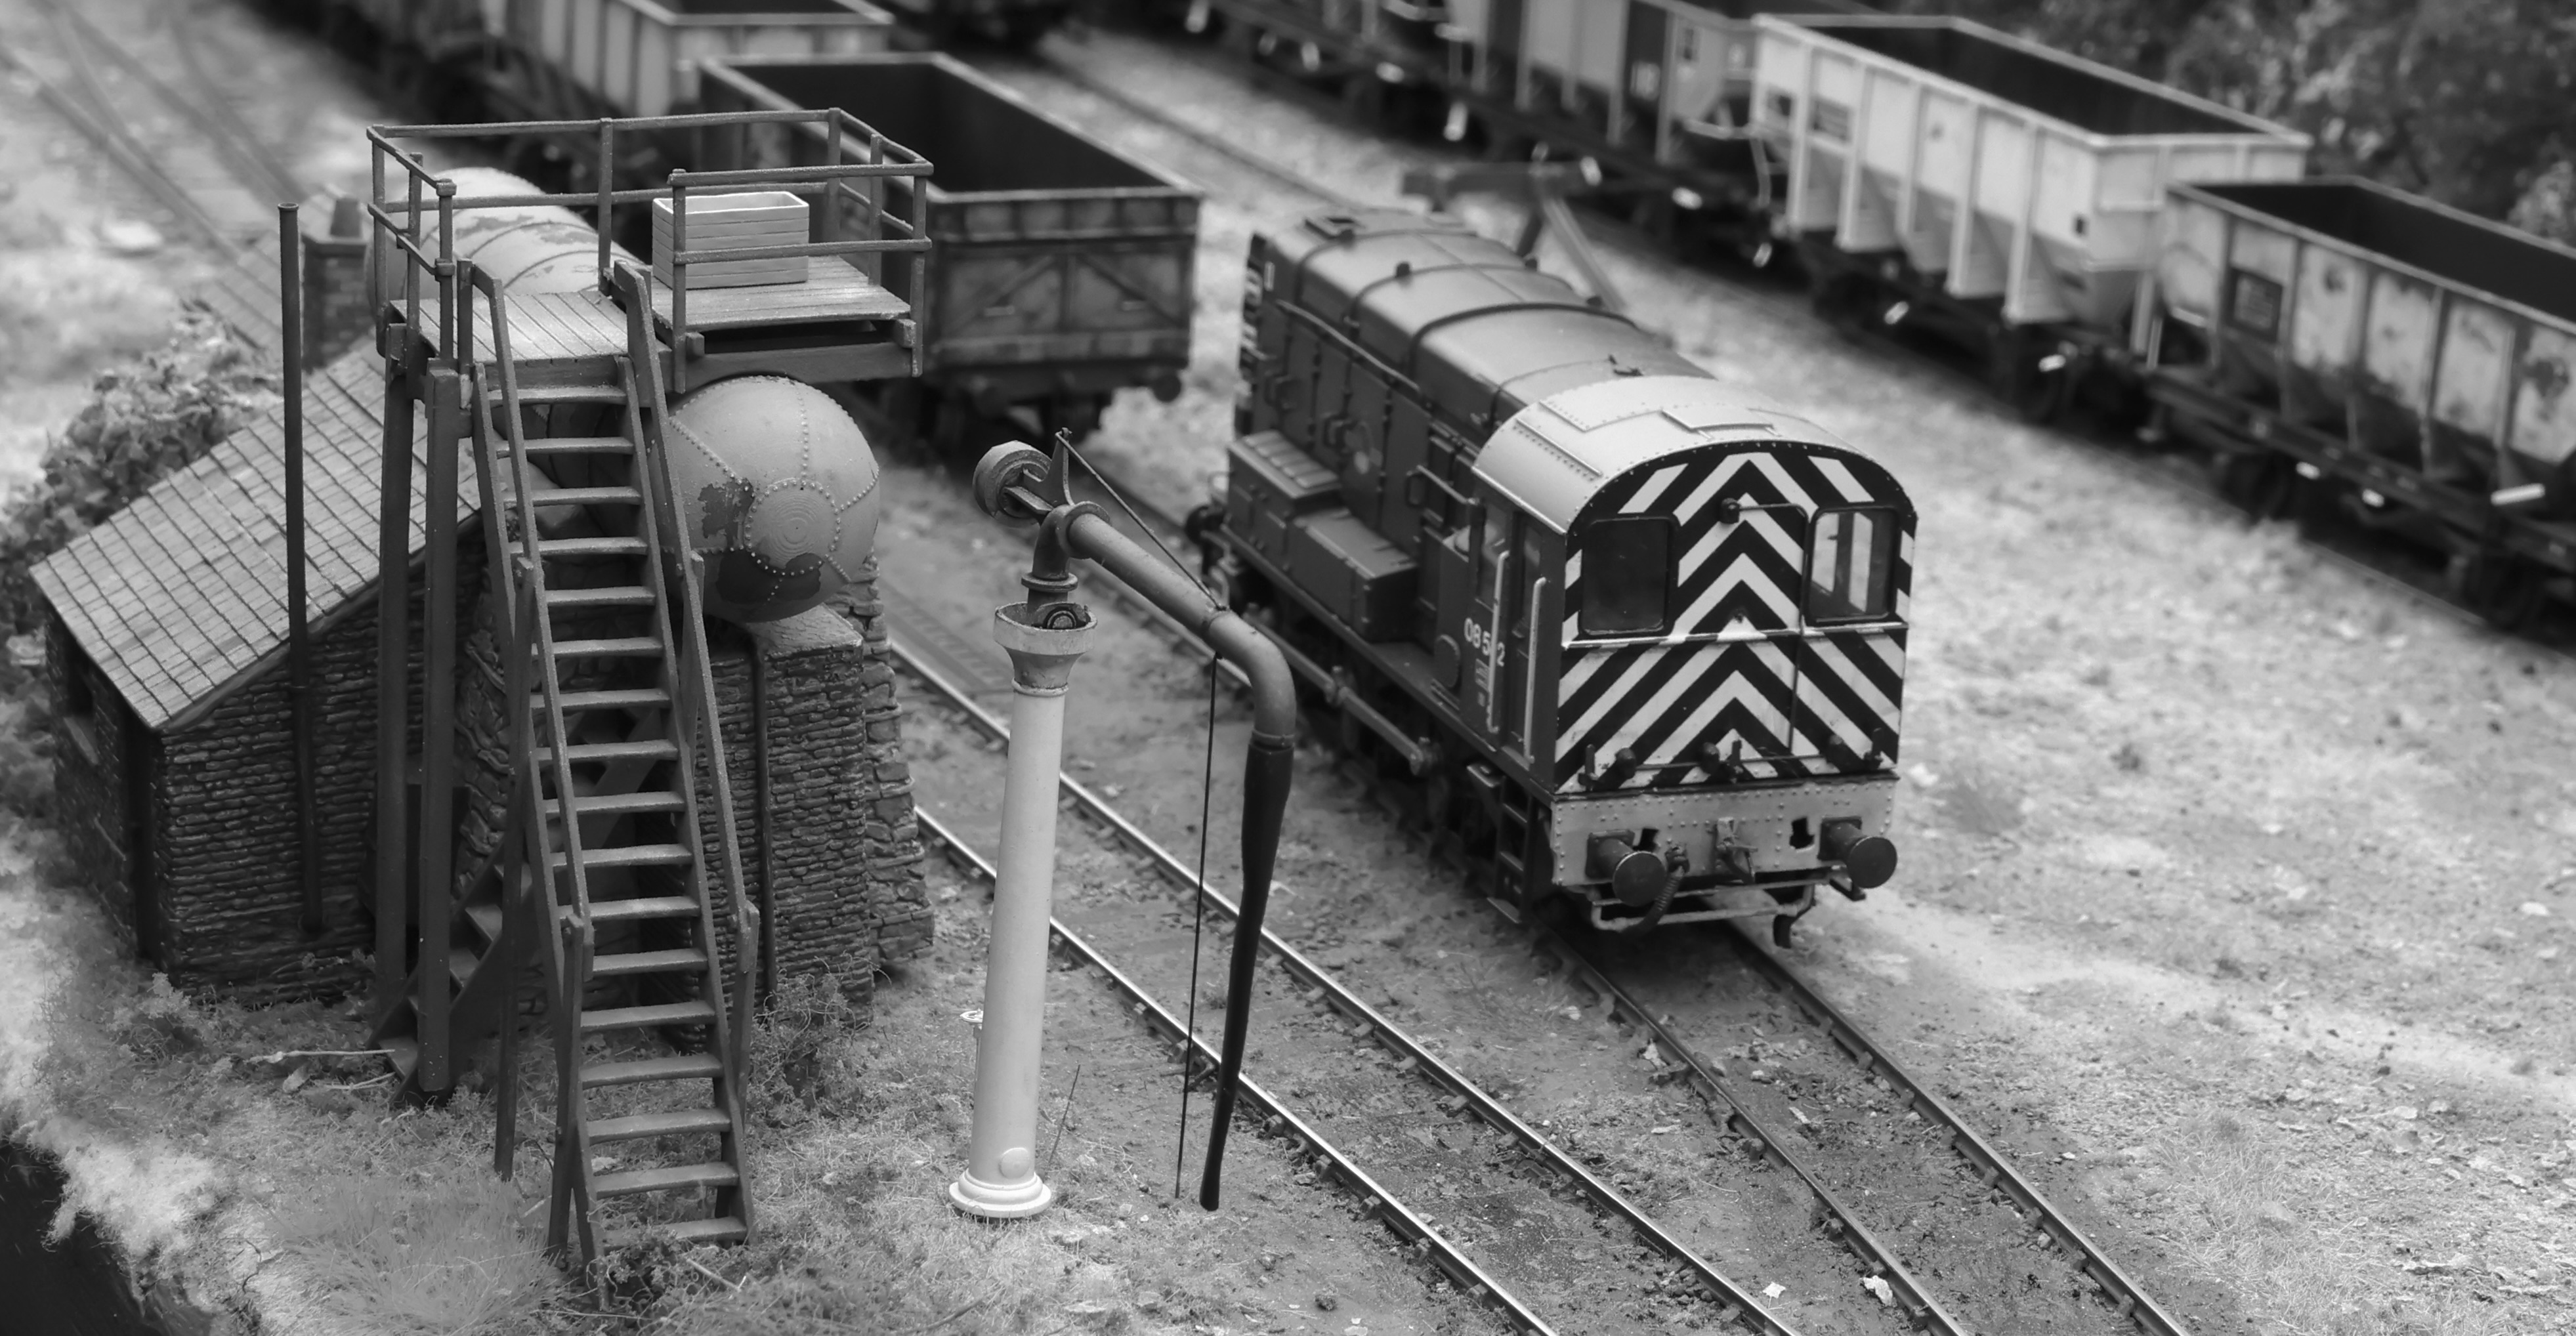
The roster is primarily Bachmann 08’s and a Heljan Class 11, the wagons 21t hoppers and loco’s all configured so we can do hands free operation. That bit is really satisfying and does capture the viewers imagination especially as its analogue rather than DCC. Shopping list? As always there’s bound to be something that catches the eye, one of the benefits of the show is that there’s plenty of varied trade there, and this year I’ll be interested in what’s new in TT120, and in particular the EFE class 313 which is likely to be a bit of a catnip model for me having spent years commuting on the GN stock!
If you’re there, do drop by and say hello, thanks for reading!


You must be logged in to post a comment.