Manic Monday


4mm scale shackles. If I give up the day job I could try out as a jeweller! A mix of frustrating, and satisfaction assembling these, and remembering to breath…

Posted in Bachmann, blog, blogging, Branch Line, brassmasters, British Rail, DCC, dcc sound, Eastern Region, finescale, Great Western, HO, hobbies, Hornby, Inspiration, Layout, life, LMS, LNER, magazine, media, Midland Region, Model Railroad, Model Railway, Model Railway Journal, modeling, Modelling, Modelu, Nevard, OO Gauge, Oxford rail, Railex, Rapido Trains, Scottish Region, skill, skillset, toy fair, toy train, Toy trains, toytrainset, train set, trainset, wagon | 6 Comments

DJ Models J94 Review. Setting Higher Standards?

DJM J94 OOJ94-001   OOJ94-002 OOJ94-003 OOJ94-004 OOJ94-005

DJM J94 OOJ94-001 OOJ94-002 OOJ94-003 OOJ94-004 OOJ94-005

Well the DJM J94 is out and on the streets. This is the first product developed solely by DJM rather than working in one format or another as a partner with other stakeholders.  Yup with the ‘stakeholder’ word in there you just know this will now descend into a death by powerpoint presentation, pity you if you’re reading this at 2PM in the afternoon, welcome to the dead zone!

In the spirit of noughties powerpoint presentations here’s what you’re going to get.
1/ A bit telling you what I’m going to tell you.
2/ A bit telling you what I’m telling you, and…
3/ A last bit reminding you what I’ve just told you.
If you want to be totally contemporary and are reading this on your telly through an interweb link, just adopt the SKY/Nat Geo/Discovery Channel mode and re read sentences 1 and 2 above, every time you look away from the screen for more than twenty seconds.

Standards
The strapline of DJM Models is ‘Setting Higher standards in Model Railway locomotive design’. Quite a ballsy statement to make and implies that this model should exceed the expectations that we have come to expect from the established players, eg Hornby and Bachmann. Does this model set higher standards? Well lets have a quick look at the definition of ‘Standard’.

DJM J94 OOJ94-001  OOJ94-002    OOJ94-003  OOJ94-004   OOJ94-005

DJM J94 OOJ94-001 OOJ94-002 OOJ94-003 OOJ94-004 OOJ94-005

Universally or widely accepted, agreed upon, or established means of determining what something should be.
 A product whose properties are known with a level of accuracy that is sufficient to allow its use as a reference point in measuring the same properties of another similar product
 A norm established by custom, practise, agreement, authority and used as an exemplar for comparison of practises, procedures, quality, of other similar items.
A specific definition of limits, rules and procedures monitored for compliance by an authoritative agency. The standard in this context can be used to determine a minimum acceptable line in the sand for products to pass.

So, we don’t actually have any industry recognised standards in the UK, in the US however they have the National Model Railroad Association nmra standards, established back in the 1930’s. The manufacturers across the scales dealing with the US market use those standards as benchmarks and actively promote them within the manufacturing and sales of the hobby. The UK did have BRMSB (British Railway Modelling Standards Bureau) headed by J.N. Maskelyne whom with others devised a set of standards which were supported by their trade section,  META (Model Engineering Trade Association) way back in the 1950’s, and through the 1960’s. They endeavoured to establish similar protocols, but for reasons various they fell by the wayside, and the UK hobby has evolved largely without them in any structured format. META primarily dealt with the smaller cottage industry makers such as the component and kit manufacturers, rather than the Triang, Trix, Hornby, Graham Farish and Wrenn who were the big players of the era. The UK today industry does and has adopted some of the NMRA standards, but those issues fall outside the scope of this review. So, (see sentence #3), we don’t have a set of standards to measure this model by, but its not unreasonable to use comparisons with other contemporary releases. Ideally there should be a like for like model to use, released at a similar time, but there isn’t. The manufacturers strapline targets higher standards in model locomotive design, so apart from the normal review of how long does it take to unwrap? does it look like it should?, how does it perform? what color is it, and have all the bits fallen off before its opened, we should be looking at how the design features of the model are different and presumably better than its contemporaries.

 DJM J94 OOJ94-001  OOJ94-002    OOJ94-003  OOJ94-004   OOJ94-005

DJM J94 OOJ94-001 OOJ94-002 OOJ94-003 OOJ94-004 OOJ94-005

1/ A bit telling you what I’m going to tell you.
Cutting to the chase then, does this model set higher standards in model railway locomotive design? Erm, no. In some respects there’s a bit of a throwback going on. Are there some elements that are very good?, yes. Does this model represent a reasonable first solo effort? Yes, on the whole it does. There ya go review done and dusted, now whilst that should satisfy some, whom will already be topping up the internet foam and froth aisles with that news, we can have a bit of a better look at the model.

2/ A bit telling you what I’m telling you,
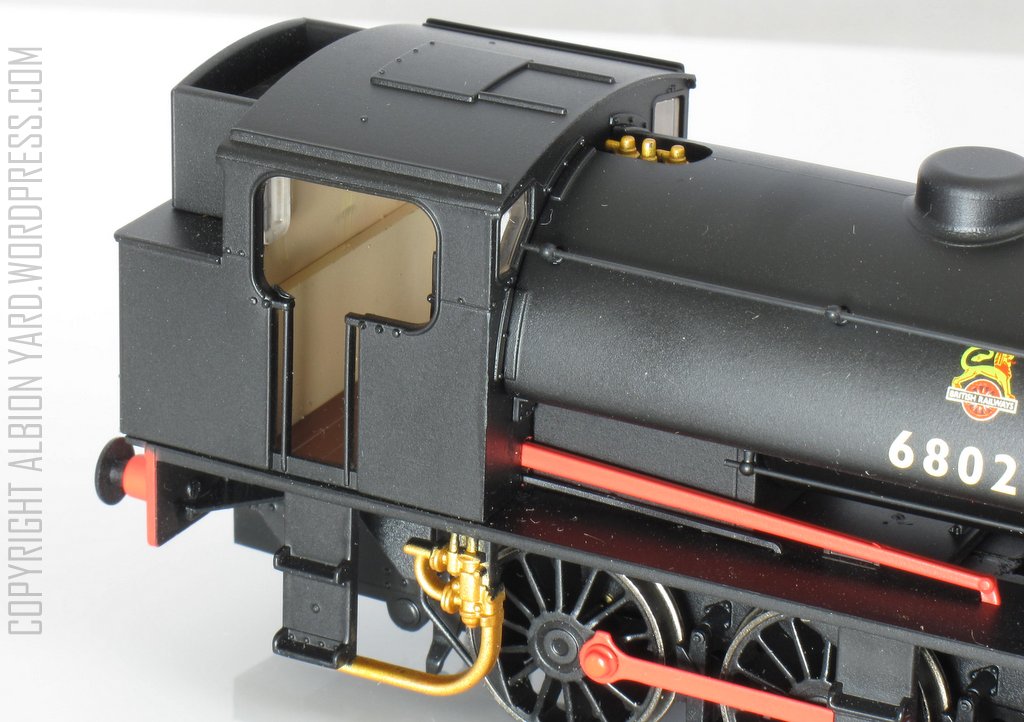
Packaging is a good quality strong cardboard carton with the model surrounded by foam padding, very similar to Heljan models before they adopted the vacformed tray for their models. No components were damaged in transit, and no bits left rattling round in the bottom of the box. Instructions are very basic, only covering oiling the chassis and fitting a DCC chip, the prototype information is of no particular relevance. The locomotive is supplied DCC ready requiring a 6 pin decoder of your choice. The overall appearance of the model is good, decoration and paint of a good standard, a nice matt to satin finish and this example holds its own against other contemporary RTR models in this respect.

First thoughts on placing the locomotive on the track is how light it is. The main weight of the model is the chassis block and the loco tops my scales at 153 grams, lighter than the Bachmann 1F at 178 grams and significantly lighter than the 57xx pannier at 191 grams. The overall haulage capacity of this model can only be compromised by this lack of adhesive weight, though I’ve yet to try any significant loading with it. Dimensionally the model hits the target with all the key dimensions being correct and things like cab roof radius matching both drawings and images. Detailing components include an etched set of fire irons, plastic brake pipework and a plug in section to indicate the internal motion which sits on the chassis top. A nice idea but if plugged in it makes the running plate under the boiler look solid, so it doesn’t achive the result intended.

  DJM J94 OOJ94-001  OOJ94-002    OOJ94-003  OOJ94-004   OOJ94-005

DJM J94 OOJ94-001 OOJ94-002 OOJ94-003 OOJ94-004 OOJ94-005

The chassis is hardwired to the motor which is held within the body moulding. This means that you can’t separate the body and chassis without a soldering iron. Whilst not a unique configuration this example had very short wiring between the two components and just the flexing of the conection with the body and chassis undone was enough to break one of the wires from the chassis terminal.

img_0019

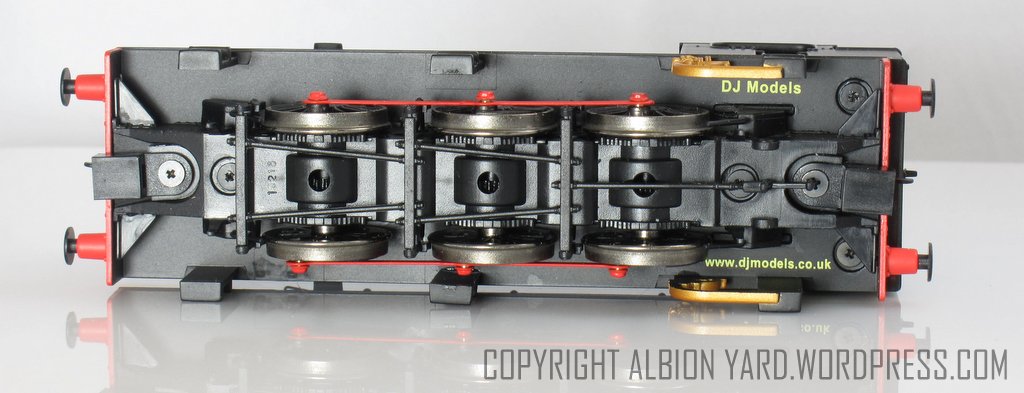
Care is needed if you take this step, the screws which hold the coupling mount and the body to chassis are different types, despite looking the same, and on the exploded maintenance diagram having the same part number. The coupling mount is a self tapping screw and the body mount a fine thread. The fine thread version pictured here does not look good quality at all, already showing signs of rust and is slightly bent. Better quality hardware is definitely needed. The motor is a DC coreless unit, an odd choice in my book. This means that some older controllers will not work well with the coreless motor and neither will Relco type track cleaners. There’s no doubt that DCC has grown in its adoption, but there will still be a significant number of DC users in the hobby that will find this runs very poorly or not at all, without changing their controller. I briefly tried it on a H&M Duette, and the loco responds very poorly to it, to the extent that after a matter of seconds I turned it off (with no subsequent ill effect), and won’t be trying it again! On a contemporary Gaugemaster ‘W’ handset the loco works well but is quite noisy, compared to other contemporary locos, J15/64XX. The loco has been run for about an hour in each direction on rollers at varying speeds, so I don’t think this one will be any better than it currently is.  The chassis drives all three axles through intermeshed cogs from a gear tower. The tower is a push fit into the body to mesh with a horizontal worm on the cam motor shaft.

DJM J94 OOJ94-001 OOJ94-002 OOJ94-003 OOJ94-004 OOJ94-005

DJM J94 OOJ94-001 OOJ94-002 OOJ94-003 OOJ94-004 OOJ94-005

The axles are split for electrical pickup, the wheels capturing the appearance of the prototype wheels well.  Back to Back measurements on this model were a bit on the tight side with 14.35, 14.45 and 14.44mm readings across the three axles. There is significant side play on all three axles, but virtually no vertical element. Coupling rods are single piece, which looks odd when compared to other contemporary releases fitted with working representation of knuckle joints, and one of mine has a slight bend in it, though not enough to compromise the running qualities. The connecting rod clearance on crankpins varies considerably, one has a clearance of 5 thou, whereas all the others have 15 thou at least. This means that one crankpin fixing is determining how the other five react due to lack of lateral movement on the crankpin. I have had one issue with the running qualities, where the leading drive wheels whether running bunker or smokebox first, noticeably strike the V crossing on a curved Peco code 75 electrofrog point. No derailments but a noticeable deflection on the tighter radius which is more pronounced the higher the speed. On occasion it occurs with a medium radius point too. Whilst the back to back measurements are slightly tight this shouldn’t affect the wheels striking the frog. As no other stock with correct B2B strikes or derails at this crossing, it may be the tight crankpin clearance that is holding the wheels in an alignment that doesn’t allow sufficient end float to smoothly use that crossing. The effect doesn’t occur on large radius Y points or large radii left and right hand points.

DJM J94 OOJ94-001 OOJ94-002 OOJ94-003 OOJ94-004 OOJ94-005

DJM J94 OOJ94-001 OOJ94-002 OOJ94-003 OOJ94-004 OOJ94-005

At this point I would normally have a look at the chassis mechanism, but am unable to due to two factors. The brake pull rods are glued into position so unless I break or cut them I cannot access the chassis mechanism. The second issue and I found a similar problem with some of the body mounting screws is that the screws are fixed so tightly that the heads are damaged trying to remove them making the screw impossible to undo. Both these factors make the chassis on this example a throw away in the event of any problems, which is immensely frustrating. The gear train has opening on the underside to allow oiling, I see little point in this, not only will it let oil in, it will allow other debris to get in too. If I could get access to the chassis, the gear train cover needs removing. This is held in place by four cross head screws, these are clearly visible on the side of the chassis and for me spoils the chassis appearance.

 DJM J94 OOJ94-001 OOJ94-002 OOJ94-003 OOJ94-004 OOJ94-005

DJM J94 OOJ94-001 OOJ94-002 OOJ94-003 OOJ94-004 OOJ94-005

Moving on to the body there are a number of faults with this livery and details applied, or rather not applied. The model depicts locomotive number 68023 one of the RSH (Robert Stephenson & Hawthorne) built locomotives. The engine was one of the locomotives that received stirrup steps on the saddle tank as early as 1950, these are omitted from the model. The bunker had the distinctive bunker ladder too, the ladder on the model is unfortunately a crude  etch which doesn’t replicate any of the types of steps well at all. It correctly has the centre running plate steps but no grab rail above them, but it does have the grab rail above the leading pairs of steps. The model features sprung buffers, the springing on these is so stiff as to be ineffective. For me using 3 link couplings this is actually a noticeable feature. The buffer beam also has holes for Vacuum and air brake pipes, neither of these appropriate for this locomotive.

 DJM J94 OOJ94-001 OOJ94-002 OOJ94-003 OOJ94-004 OOJ94-005

DJM J94 OOJ94-001 OOJ94-002 OOJ94-003 OOJ94-004 OOJ94-005

The cab steps also have the injectors as part of the same component, unfortunately this has meant the injector looks quite crude with a flat profile and overthick representation of the associated pipework. The similar injector on the Hornby J50 model is a much more delicate affair. The cab detailing is quite good, the glazing however is very thick and should be better for a contemporary model if you compare to the Oxford and Hornby Adams radials as examples. Cab sides are quite thick with the cab entry hand rails being the same thickness, thus looking a little crude. One feature of the prototype was the fitting of cab doors by the LNER, there are no cab doors modelled which should be there, (even though most images show the doors open), and there is no detail on the rear bulkhead of the inside of the cab, very noticeable without the doors featured.

 DJM J94 OOJ94-001 OOJ94-002 OOJ94-003 OOJ94-004 OOJ94-005

DJM J94 OOJ94-001 OOJ94-002 OOJ94-003 OOJ94-004 OOJ94-005

The rear bunker shows an engraved line on the bunker extension, I’ve not yet found an image which has a similar panel showing on the prototypes. The saddle tank captures the shape well, I’m less convinced with the dome for this particular engine, with the top appearing quite flat when the two images I’ve seen of the locomotive appear to show a more curved top. (Note some J94’s and Austerities did have a flatter dome as depicted on this model.) The chimney looks the part, with very faint moulding lines showing, however when looking at the model from a reasonable elevation a cross point screw can clearly be seen in the centre of the chimney. There is also a mould joint line running the length of the saddle tank from front to rear at top dead centre, there was no panel joint at this location on the real thing and under layout lighting this line is visible.

 DJM J94 OOJ94-001 OOJ94-002 OOJ94-003 OOJ94-004 OOJ94-005

DJM J94 OOJ94-001 OOJ94-002 OOJ94-003 OOJ94-004 OOJ94-005

One element that is a very good piece of design is the access to the DCC chip mount. This is the removable smoke box front which is held in place by two small magnets. The disguise of this is very neat allowing a simple fitting for DCC chips. What isn’t so easy is the addition of sound. A small sugar cube speaker will almost certainly fit into smoke box saddle tank area, however there is no real outlet for the sound. Its likely to be possible to fit one into the bunker space, but I was unable to check mine due to the problem of assembly screws again being too tight and the potential of damaging the head whilst trying to remove them. A common option on similar locomotives is putting the speaker into the cab space, however without the cab doors modelled closed, the speaker will be very visible.

OOJ94-001

OOJ94-001 DJM J94

3/ A last bit reminding you what I’ve just told you.
The model is ok. However for me it has some elements which leave me scratching my head and thinking, why? This is the only version I’ve had so far though I do expect to see others through the workshop in the foreseeable future. On the issue of setting higher design standards, the only real forward step is the ease of the smoke box door installation for the DCC chip, a feature carried onto Hattons 14/58xx family, and well worth having in models like this. There are backward steps. Un-jointed connecting rods, crosshead screw in the chimney, visible screws on the sides of the mainframes, lack of rear cab bulkhead detail and the chunky elements of items such as glazing, cab sides, injectors and running plate steps for me, being visible manifestations of a bit of a step backwards in design rather than forwards. Build quality, lack of weight, glued brake pull rods and too tight screws, potential difficulty of adding quality sound easily, and incorrect details for the locomotive number depicted make this a bit of a ‘meh’ model and doesn’t have me enthused wanting to know what’s coming next. RT models have already started working on an etched detailing kit for this model. Its not a bad release though, like the Oxford LNER Cattle wagon it’ll find a place in the market that will satisfy a good number of buyers. I doubt though that many of us whom still have the Brassmasters kit squirrelled away, will be getting rid of them anytime soon.

_B6O4719.CR2

Posted in 2016, Bachmann, blog, Branch Line, British Rail, critic, DCC, dcc sound, djm, Eastern Region, finescale, HO, hobbies, Hornby, Kalmbach, Layout, LMS, LNER, media, Midland Region, Model Railroad, Model Railway, Model Railway Journal, modeling, Modelling, Nevard | Tagged , , , , , , , , , , , , | 18 Comments

Throwback Thursday (just do it..)

  
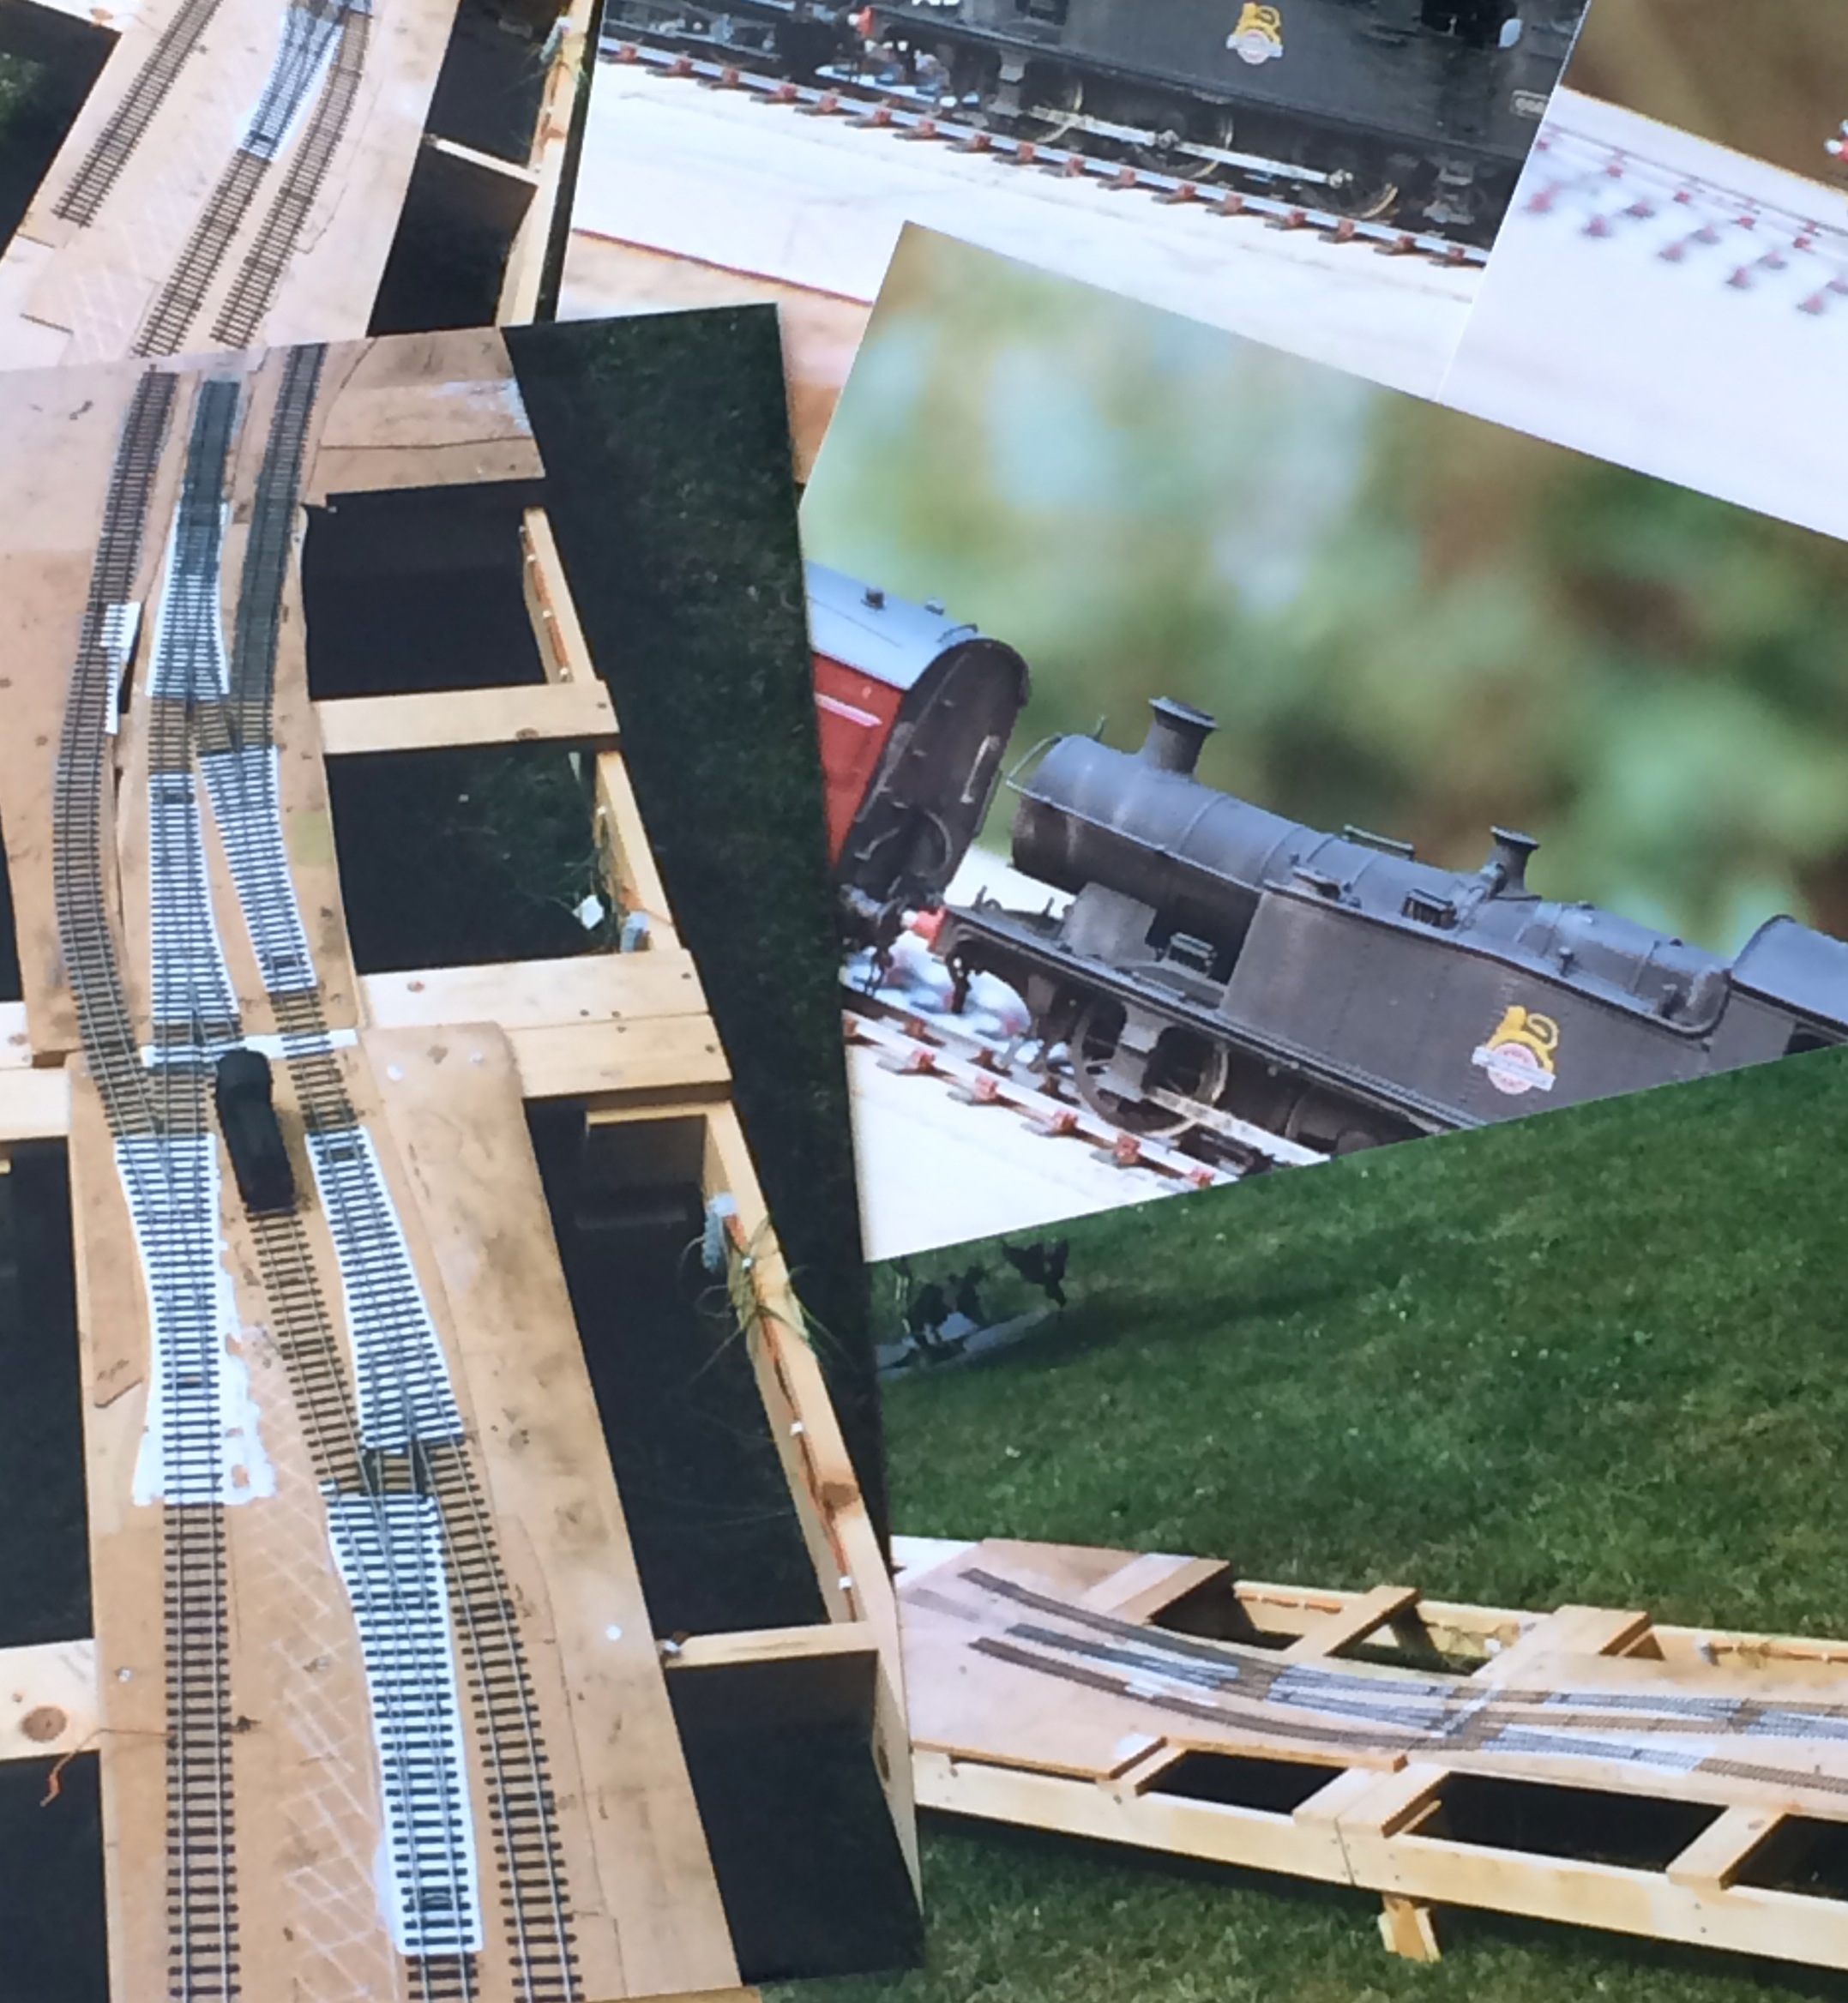
Today I’ve been tidying the workbench and office area where I do my modelling. If you’re like me that’s akin to rearranging the deck chairs on the Titanic for all the good it’ll do!  I did find some ‘artifacts’ though such is the depth of the stash of things I’ll one day need…

I did find a few sets of images a grouping of them can be seen above. They show some of my first efforts of a finescale solo build. This was early 90’s the 56XX a mix of a Mainline body, Perseverance chassis, Ultrascale wheels (EM),and Portescap motor, again an early foray into solo modelling rather than as a club or society member. The layout and track were built by myself learning the hard way. The most challenging element were my first points. These were from K&L components and were the forerunners of the C&L range. There were no kits available, just buy the templates and get on with it. MRJ since issue ‘0’ has been an excellent  conduit of ideas and construction articles. I read the reviews and test builds of the track by Pete Kirmond and that gave me confidence to press ahead, by a few twists of fate Peter has subsequently become a very good friend indeed, and we operate each other’s layouts at exhibitions. 

  
Getting into clearing the work area was a bit like the track building, a bit of knowing you should do it, a bit of what if it doesn’t go as planned, and eventually a good amount of ‘f### it’ it’s not going to do it itself, and pulling the trigger on it! Once starting it of course isn’t as bad as you think, and the sense of satisfaction of that first point working, knowing I’d built it was almost empowering!, the very same for the 56XX, a model built towards the top end standards of the time, built by me, and working!

  
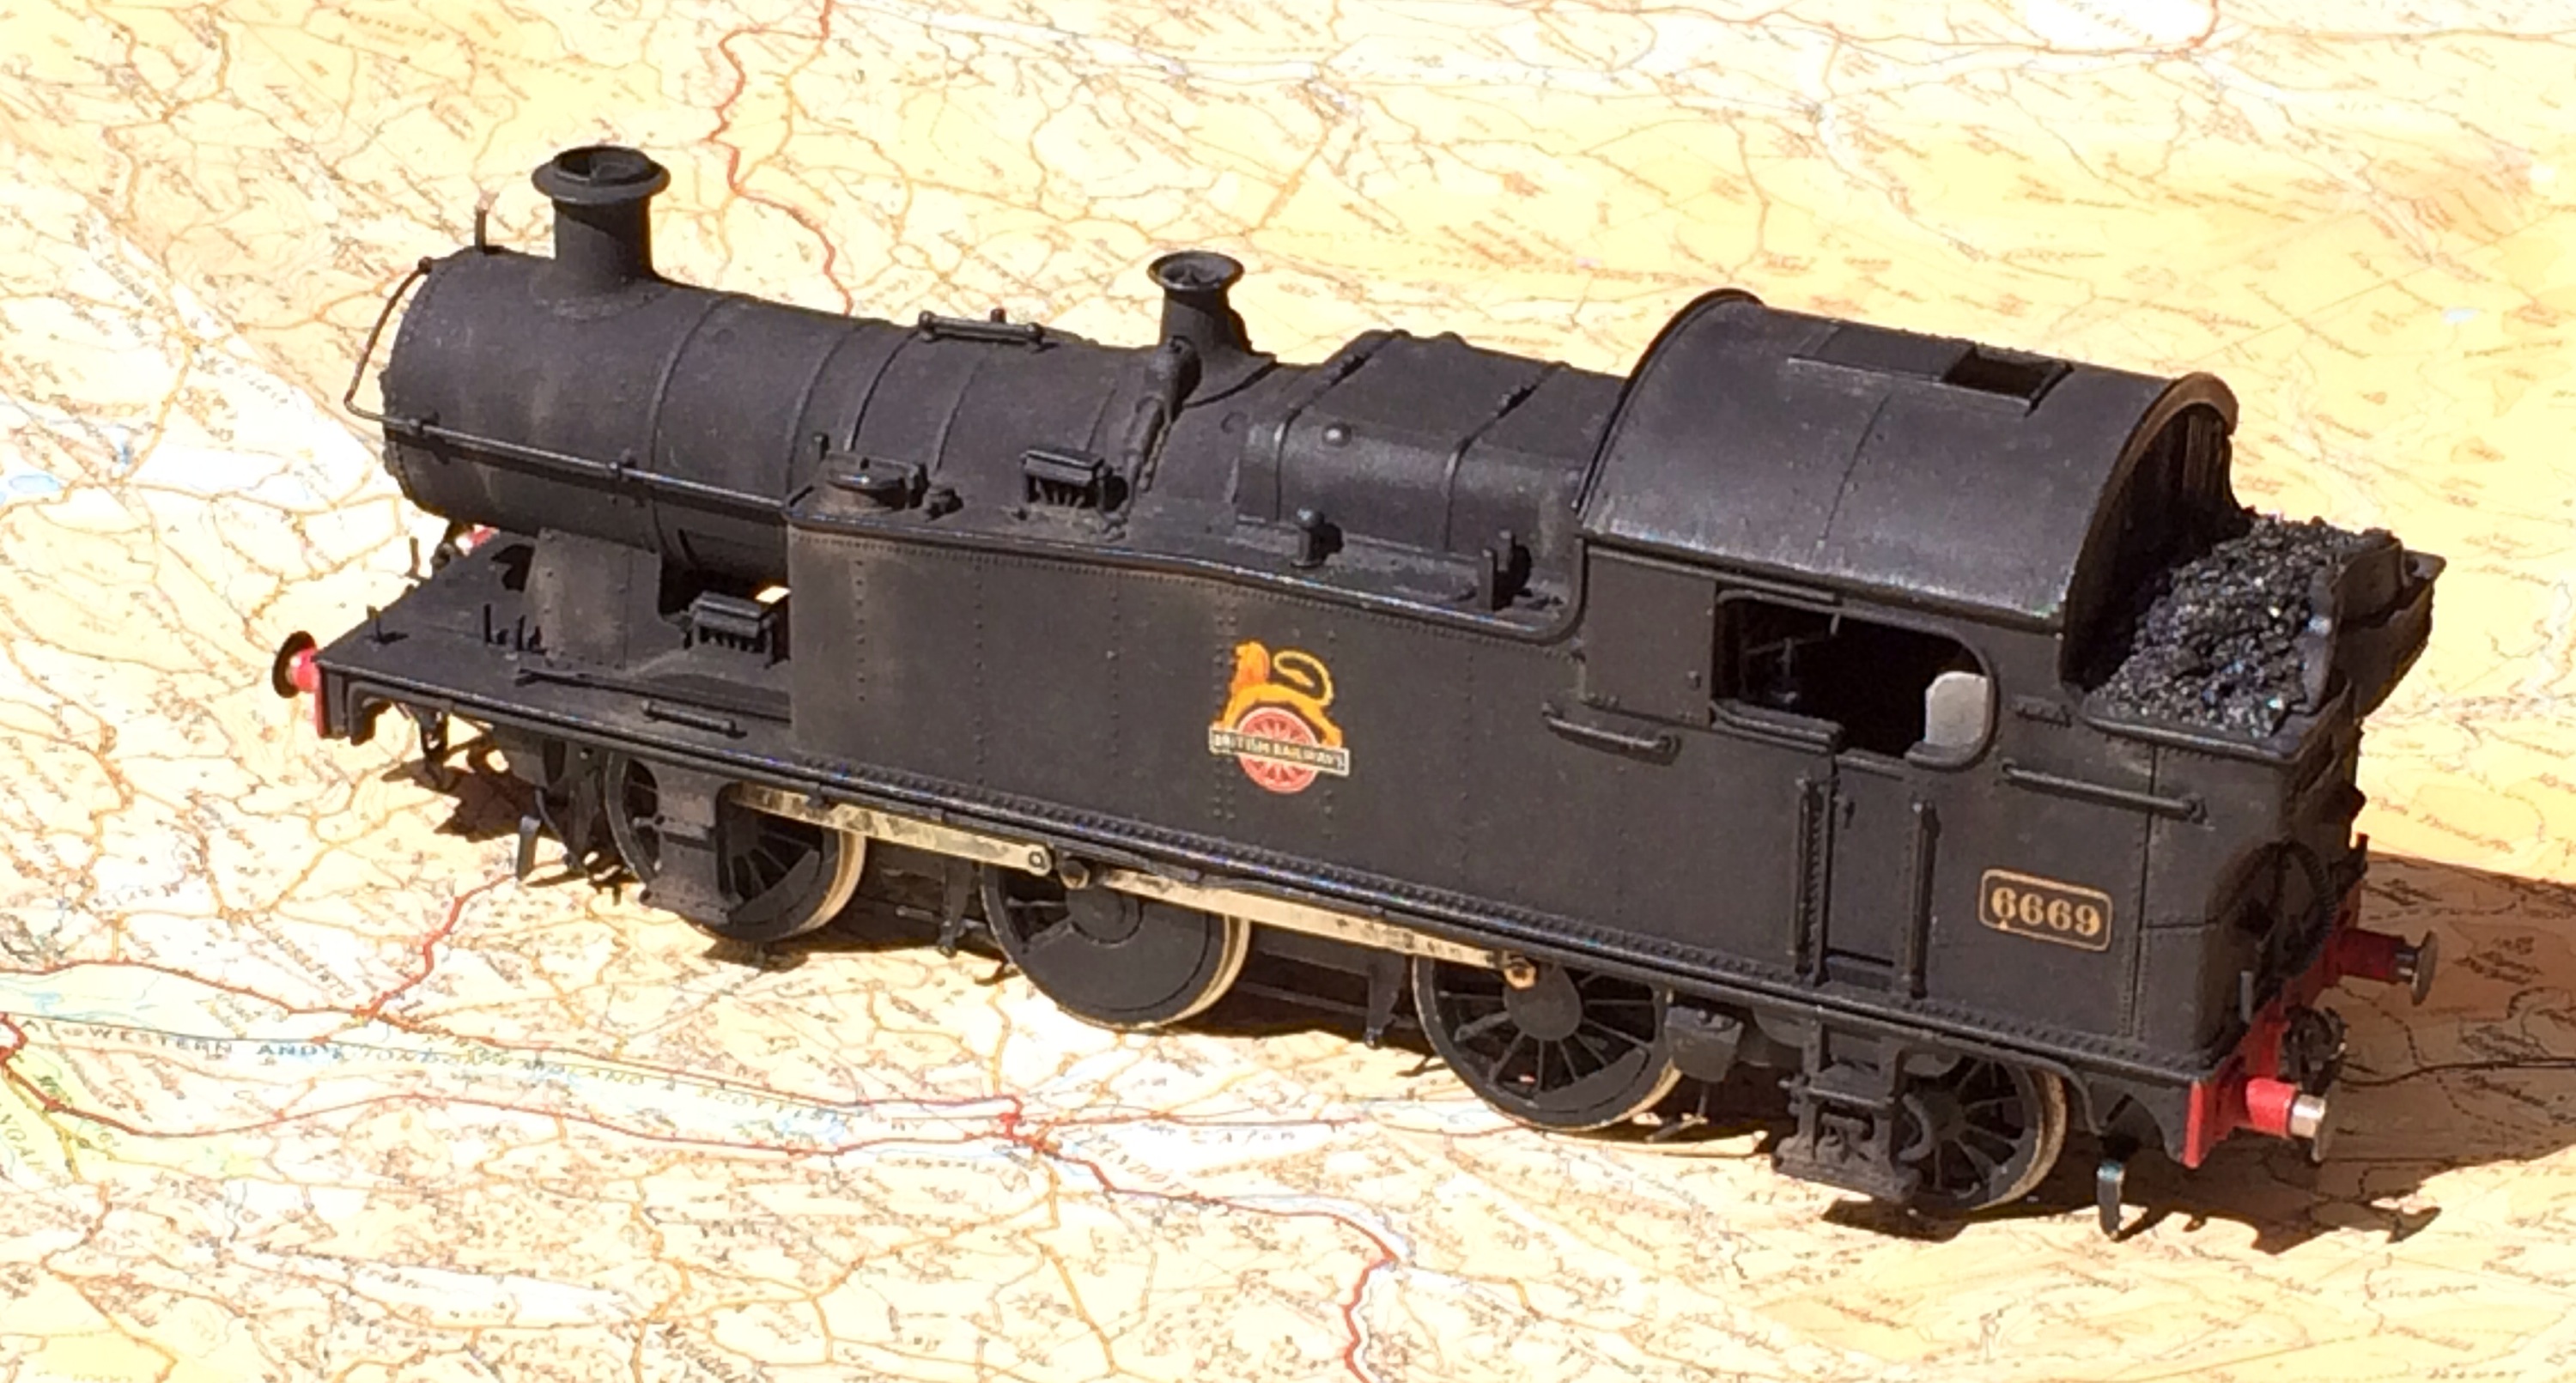
The 56XX is still with me, seen here on a 1930’s OS map of my late fathers. Both reminders of ‘where I’ve come from’ and what I can do if I want, I don’t need to wait for others, as Nike says ‘just do it’. It doesn’t always work, life’s like that, but it is what it is, not driven by dancing to the tune of others. 

Now where’s the dustpan and brush? Back to reality..

Posted in 2016, blog, Eastern Region, EM, Exhibition, finescale, Friends, Great Western, HO, hobbies, Hornby, humour, Inspiration, Interweb, laramie, Layout, life, LMS, LNER, media, Midland Region, Model Railroad, Model Railway, Model Railway Journal, modeling, Modelling, Modelu, n gauge, Nevard, O Gauge, o scale, Old school, OO Gauge, Oxford rail | 1 Comment

Wordless Wednesday Clan


Posted in Bachmann, blog, British Rail, DCC, dcc sound, Eastern Region, Exhibition, finescale, Great Western, HO, hobbies, Hornby, iphone, Layout, life, LMS, LNER, media, Midland Region, Model Railroad, Model Railway, Model Railway Journal, modeling, Modelling, Nevard, OO Gauge, Oxford rail, Photography | Tagged , | Leave a comment

Wordless Wednesday playing trains!


Posted in Bachmann, blog, blogger, Branch Line, British Rail, DCC, dcc sound, Eastern Region, Exhibition, finescale, Great Western, HO, hobbies, Hornby, Ian Futers, Layout, LMS, LNER, Midland Region, Model Railroad, Model Railway, Model Railway Journal, modeling, Modelling, Modelu, Nevard, OO Gauge, Oxford rail, Toy trains | Tagged , | 2 Comments

Tracing Tuesday

  
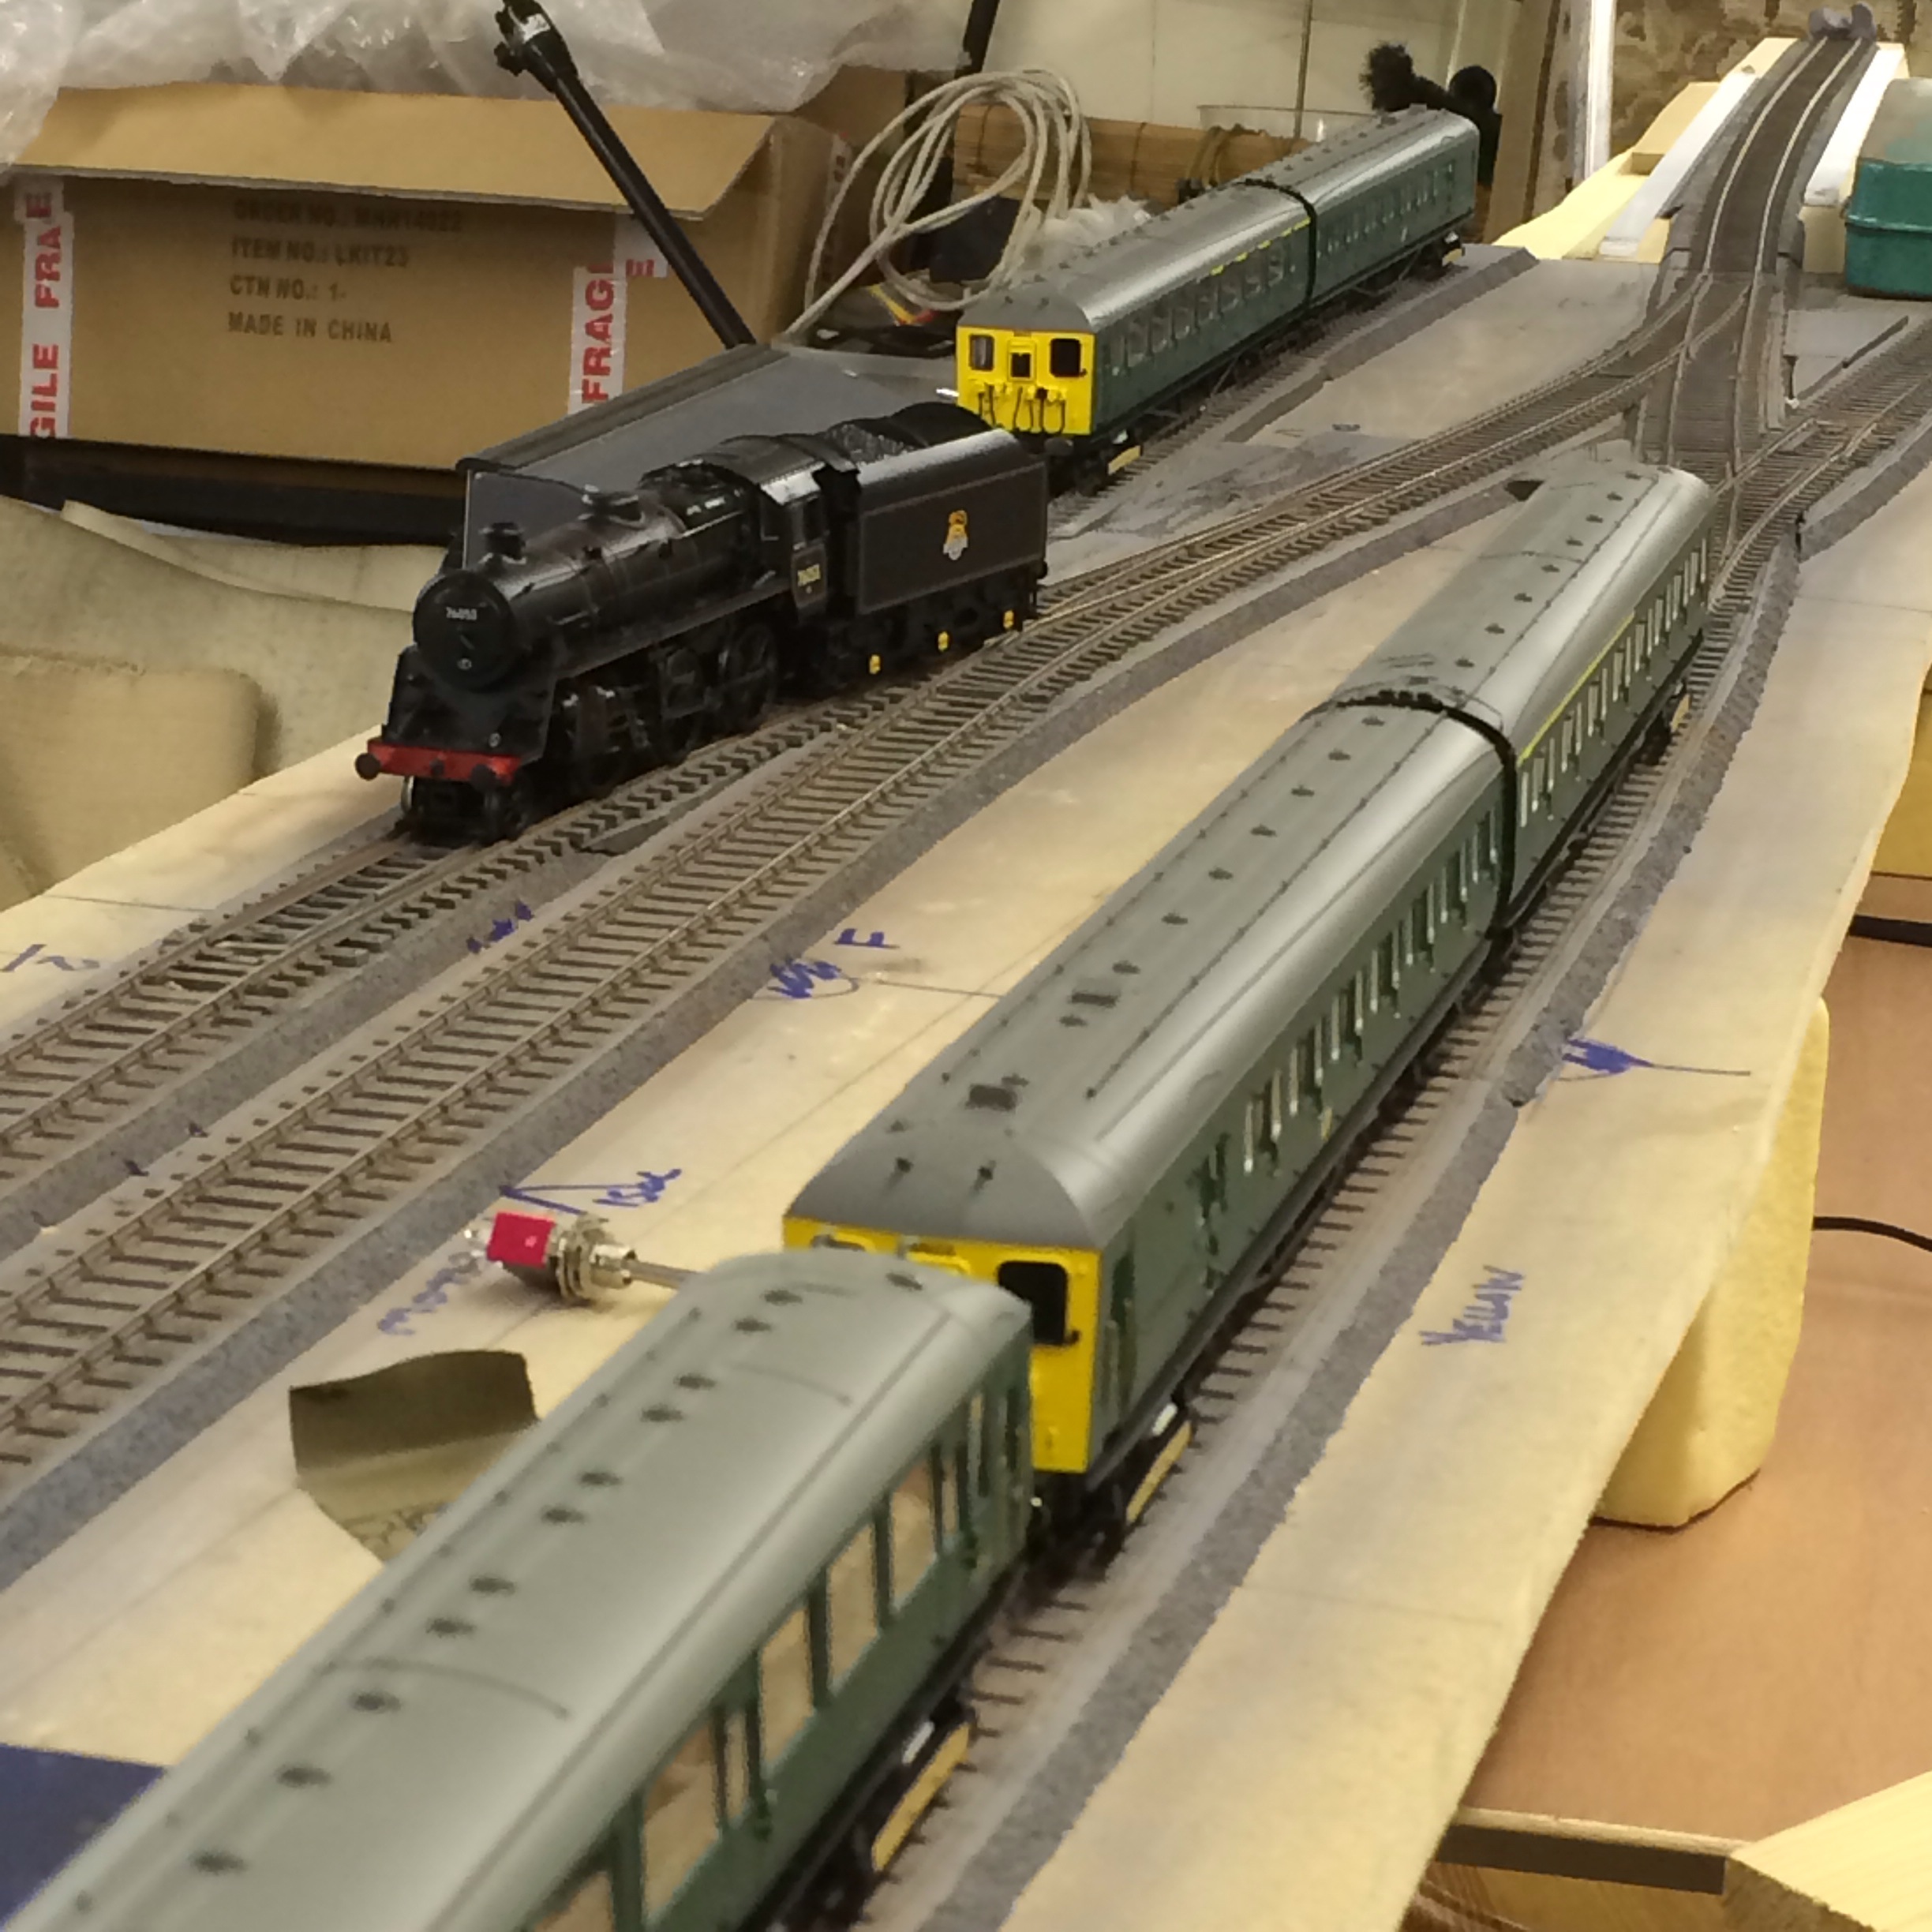
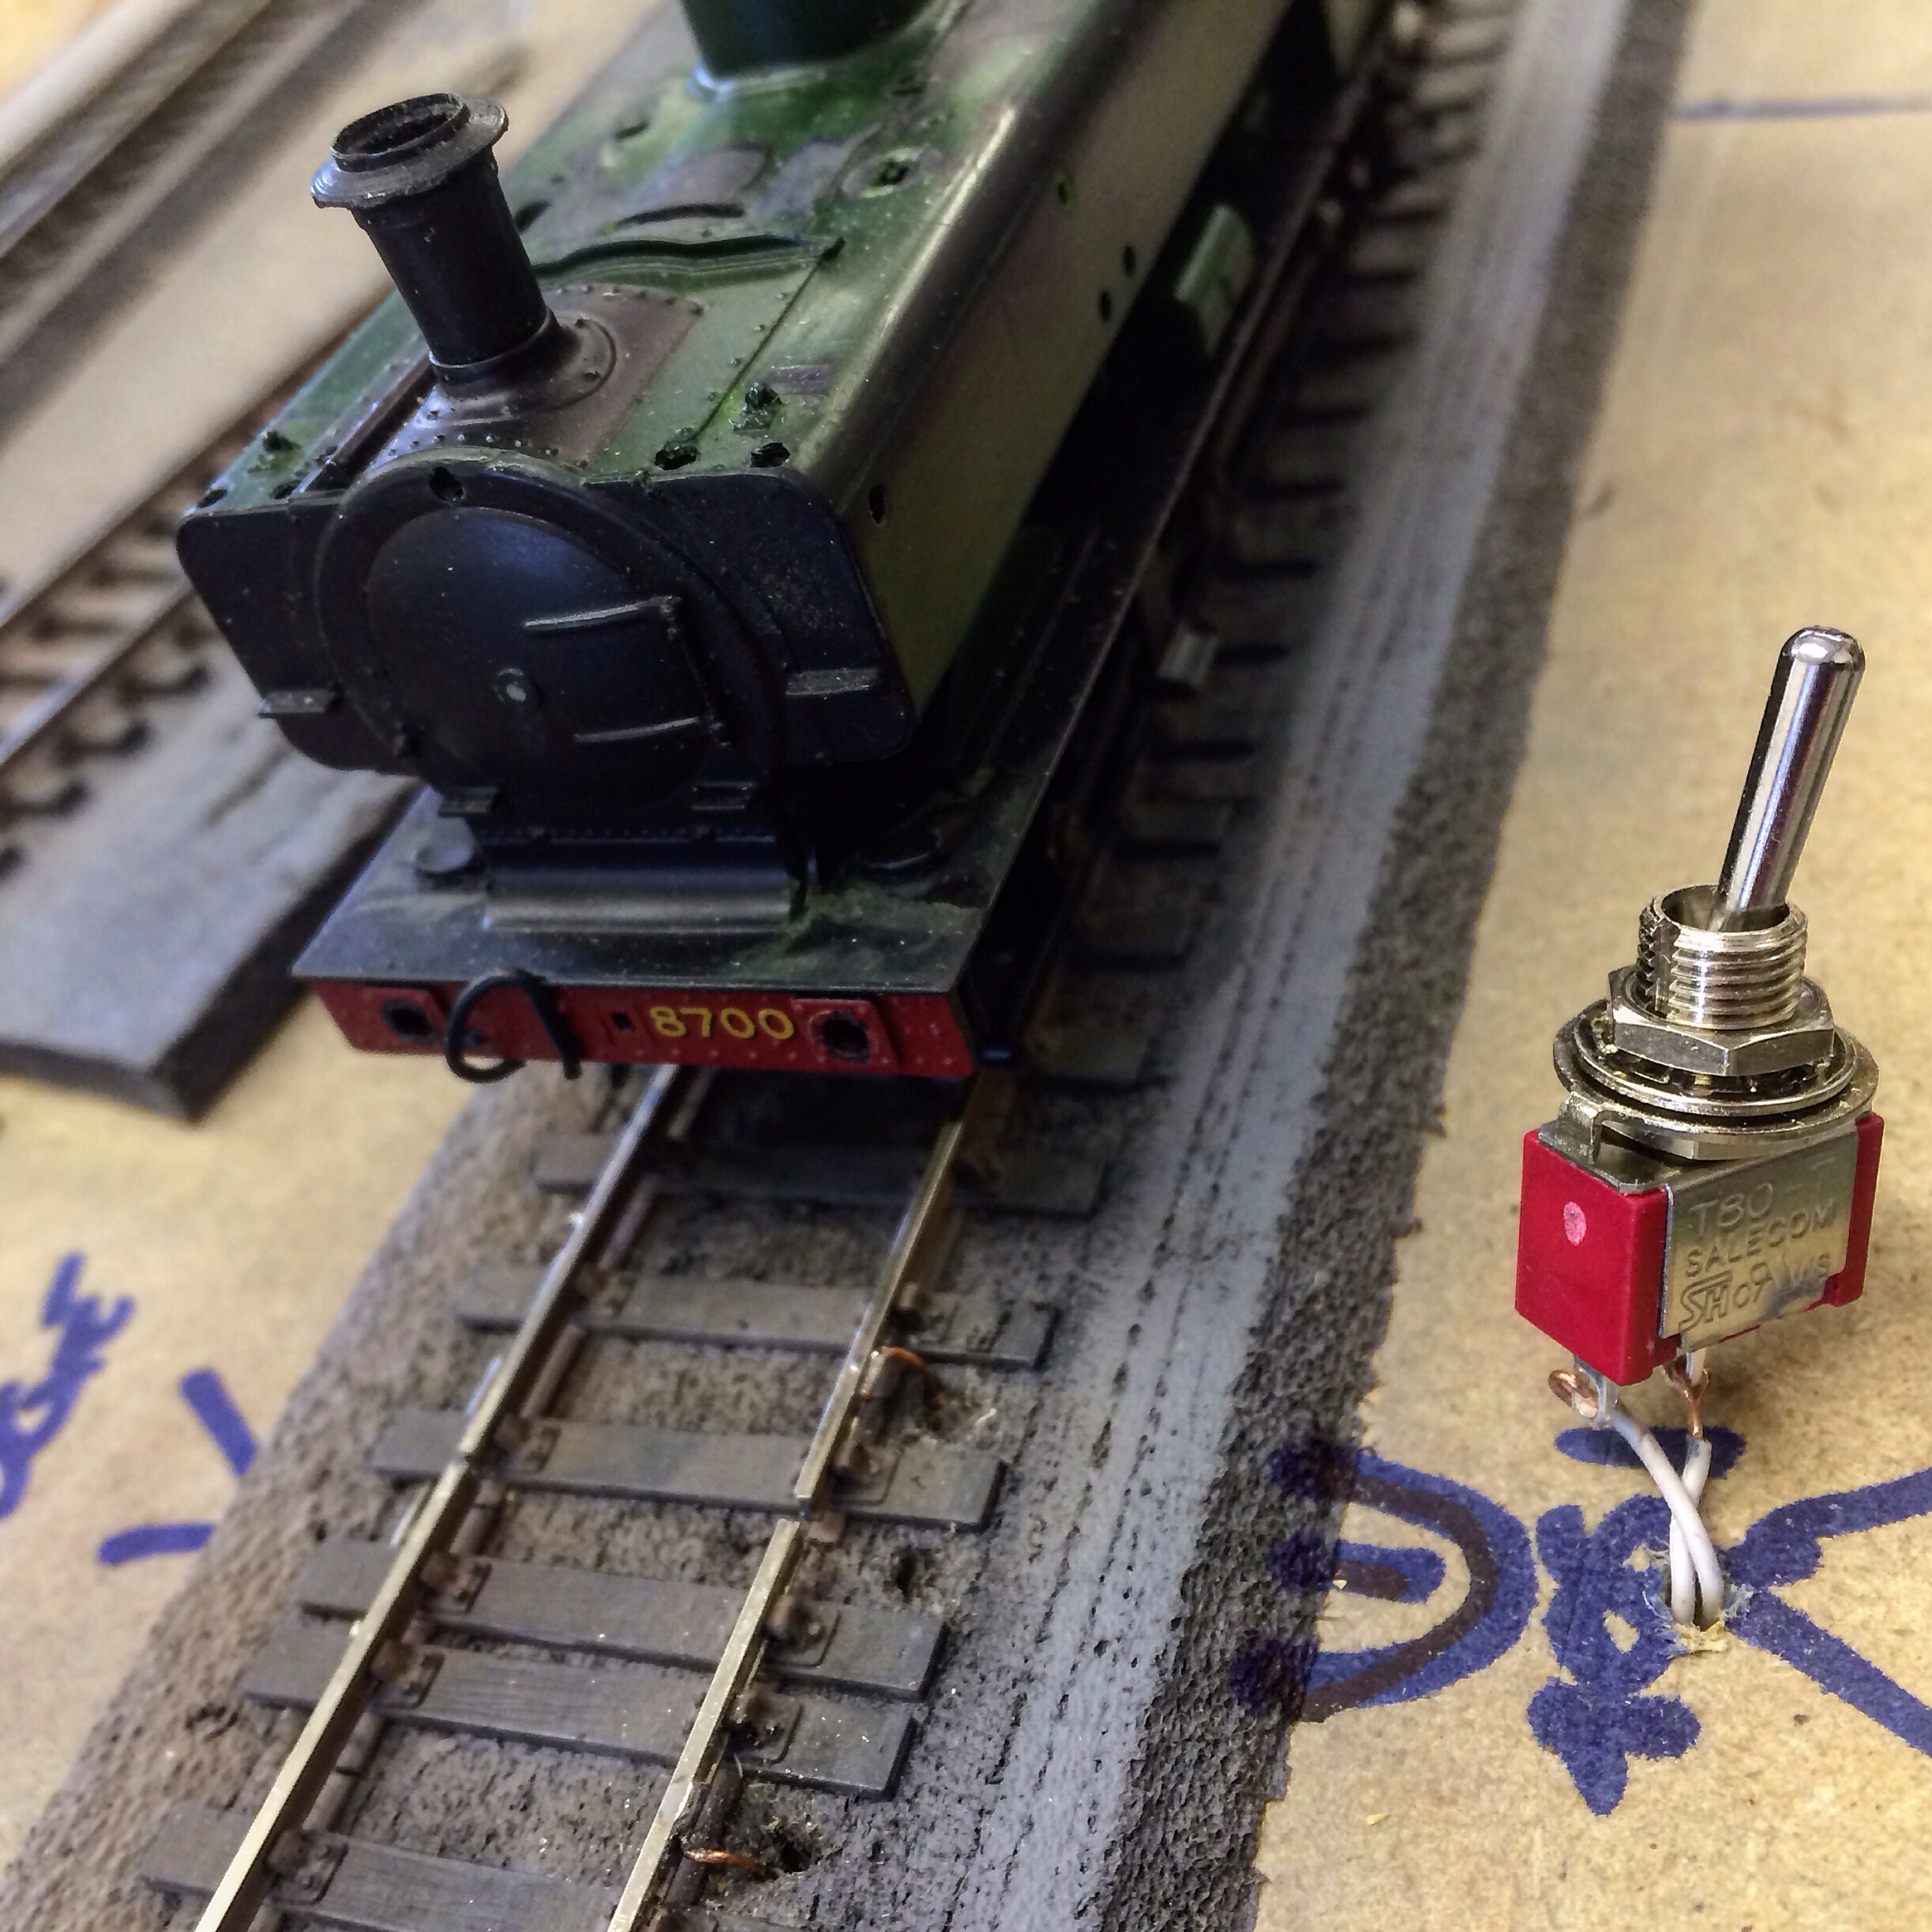
Wiring up continues with temporary switch locations for DC isolating sections. Once the sections are tested I’ll remove the switches and trace the wires into the main loom to the control panel. 

The layout will be DC/DCC with the change being facilitated by only swapping controllers, as I do with Albion Yard. The isolating sections in DC then become DCC power districts, so any short circuit finding can be helped by switching sections on or off. Point switching and polarity changes as mentioned in an earlier post are powered from a separate source, so once these sections are wired in there will be a small panel to make for the sections . This will be separate from the points and signals panel, but both panels will be separate from the layout chassis, to allow flexibility when operating as a peninsula section. 

 
These panels aren’t huge pieces of hardware, for ‘Shelfie’ the panel is an old 35mm slide box, and they’ll be similar here due to the simplicity of the layout. Another day or so and all board wiring will be complete, and I’ll be able to run a test session. That I’m looking forward to, as that’s when the project really comes to life!

Posted in 2016, Bachmann, blog, blogger, Branch Line, British Rail, DCC, dcc sound, Eastern Region, finescale, Great Western, HO, hobbies, Hornby, Ian Futers, Layout, library, life, LMS, LNER, Midland Region, Model Railroad, Model Railway, Model Railway Journal, modeling, Modelling, Modelu, Nevard, OO Gauge, Oxford rail, trainset | 3 Comments

Many Happy Returns..

  
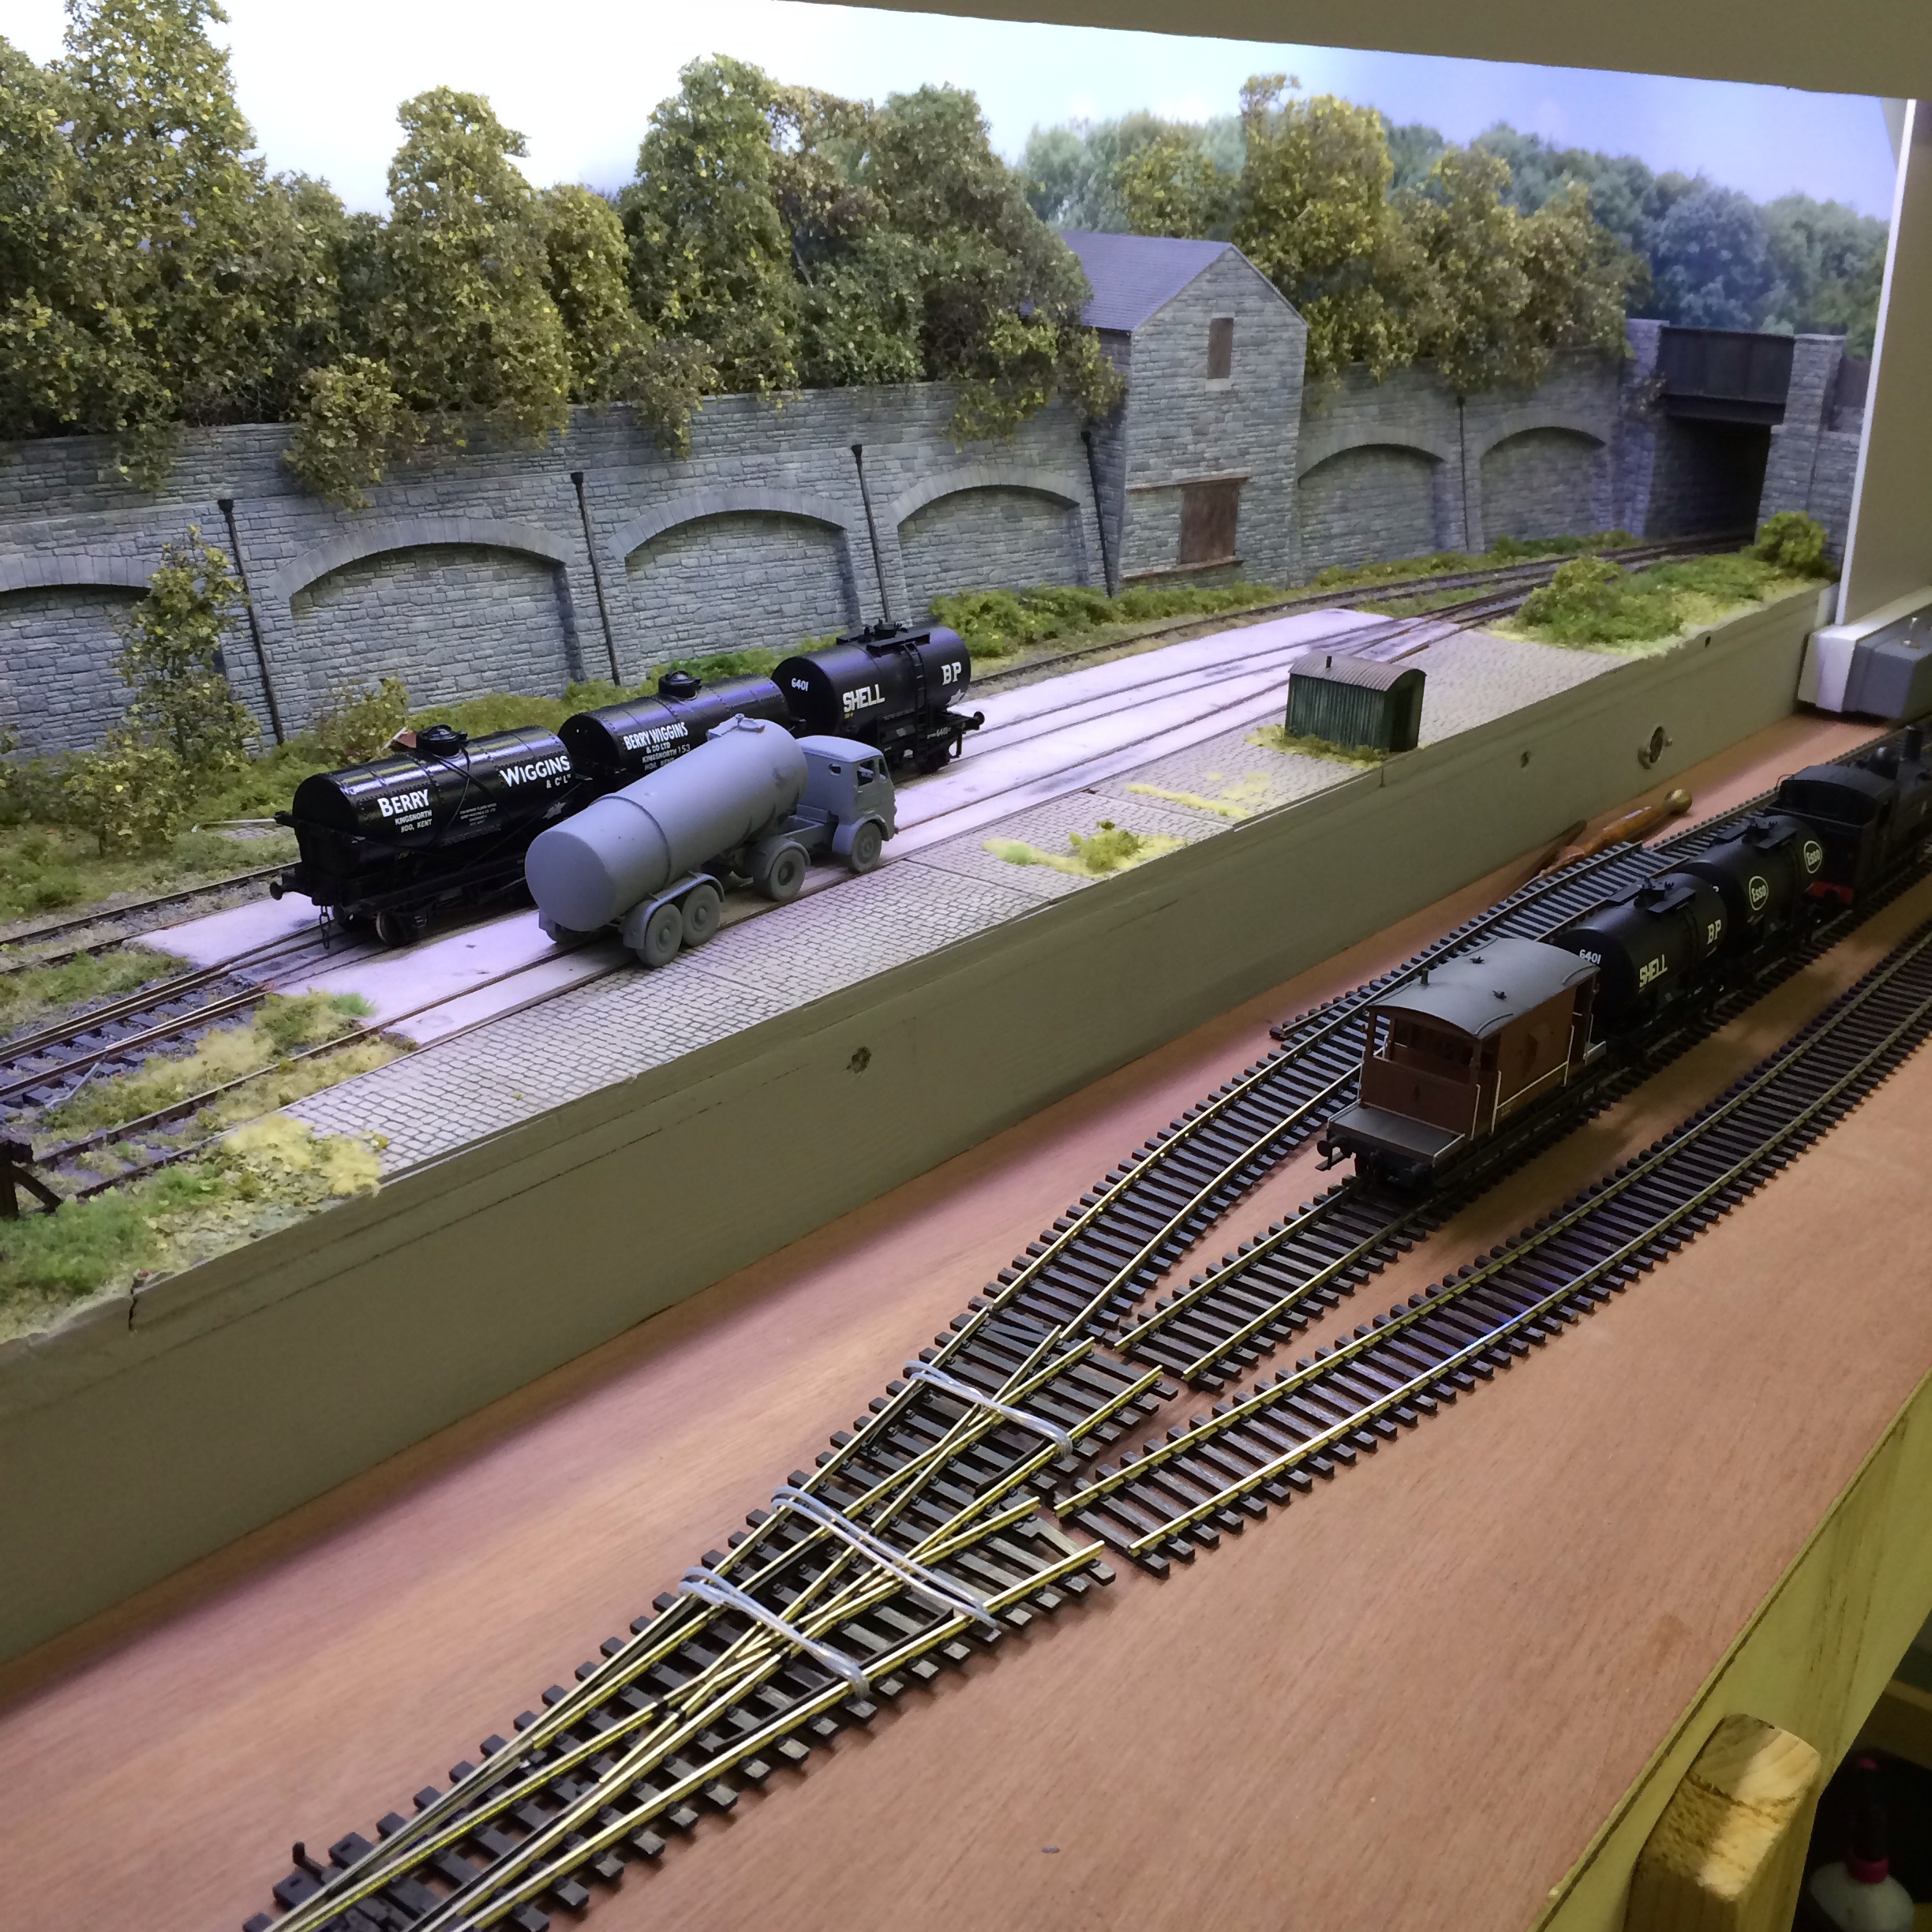
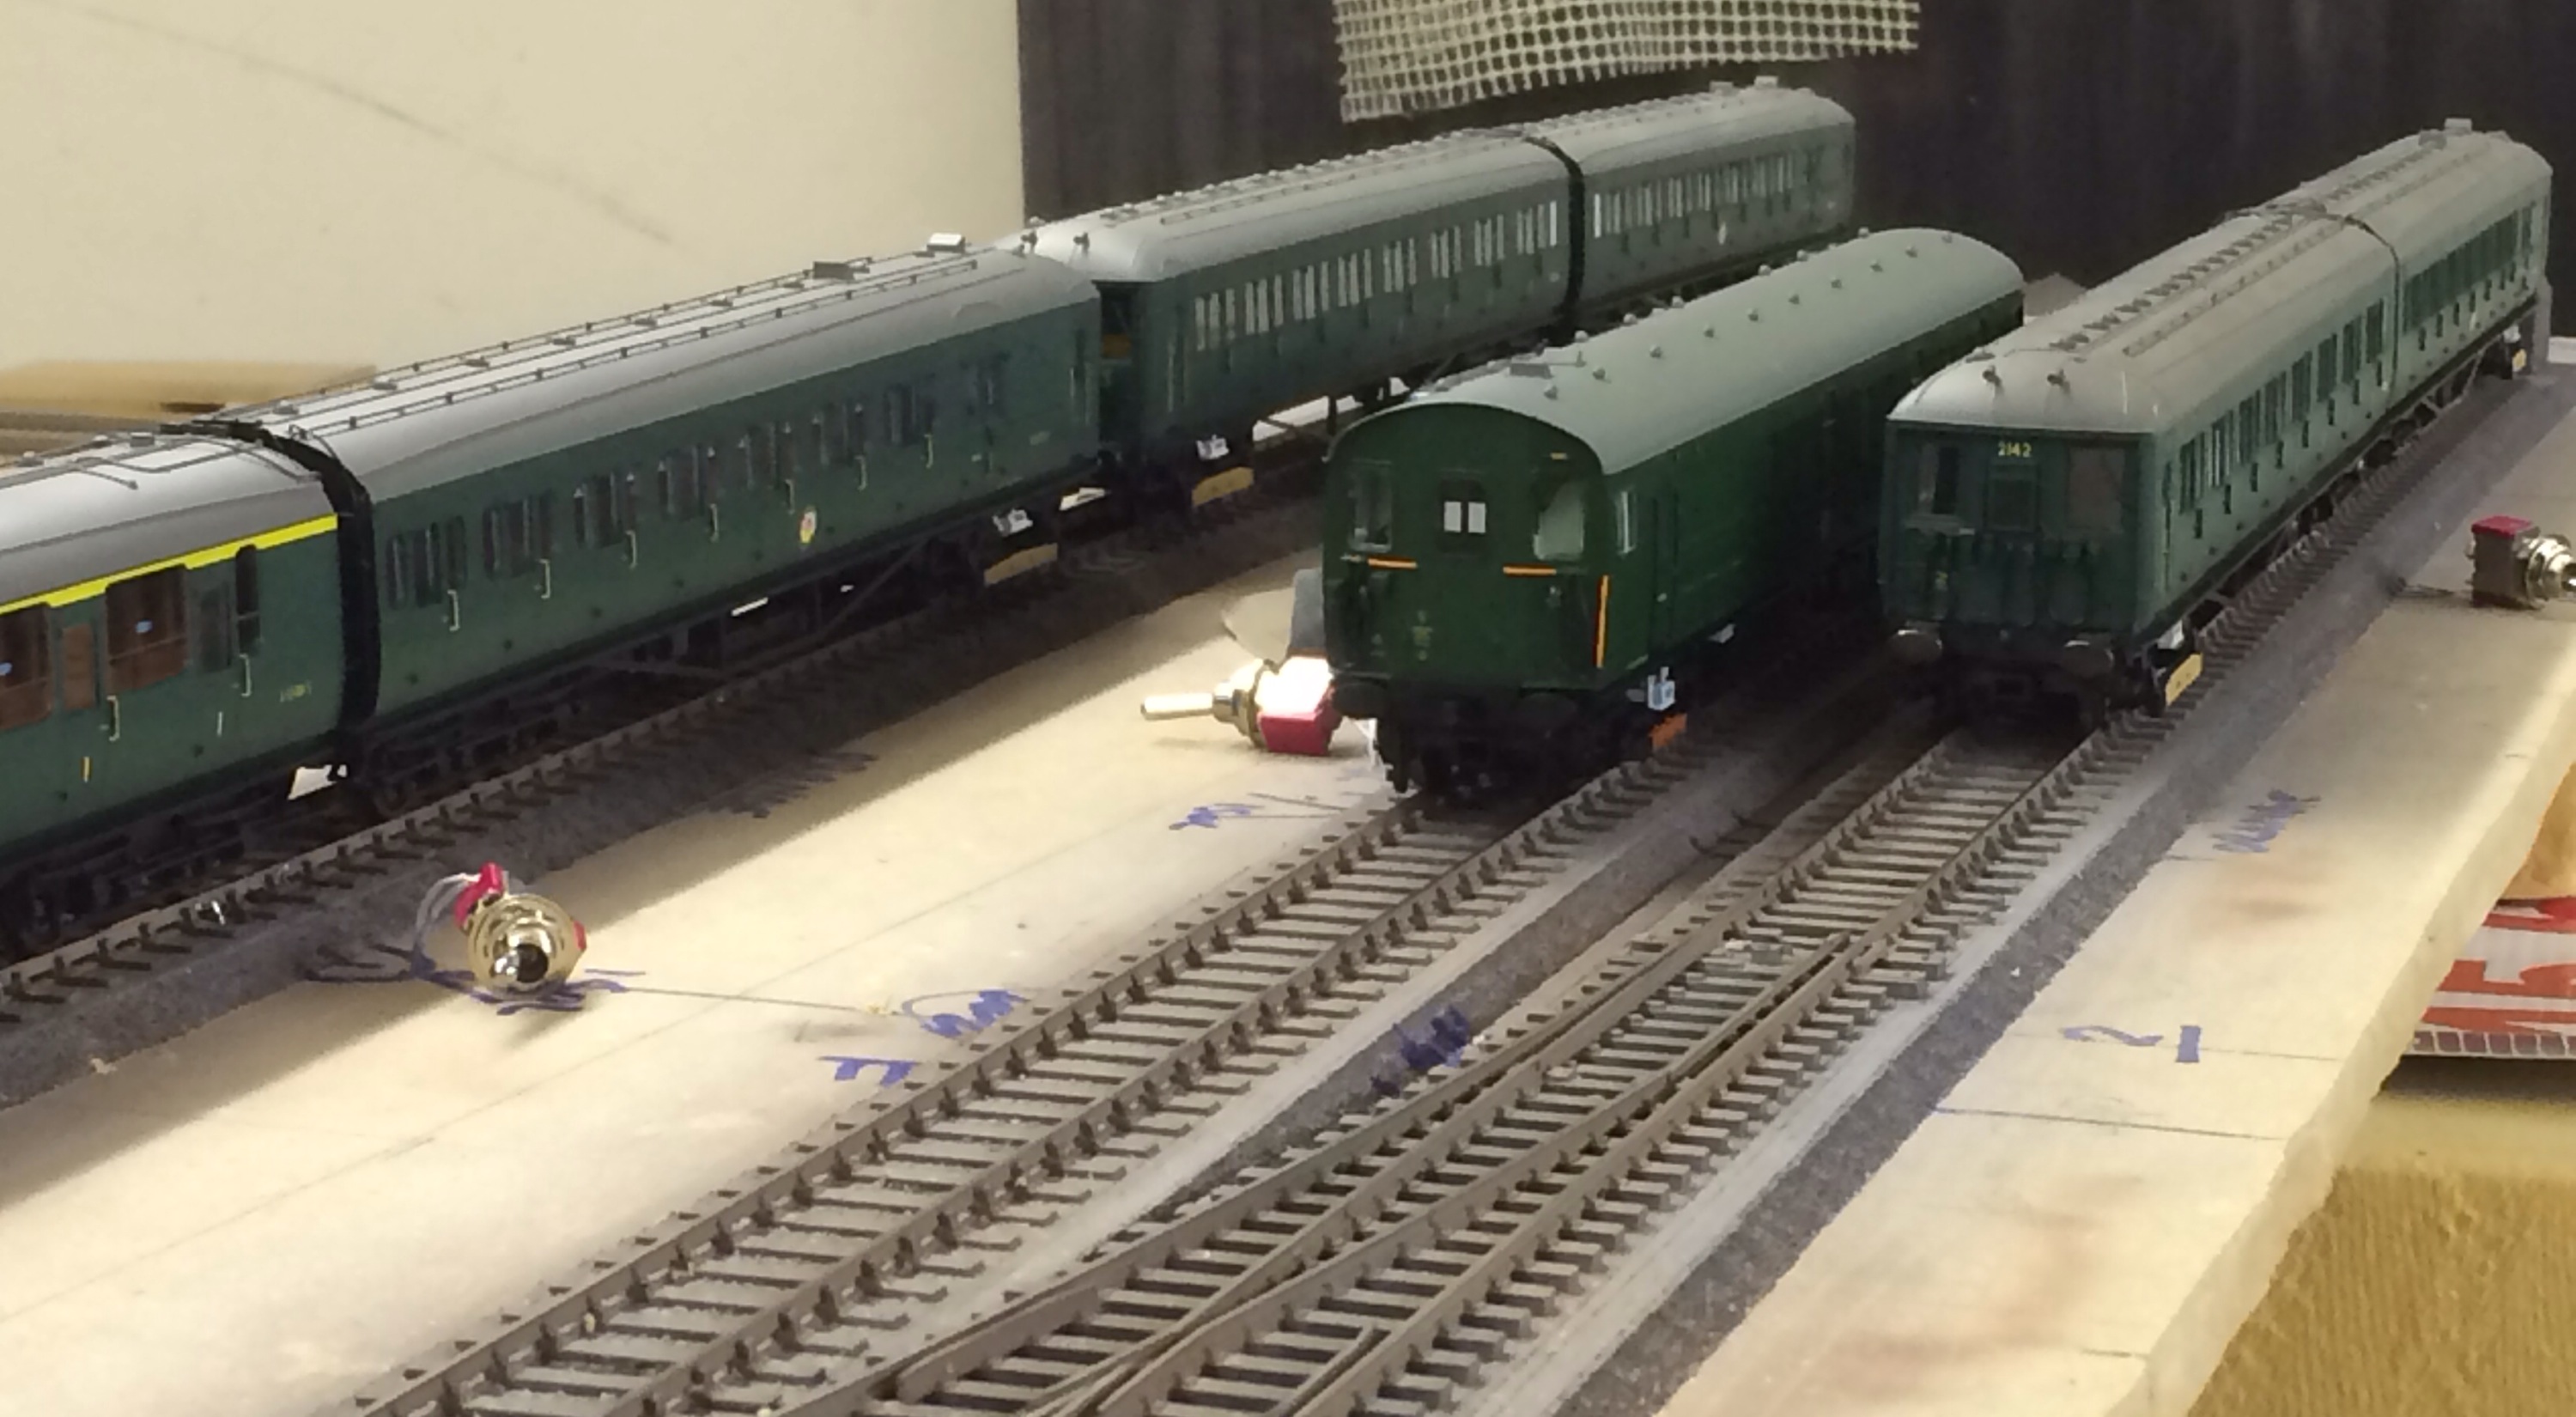
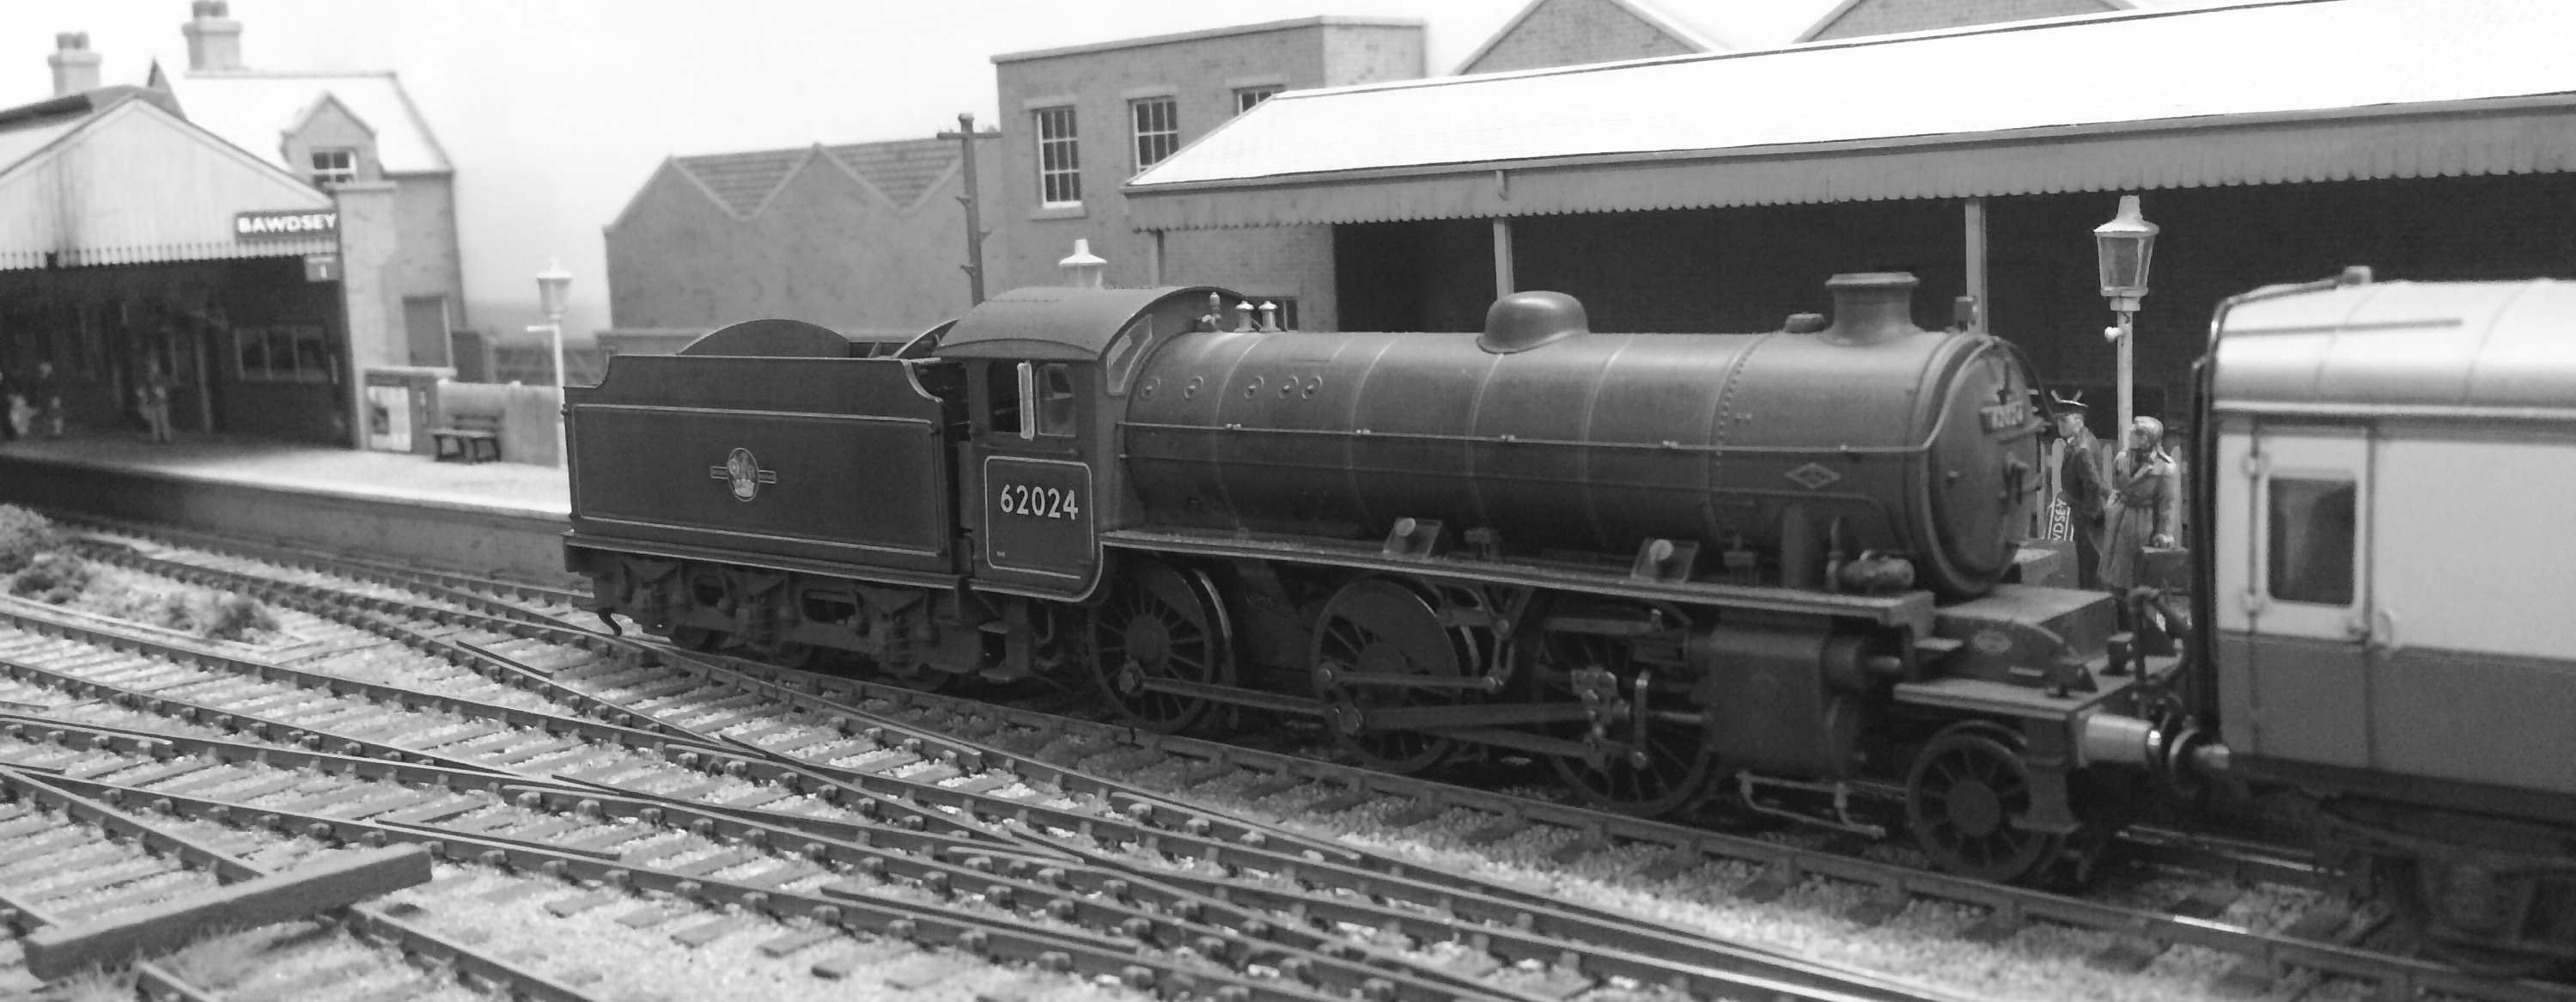
Like most of us I spend a good deal of time thinking and planning future projects, and sometimes help others with theirs. What you see above is just that, in the foreground is some 3D ‘thinking’. When the Forest of Dean (FoD), project gets underway I want it to be pretty well structured, and not suffer from too many changes, there will be some, that’s a fact of life. Last weekend I took Bawdsey to Larkrail. To do that meant moving quite a bit of stuff to dig the layout out of storage. A by product of this was to set Shelfie up on the chassis I’m using for the new  Southern project. Whilst Shelfie was up I happened to store some of the Berry Wiggins bitumen tankers on the new Southern board which has just had the track receive it’s first coats of paint.

  The law of unintended consequences comes into play here, the tank wagons looked good sitting on the track and my mind turned to ‘Whimsey’ a FoD  layout design element if ever there was one! Whimsey goods yard was a simple linear twin loop layout, in latter years being an unloading and storage depot for Bitumen for road construction and repair. So, out came some Peco OO track and the simple Whimsey track plan was quickly mocked up in front of Shelfie. I know the rough space in terms of footprint I need and I feel it would work particularly well as a peninsular section, the thin nature of the prototype working in it’s favour. I really enjoy some of this 3D planning, you instantly get a feel for if the plan will work within the allocated footprint, this saves a huge amount of time and frustration. Not so long ago I was shown a layout design for a modest space, around 8ft x 2ft scenic footprint. Using lining wallpaper, Peco track, and a few items of rolling stock I was able to show that the design would look cramped, there was no space allowing the layout and trains to breathe. It helped the builder realise his design wouldn’t work as he hoped, potentially saving him future problems. The downside being it can also cause frustration when you realise the grand scheme, even if a branch or short line project won’t work. 

So what of the happy returns then? Well this diversion reminded me of the articulated truck you see here, it’s two kits, the tractor unit and the trailer tank.  I bought them to build a representation of the articulated bitumen tankers that operated out of Whimsey, and messing about with the layout design reminded me of this shelf queen, sitting there, waiting it’s time. So taking it out of the box reminded me why it had sat on the shelf, the tractor unit chassis  was a flat bed rather than aprototypical open frame chassis looking a bit ‘meh!’ in the process. I can fix that I thought, so out came the drills to make a pepper pot pattern, and the blades to cut away the solid section. Success! An hour or two of work has got this unusual truck well under way to completion, that satisfaction now feeding the creative motivation to build and plan more ‘stuff’. 

  
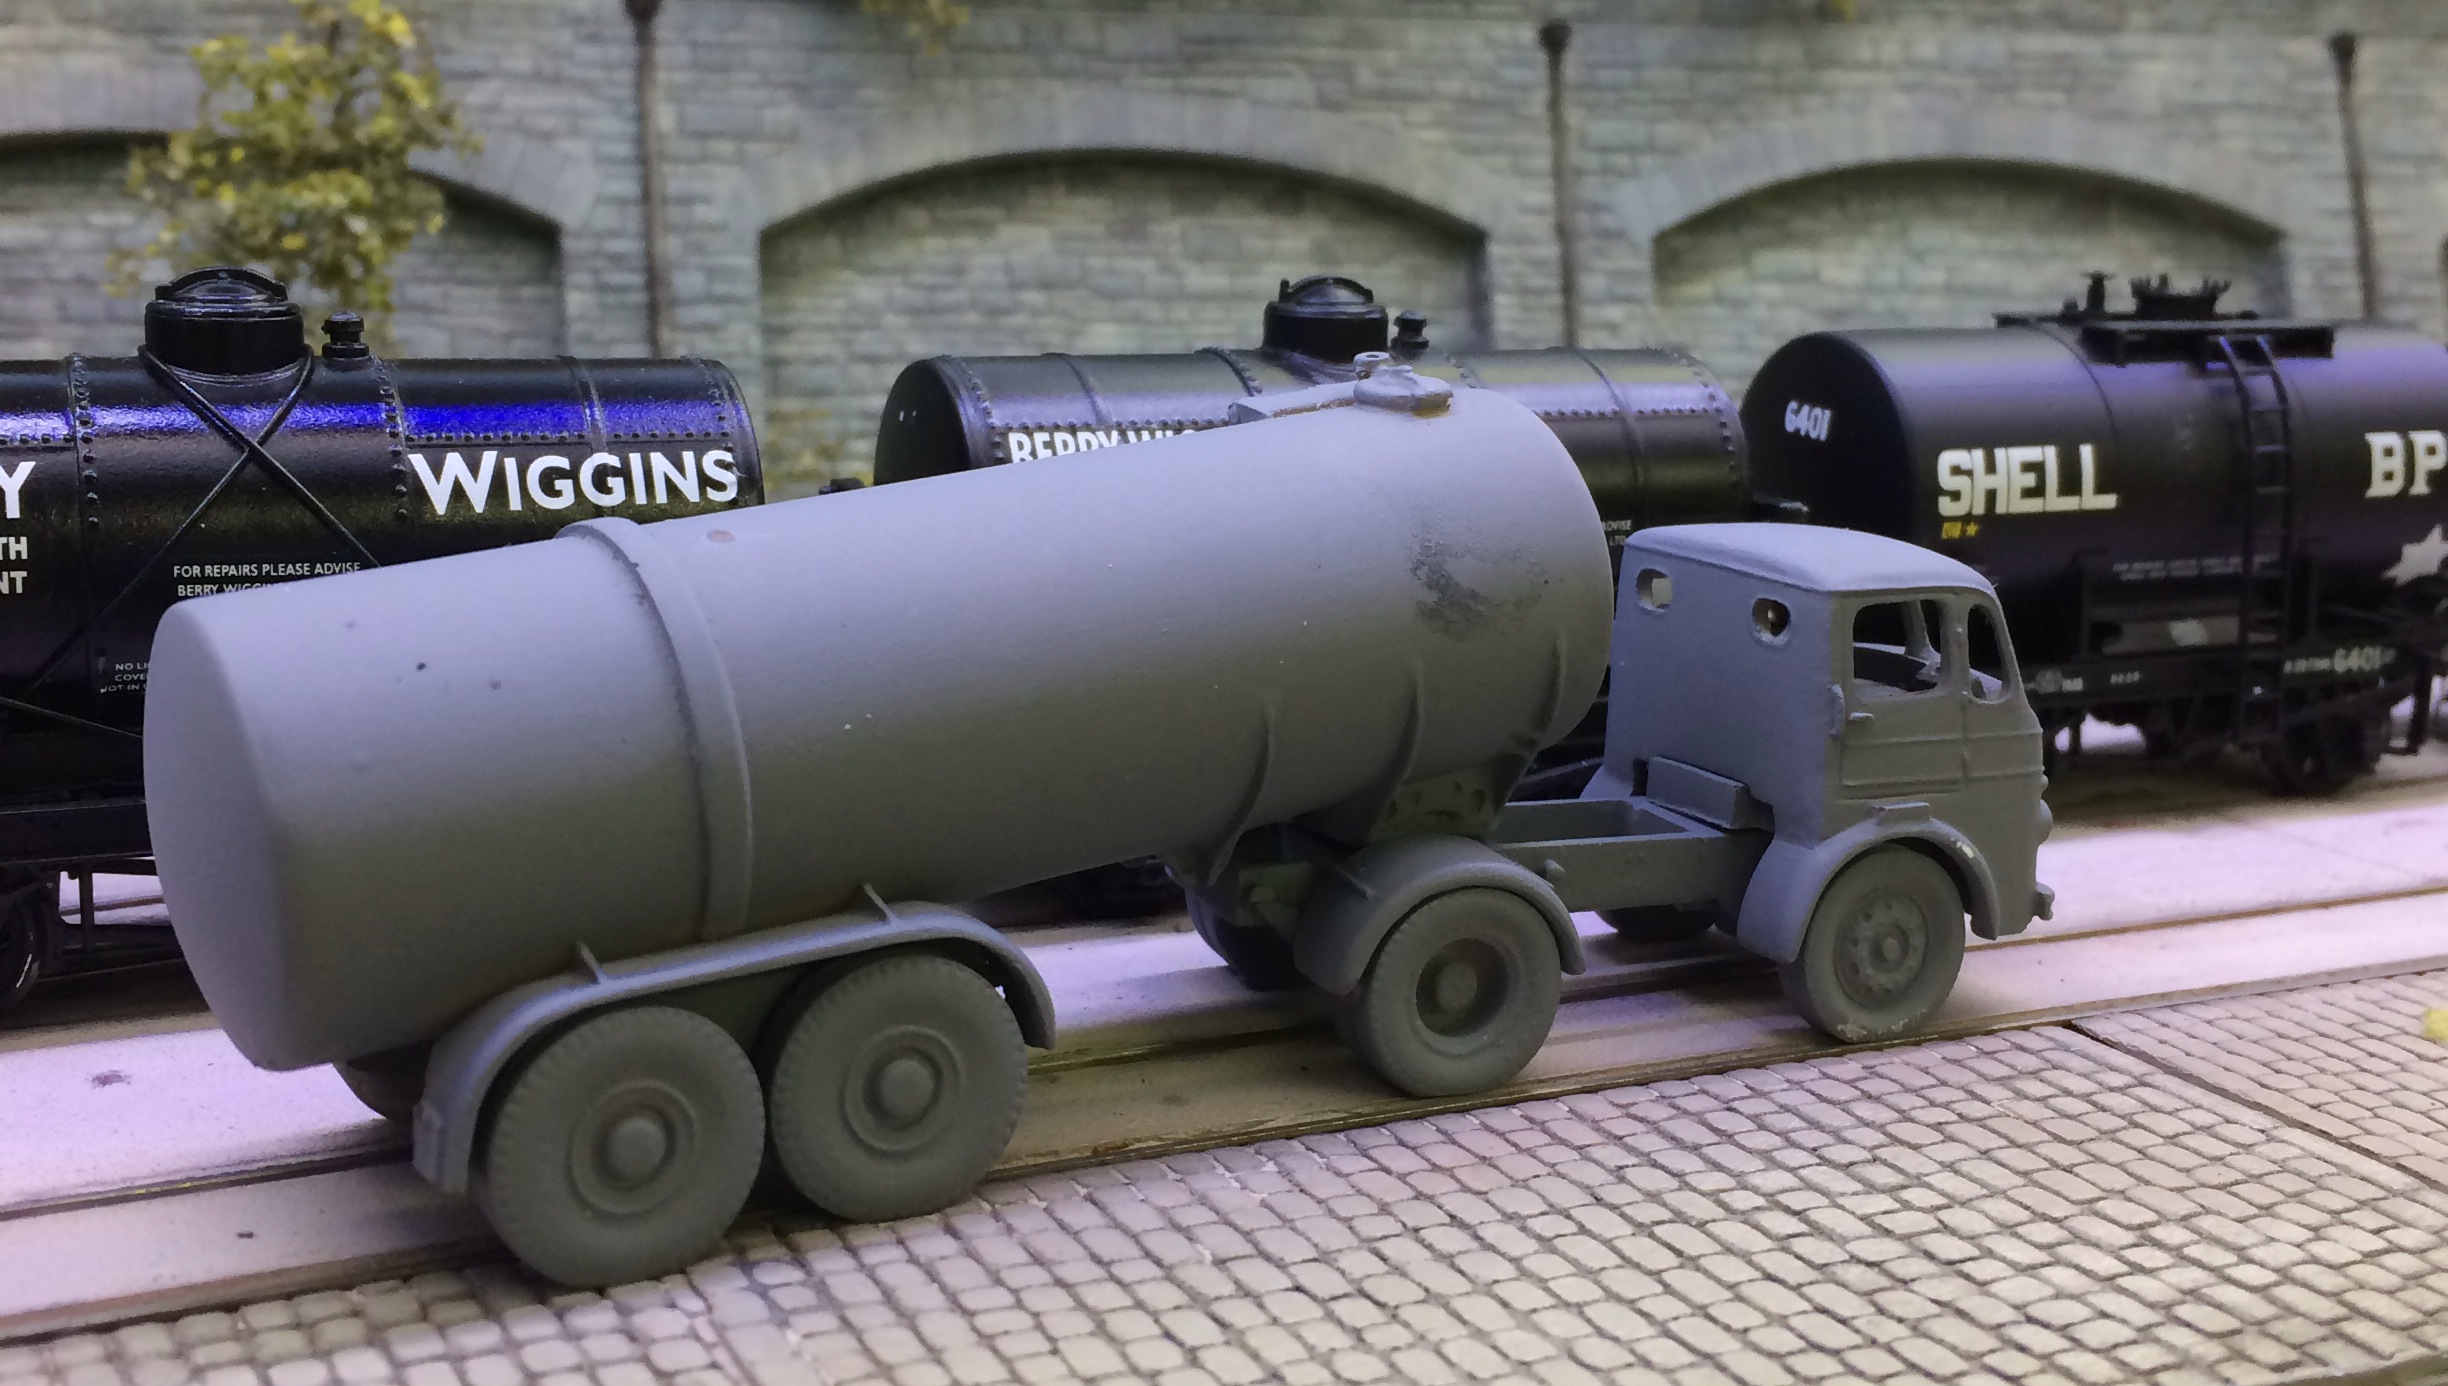
So the process of preparing for an unrelated exhibition has meant me returning to my core interest, and getting a shelf queen underway again. Maybe I should get Bawdsey out more often!

Posted in 2016, Bachmann, blog, blogger, British Rail, DCC, dcc sound, Eastern Region, Exhibition, finescale, Forest of Dean, Great Western, history, HO, hobbies, Hornby, Layout, life, Midland Region, Model Railroad, Model Railway, Model Railway Journal, modeling, Modelling, Modelu, Nevard, New Radnor, OO Gauge, Oxford rail | 2 Comments

Wordless Wednesday (R3243a)

Hornby R3243 R3243A R3243B R3418 R3417 R3242A

Hornby R3243 R3243A R3243B R3418 R3417 R3242A

Posted in Bachmann, blog, blogger, blogging, Branch Line, British Rail, DCC, dcc sound, Eastern Region, EM, finescale, flying scotsman, Great Western, HO, hobbies, Hornby, Layout, LMS, LNER, media, Midland Region, Model Railroad, Model Railway, Model Railway Journal, modeling, Modelling, Modelu, Nevard, OO Gauge, Oxford rail, R3243 | Tagged , , , , , , , , , | Leave a comment

Throwback Thursday, better late than never …

A few weeks ago on a Thursday, I wrote about using double sided tape to hold down or rather ‘up’ Tortoise point motors. albionyard-back-on-track/ Well all went well overnight, or part of it. In the morning I arrived to find two of the point motors on the floor and one hanging ready to join its mates. This was officially ‘disappointing’, I’d thought my solution would be a quick and easy fix to get the track up and fully functioning. I tried a second time with only slightly better results, it was clear that the tape would be unable to hold the motors.

Unibond double sided tape cat no. 1507603

Unibond
double sided tape
cat no. 1507603

At this point the benefit of the blogging community and readers stepped in in the form of todays hero, Brian Patterson from South Africa. He suggested that I search out Unibond double sided tape, I did, (see UK packaging above) and got some from a local B&Q store. I replaced the old tape with the Unibond product and the difference is incredible. Overnight the motors were held firmly in place, a month on they show no signs of loosening, and the 6ft long (9mm thick MDF) track board can be physically moved laterally holding onto a point motor body. Thank you Brian, your suggestion potentially saved a huge amount of messing about! Over at Llangunllo, radnorailwaystrack-finishing-touches Geoff too has been working on track, with an interesting comment regarding linking to blogs and using suggestions from the community. The point motors are acoustically uncoupled from the board and you can only hear the low volume whine of the motor/gears as it performs the switch function. All the motors are wired up and running from a mobile phone charger.

Project 'Southern'

Project ‘Southern’

The chassis of the baseboard is made up as can be seen here, at this stage I haven’t got the full footprint worked out which may seem a bit weird, but I’m still thinking through some lighting concepts for the presentation. Pete Kirmond’s Laramie being a big influence on how I might manage the lighting and fiddle yard. Many readers will note an unashamed influence and connection to the Ian Futers style of terminus design. On this view you are looking to the station throat, and the fiddle yard length and style will be determined by the scenic join and as previously mentioned, lighting. Its highly likely it’ll be a peninsular  type of design with the viewers able to walk around at least three sides of the layout. This view will be one the public gets, looking down the layout to the fiddle yard. Multiple unit use will reduce the amount of presence required by the operators in the scenic section. At the moment I’m thinking the right hand line may drop and curve away from the current alignment to give a Kings Cross, York Way, widened lines feel. That will also give challenges to the building alignment and heights. Its quite interesting working in this very fluid way at the moment, because this won’t be part of the Forest of Dean project I can afford to experiment a bit with the design and construction. The FoD project has the potential for a peninsula or two, so I’ll learn the craft with this one!

On the Forest of Dean project I was fortunate enough to spend a while looking at Hattons 14/58XX pre-production models a week or so ago, and talking to Dave Mylett about them.  I have to say I was pleasantly surprised at the initial model samples I was shown, and only had the opportunity to take a couple of phone snaps of them. ehattons.com

Hattons 14XX H1412

Hattons 14XX
H1412

Hattons 58XX H1410

Hattons 58XX
H1410

On the basis of looking at them and speaking to Dave Mylett, I have ordered one of the plain black top feed versions. There are some clever ideas with them, for the DCC sound fitting the bunker coal is removable allowing a sugar cube speaker to be fitted easily with I understand connections ready for the speaker to be attached. The sound will be helped acoustically with apertures in the base of the bunker to allow the sound out. Turning them upside down briefly indicated that the splashers may have sufficient clearance for the EM/P4 contingent. Axle diameter looked to be in the 3mm area but I wasn’t able to determine if the chassis would be an easy conversion. Visible behind the leading driver was a cross head screw into the side of the chassis, so it could be the there is the facility to dis-assemble the chassis to swap wheelsets for those that wish to. Please note these are just my very brief overview of those shown to me. The colors of the black versions looks particularly good in the flesh, a dark charcoal grey or ‘light black’ giving a nice eggshell finish. I wasn’t so keen on the BR green version and lined black, the lining on both appearing to be too heavy and thick. I don’t think they’ll be the best steam outline models we’ll see, but feel they will stand favourable comparison to the major players, and that any cosmetic shortcomings will be a relatively easy fix.

Also to be seen were the J94 samples for Hattons, to be frank they didn’t catch the eye or imagination like I hoped they would have. The detail and appearance of the 14/58XX appears far finer than for the J94, and they will be almost contemporary products from the same manufacturer. Note the J94 is a standard range DJM model with limited edition liveries for Hattons, where the 14XX is a Hattons commissioned model. Having looked at the J94’s I’ve no compulsion to place my Brassmasters  kits on ebay on the basis of looking at these admittedly pre-production examples.

To close, a week or so ago a friend advised me that John Hayes had passed away which is a great loss for the hobby. I’d lost regular touch with John over the past few years, usually catching up at scaleforum, but am eternally grateful for the help he gave me after my fathers passing. We had an engineering workshop to dispose of, and John helped dispose of machinery and tooling to friends in the vintage motorcycle restoration field. It was good to know they were going to a good home and something my late father would have appreciated too, he like me being into, and riding motorcycles. I was also extremely fortunate enough to spend some time over the years with John learning skills, (you really felt like the sorcerers apprentice watching him), and still have some of the tooling and jigs he made to help me with some of my earlier projects. John’s skillset was immense and he was very, very modest about that talent. For those of you familiar with his modelling skills, if you can imagine those transferred to full size historic motorcycles, you get an idea of the quality of the bikes he maintained and restored. Older vehicles like those rarely capture my attention, they’re just not ‘my bag’, but I always asked for a sneaky peak at the bikes, just to appreciate the quality of the art of engineering he achieved, and to see what a proper English bike should look and sound like! Good luck to ya mate! RIP.

_B6O4719.CR2


Posted in Bachmann, blog, blogger, blogging, Branch Line, British Rail, DCC, dcc sound, djm, EM, finescale, Forest of Dean, Great Western, HO, hobbies, Hornby, Ian Futers, laramie, Layout, life, media, Midland Region, Model Railroad, Model Railway, Model Railway Journal, modeling, Modelling, Nevard, obituary, OO Gauge, Rapido Trains, research, skill, skillset, social media, Southern, Southern Electrics, Southern Region, throwback thursday, toy fair, toy train, toytrainset, train set, Uncategorized, Western Region, Wyoming | Tagged , , , , , , , , , , , , , , | 5 Comments

Wordless Wednesday (fifty shades of grey)


Posted in blogger, Branch Line, British Rail, DCC, dcc sound, Eastern Region, finescale, flying scotsman, Great Western, HO, hobbies, Hornby, humour, Layout, LMS, LNER, Midland Region, Model Railroad, Model Railway, Model Railway Journal, modeling, Modelling, Nevard, OO Gauge, Oxford rail, paint | Leave a comment