
Oxford Rail Dean Goods
OR76DG001 OR76DG002 OR76DG003
A week ago I had the pleasure of visiting the London Toy Fair at Olympia courtesy of Oxford Rail. It was an interesting visit, very much the ‘trade’ show rather than the exhibitions we frequent. What was very apparent and clearly reflecting the importance of the event and the outlook of the exhibitors, was the clean well lit appearance of all the stands from all sectors of the ‘toy’ industry. For me the interesting companies were Oxford Rail, Hornby/Airfix and any other items that could cross over into railway modelling related interests, of these, Revell, the plastic kit company had a couple of pieces that ticked the box. Also for me of interest for both professional and business reasons was the number of radio control quad copters and similar flying machines that are making inroads into the ‘toy’ market.
Due to work commitments a late arrival meant I had limited time to spend at the event. Oxford Rail had announced for the Toy fair a new locomotive, the GWR Dean Goods, four new steam era wagons, and BR Mk3 coaches. New liveries were also announced for the Adams Radial, and the first test shots for the chassis and main body components of the Janus 0-6-0 industrial diesel were available to view.

Oxford Dean Goods
OR76DG001 OR76DG002 OR76DG003
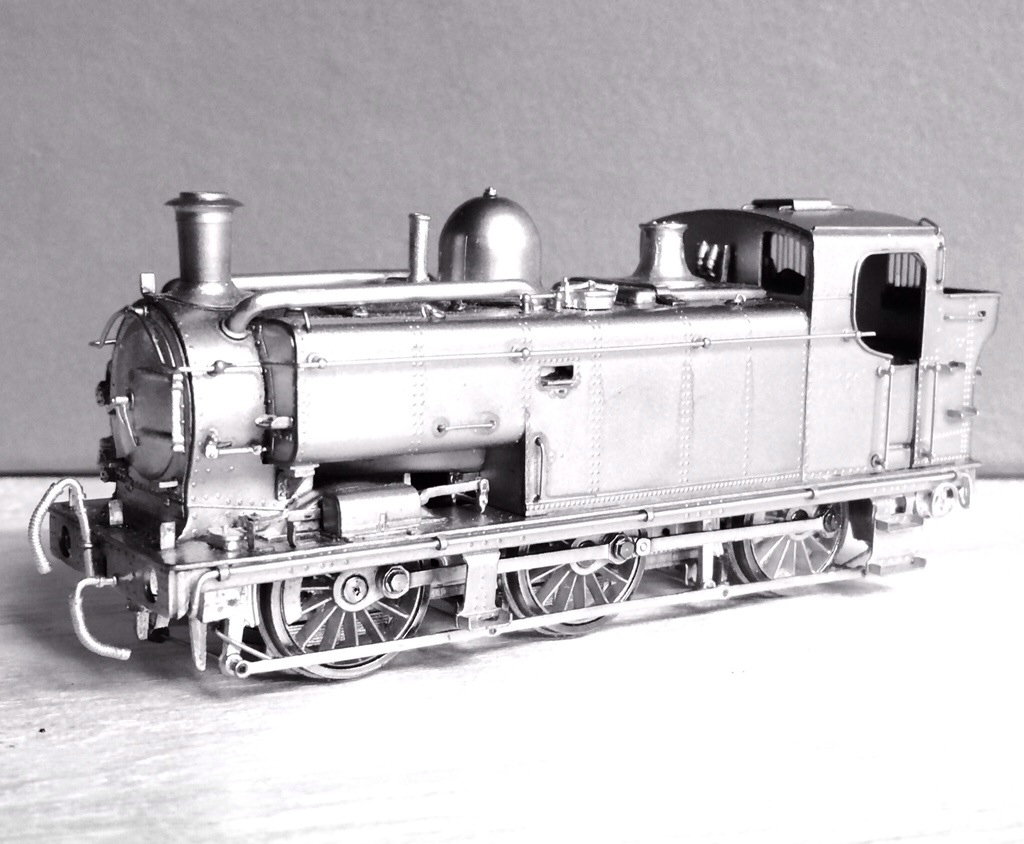
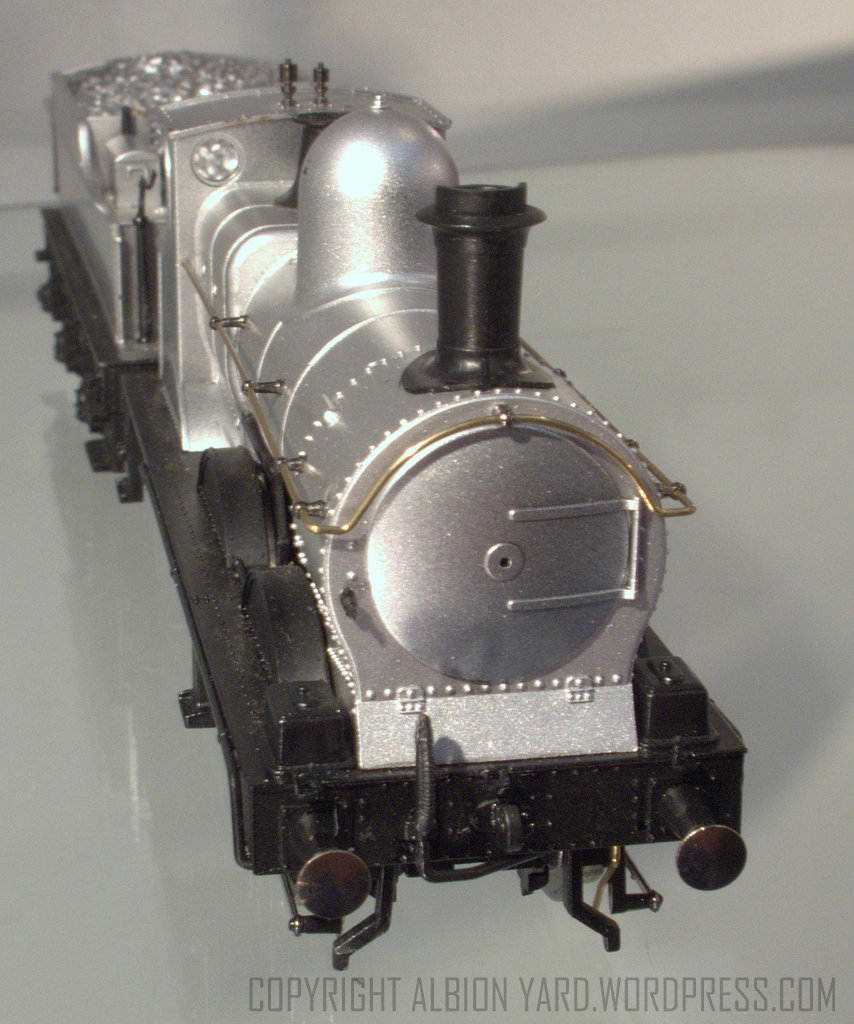
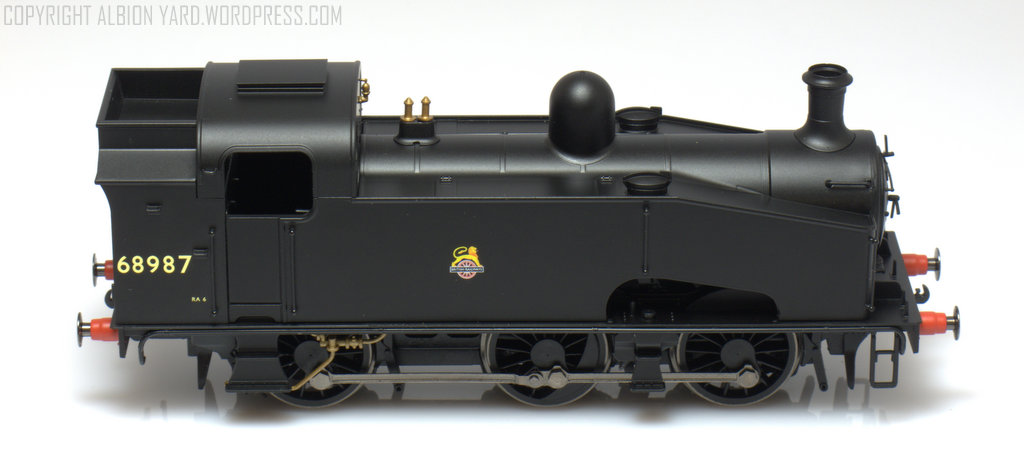
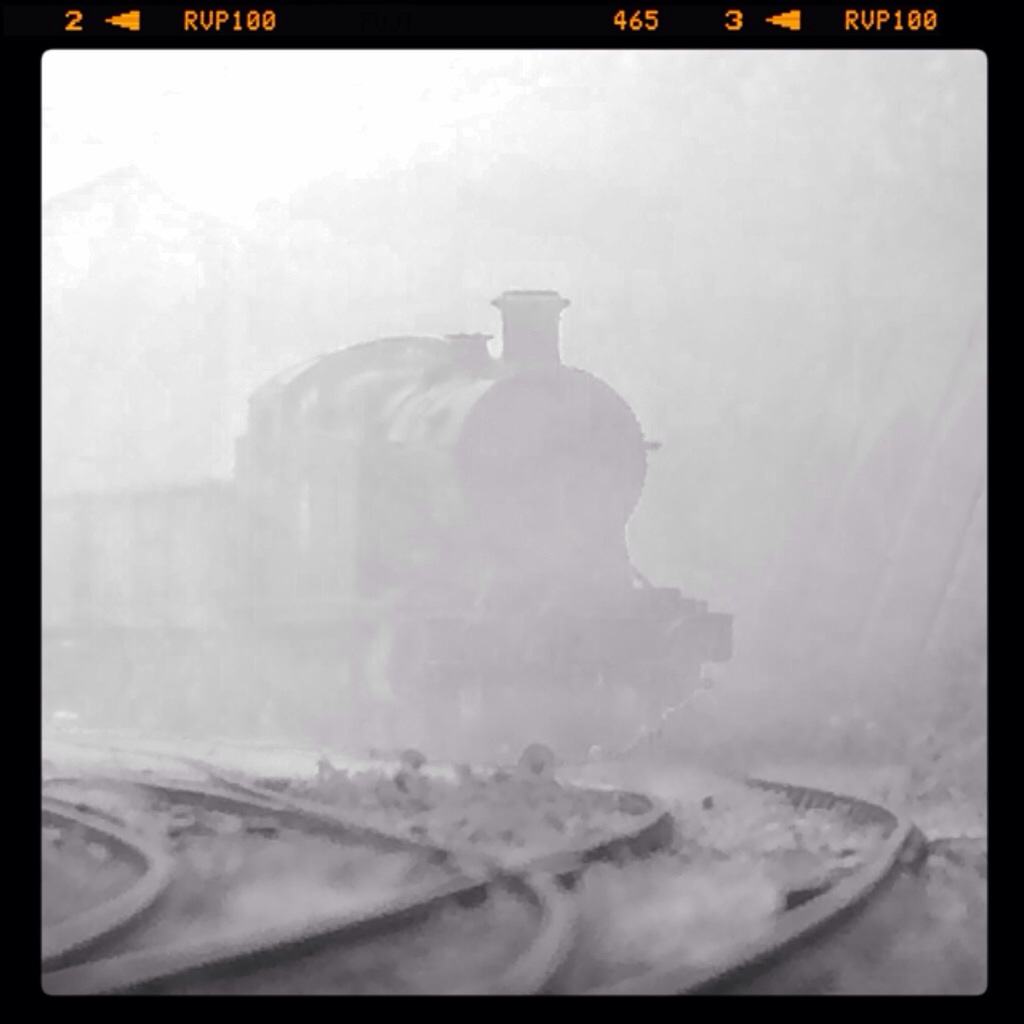
The Dean Goods immediately looks good the proportions and finesse of the mouldings capturing the appearance from memory of the prototype very well. The sample here is one of the advanced engineering prototypes (EP), and had been subject to a couple of days intense examination at the toyfair. The following notes are based on a quick overview of the model and a few iphone snaps! Double click any of the images for larger! The superstructure of the locomotive and tender is plastic, with the running plate and lower boiler section cast metal. The weight of the model when handling it seemed appropriate if that makes sense, it certainly didn’t feel too light at one end of the scale and wasn’t made from depleted uranium at the other. On this Belpaire firebox version there are separate mouldings for the chimney, lamp irons, regulator, whistles, safety valve, rear cab springs and reversing lever. Handrails are metal with the EP’s main handrail knobs level rather than slightly angled. The prototype handrail fixings aren’t as prominent for being mounted on a radial from boiler centre as the J15 has, if left as is, once painted, my feeling is that it won’t be too noticeable.

Oxford Dean Goods
OR76DG001 OR76DG002 OR76DG003
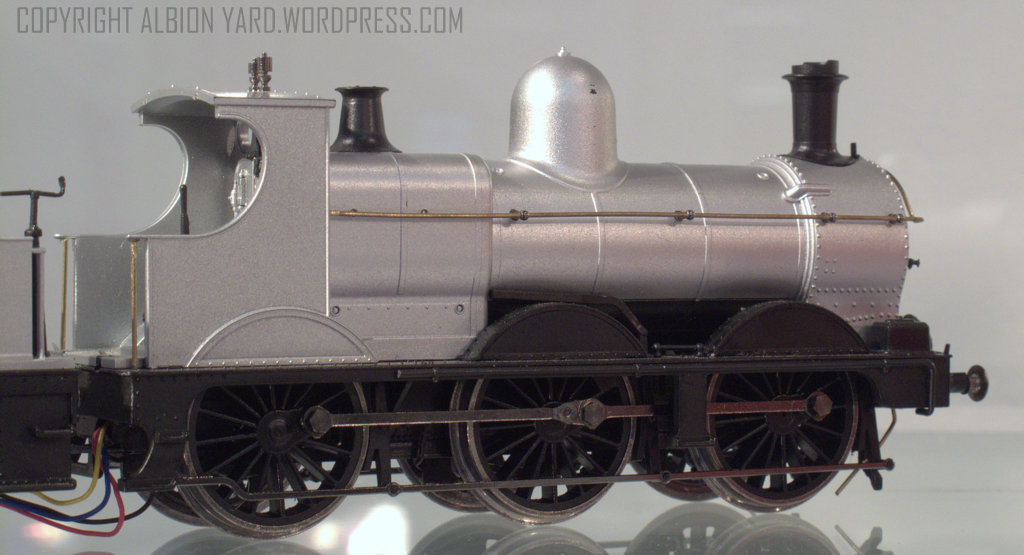
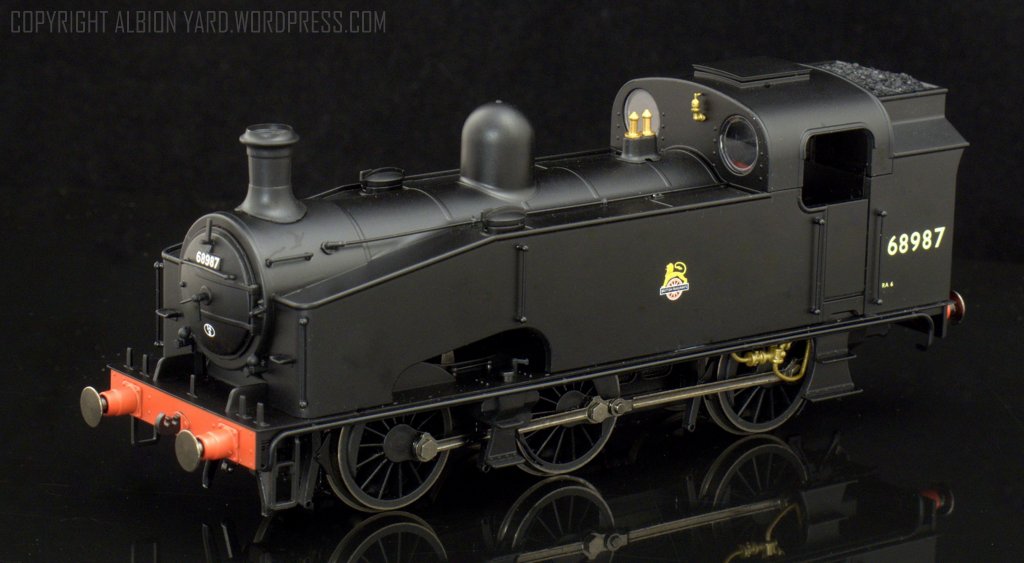
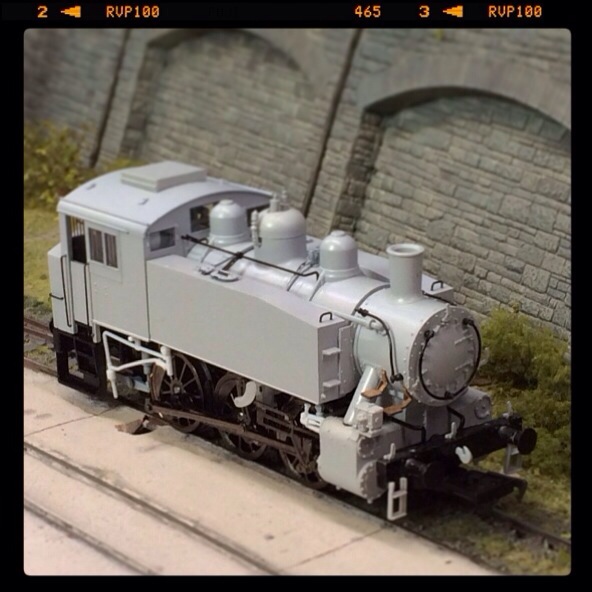
The footing of the flare at the bottom of the chimney looks a little large, but this may be an optical illusion caused by the high contrast between black chimney and silver body. Smokebox front captures the face of the locomotive with a steam lance fitting, and separate smokebox door dart. It’s not clear if there’s a separate fitting for a BR smokebox plate, or if its a separate slide tool which includes it. The split between the body and chassis looks like there’s potential for round top boiler version in the future. There’s good daylight underneath the boiler, with reversing rod and footplate handrails also included.

Oxford Dean Goods
OR76DG001 OR76DG002 OR76DG003
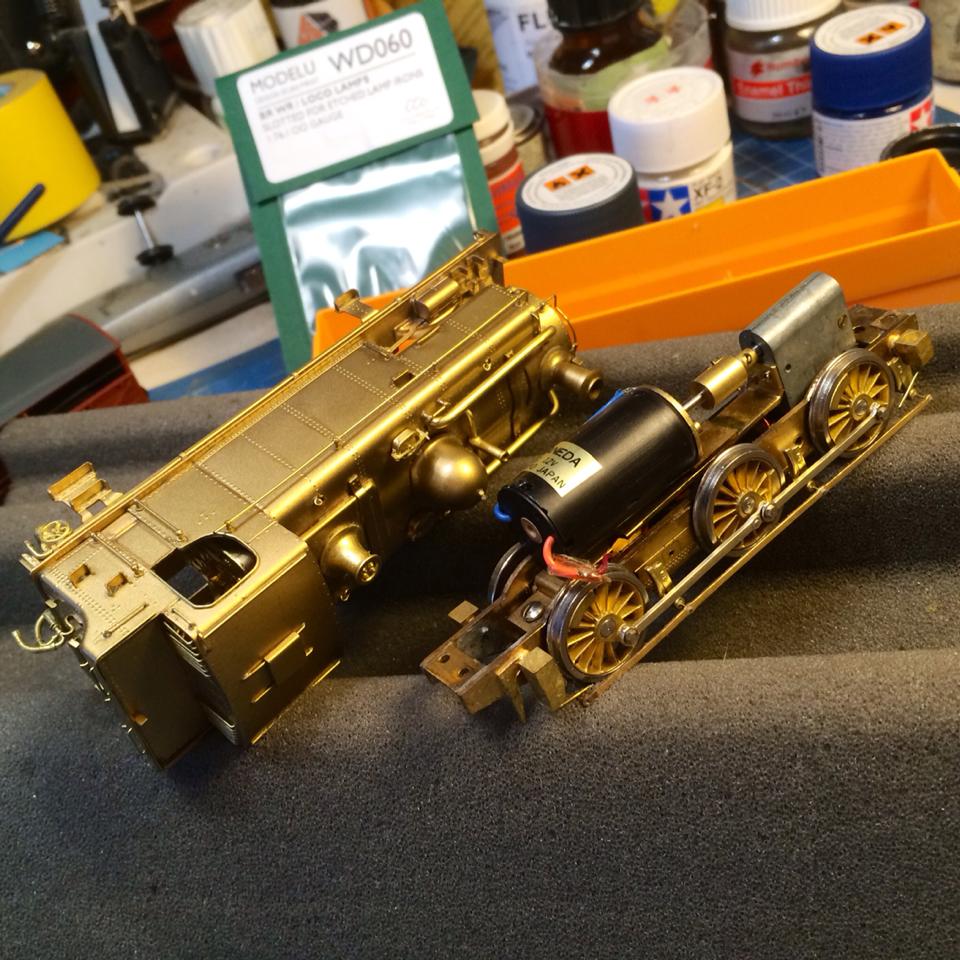
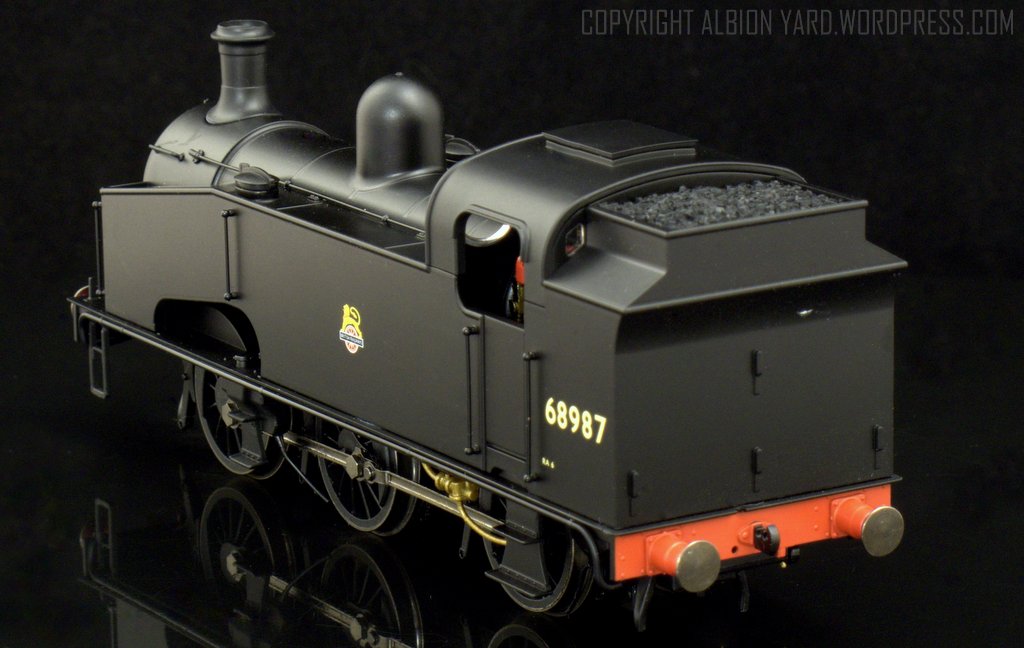
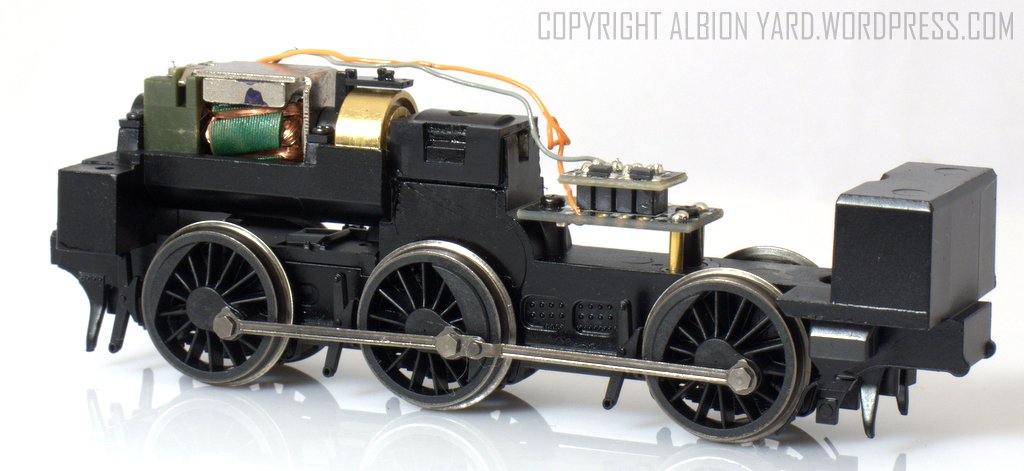
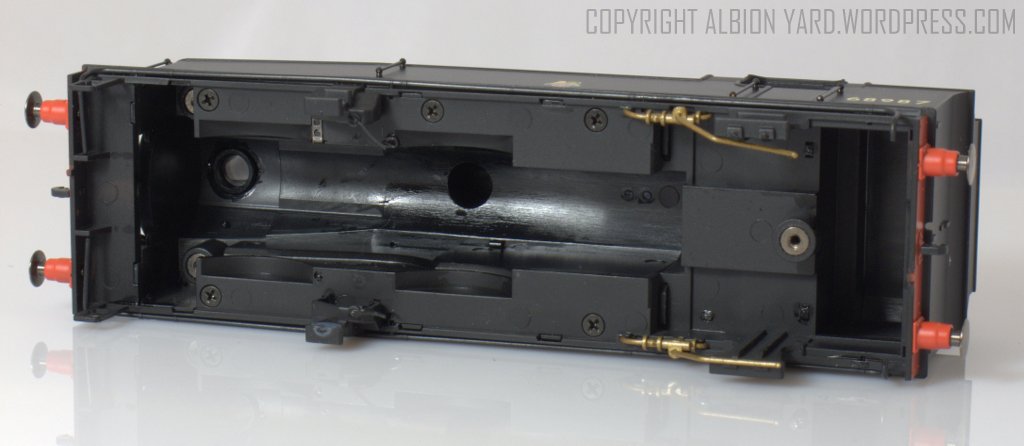
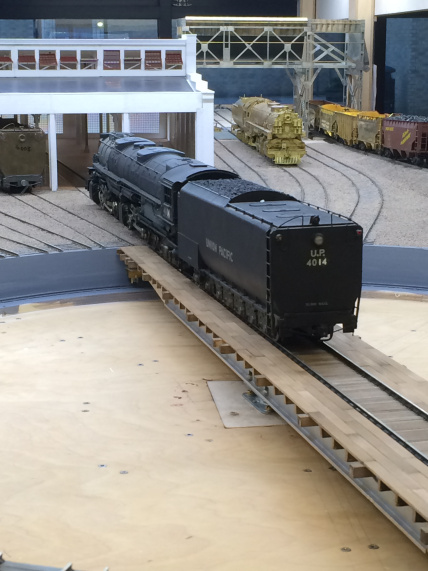
The chassis drives to the rear axle, this looks like it could be a similar drive train to Hornby’s J15, the front of the motor and gear train not being visible. The motor is a skew wound five pole I didn’t get to see how much clearance there was for wider gauges on the loco chassis but the tender looks relatively easy to convert. One of the big visual impacts of the EP was the chassis, the brake pull rods being flat metal strip rather than plastic, and the wheels look well proportioned and profiled with smaller flanges than the earlier Adams Radial. The tender to locomotive connection has the appearance of being adjustable for close spacing, with a metal fall plate. The coal load is fixed and the space underneath is utilised for the DCC mounting. Currently, (toy fair week), there’s no sound hole provision for DCC sound, but I mentioned that an aperture of some kind may be useful for those who wish to add sound. Overall the Dean Goods looks a good step forward from their Adams Radial, which in fairness to it isn’t bad for a first locomotive. If you didn’t know which manufacturer was responsible for it, you’d easily place it in the Hornby/Bachmann brace of manufacturers, that I feel is a considerable achievement just based on its appearance.

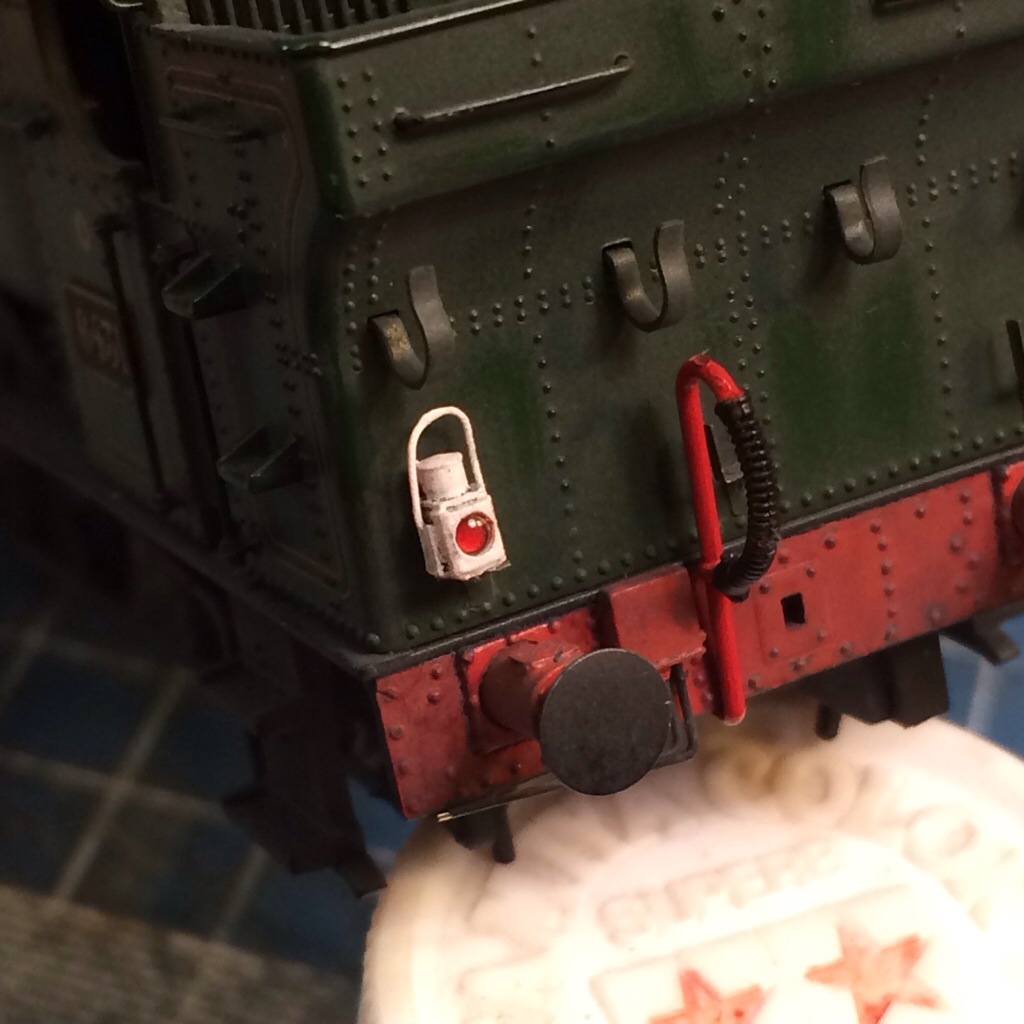
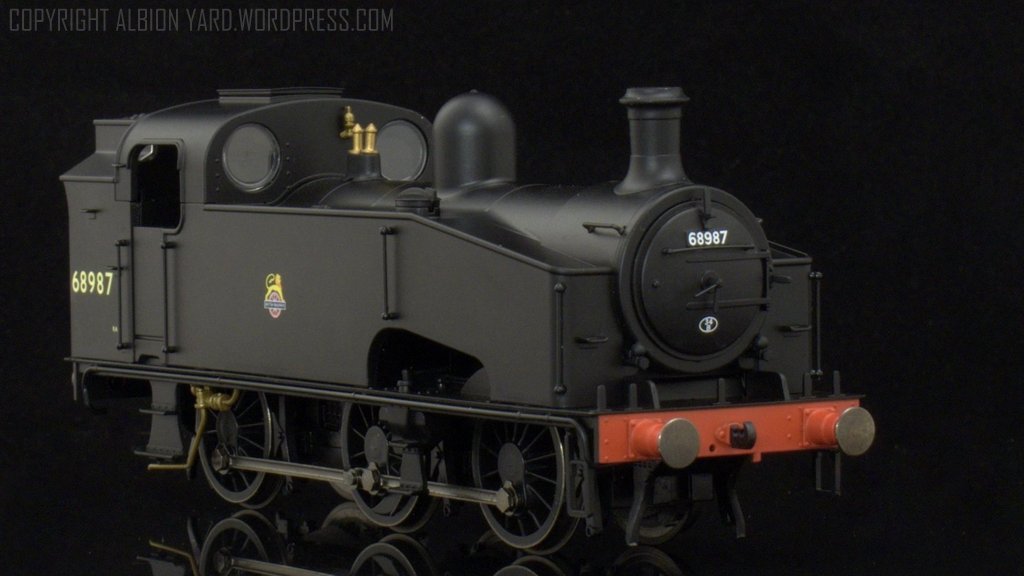
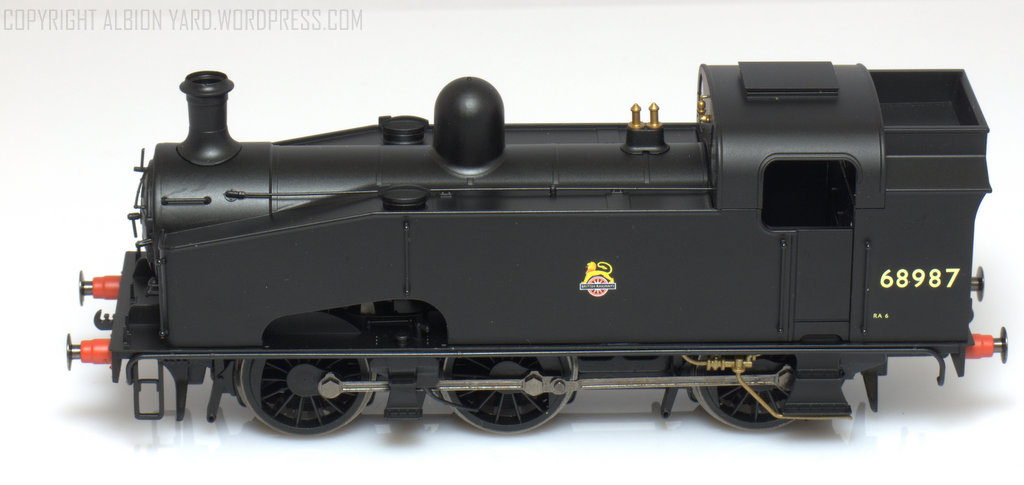
Oxford Rail Adams Radial
OR76AR001 OR76AR002 OR76AR003 OR76AR004 OR76AR005 OR76AR006
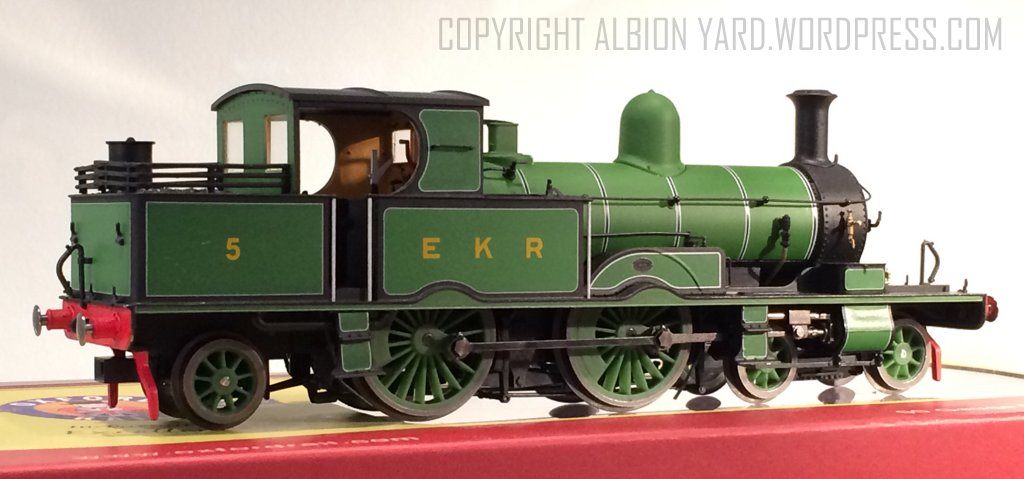
There are a couple of new liveries for the Adams Radial, and the handrails are now supplied blackened which has made a massive visual difference to the BR Black version in particular. A few engineering tweaks have been made to the chassis to improve performance. I managed a look at the Hornby Adams Radial which shows a very different design for the Radial truck. On the Oxford model the rear axle is rigid, Hornby have gone for a cast rear bogie in effect which has lateral movement guided by a radiused channel with no noticeable fore and aft movement, and a limited amount of vertical play too. The split between chassis and radial bogie is well engineered and almost impossible to detect, the Hornby front bogie is very similar to Oxford’s but with a small cut away at the top giving clearance for Vacuum pipes and a little more ‘toe up’ than the original Oxford offering. Detail and paint on both Hornby and Oxford models was very good, both types scoring well for me on the windows which show very little refraction from the edges.
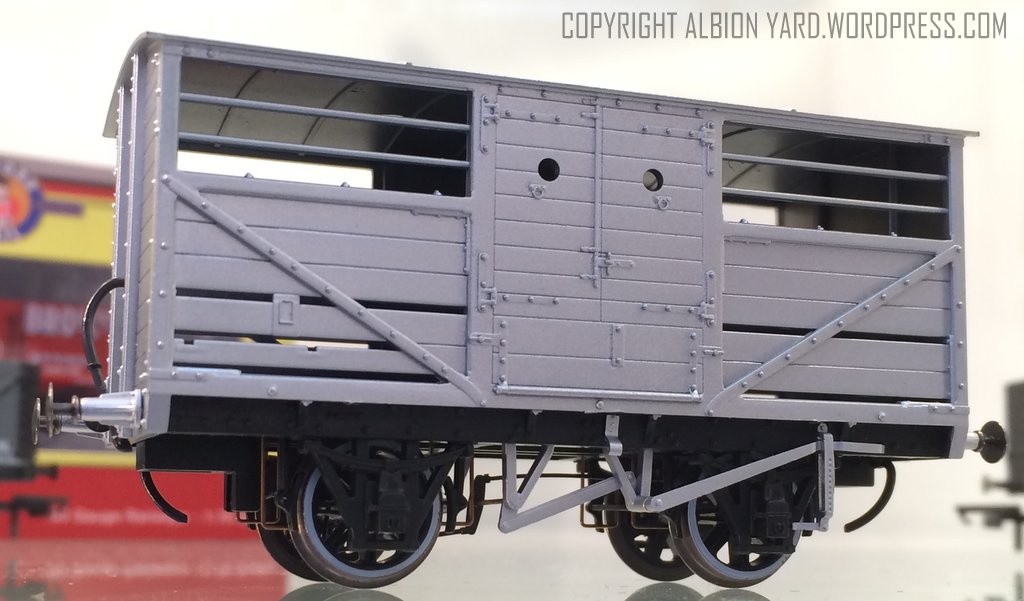
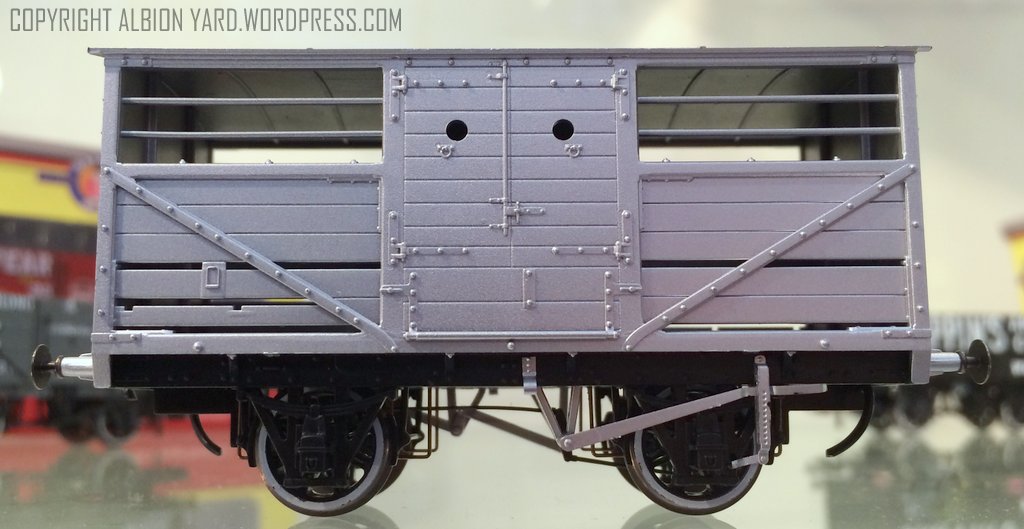
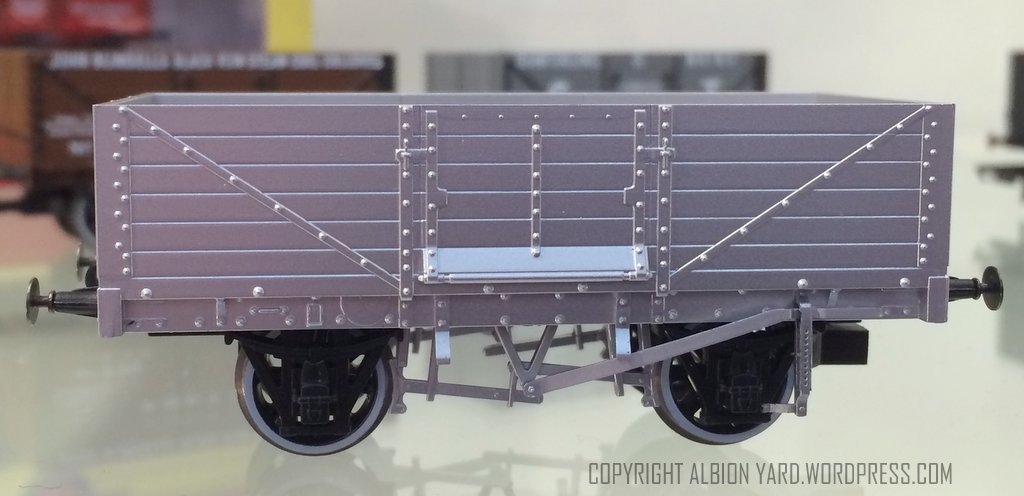
Four wagons were announced at the fair, three new toolings with a North Eastern/Scotland area applicability. The fourth wagon announcement were further liveries of their 7 plank RCH private owner. The cattle wagon and 6 plank are good country wide choices, the four plank being more restricted in its travels and is closely associated with ‘the north’. Another interesting development was the announcement of weathered versions in the offing too, no samples were available to show the weathering style Oxford will use.
NE/LNER/BR Cattle wagon

NE Cattle wagon
OR76CAT001 OR76CAT002

NE Cattle Wagon OR76CAT001 OR76CAT002
NE/LNER/BR 6 plank open

NE 6 Plank Open
OR76MW6001 OR76MW6002
NB/LNER/Private Owner 4 plank

Oxford Rail North British 4 Plank
OR76MW4001
OR76MW4002
OR76MW4003 OR76MW4004
BR Mk3 coaches are in the line up too no specific liveries/variants were announced and no samples or test shots were to hand, I got the strong impression that the development of the range will be market led, i.e. the most popular liveries/versions requested may take a priority. Oxford mention they have a joined up approach to the development of their product range, and demonstrated a suitable Vegas poker face when asked about the MK3 stock and what else could be in the planning motive power wise.
The Oxford/Golden Valley Janus industrial 0-6-0 diesel shunter initial mould shots were available. On quick inspection they looked good with a degree of finesse about them that should please the market. One of the elements being looked at is a DCC sound configuration, and these early stages suggest a design likely to include a ‘sugar cube’ speaker specific sound installation. There was no confirmation if that was to be an option off the shelf, or an after market fitting.

Collett Bow Ended Stock
R4684 R4685 R4686 R4787 R4688
An even briefer visit to Hornby was also of note. A brief discussion outlined that Hornby recognise that new entrants need to be encouraged, with the realisation that the buying market as it stands is dominated by the 40+ age category, fine for today, but bluntly, a limited life expectancy. This appears to be one of the key drivers behind the Hornby Junior range, battery powered train sets. Not a product that I think most of the readers will be interested in but good news that Hornby are considering ‘future proofing’ the company. If it works for them they will build brand loyalty and interest from an early age. Even if the juniors take a sabbatical to chase ‘gurls/arse/drink’ etc, perhaps the ingrained red box loyalty will pay dividends for them in the long game. Airfix and Hornby are under the same umbrella these days, one of the interesting Airfix boxes on display was for a Steam locomotive working model. It’s clearly based on, or is a Q6, which would make sense if Hornby already has the data to hand. This kit fits in the Airfix range as a cutaway model, there already being an internal combustion engine and a high by pass jet turbine in the proposed range. Price will be approximately £30.00, and no tender included.

Airfix Engineer
There was little in the ‘other manufacturers’ field to look at, of note though Revell had a stand there with their range of plastic construction kits. The one thing that really caught my eye was the 144th scale Flower Corvette. This has obvious applications for N/2mm scale modellers, and some interesting forced perspective opportunities for larger scales.

Flower Class Corvette
05132
An interesting show then, and to cap it all a few days later at Nuremburg those dastardly chaps at Peco, upset the ‘OO proper track’ contingent. Unbelievable!
Devon Company Makes Track Exclusive! www.trackmanufacturermakestrackshock
http://www.oxfordrail.com/
http://www.hornby.com/uk-en/
http://www.airfix.com/us-en/
http://revell.com/


You must be logged in to post a comment.