
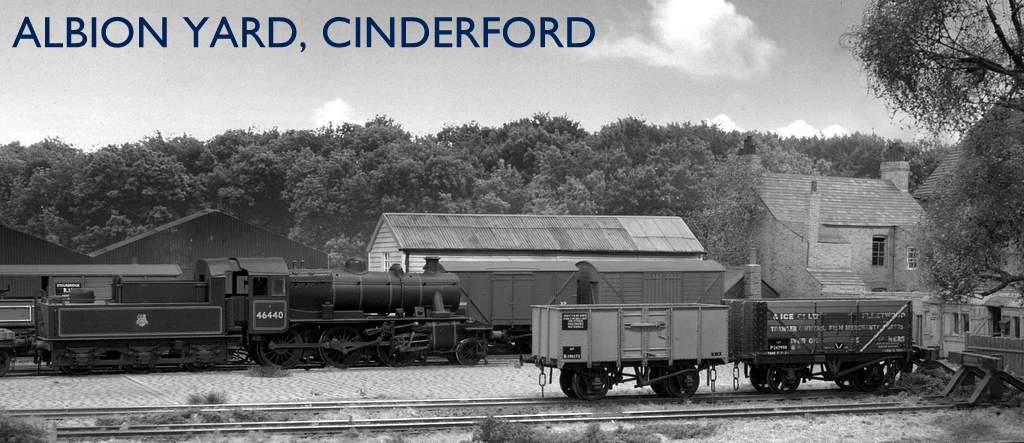
 This weekend is the final show for the layout, and we are stand B50 at the NEC Warley show. One of the main features of the layout is the backscene, which is a digital print. It is one of the items as well as trees and fiddle yard that I get asked most about. So, this is a quick story of the backscene.
Some of the biggest challenges that layout builders have, particularly those that exhibit layouts, are to do with the transport and presentation of the layout at shows. One of the key choices to make is about the back scene, whether to have one, and if so how to go about the production and presentation of it. Not everyone feels the same way of course, I was recently sent this quote about Albion Yard, I’d not seen it before, from one of the hobbies foremost bullshitters, sorry ‘experts’.
Hiding is easy on a plank size layout with a limited service but a big roundy roundy with lots of trains moving presents a lot more issues, as Tims photo (above) shows, it takes enough work to make the layout without having to spend as much time hiding the fiddle yard
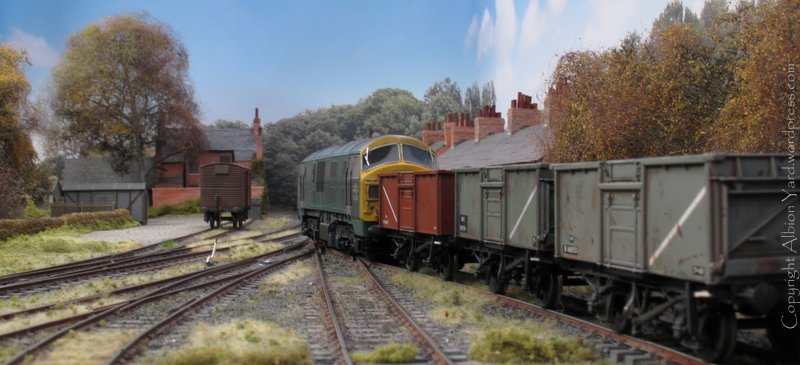
I’ve always felt that a back scene was a critical element of a layouts presentation, so rather than just following our Guru’s mantra of nailing pieces of hardboard covered in white paint, heavy emulsion brush marks, and backscene joins provided by ‘The Bachmann Trencher’, (you wondered where he’d gone? Alive and well working in the North West apparently)’ I did something different. Rather than staying in the 1970’s, as the group above clearly feels is the way forward, I spent a good deal of time looking at how the layout would appear. I wanted it to look plausible and have depth, rather than something from the flat earth society. It takes no more effort to make a layout look good than bad, it can take time of course, and size doesn’t have much to do with it either, if you use the right commercial printer you’ll run out of a single ream of material before you run out of layout. One critical element our guru missed, and which shows he has no knowledge or experience of making decent scenery and backscenes, is the fact that with smaller layouts making the scenery and backscene integrate effectively is far harder on a small layout than it is on a big one. He won’t know this as he’s never done it, but its because you have less room and the backscene is closer to the viewer!
Previously my layout was in a room with a neutral off white wall colour a natural back drop, now the layout was free standing I felt it needed a plausible back scene.
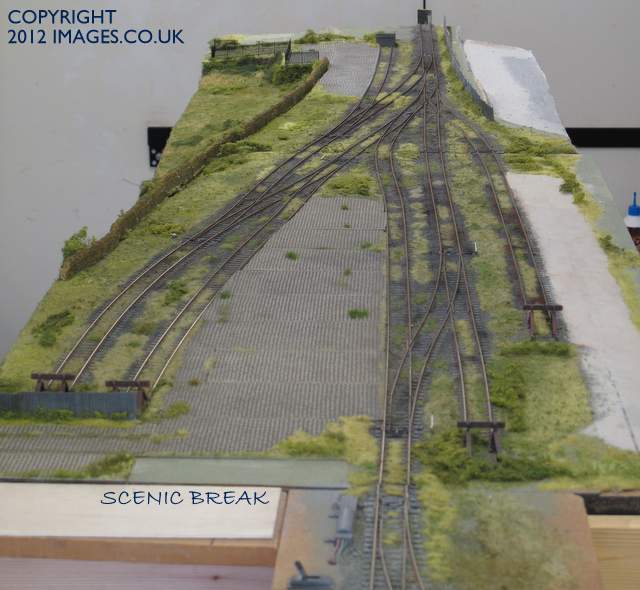
Track layout looking from fiddle yard.
The layout is three separate boards, no different from many other layouts. I’d always been impressed with layouts such as Barry Normans ‘Petherick’, Iain Rices ‘Woolverstone’ and Peter Kirmonds ‘Blea Moor’.All of these had backdrops, Petherick was unusual as it had the whole display thought through including fascias and lighting, for its time, I believe it was unique in this aspect. Woolverstone and Blea Moor had material back scenes so I was heavily influenced in presentation by these three layouts.
Blea Moor
By Pete Kirmond
The other layout I’d been fortunate to watch develop was Chris Nevards ‘Catcott Burtle’ http://nevardmedia where he had used a digitally printed back scene attached to a rigid one piece backing. I had messed around with some commercial photo back scenes but wasn’t very pleased with them. The join was very difficult to hide as was getting them fixed without any ripples. The colours on the images were also too dense and not balanced to the foreground model.
From all these influences I came to a simple conclusion. What I needed was a creaseless, seamless and detachable back scene, about 16 feet long and matt finish. That was the easy bit, the next part was where to get it from, and what material to use. I’d determined the layout would be set in the Forest of Dean, so any image on the background would need to reflect that in some way. So my two criteria were now a seamless backdrop, depicting the Forest of Dean. The digital printing option seemed to hold the most promise, but whilst that was the final outcome it wasn’t an easy journey.
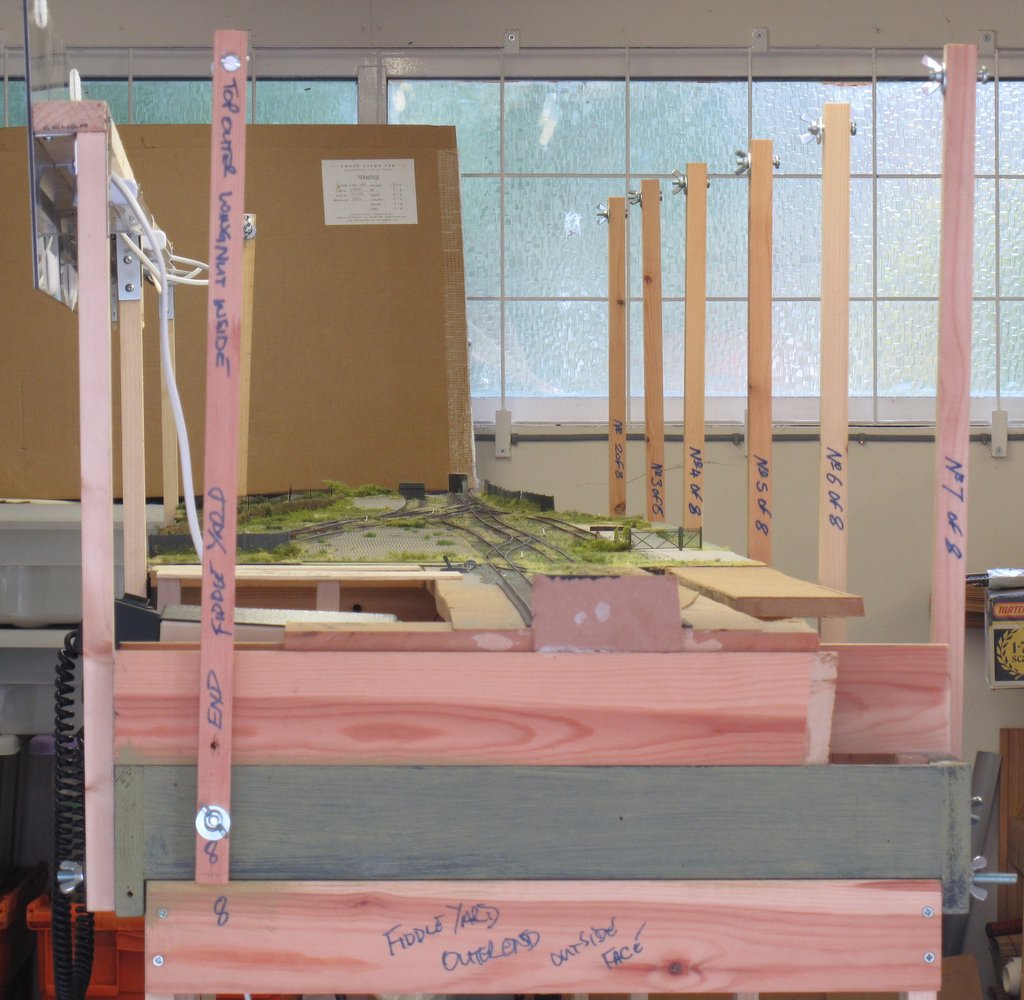
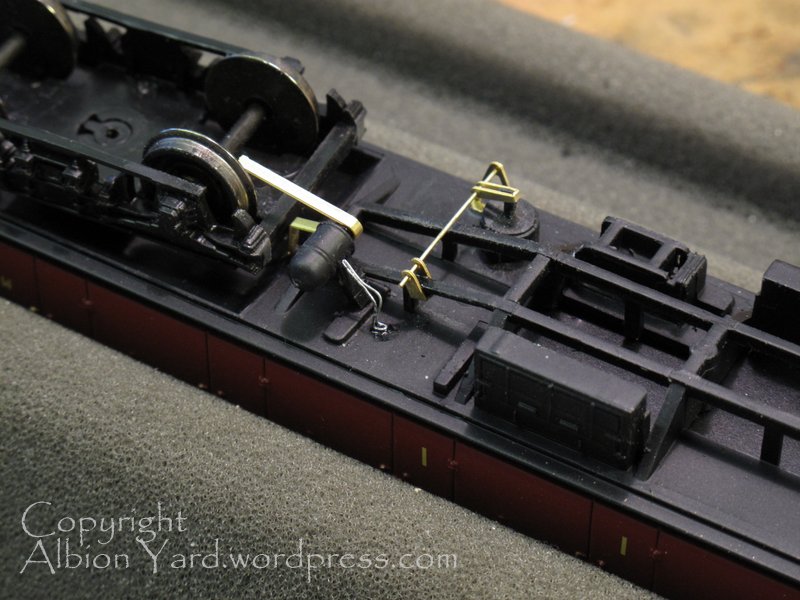
Basic hanging framework on the layout chassis
Most high street commercial printers have a variety of materials they can offer, but it took a while to find what I wanted. I worked out that to get a durable print with a degree of strength and thickness a commercial material should be where to start my search. The first break though I had was looking at curtain side truck canvasses. These had the strength and rigidity I wanted but as the cotton used as a strengthening weave showed though, there was an unwanted texture that would be visible. I’d almost exhausted the local printers in that none of them had the right material for the print, for the most part they were too glossy and thin. By chance I was visiting a friend and on the way passed a print shop at the roadside. As I had a few minutes spare I popped in to see what they had. It very quickly turned out I’d found the right place. John, the printer, was asking all the right questions, and didn’t seem surprised when I told him the application for the print. This was because in the past they had worked on theatre backdrops, so I knew we both had the same understanding of what I wanted to achieve. We quickly found in stock the material that had been so hard to locate, it’s a product used for exhibition displays and can roll up like a slide projector screen. It was matt white in finish and had a medium grey opaque backing. John showed me that it could have eyelets attached to it so I could hang it from a structure on the layout, which met the detachable criteria. So that was sorted, next job, the image!
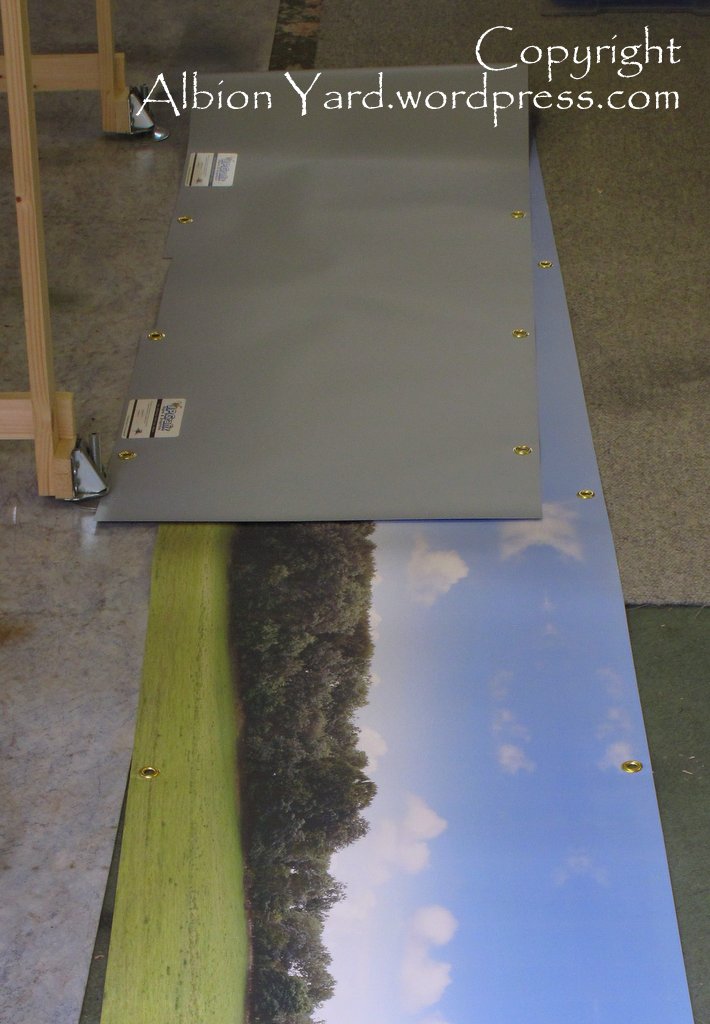
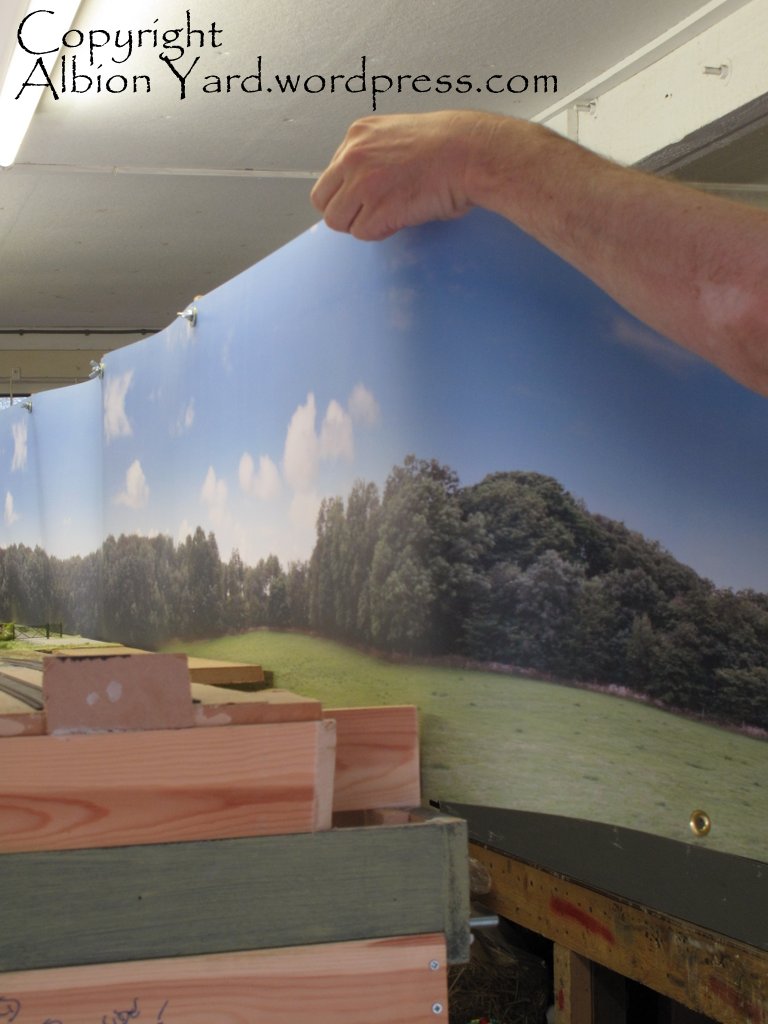
14ft of digital print prior to installation
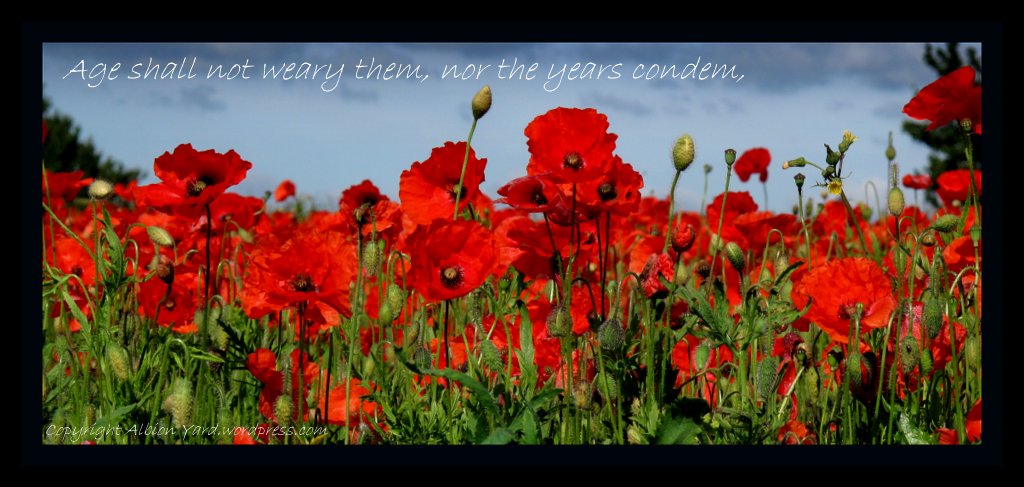
I’d been speaking at length with photographer and modeller, Chris Nevard, we both have similar ideas about layout presentation, and he kindly offered one of his images for me to try taken near Priddy in Somerset. It was a large panoramic image of a tree lined field which we worked out would stretch half the layouts length. It was taken on an overcast day so we mirrored the image and there’s very little in the way of visual clues in the shadows to see that’s been done. The greater majority of photo back scenes have too much contrast and this shows by making the back scene overpower the foreground, this then creates a visual imbalance and is as noticeable as a vertical join line.
Chris has done a little photoshop work on the image, adding a different sky and some blue tint over the whole image, this isn’t really noticeable just looking at the image but adds distance and depth by reducing contrast. You don’t need the range of digital skills that Chris has, many good printers will be able to help here, John, my printer was able to do some last minute digital adjustments before we went to print.
I’d now got my back scene image ready, and we printed the first test piece. I’d taken a small diorama I use for photography and a black locomotive to try in front of the test piece. The first result was a little disappointing, the colour being too dense, so we tried a couple of different test prints until I was happy that the colour density of the backscene matched the test diorama, when it did we were able to print the entire image.

Cutting scenery to ensure no square corners in the sky!
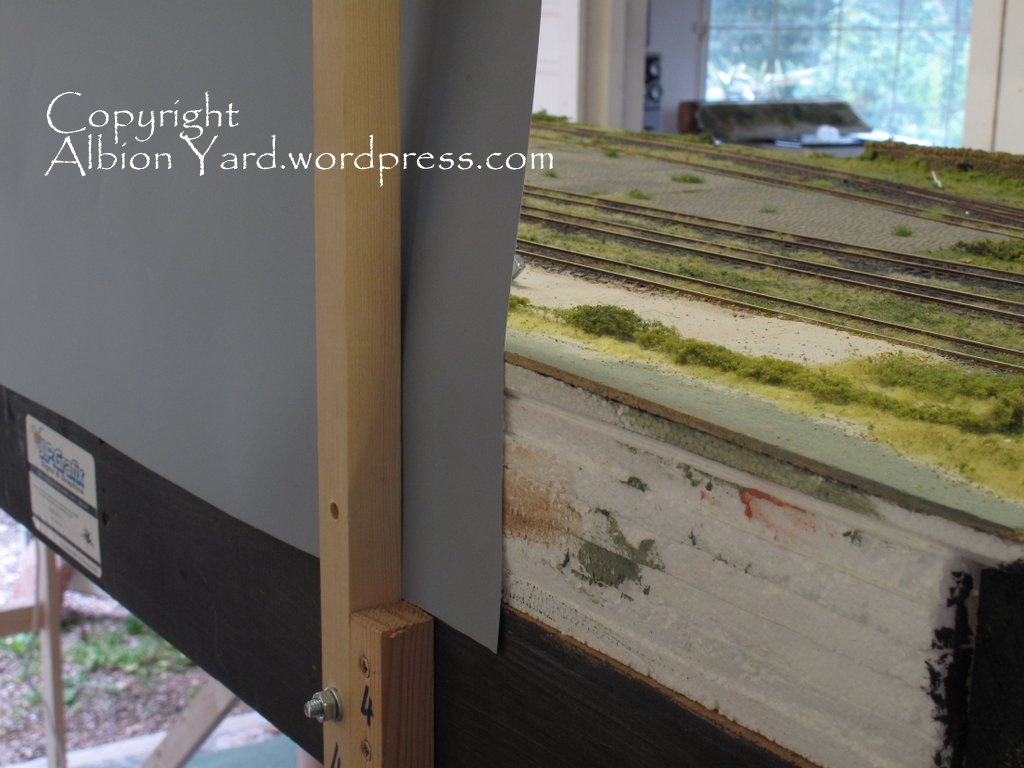
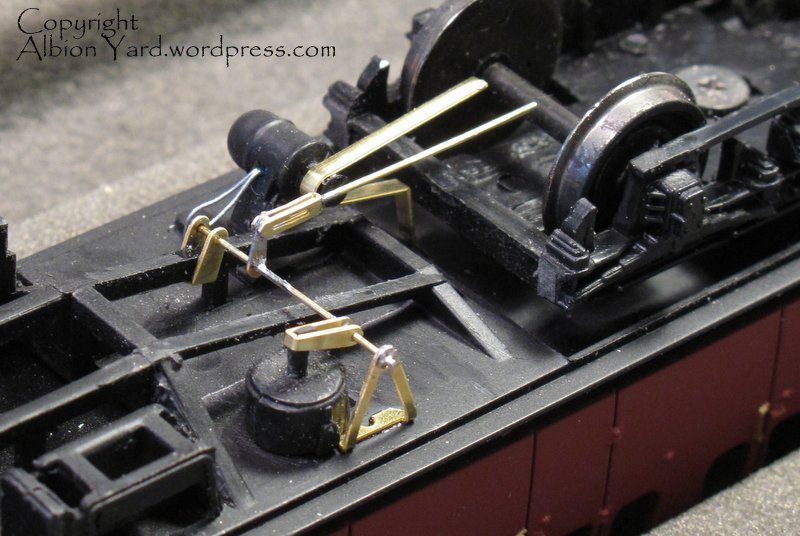
The stantions sandwich the print between baseboard and support
Whilst the printing was carried out I still had to work out how to mount the final image. As John was inserting eyelets for me he needed to know where to put them. The image would wrap around three sides of the layout, so I divided it up into 60 cm spacing making sure none of the eyelet alignment occurred at baseboard joints or at structural beams. It took a while thinking of all sorts of contraptions but the simplest idea once I got it was the easiest to install and make functional. I made detachable stations out of 2cm square stripwood leaving the layout looking like an empty bogie bolster without the back scene. Keeping them vertical was simple, they butt up against an alignment block fixed to the layouts side.
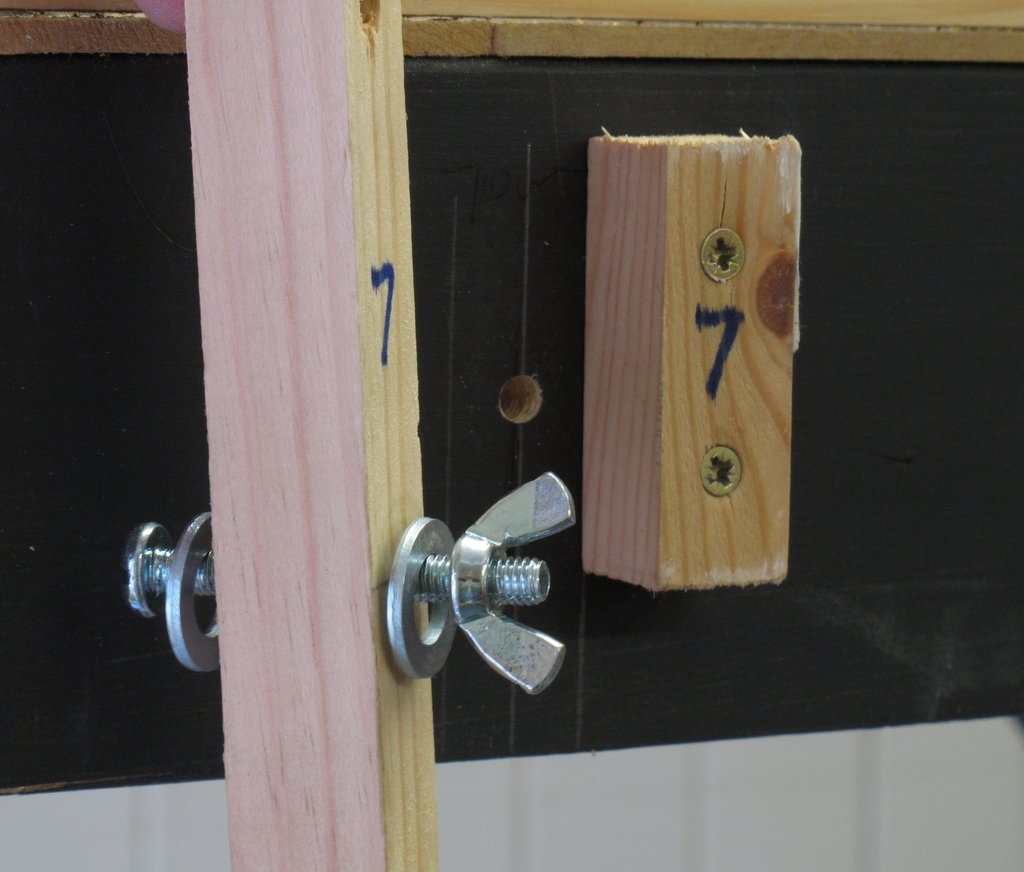
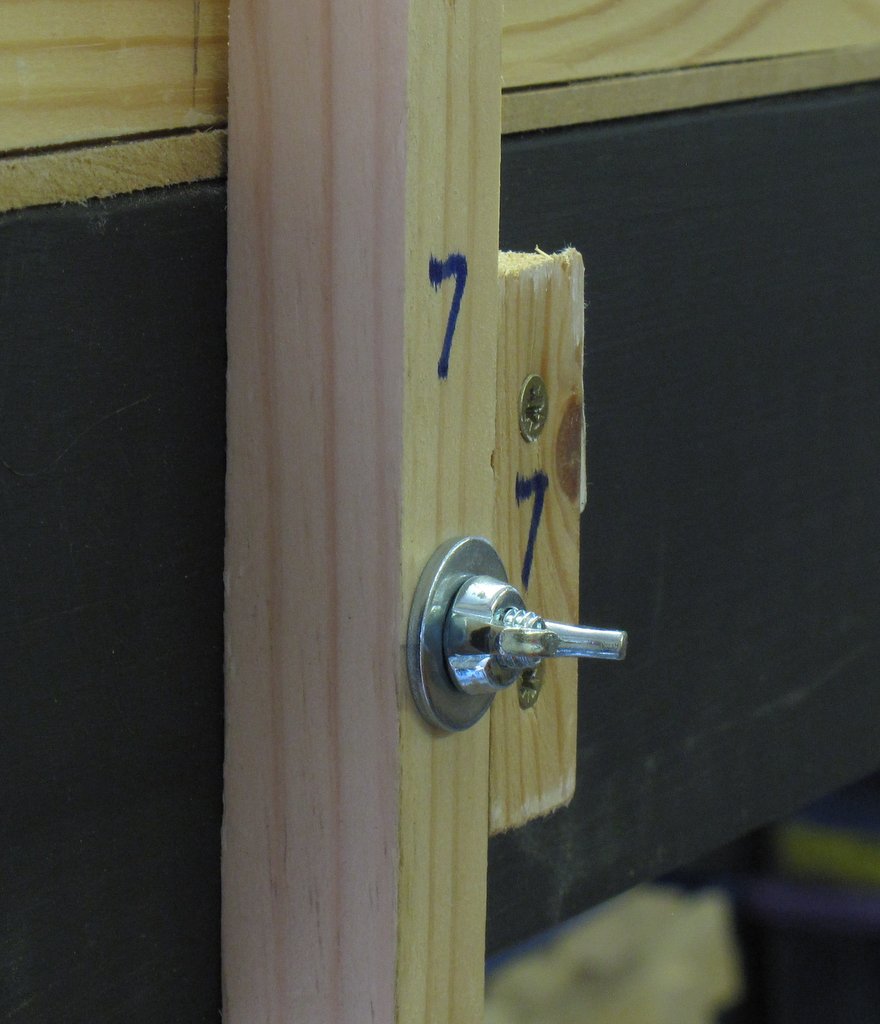 The top mounting for the image was a simple coach bolt, penny washer and wing nut. When the image came back from the printer the first trial was really interesting. The eyelets worked as I intended. The image can be unrolled and loosely fixed one station at a time. Even when it’s loosely hung it makes an astounding difference to the overall appearance. I started at the middle of the layout tightening each coach bolt as I went. The coach bolt is a smaller diameter than the eyelet, so on each station there is vertical and horizontal adjustment available along the entire layouts length. This allows the back scene to tighten and removes any waves or ripples that are there before tensioning. At the corners the material naturally curves around whatever former you choose, immediately removing the square corners so often seen on layouts be they home or exhibition based.
Installing the backscene
The layout back scene is an elongated U shape and final fitting can be made trimming the edges of the image to suit your requirements, the only trimming I did was at one corner to allow the images to sit level on the baseboard. I then designed my fascia to join the ends of the layout and image, making a letter box view presentation.
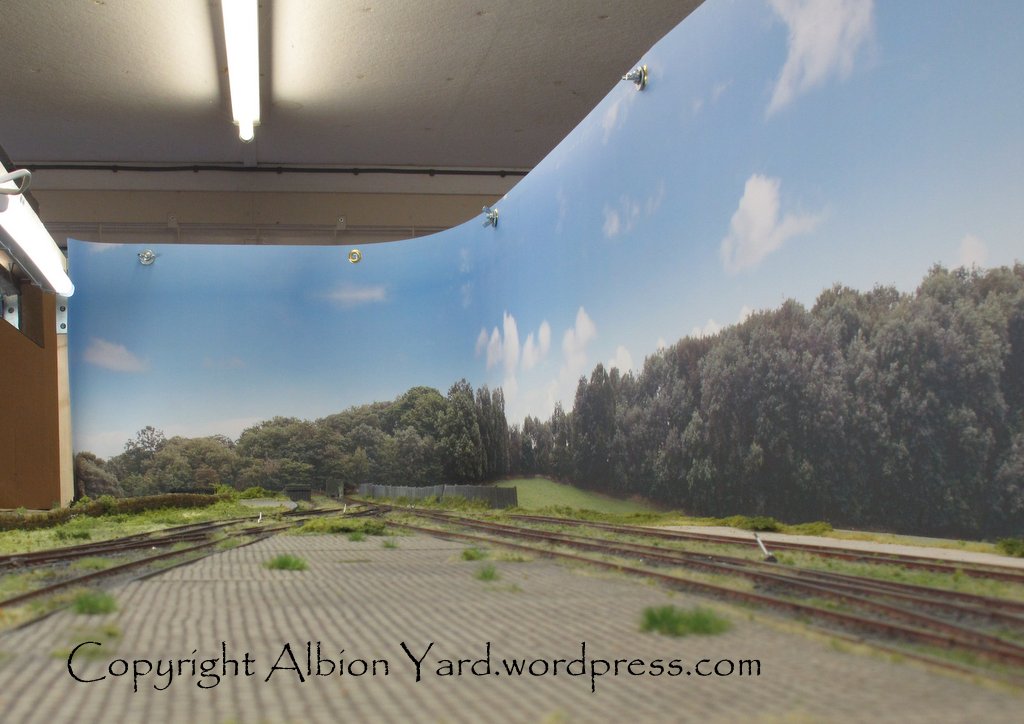
From the inside, note little shadow on backscene
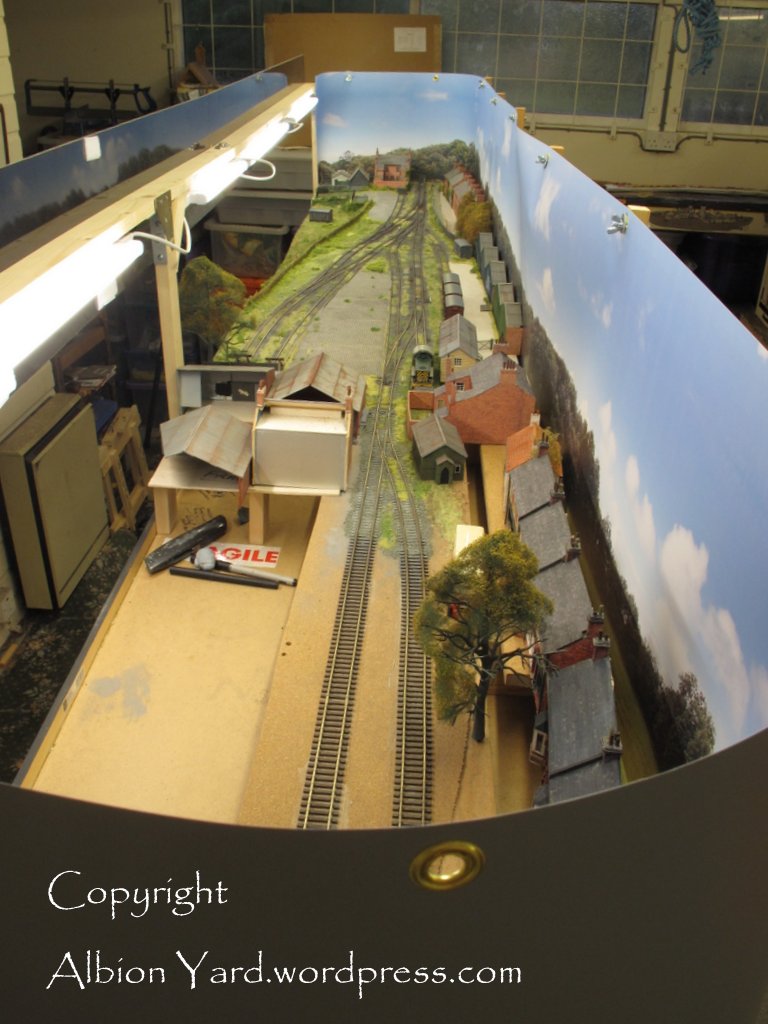
Overview of installation and fascia’s fitted
As the layout is operated from the front the fiddle yard is view blocked with a simple curtain which can be accessed when trains are required to be changed. The lighting units are fixed on the rear of the fascia and are simple 20w kitchen under lighter units, these are powerful enough to light the whole layout and the back scene bounces light back onto the model giving an even light across the whole scene. Once I’ve built the layout structure, I then place buildings and scenic accessories as required, I can change some of these around too subtly altering the appearance if I wish to.
One thing I’ve not mentioned so far is the cost of the project. Including materials, printing and manufacturing the whole back scene project cost approximately £175, which may seem a lot. However its less than the cost of many DCC sound locomotives, but gives a superb one piece seamless back scene, customised to your specific layout. Is all this too much hard work? I don’t think so for the ultimate effect it has on the overall appearance of the layout. If you come to the show make you look at the layout from the left hand end, this is the point where the backscene, view blocking and hidden fiddle yard comes into its own, and you get the ‘long view’. Judging by the positive responses I have both on line, but more so when people see it at shows, it really does make an impact. The ladies seem particularly taken by it, so if the traditional route of flowers or chockies isn’t working for you, show them your back scene!
Don’t forget of course that this is a hobby, it has far more nice people in it than unpleasant sciolists. I hope at the weekend to see plenty of the nice ones, rather than those who are as thick as two short shunting planks.


You must be logged in to post a comment.