


It’s funny how this little engine has been quite the motivator.
Started as much as eight years ago, likely quite a bit more, but I can’t really remember it’s been so long! But this one for some reason just needed to be finished. Other kits ‘meh!’ And have been sold on incomplete or unstarted. This one though bagged to br done. Possibly because it was a starter kit back in the day, so if you didn’t finish it, you weren’t trying hard enough. Since completing it though it’s spurred on a good few short tasks. Subsequently a 24/1 conversion on a Bachmann 24 has now been completed and there’s a Heljan LNER 02 going through weathering at the moment too. And Shelfie3?, well that’s ticking over. Track plan and operations are sorted and working through required stock has proved interesting. It’s still not ‘landed’ yet though, the geography vs stock/location not yet giving an immediate feel that it’s right. It’s the sort of point where it’s probably better to put it away for a few weeks and then revisit it. In the meantime Shelfie2 gets its pictures taken in a week or two’s time, and there’s a few shelf wagons to complete before then. But it’s mainly due to completing the 02, suddenly the man cave shelf queens are now fair game to complete or move on. That’s a good thing!
We’ve all got them. Projects that get started and then ‘mature’…. I can look around the man cave and see an almost embarrassing number things that have been started and are yet to reach conclusion.

This one above is just such an example. Starting out as a standard class 24, it had the roof panels changed, Brassmasters resin headcode boxes fitted, and replacement fuel and water tanks from them too. Then it sort of stalled. I’d made a painting error too, giving it a full yellow nose whilst leaving the body side skirts attached. Having realised this it then sat there, in the ‘one day’ pile.
Here’s another from a few years back, a Craftsman 02 kit, it’d just been slowly ageing in a drawer. As it matured, I’d suggest my metalwork skill regressed, and not long back I realised that when taking far too long to solder a simple joint. Whilst not the end of the world it did make me sit up and think I used to do this so easily, and not that long ago. Most of my shelf queens are there due to temporary pauses in the work flow that have got a bit less temporary as time marches on. The 02 was very useful in a way, it gave me a kick up the bum to get it completed, the only items missing were transfers, and me! Much like two of my earlier posts how-to-gain-weight and fifteen-minute-heroes/ a large part of the shelf dwelling comes down to time and using it effectively. I’m not sure there’s a silver bullet solution to it, but I’d stopped the 02 partly or mainly, (I’m not sure which), because of the transfers, both wasp stripes and BR logos.

Retrospectively there was nothing really stopping me continuing, and that only really dawned on me when I got it to the position above. However having decided it wouldn’t stall again, I ploughed on and bought the transfers, making sure the workflow wouldn’t have an excuse to cease. There’s an interesting side story to the transfers which I’ll return to in the future too.
It was a real conscious effort not to pick up anything else in the meantime, and over the course of a week I got the core of the work done. It now just needs lamp irons and marker lights to complete. What I’ve noticed is that’s beginning to annoy me, so this week it gets completed. Already another shelf queen, the 24 at the top, is on the get it done list, everything was to hand!
Perhaps the secret of ridding us of shelf queens is that simple, get all your shit in one sock before you start!
Nope, not the arena. This one..

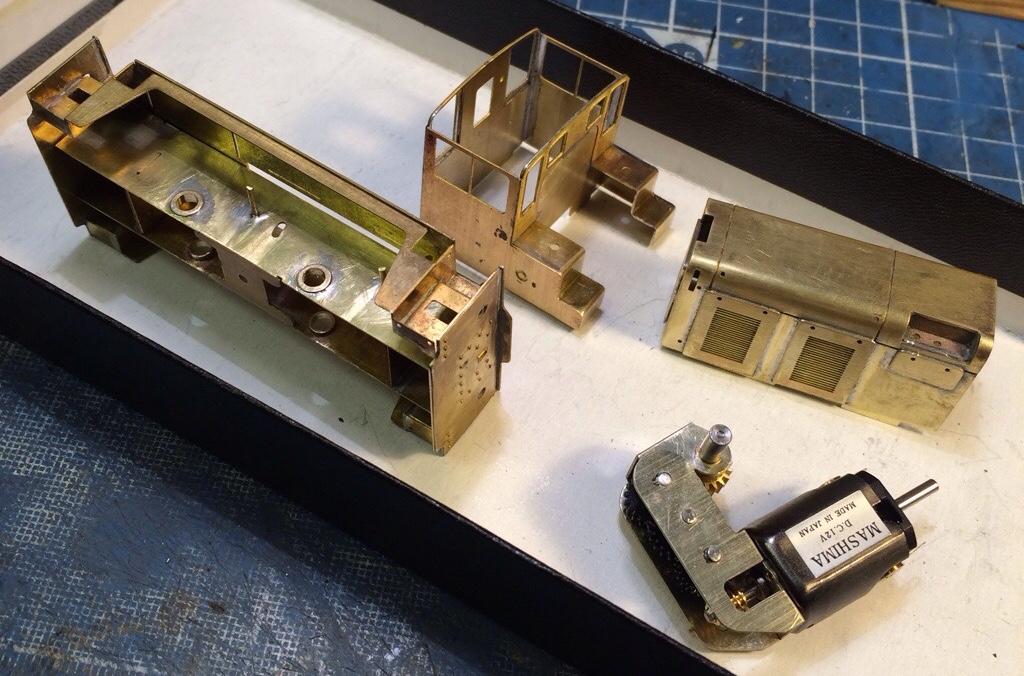
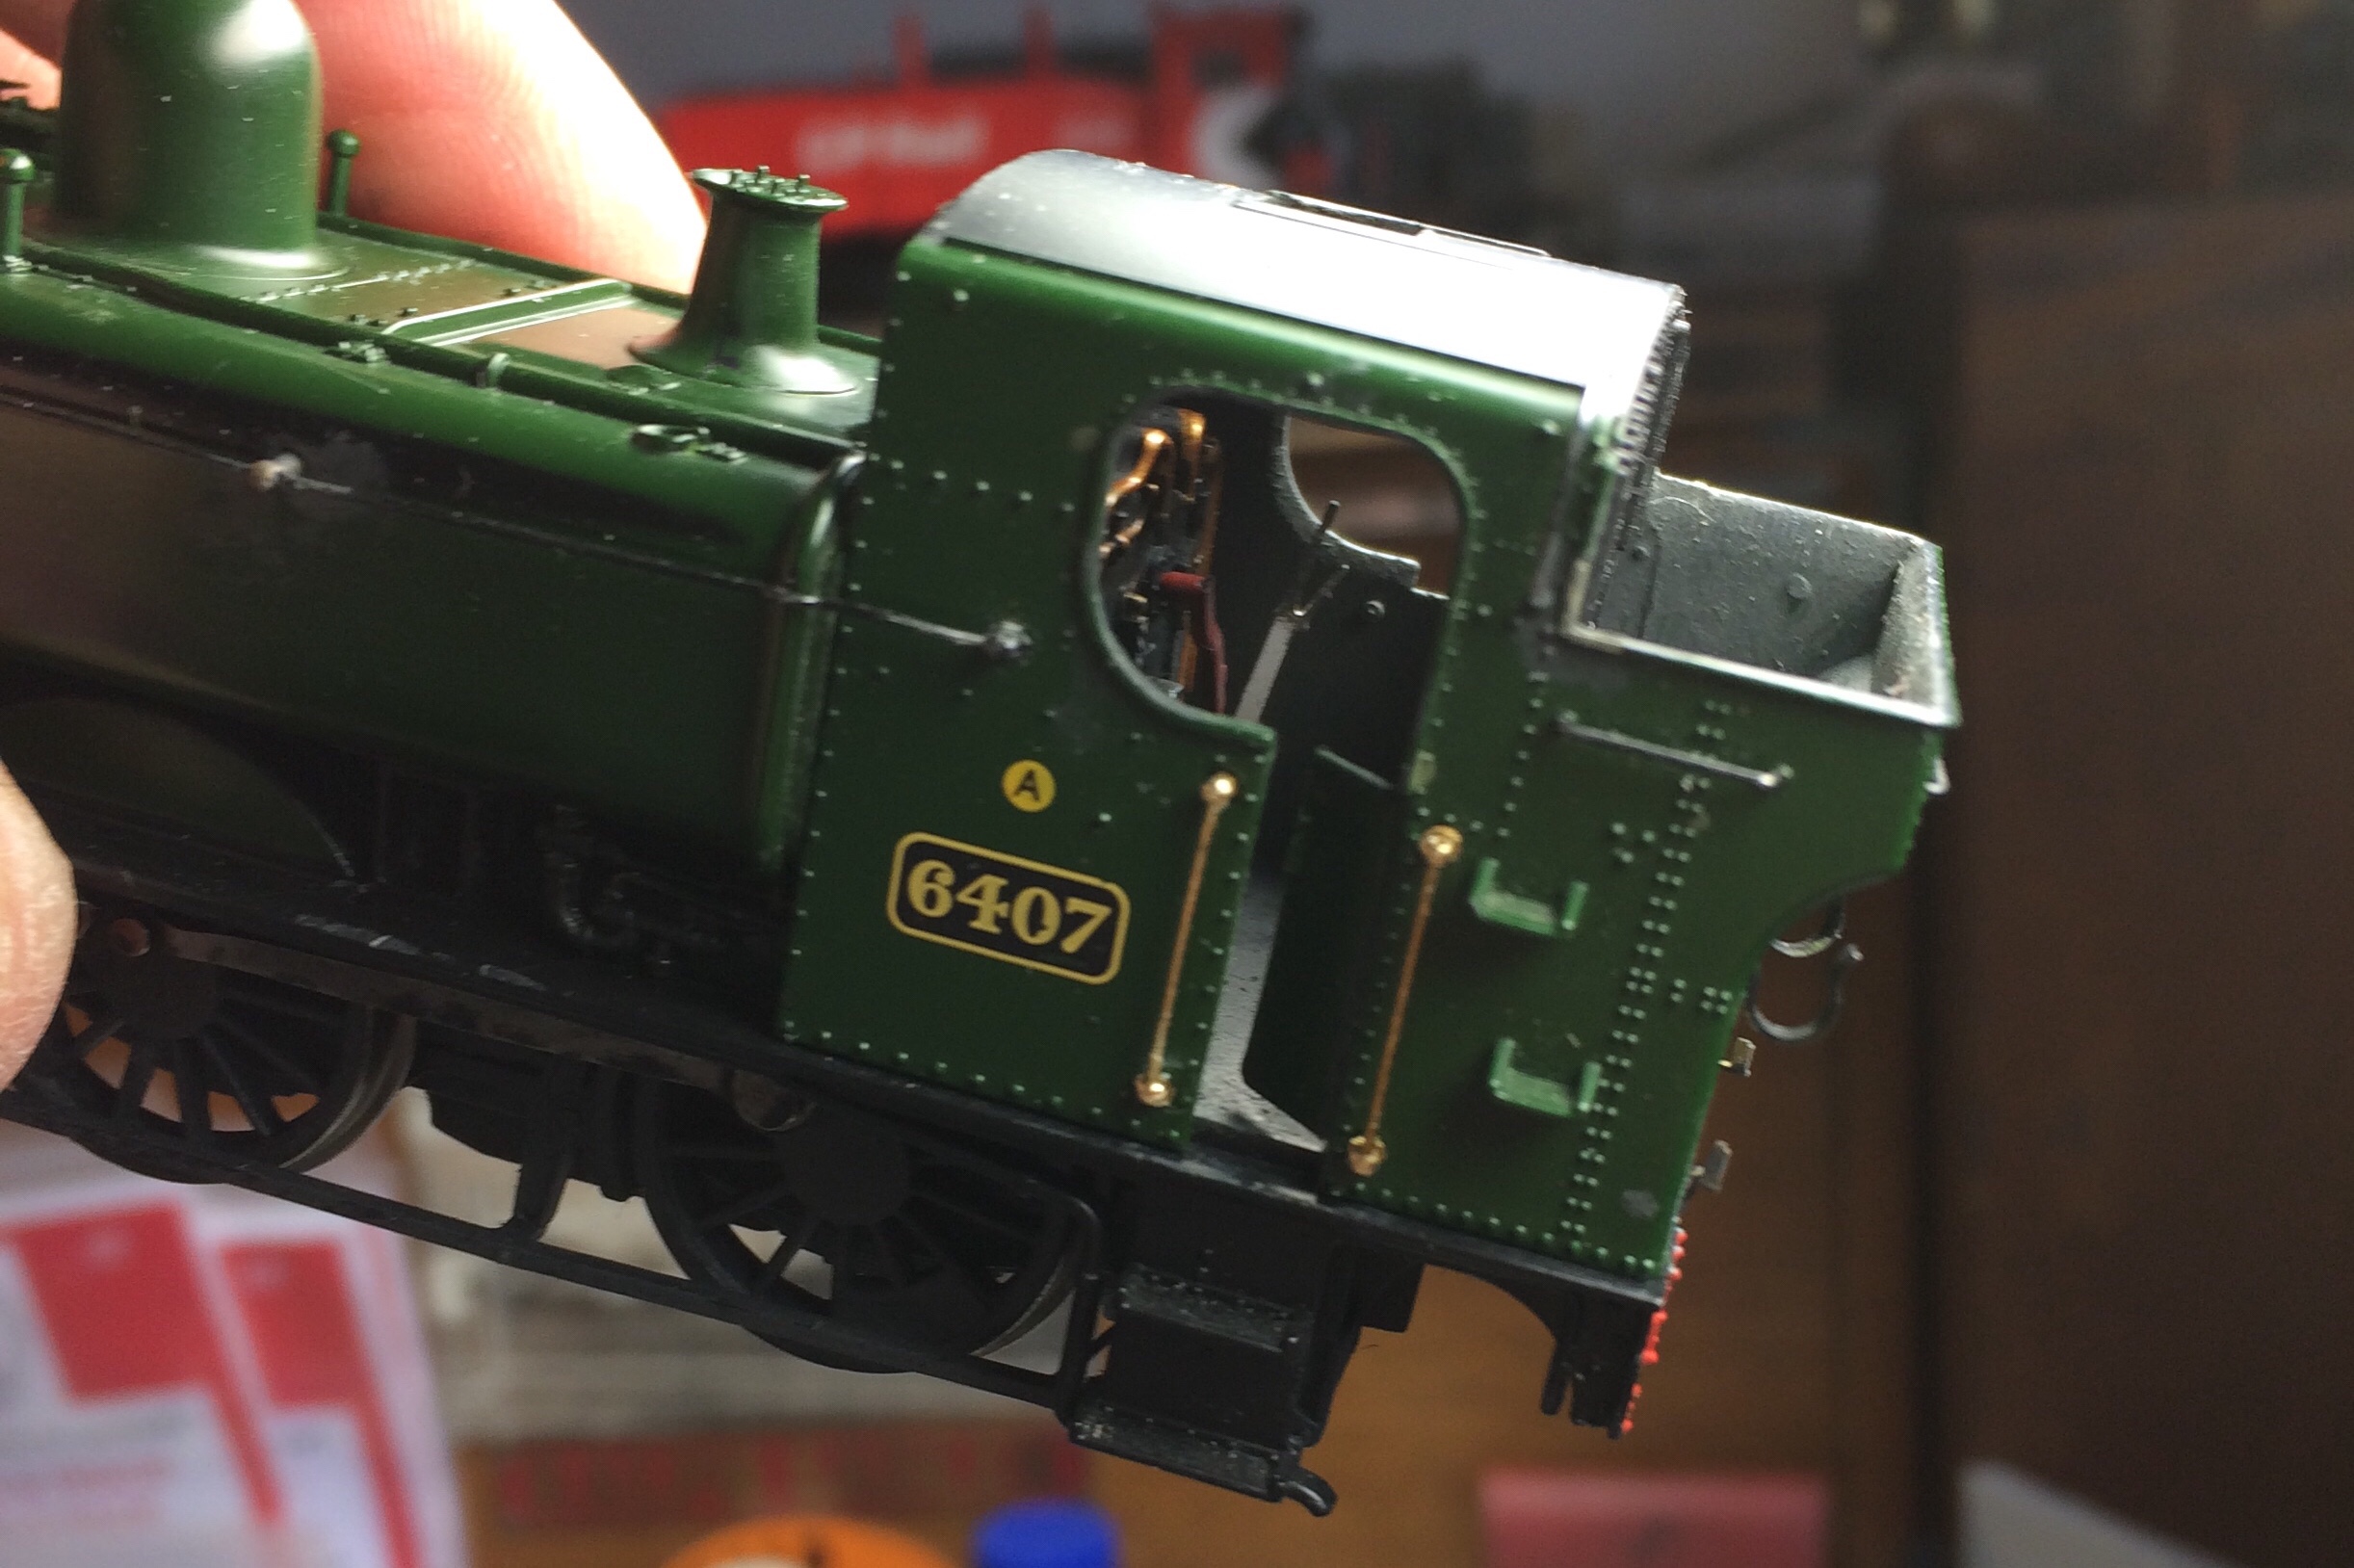
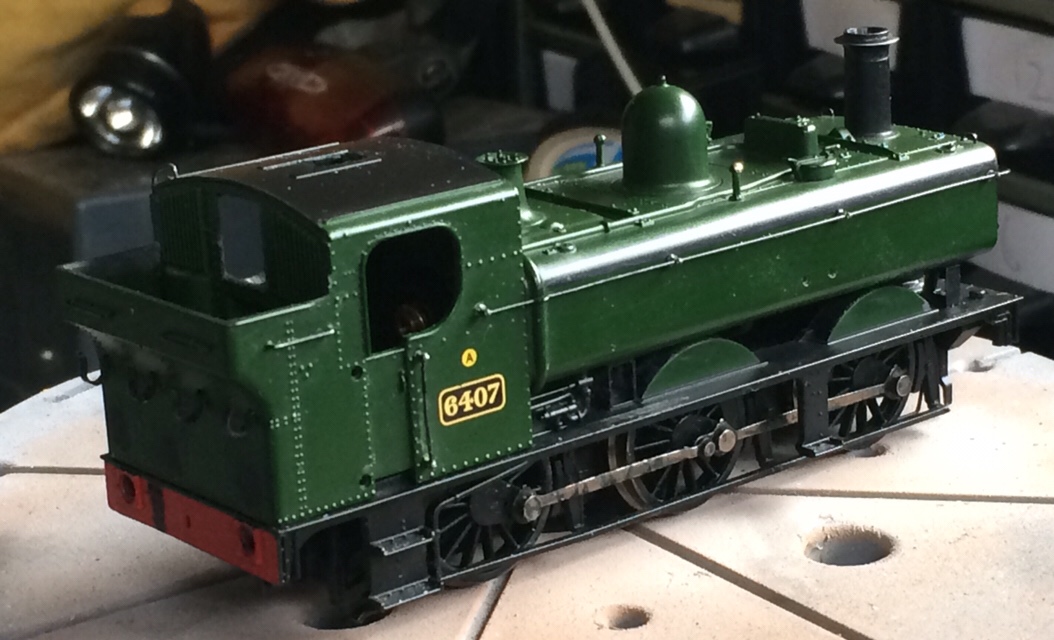
This is one of those escapees from the shelf of doom. It’s been kicking around for quite a while, and last week I decided it’s about time it got finished.
It’d stalled at quite an advanced state of build, but in the way these things go, that was irrelevant.
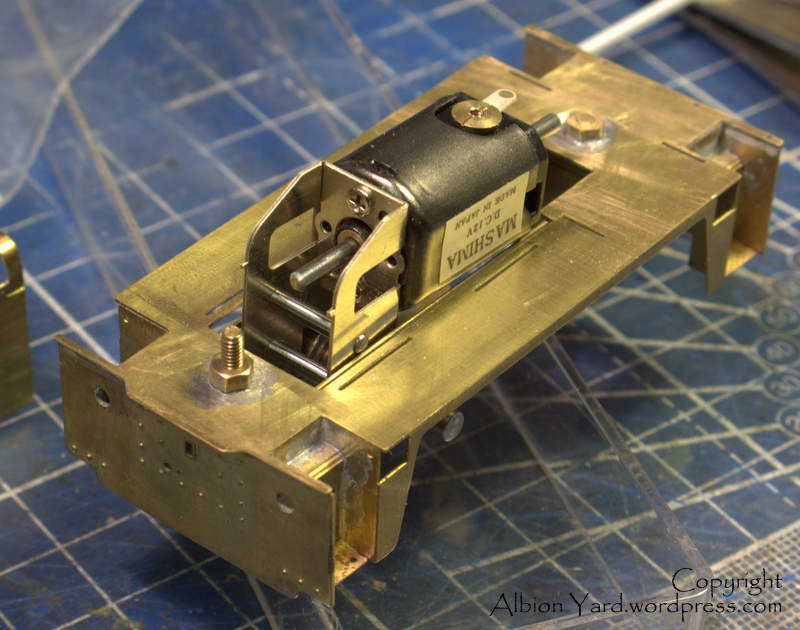
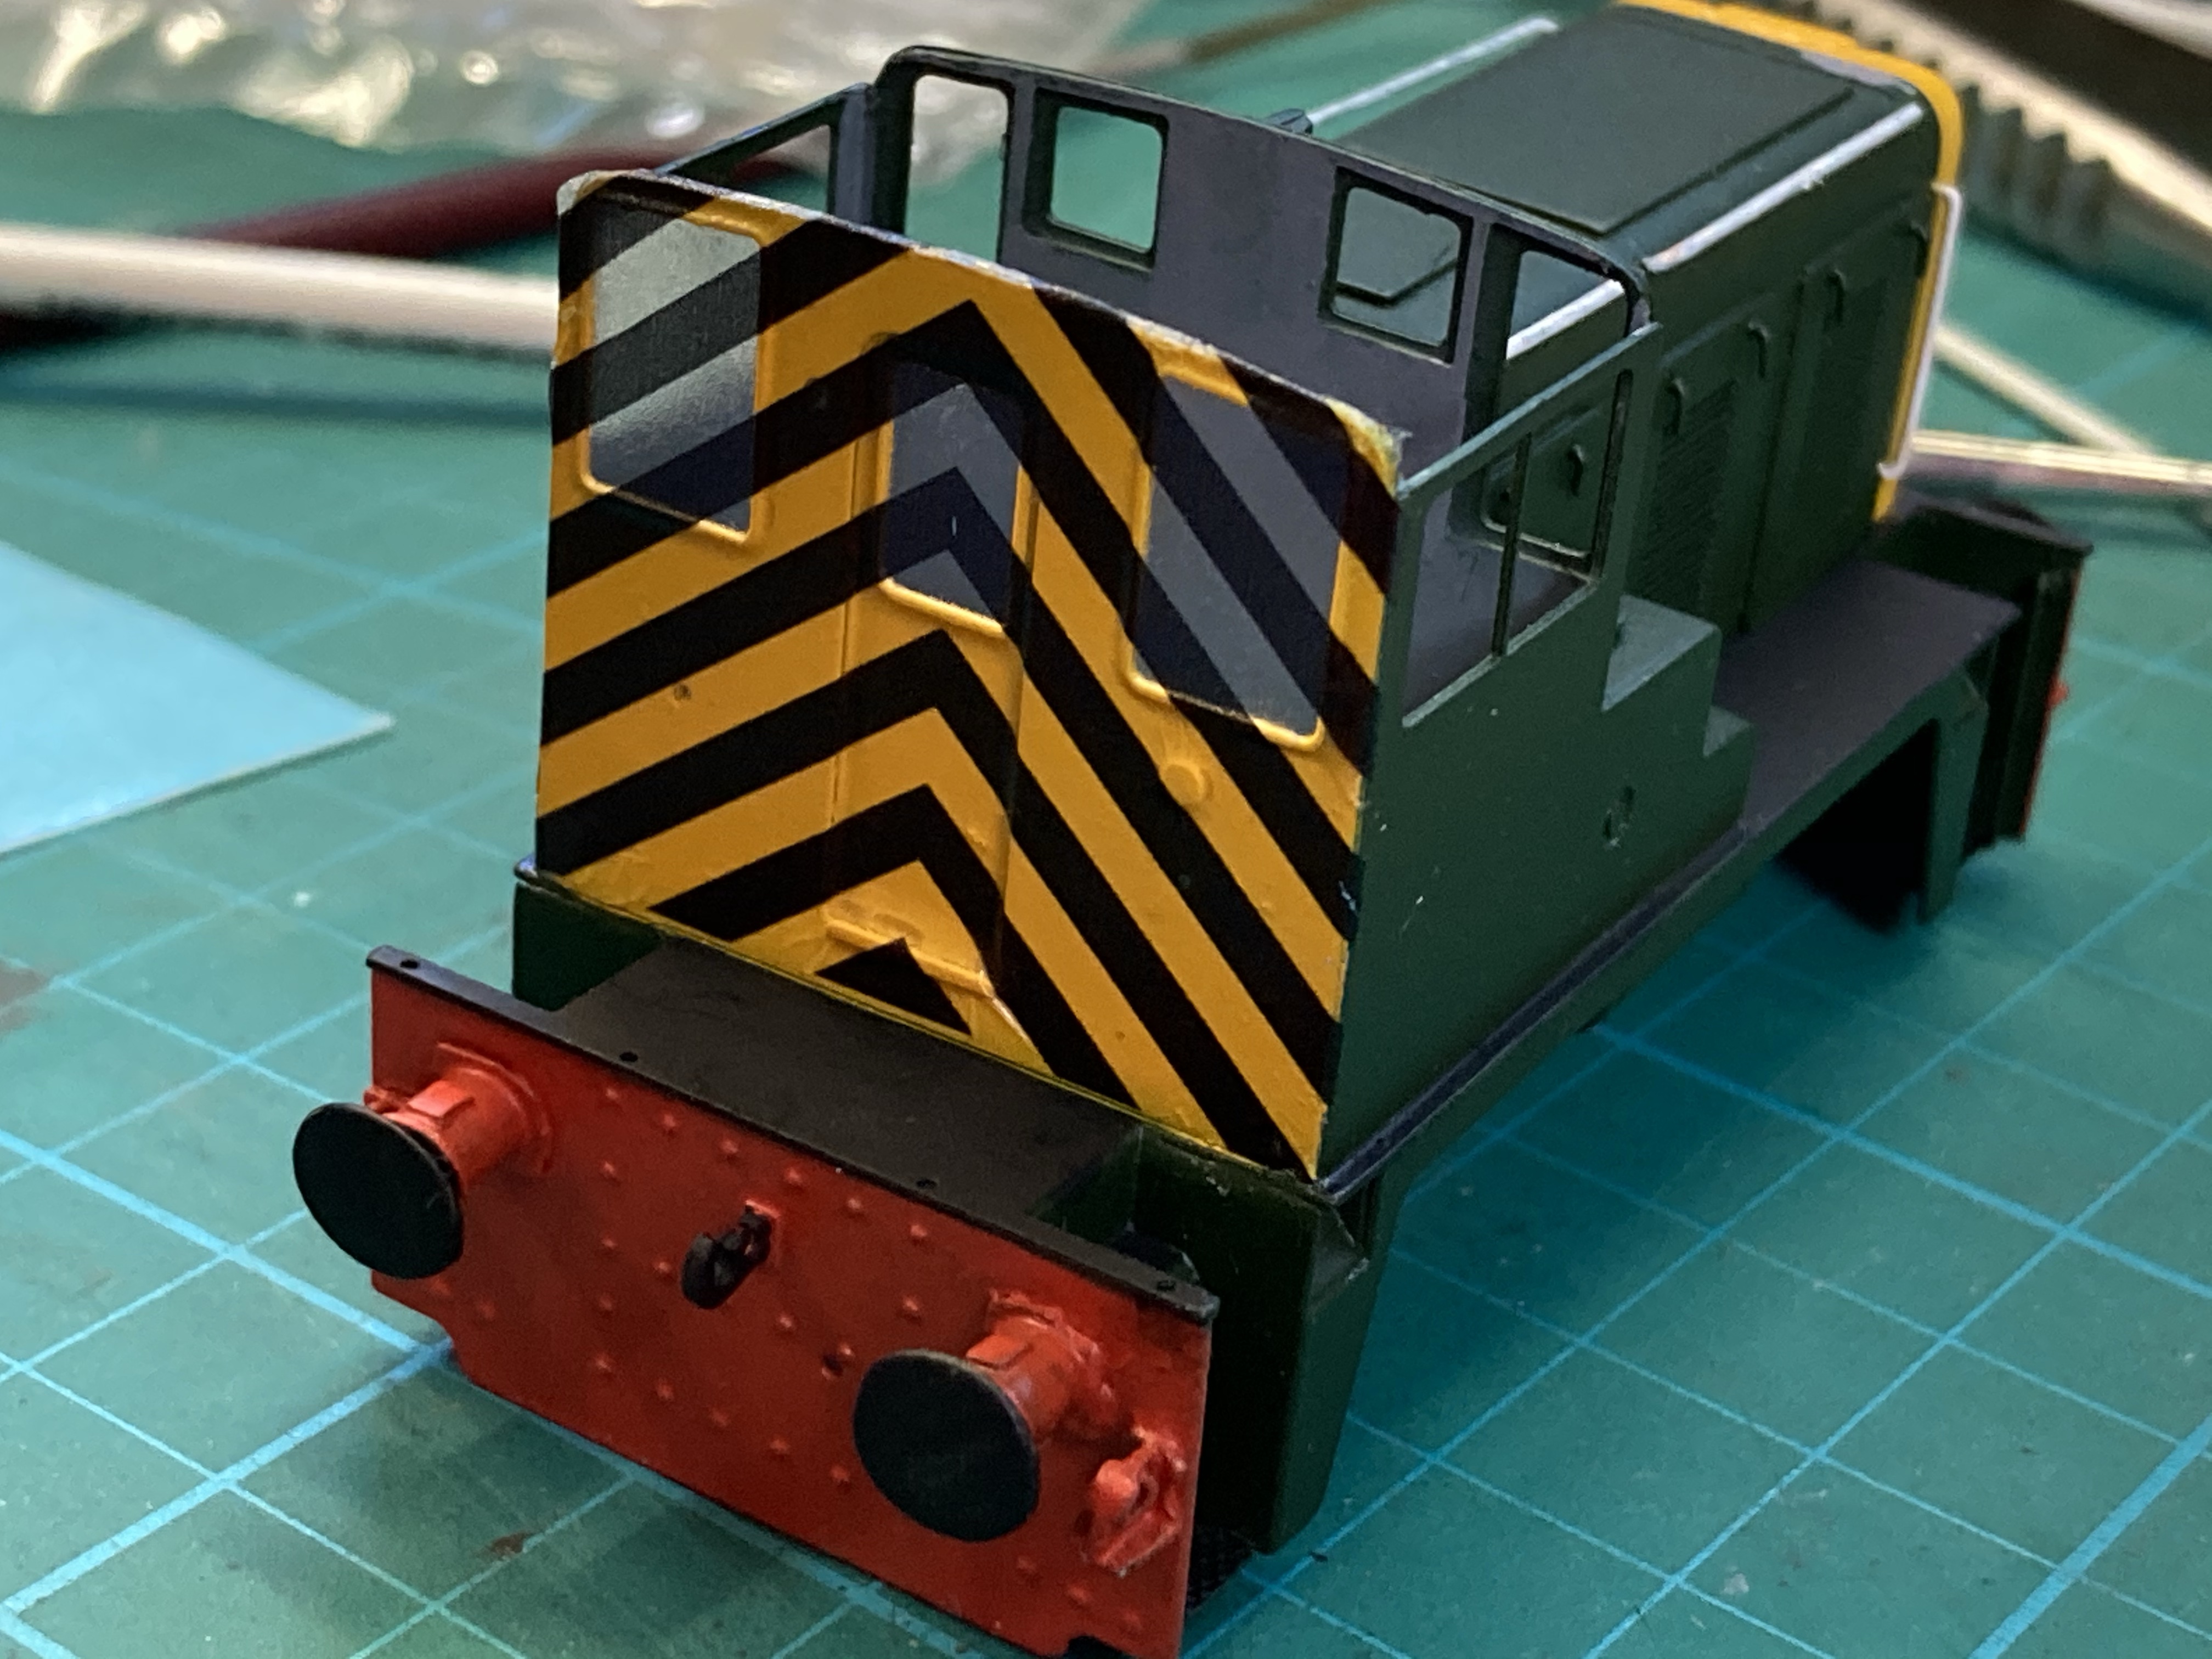
What was relevant was the stall was just that, no particular reason why that I can recall. Back in the 80’s (ffs!), these were sold as introductory kits to etched kit building. For good reason too, simple and accurate they can be made into a nice little model, so getting back into it was easy.
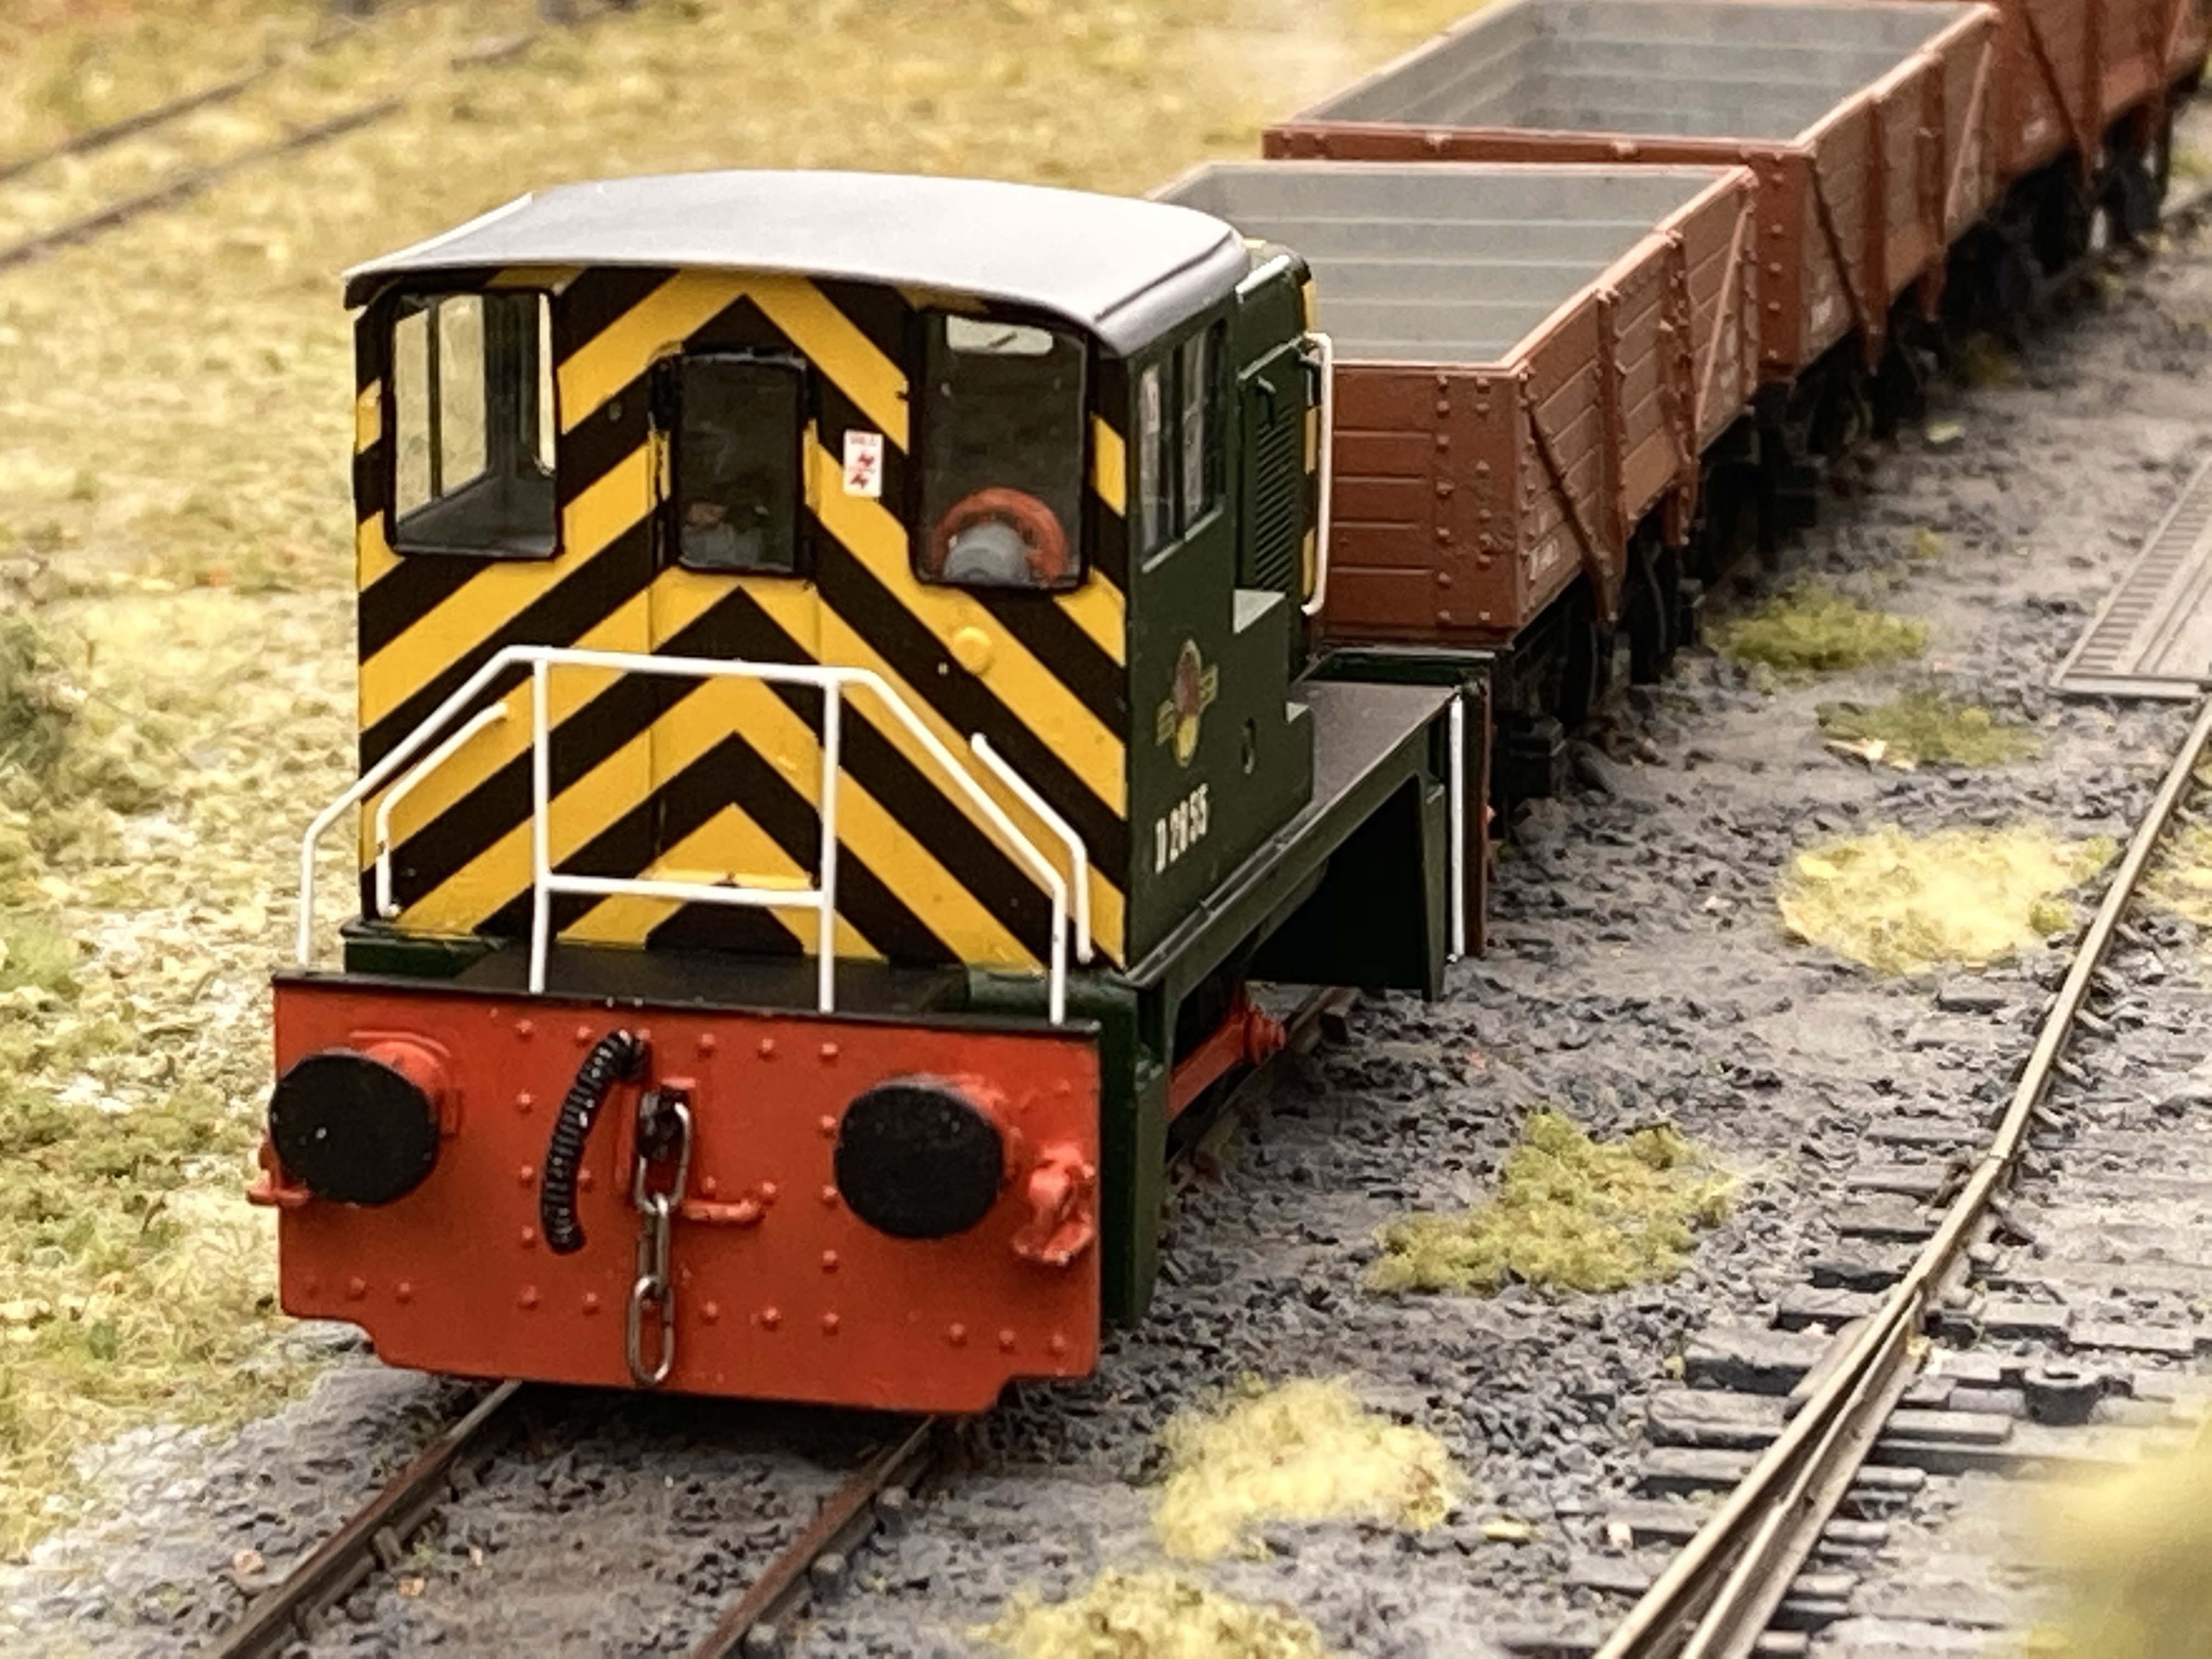
It’s a long long time since I’ve built an etched kit, but this has done exactly what we used to sell it to do. To be completed and to provide motivation for more complex builds. So whilst I await the final decals to complete this one, the maturing drawer has been rummaged through, and a couple of likely suspects identified.
Job done!

 Hornby Prairie
In through the man cave doors this week from Hornby is their latest release of a GWR 61xx design. The original Hornby 61XX model was the 1970’s Airfix model, well thought of in its day, and one that responds well to some detailing TLC, however this is a completely new model with no connection in any of its components to that earlier version. One of my best friends reports he’s just about completed a makeover of an Airfix Prairie, so obviously this arrival is of moderate amusement to myself. Him? not so much…
The model under review in this article is as follows:
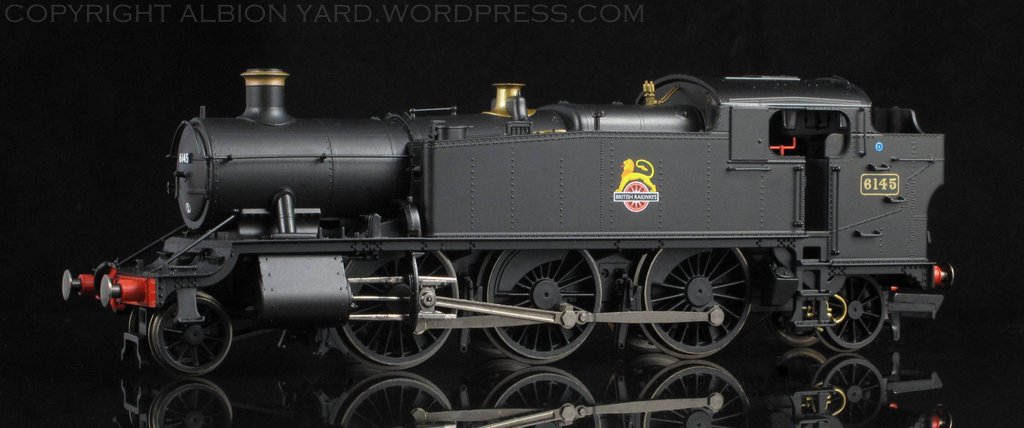
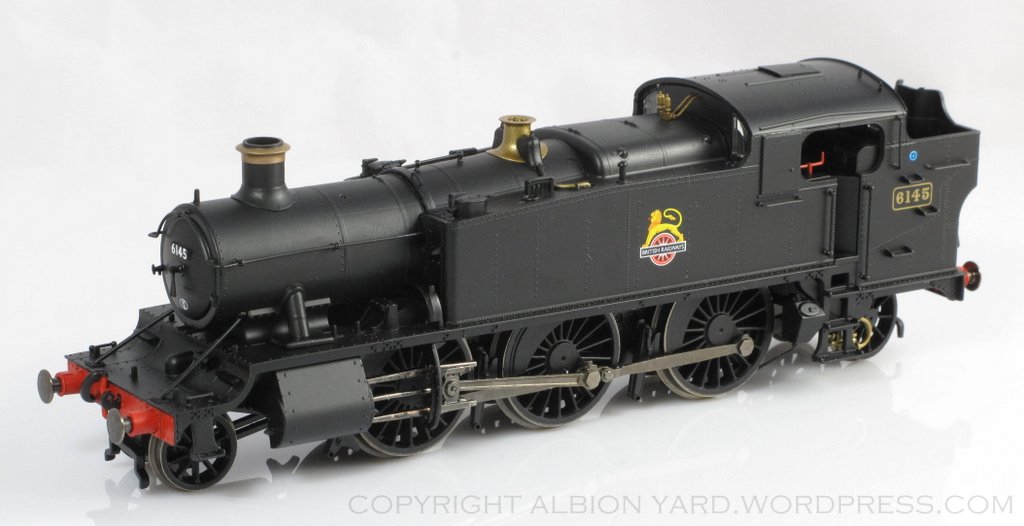
61xx Hornby Large Prairie BR Black No.6145
R3723 / R3723X
LOT01-PO10005199
R3723-03-525
 Hornby Prairie
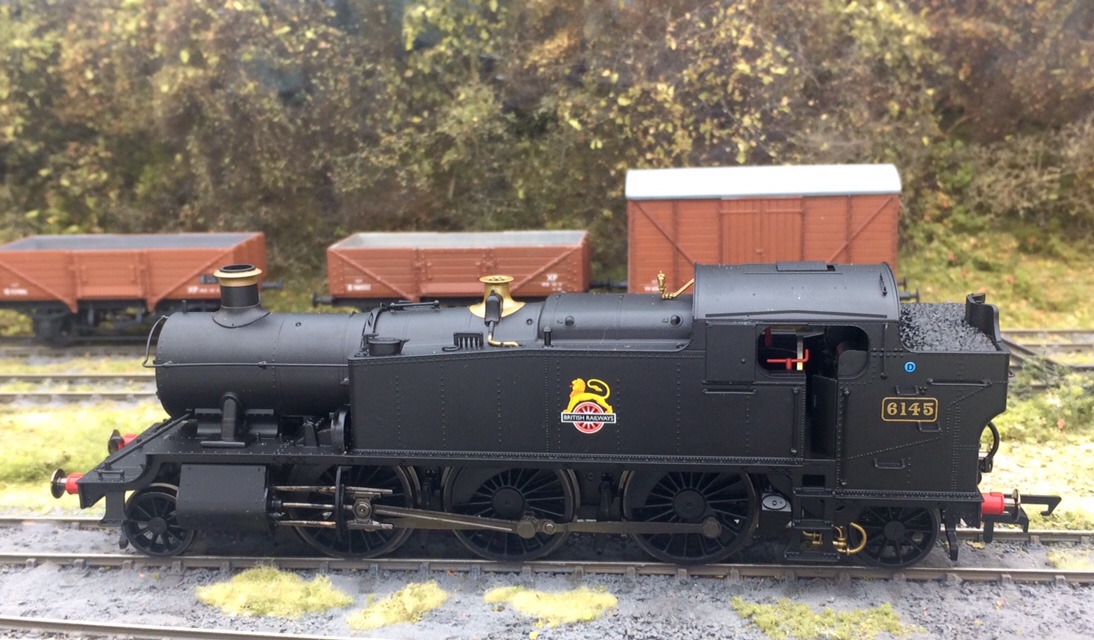
The prototype 6145 was built with a batch of other locomotives 6130-6159 at Swindon during 1932-1933. The locomotive 6145 was a London Division engine based at Reading, Old Oak Common, and Oxford during the BR era. The model comes in standard packaging in a cardboard outer carton with a vacuum formed plastic cradle for the model. The space inside the cradle indicates that the cylinder drain cocks and brake pull rods should be able to be fitted and left in place. These are separate components supplied with the model. The locomotive arrived with no items damaged or missing in transit.
 Hornby Prairie
The superstructure is dimensionally correct, cross checked against measurements from a couple of sources, the neatly moulded plastic body with joint lines all discreet. Two parallel lines are faintly noticeable under the strongest of natural or photographic light along the boiler top from the smoke box to the tank front. The prominent boiler band and tank strap was sitting slightly proud of the boiler by a few thousandths of an inch. A touch of glue will sit it tightly to the boiler outer face. The front steps are splayed outwards, whereas prototypes are angled inwards. This is clearly to give adequate clearance to the leading pony truck. It isn’t immediately obvious and the subterfuge largely works.
 Hornby Prairie
The tank top is correct for 6145 with top mounted lubricators. Not all 61xx’s had this configuration so choose carefully if changing the number, or remove them if appropriate. NB. if you remove them carefully they may be useful if doing a 64xx with the visible lubricators abeam the centre of the tank. The brake pull rods are included in the details pack and are a simple fitting process, a minor omission noted are the sanding pipes for the leading drivers, again hard to see on the prototype so a practical step to leave them off in my opinion. For these London based engines the London Transport (LT) trip cock is missing. These were fitted on 61XX class London engines for working over electrified lines, and generally removed when engines located away from the London sheds. The trip cock is mounted between the centre driver and the rear brake blocks. No facility is shown on the model for fitting this so it’s reasonable I feel to assume it won’t be fitted to 61XX’s in other liveries. This then allows the same chassis to be used for other class variants with a saving on tooling. It is a notable omission, but taking a pragmatic view perhaps better left off, than included.
 Hornby Prairie
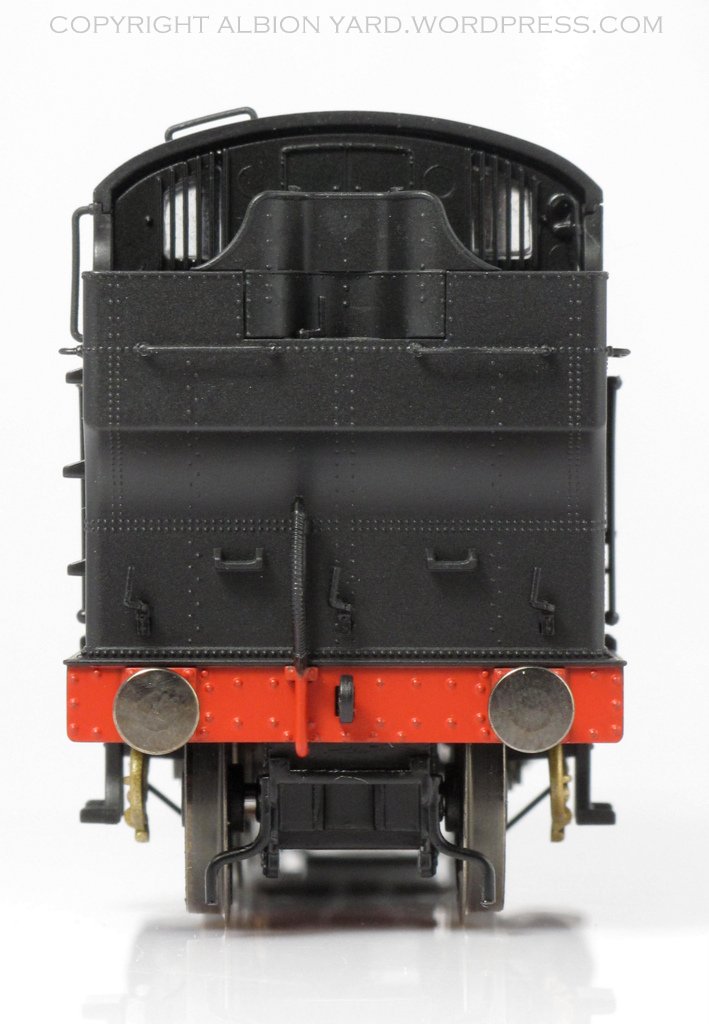
The tank front steps varied between a ‘high’ fitting, correct for this number, and a lower setting around half the tank height, another detail to be mindful of if swapping the identity. The high fitting just beneath the boiler handrail is the more common. The cab handrails and roof grab rails are all in the correct place and lengths for this variant. The same for the firemans bunker steps, these do exhibit a variation but this model has a very common configuration, (correct for 6145), which will be helpful for any identity change. Cab doors are fixed in a half open position and the top roof vent slides, allowing additional light into the cab. The cab roof is firmly fixed and placing crew accurately in this one will be a challenge, I’ll likely do a breaking and entering job later.
 Hornby Prairie
The bunker coal load is removable leaving an apparently correct shaped internal bunker. Underneath the bunker is space for a DCC sound speaker when fixed to the chassis. The livery is an excellent satin black finish, the printing being sharp, opaque and legible. The Route restriction marking (blue disc), is in an uncommon position on the driver’s side of the bunker, the fireman’s side marking is also in an uncommon position, but less so. That’s difficult to explain, take a look at drivers side images of 31/41/51/61/81XX and the comment will make sense. The chimney and safety valve bonnet appear to be separate fittings, and of note there’s no evidence of any glue or paint overspray on either. The copper chimney cap and the bonnet are in subdued, appropriate, metallic colours.
 Hornby Prairie
Both trucks, front and rear are cast metal, including the guard irons which are integral to each casting.
The Chassis
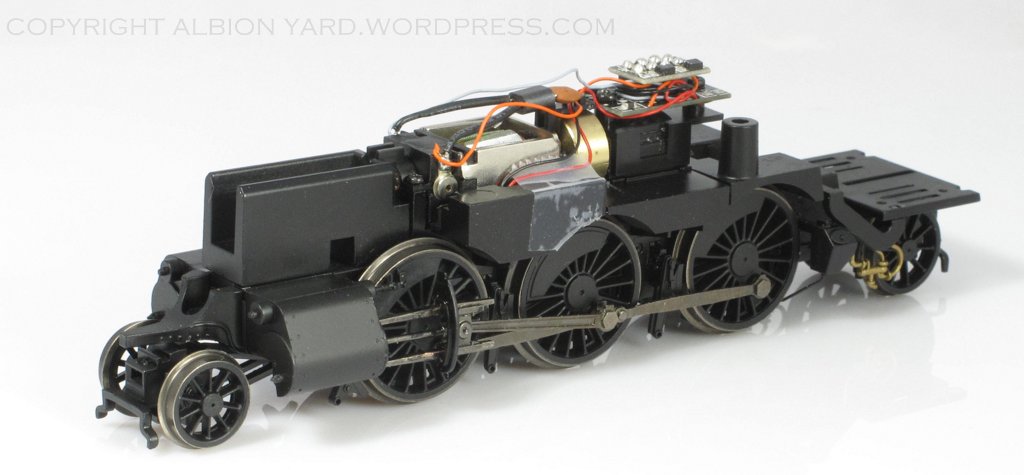 Hornby Prairie Chassis
The chassis is a cast metal block, with plenty of weight, the access to which is very simple, four screws, including the removal of the front bogie, and the chassis assembly drops easily away. Sprung fitted parallel buffers are fitted to the body, clearance slots for the shanks are included in the chassis for easy removal. The motor is five pole with a brass flywheel, and mated to a vertical gear train to the centre axle. The resulting drive is smooth across the whole speed range and no cogging under load on a downhill gradient. Back to back measurements on all three driving wheelsets were at 14.5mm as were the pony trucks! All phosphor bronze pickups were in positive contact with the drivers, no electrical issues have arisen.
 Hornby Prairie Chassis
Driving wheels have correct shaped spoke profile and centre hubs, this includes the balance weights, and solid section between the crankpin and wheel rim. Clearances look tight for those who may want to gauge widen this model particularly behind the leading crankpin and crossheads. The driver’s side crosshead should have the triangular vacuum pump connecting arm bracket, but this is missing. It’s hard to see on the full size version so not a huge omission. The motion has been chemically blackened and has a nice subdued finish to it which matches the overall chassis and wheel tread colours. Connecting rods are straight with no joggle in them to make OO clearances ‘work’.
 Hornby Prairie Chassis
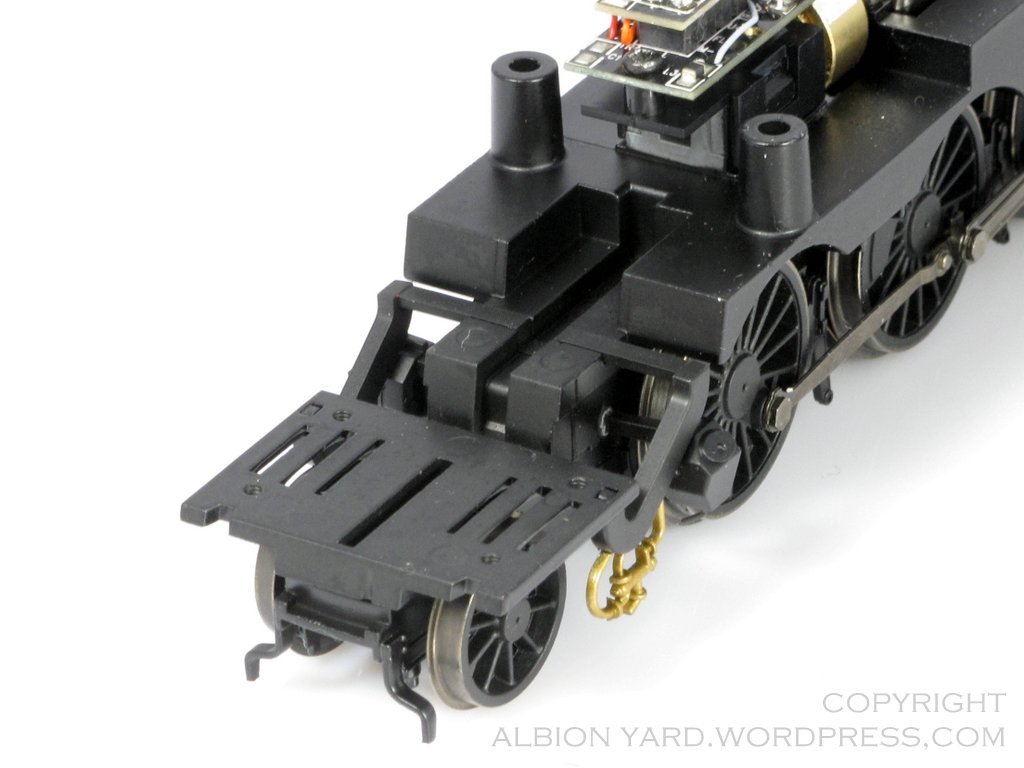
The pony trucks are well engineered and cast in metal improve their track holding. The cylinders have a small cut out in their front face to allow the swing of the pony truck to be viable for second radius curves. The rear truck is a discrete and clever design radial truck, which encompasses part of the chassis. This was first done if I recall by Oxford Rail with their Adams Radial model. Again to allow the clearance for ‘trainset’ curves Hornby have taken this step, but also added a 1mm fore and aft movement similar to that on the 52XX model varieties. This variation in wheelbase length is very hard to see, giving clearance behind the rear water tank balance pipes and ejector pipework. If it means trouble free running, it certainly gets my vote. DCC fitting looks to be a simple process. It’s an 8-pin fitting with a slot in the chassis to allow the chip to sit unrestricted. Sound provision is for a flat speaker inside the bunker. Wiring channels are visible on the chassis casting again making this option to fit sound easier. The bunker internal structure could be easily modified to fit a sugar cube or larger type if required.
 Hornby Prairie Chassis
The performance under test so far has been excellent. Initially I run a chassis under power on one of my layouts just to see if there’s power getting into the model and that in runs well in each direction. Assuming it passes that base test, (only one model has ever failed), it’s onto the rollers for about an hour through the speed range in each direction on a rolling road. The Prairie passed these tests with no problems at all. The locomotive has been run now through Shelfie2 and Shelfie3, these have Peco Code 75 medium and long radii points and no issues were encountered. The same for the Kato Unitrack Code 83 points that I also use as test pieces. Finally a basic haulage test, with the Prairie weighing in at 235 grams. I use the Woodland Scenics polystyrene gradients as simple testers. On a 3% gradient the Prairie started and pulled with limited slipping a five coach train of Bachmann BG’s, that’s around 720 grams of weight. The model pulls this load slightly better backwards than forwards, almost certainly due to the weight distribution on the model itself.
 Hornby Prairie
So my thoughts on this one are that it’s an excellent value for money model, balancing the compromises of a scale appearance and user practicality well. DCC fitting has been thought of in the design and I think will be a simple process to fit. For me though it has that look of the mass and bulk of the real thing, in the same way Heljan has captured with its long standing and well regarded Hymek. I think it will be well received by the market, it’s another example of when Hornby get it right, they really do.
Dapol’s large Prairie currently under development has got a tough act to follow
Hornby Large Prairie R3723 R3723x R3719x R3721x R3725x
The first of the Hornby Large Prairies has arrived at the man cave. Firstly an apology, I’ve taken it out of its box and run it already. Sorry about that, but if you want to watch someone literally opening a box, you won’t find it here. A proper set of pics later, initial impressions are very favourable, expeditious dispatch from Hornby, nothing broken in transit. On opening the box (not here) the model finish is excellent, and on rollers it runs smoothly and quietly through the speed range in both directions.
So, a good start.
It was around five years back that Bachmann brought their 64xx to market. Adding to the high and low cab variations of the 57xx family already in the range. I bought a couple for the Forest of Dean project, (still in planning!), and converted a couple to the top feed removed variety, one of which seen below.
Bachmann 64xx 31-638 31-636
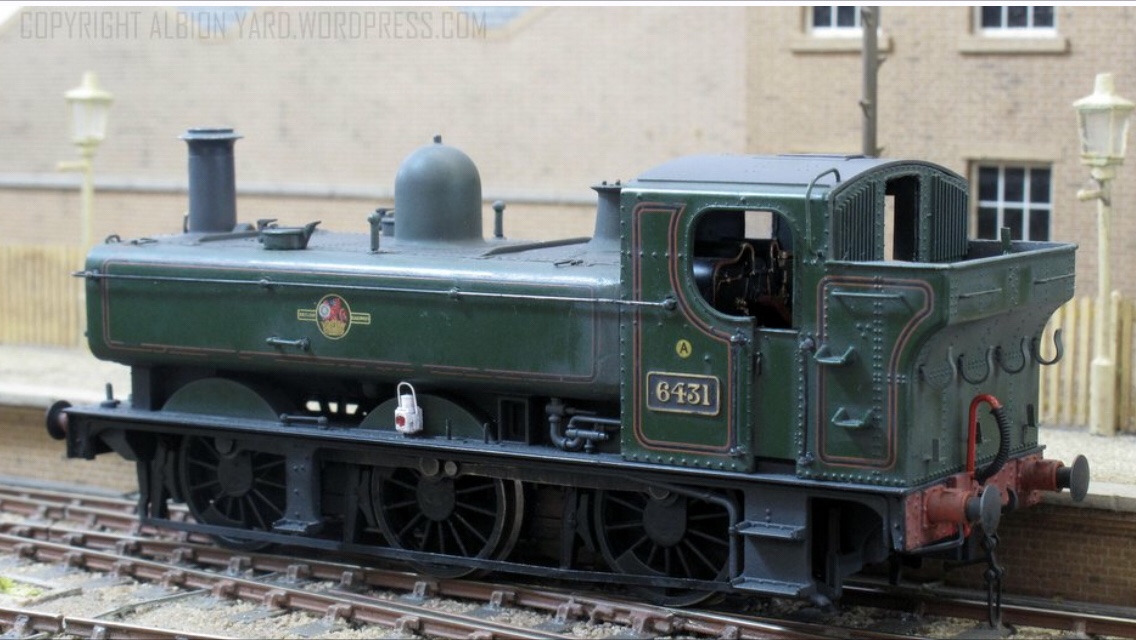
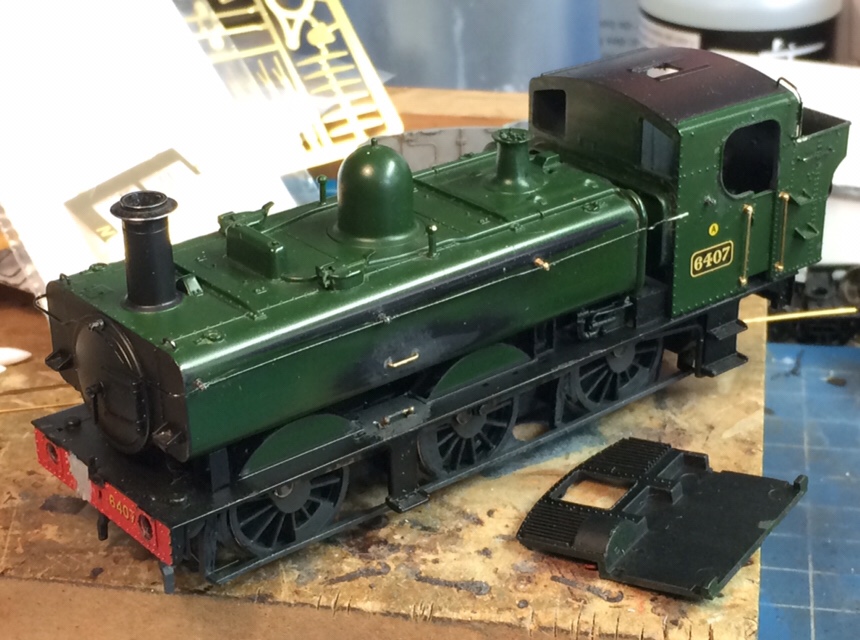
The ‘problem’ with the 64xx for me is that they weren’t common in the Forest, 54xx were seen but that means a full High Level chassis conversion, and I’m not sure if I want one enough to do that yet. I’ve been fortunate to pick up a couple of the 64’s cheaply and had one sitting, slightly damaged, available to do something with. A friend wanted a 74xx, a late one, and this seemed a good opportunity to do one. 74’s were very similar to late 64xx’s, with a few easy to modify changes. The bunker to cab join is a right angle, a flush front and rear cab roof, a lever rather than screw reverse, no auto coach gear (74xx), different grab rails on the tank side, and for the later 74’s, open front tank supports.
OO Bachmann 74xx 64xx conversion
You can see the open tank support on this image, it was a task I wasn’t looking forward to but James Hilton had announced them in his range of 3D printed kits and components, no further thought was required, two sets ordered immediately!
James Hilton 3D print 74xx tank supports
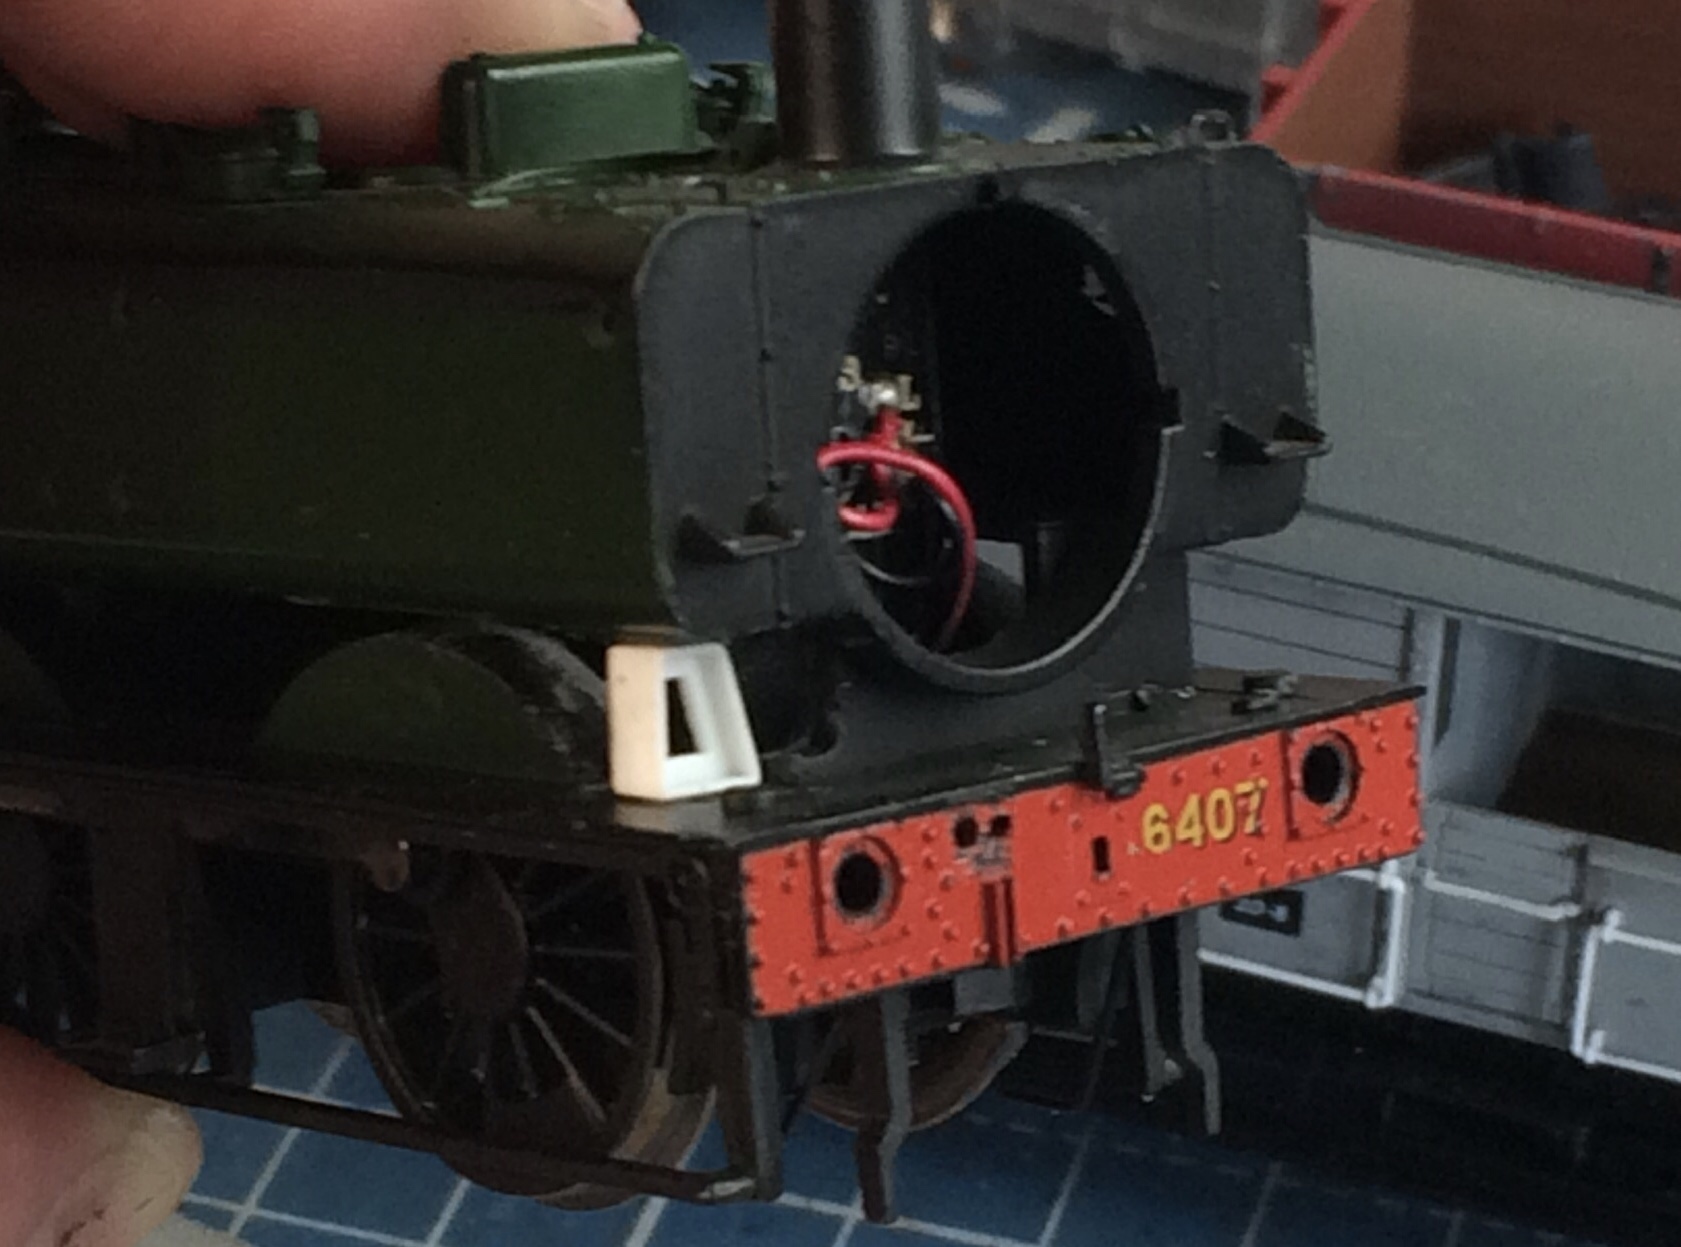
The other detail on the face of the model to be addressed is replacing the rigid Bachmann buffers with sprung versions, note the removed auto gear housing too.
One of the elements to bring an engine to ‘life’ is to give it something that sets it apart. My two usual areas are glazing and cab doors or shutters. Altering and improving those can give a noticeable difference really quickly.
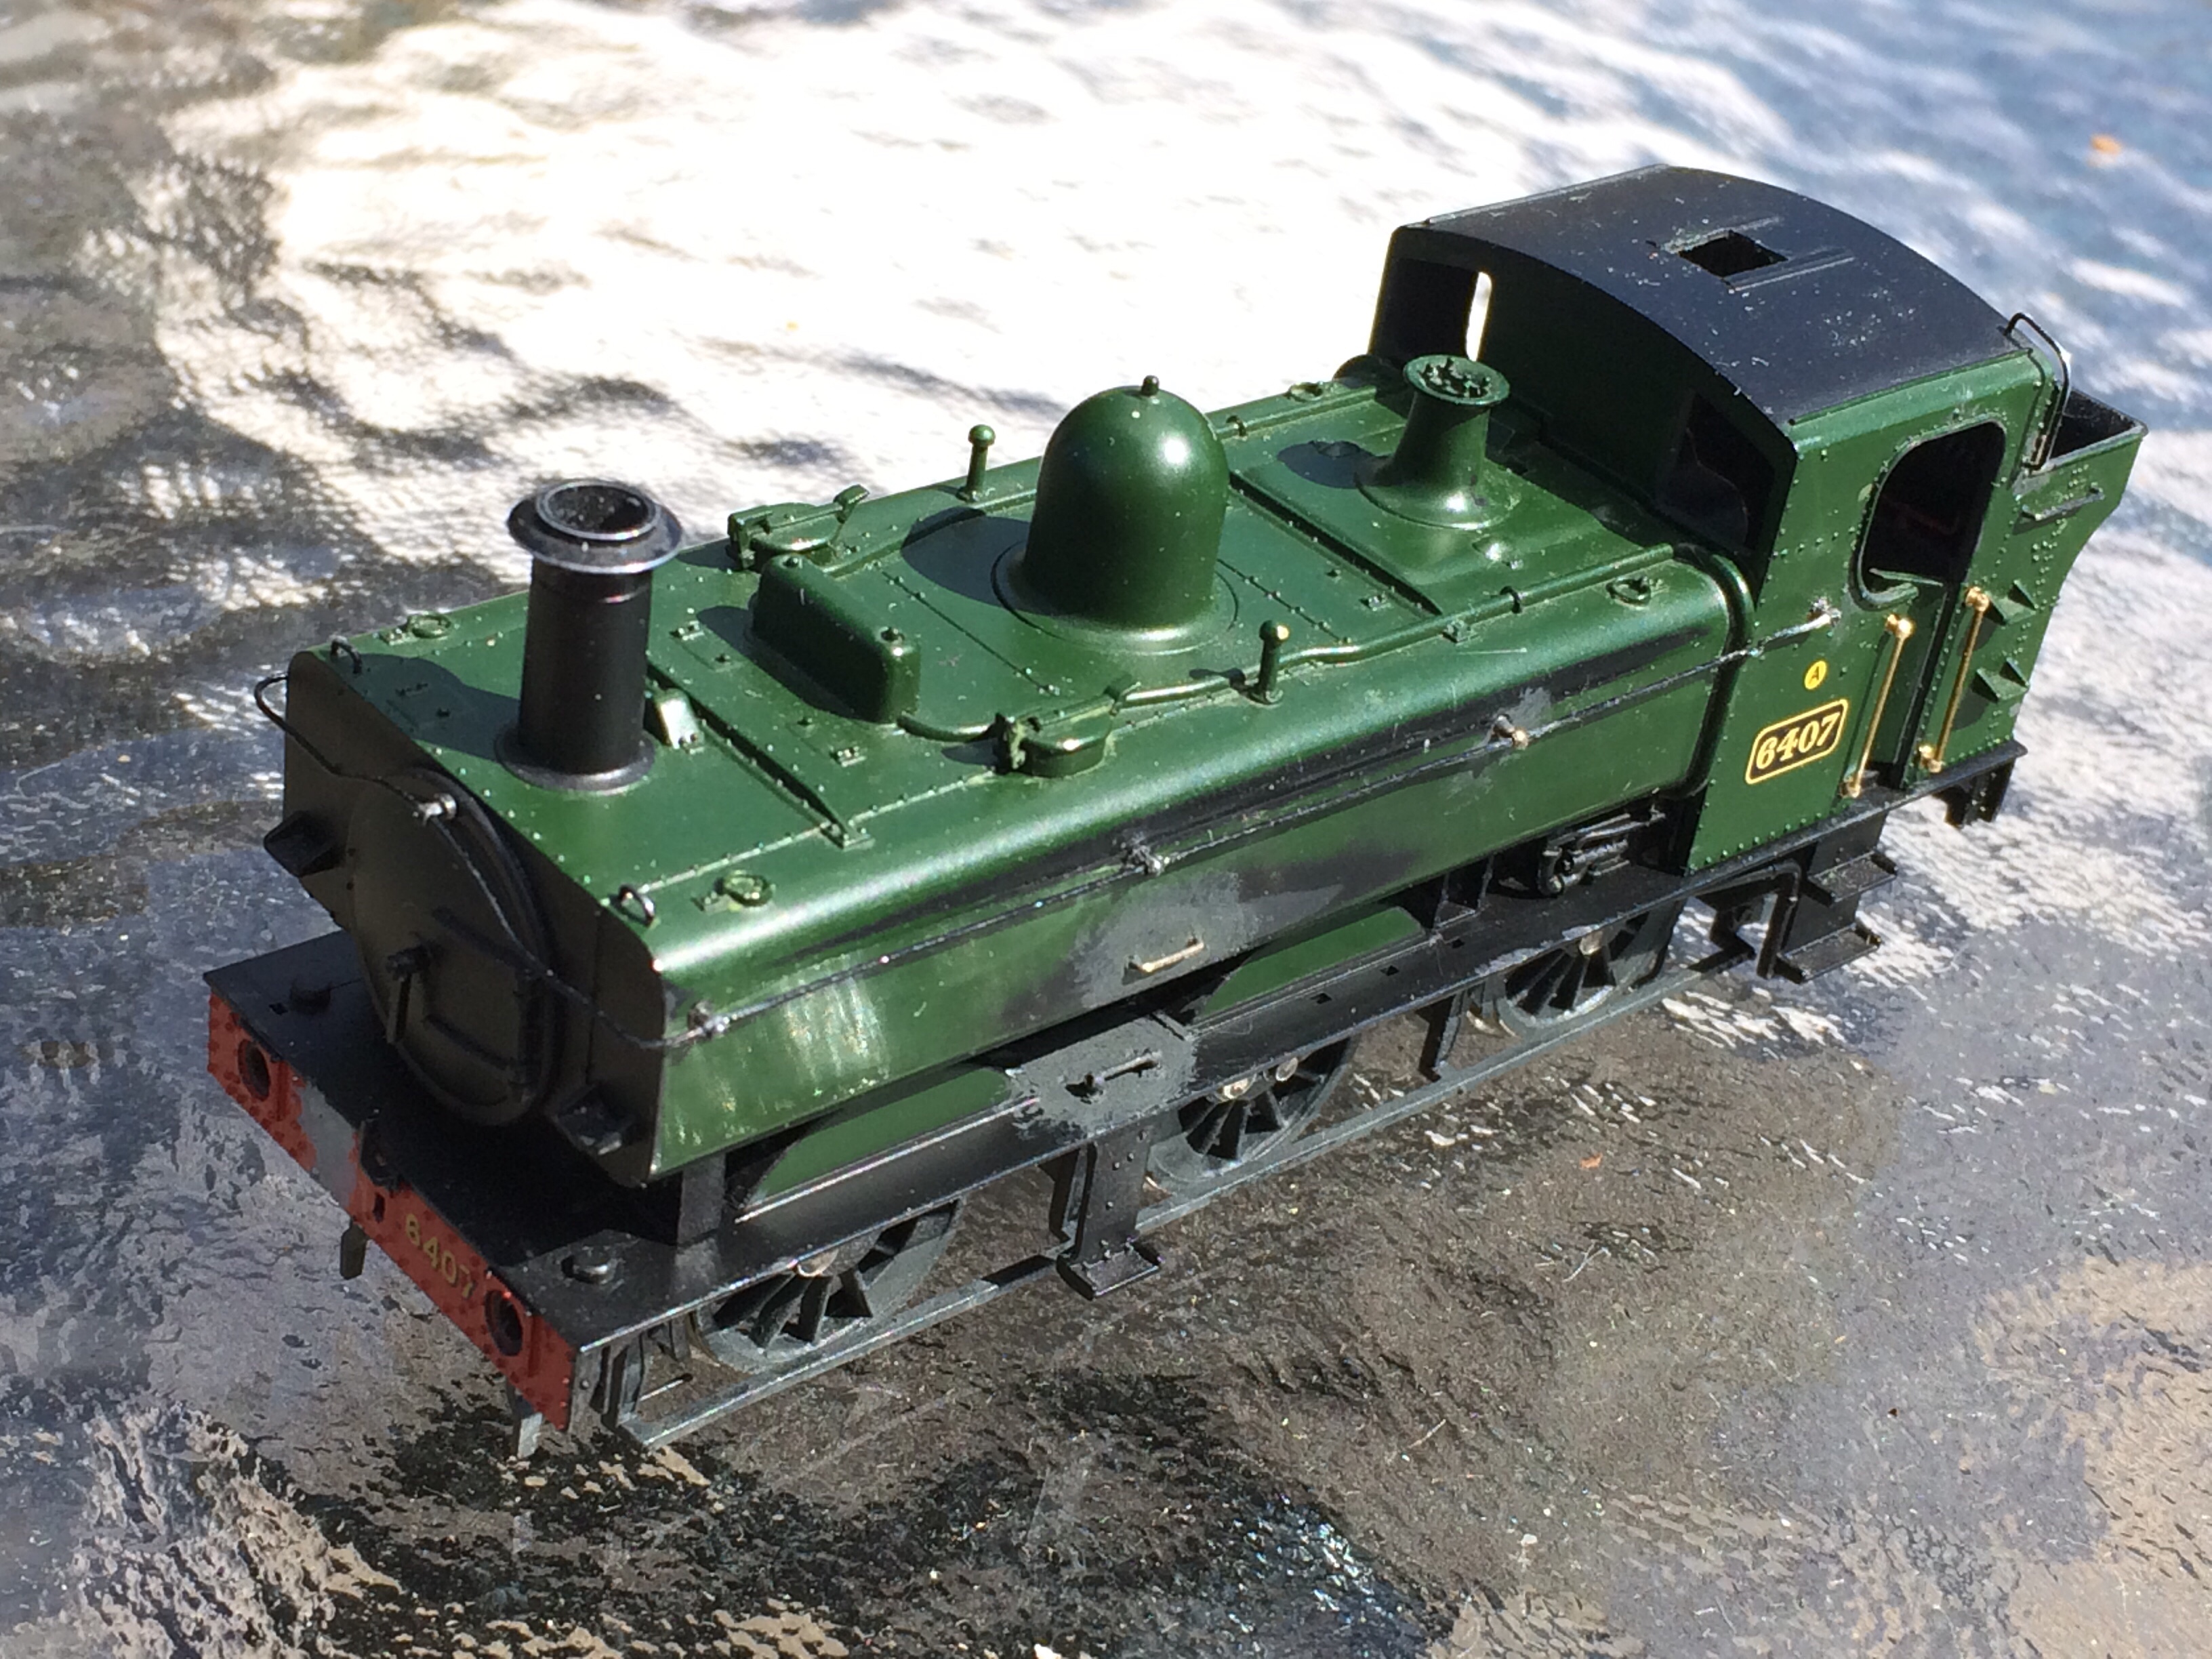
OO gauge Bachmann 74xx conversion
In the two pictures above you can see the cab rear shutters have been removed for replacing, as has the roof vent. With this model I’ve also opened the cab door and removed the coal load allowing the bunker sides to be thinned and adding etched lamp irons.
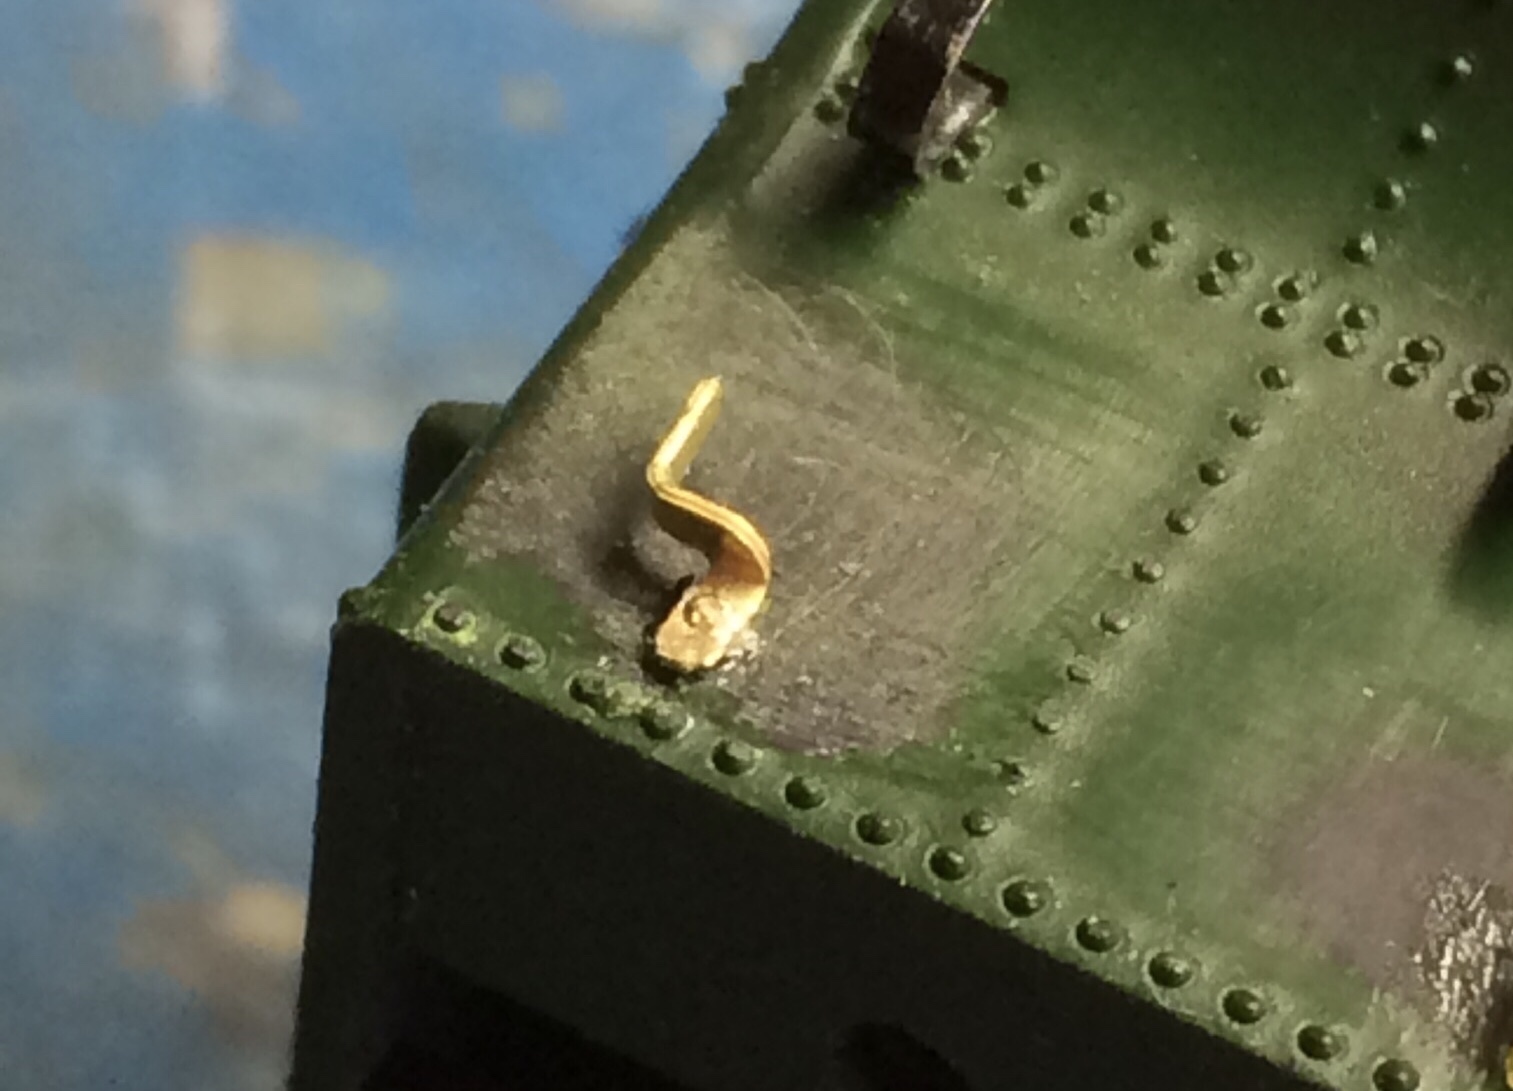
Shawplan etched Western Region lamp irons
Yep, it’s 0.5mm drilled and pinned. And moderately ‘sweary’.
So the model is very much reaching that stage where it all comes together, or sits on the shelf doom in the man cave for a year or two, you know how it goes!
Written in 1944 by John Edmonds, the following epitaph seems particularly appropriate in these times.
When you go home, tell them of us and say, For your tomorrow, we gave our today.

You must be logged in to post a comment.