Well I’m definitely getting there, not just with the layout but to Define 2019 this weekend. Define will be a first showing for the layout, it’s a one day event, sort of a social/open house thing by the Define group. I had hoped to have the backscene and fascia’s completed, but the material is still in Germany after a Spinal Tap and measurements type re-occurrence! So this weekend I’ll rig us something that’ll give very much the feel of the finished design, but Blue Peter styley it’ll involve an adult, sellotape, sticky back plastic and a metal coat hanger.
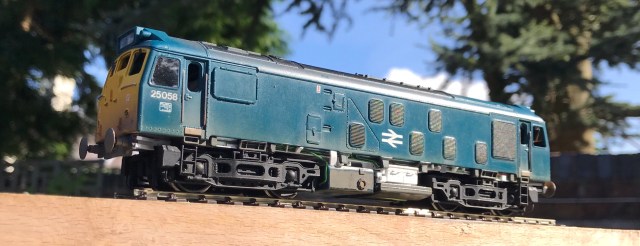
The largest loco in use will be this Class 25 with a re worked chassis, fitted with Dinghams too, it’ll get a good test under show conditions. The layout is old school DC, points are all electrical fired by Tortoise motors, and the Dinghams by Gaugemaster electromagnets. The stock requirements are pretty low on this one, hoppers, and a few brake vans, all getting final checks today. I’ll likely bring a handful of 16t’ers and another 08 in the event of coupling failures.
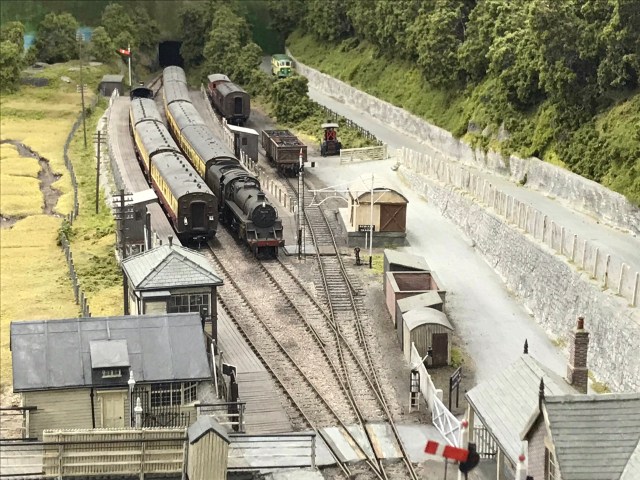
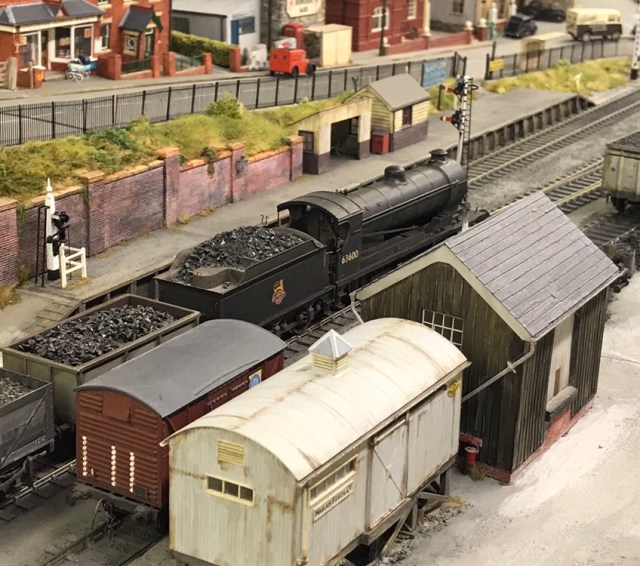
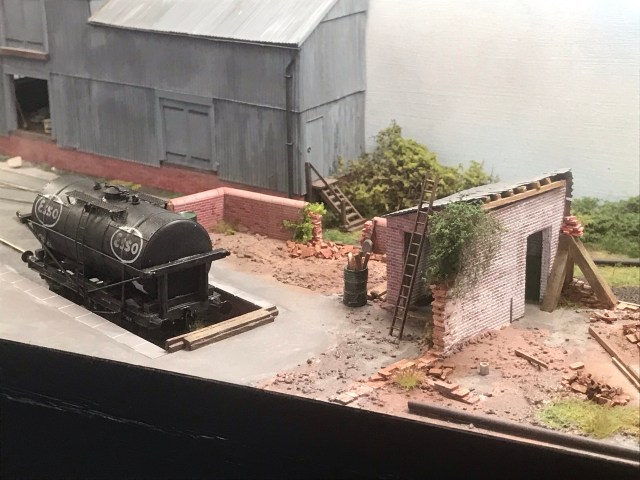
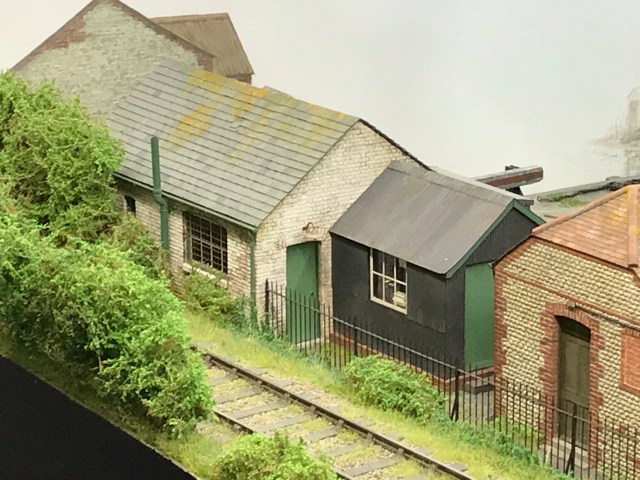
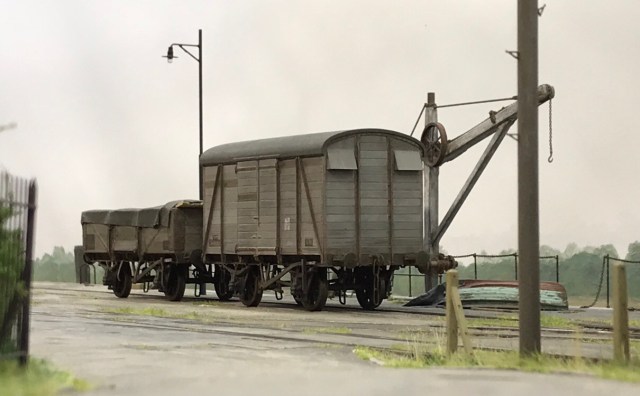
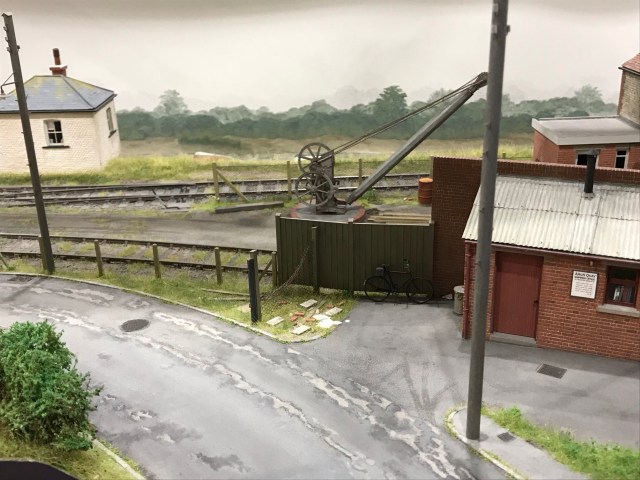
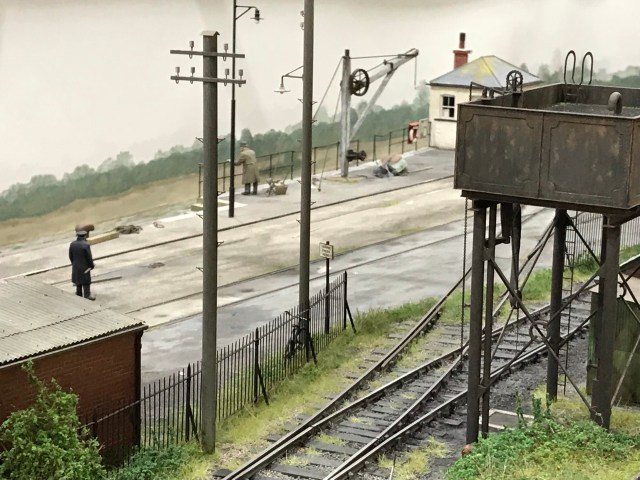
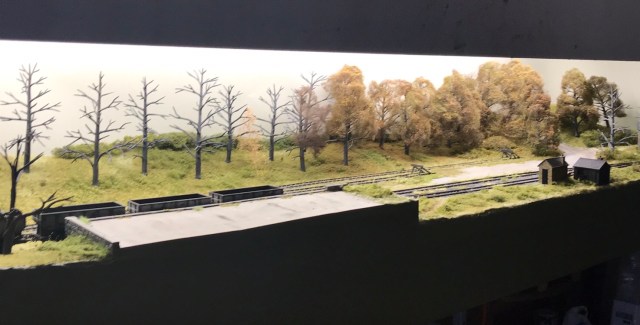
The woodland areas are nearly complete too, but you’ll be able to see the make up of them and how they’ll build to make a dense backdrop giving the impression of a small drift mine disposal point, on the edge of woodland. There’s the possibility this layout will drop into my Forest of Dean, Severn & Dean project in the future, hence the woodland. For now however, its rural Northumberland at Guyzance, in the shadow of the northern Cheviots.
Just a quick note to wish readers a happy new year and to say thanks for taking time out of your life, to read the blog. It means a lot that you visit, it really does, and it’s a pleasant surprise to realise this is the seventh consecutive year of an increase in hits, and readers, from across the globe. The heading image is Shelfie2 and it didn’t seem right not to have a Pannier shot on this post, so gratuitously here it is! The layout will be out this year doing a few shows, and I hope a couple of magazine appearances.
If you have time, please take a look at the other bloggers works on the blog roll, they’re a regular source of inspiration and ideas with superb writing and illustration.
And again, thank you, I wish you well for the forthcoming year.
Many years back I settled on three link couplings for my rolling stock on the OO and EM layouts I’ve either made or been involved with. Their visual benefits are easy to see, but they do have a few practical drawbacks. On short stock they’ve worked well, however as stock length increases the potential for buffer lock increases too, even allowing for sprung buffers. Throw in a reverse curve and the chance of buffer lock increases again, and all the while these couplings require large radius curves, meaning that layout design has to take these couplings into account from the outset.
There are some similarities with Dinghams in this respect, ideally the layout design should take into account the couplings, and there are one or two catches in their set up and operation. So this is how the Dingham couplings are supplied, as a flat etch with soft iron wire for the electromagnet dropper. I’m using them on Shelfie2 the track is Peco Code 75 flatbottom rail as well as the new bullhead track too. Baseboard material is 9mm MDF and Woodland Scenics foam underlay between track and baseboard. Track is painted with acrylics and the ballast is a mix of DAS modelling clay, and Woodland Scenics ballasts.
I’d written I was experimenting with these couplings in an earlier post, and Mark Davy responded in the comments section. His comments on his experience matched mine and clearly he and Brian Lewis has overcome some of the issues I’d yet to find. Mark has kindly allowed me to use his comments which form the core of this post, the images are mine from those I’ve assembled, and I’ll add a few elements of my experience too. So without further ado, over to Mark whose comments and notes are in bold italics.
I’m interested to see that you are trying 4mm Dingham couplings for Shelfie2. Brian Lewis and I have spent the last couple of years fitting them to the stock for his ‘Tetbury’ layout (P4).
Since my fingers are a little younger than Brian’s, I’ve done most of the assembly and fitting. Over 100 vehicles later, I’ve learnt a lot of lessons; (and some interesting language !) You may find the following notes useful.
Assembly
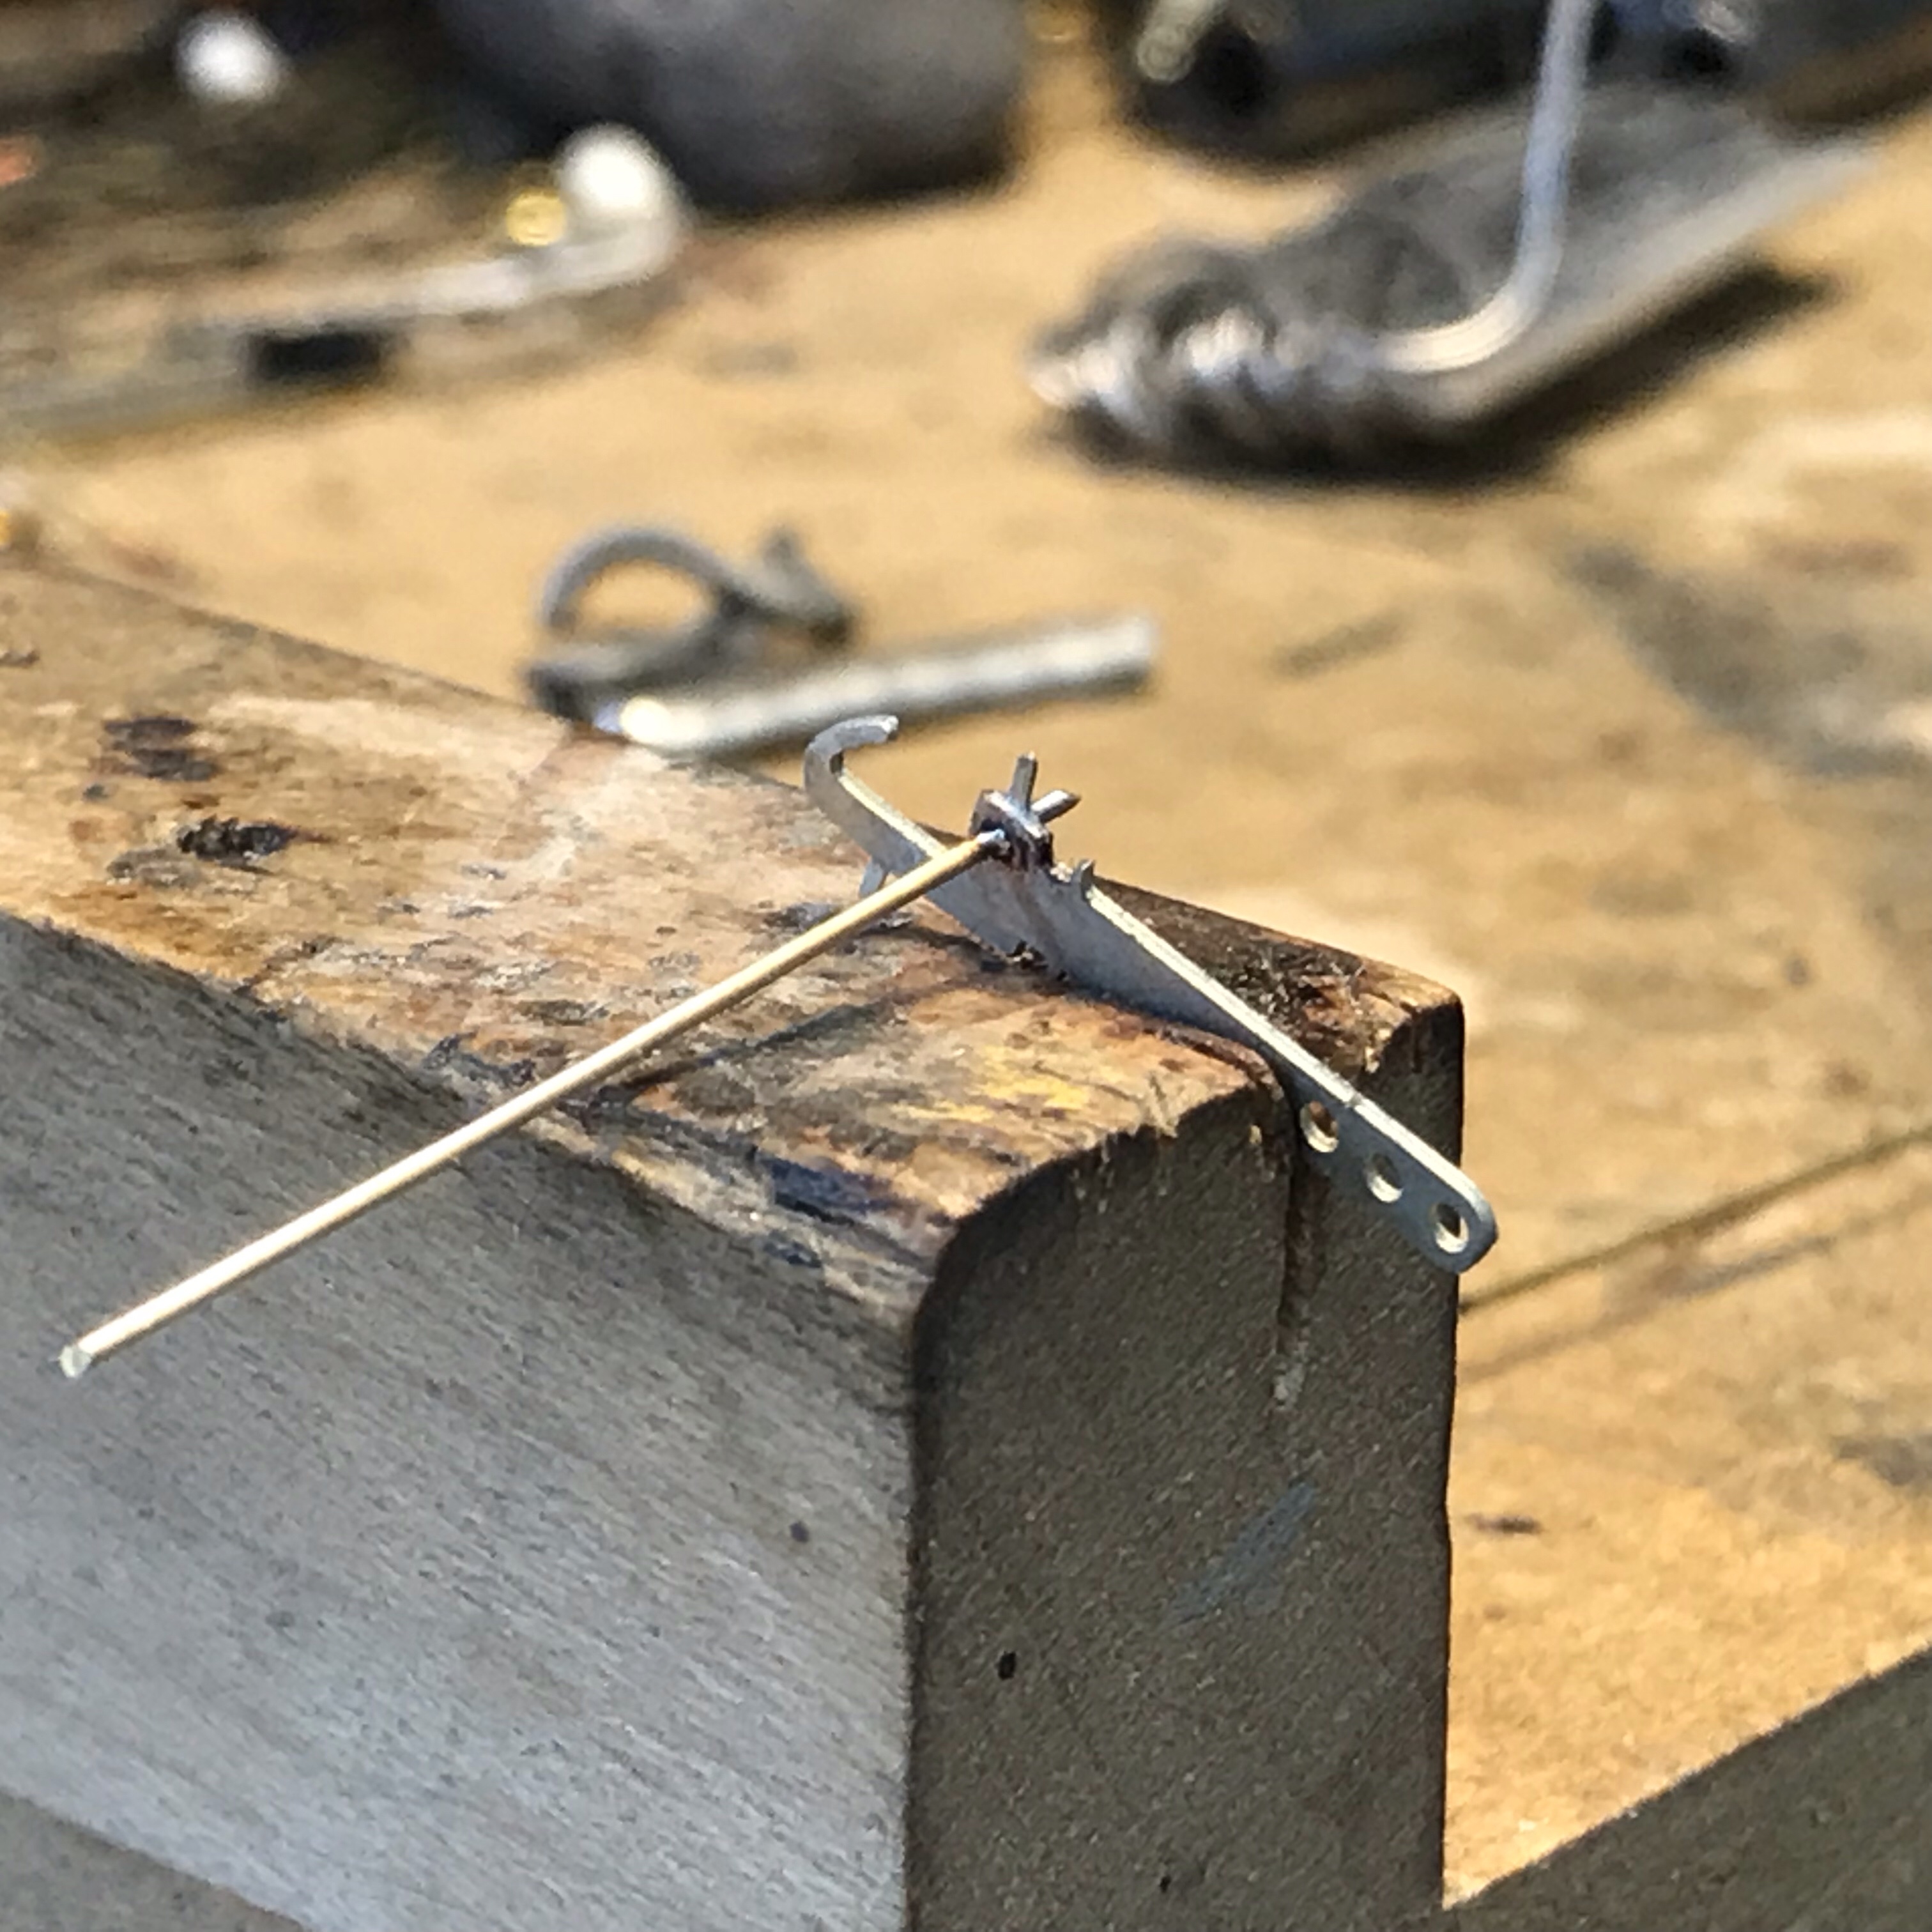
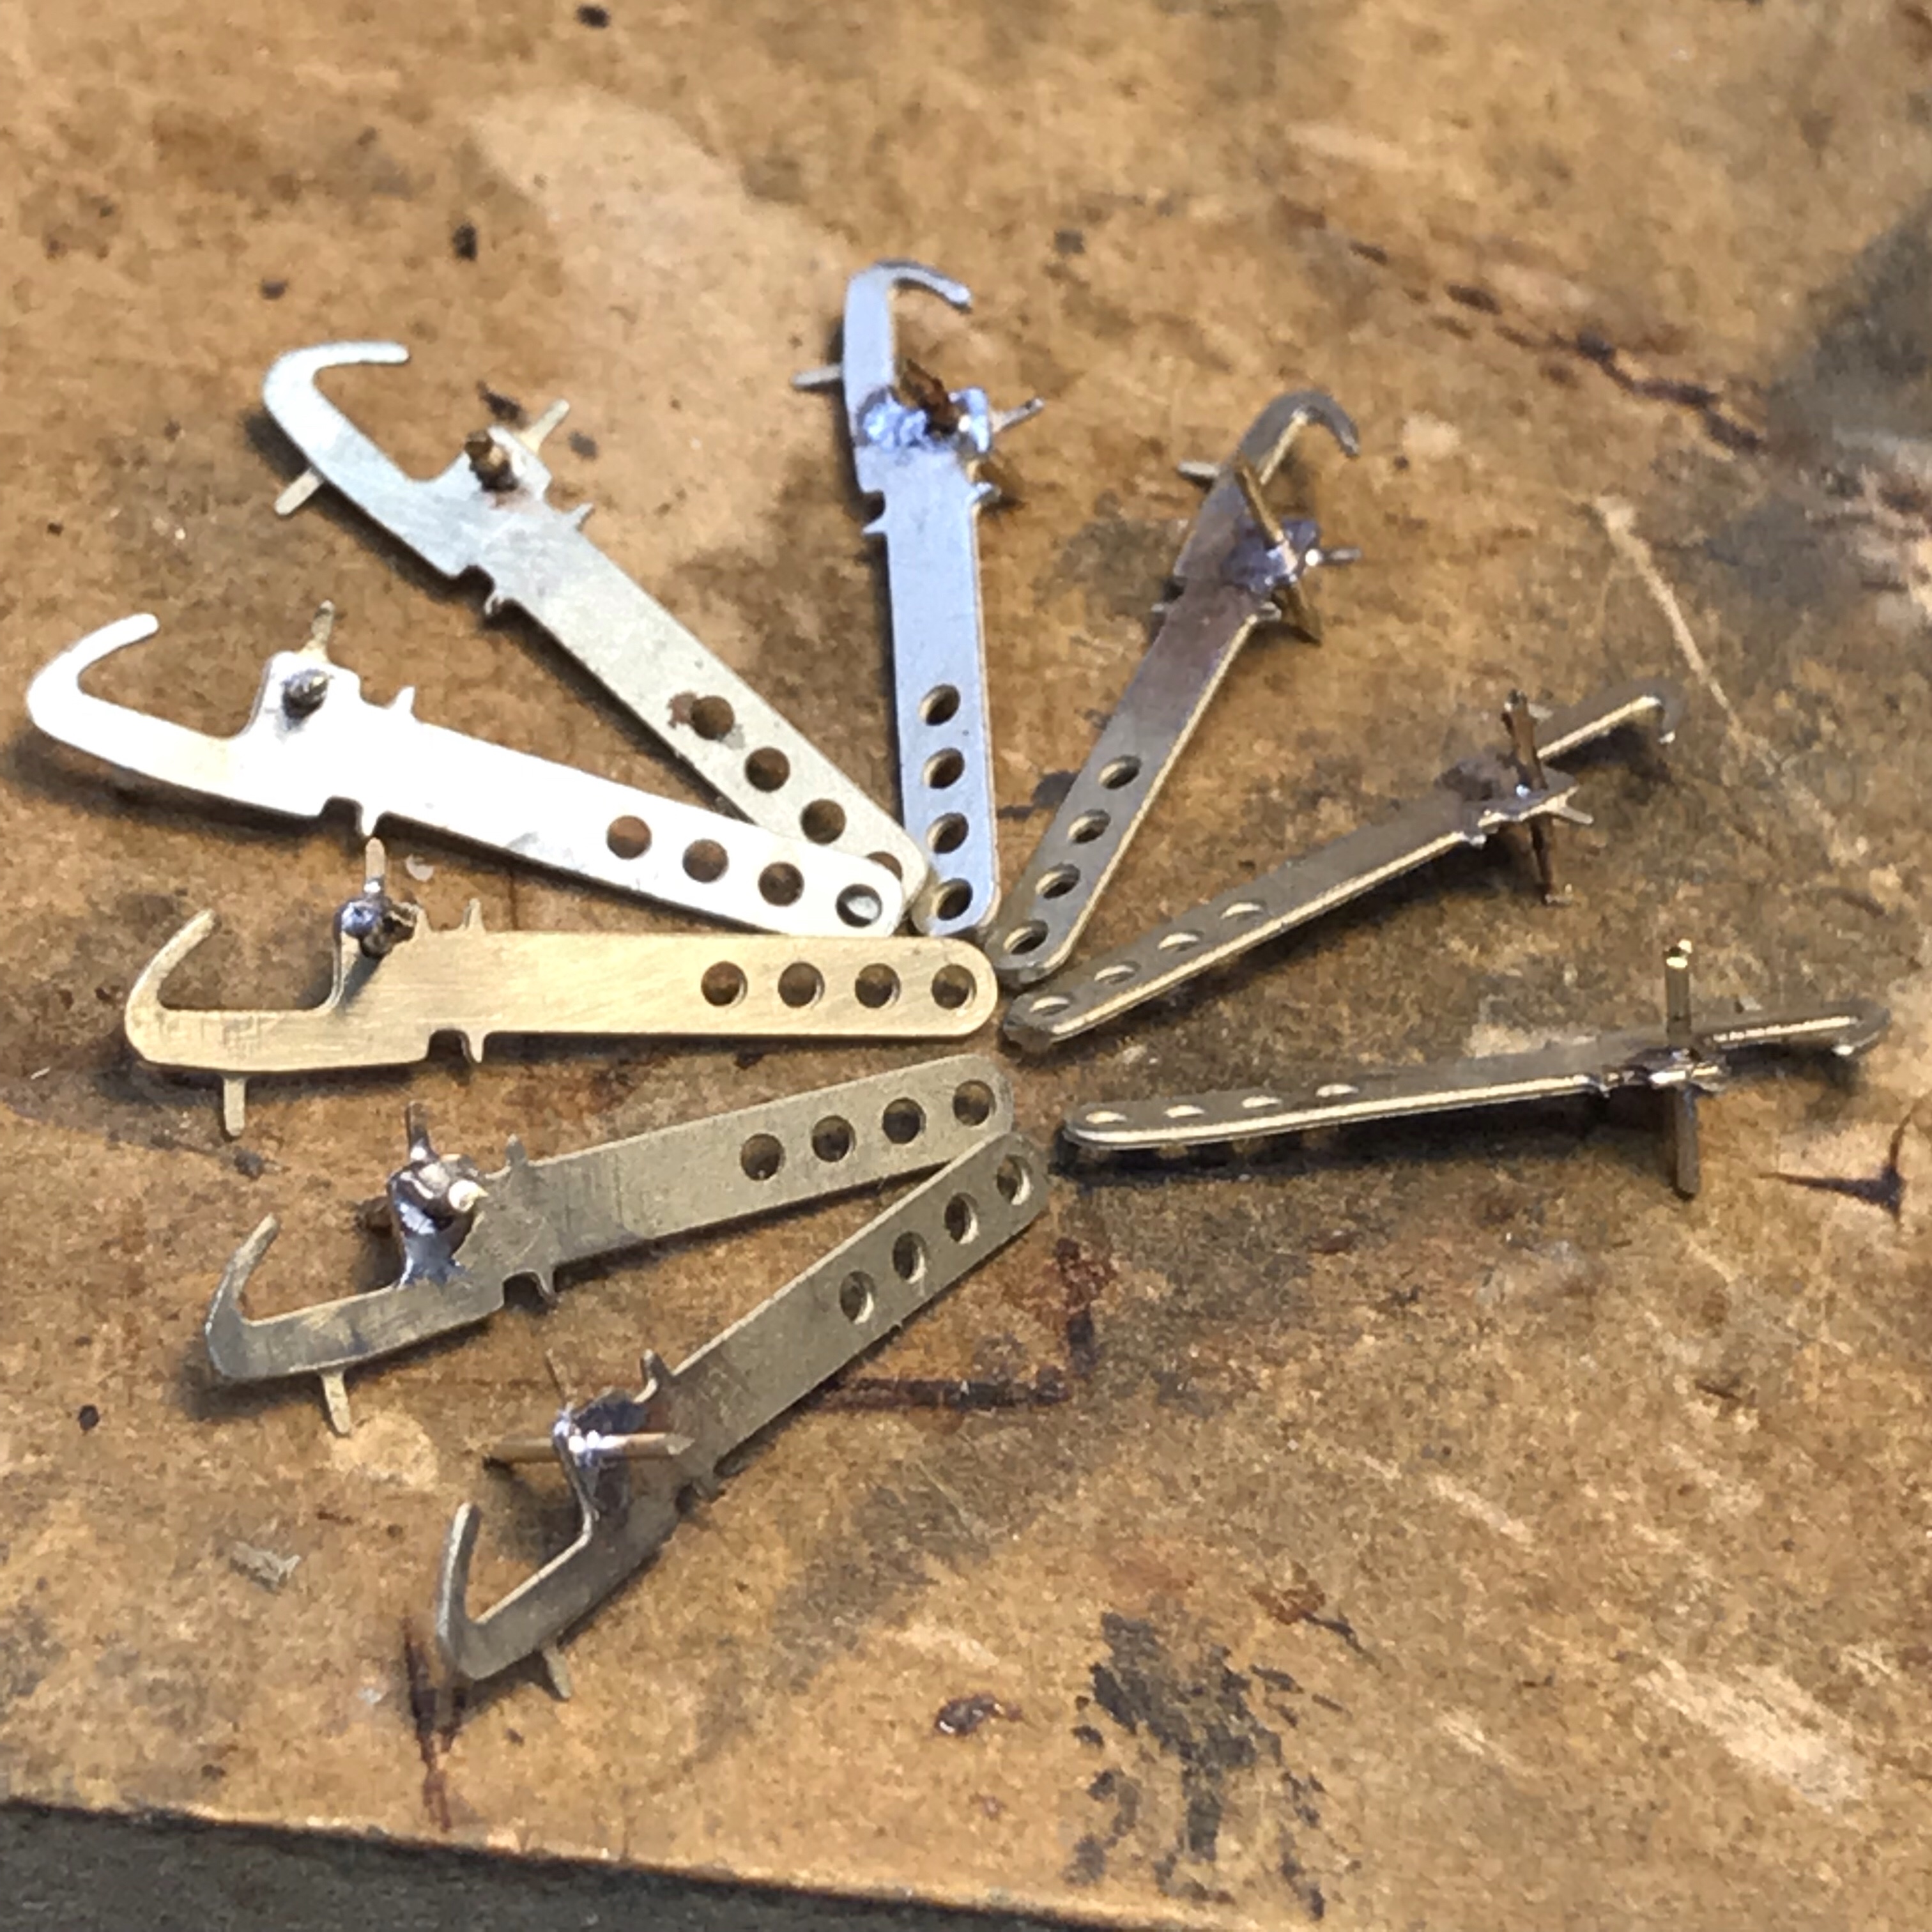
Pivot point soldering for loops and latches
When soldering the pivot wire into the hook, I find the suggested wooden jig very useful. Tin the wire first (sparingly), push it through the hook into the jig, add flux and solder. Easier said than done as you don’t want too much or too little solder, and the pivot wire must be square to the hook. It usually takes me several attempts to get it right.
Pivot points completed, batch assembly makes sense!
Pairings of loops and latches. The dropper tail can be adjusted to suit different chassis’.
When bending the tail of the loop downwards, it is essential that the bend is as close as possible to the pivot lugs, especially for 6mm buffer-length (unfitted) vehicles. I tend to make this bend (over the stock of an engineers square) before bending the pivot lugs upwards.
We also use the type 2 latch.
Type 1 Latches. The tail folds to roughly 70 degrees. Type 2 latches are U shaped.
Loops and latches ready for chemical blackening.
When finished, the latch and loop must move up and down freely. Once raised they are often reluctant to drop. Possible problems here are too much solder, the sides pinching the hook near the pivot or the tail rubbing on the hook.
I used a slightly different assembly method to Mark, I didn’t tin the pivot wire, I just tack soldered at the join to the hook, and then cleaned the joint afterwards.
Bachmann 03 with vertical dropper
The dropper tail should ideally bend under the buffer beam, however with the 03 Diesel shunter that wasn’t an option, so I have a vertical drop parallel to the buffer beam face. For the wire dropper I’ve used a thicker florists wire this can be glued rigid and doesn’t then get caught in any chassis detailing.
Type 2 Latch, soldered fillet
Type 2 loop, soldered fillet
The type 2 latch is a bit more challenging to make, but I found has better reliability, the latch is an etched ‘U’ shaped loop with the base of the U filled with solder
Fitting
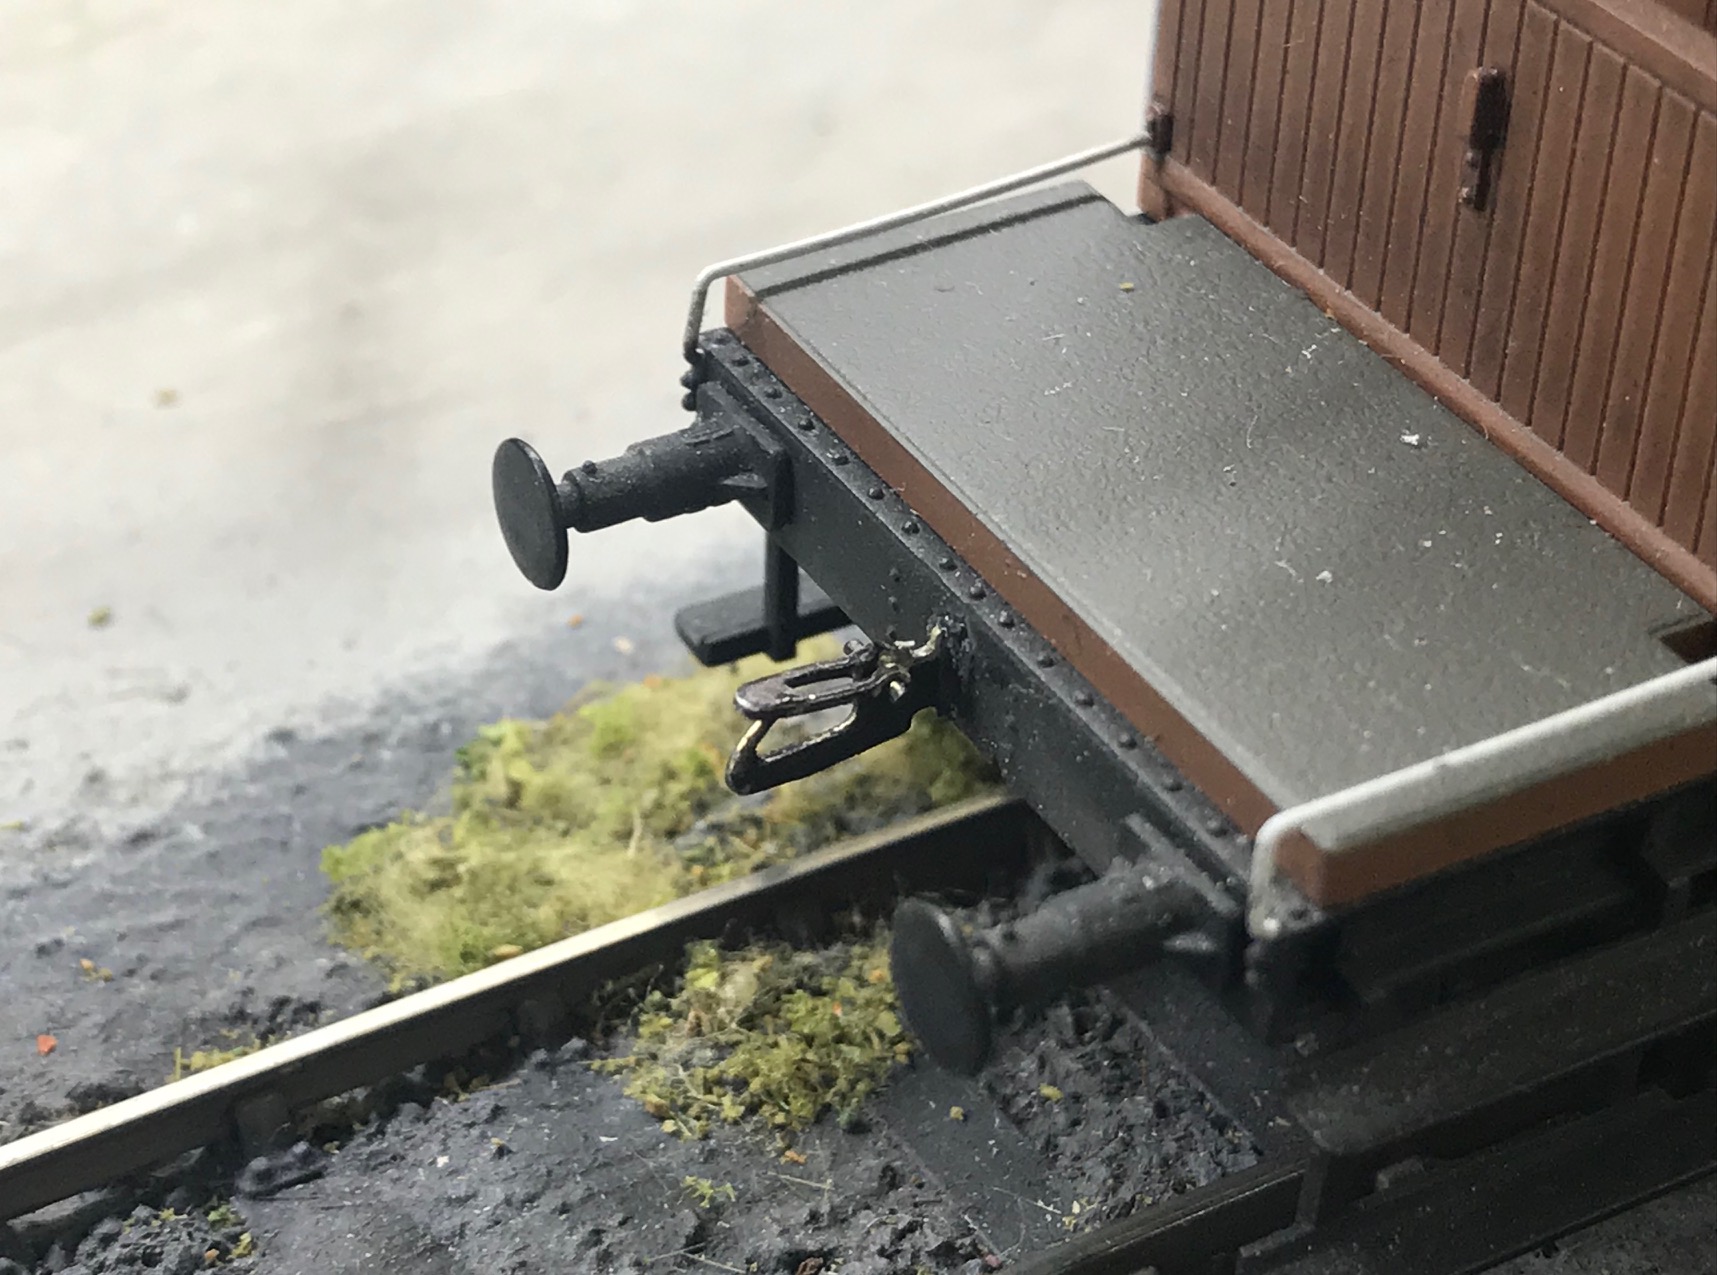
Dinghams don’t work very well with sprung buffers – when propelling, the buffers compress and the coupling loop catches under the latch on the adjacent vehicle and so doesn’t uncouple. We now fix the buffers with a little Evo-Stik contact adhesive behind the headstocks/buffer beam. This can be removed fairly easily if required.
Buffers that project less than 6mm will need to be replaced with longer versions.
The instructions say that the end of the coupling hooks should be in line with the buffer faces. We’ve found that for reliable uncoupling the hook should be about 0.5mm behind the buffer faces. Otherwise when propelling the coupling loop catches under the latch on the adjacent vehicle and so doesn’t uncouple.
The instruction regarding the height of the hook at the headstock is good, but the coupling often droops while being glued into place, and it is the height of the front of the hook that is critical. I use a jig to support the end of the hook to hold it at the correct height while the glue sets. The critical dimension is 12.5mm from railhead to the bottom of the hook. Consistency is essential !
When first fitted the front of the loop often slopes from side to side, or is not quite at the correct height. Gentle tweaking should correct this.
I don’t recommend superglue when fitting the couplings – it tend to run around and glue the whole thing solid ! I use Evo-Stik contact adhesive, which can be removed fairly easily, but it takes some time to set and I’m sure it moves as it does. Five minute epoxy might be better.
It may not be possible to fit a hook with loop to some locos, because the chassis moulding obstructs the bent tail and magnetic dropper. The Hornby 14XX is an example. (The Airfix version is fine) Here we fitted a hook with latch at both ends and reserve the loco for auto-coaches with a hook with loop at both ends. (The Tetbury branch didn’t run auto-trains as such, but ran-round at the terminus)
You may find that vacuum and steam pipes sometimes prevent the loop from rising fully. Either bend the pipes to one side, or remove them !
Once the couplings are fitted, the magnetic dropper should be trimmed to just above rail head level – a full 1mm is not necessary.
When weathering rolling stock, keep the paint away from the couplings !
Mark and Brian’s experience matches mine almost perfectly. I’ve also found that free running stock can also give reliability problems. The sprung buffers and free running can allow stock to ‘bounce’ backwards and forwards, this can sometimes bounce past the hook and latch, so an uncoupled vehicle can re-couple again.
Hornby 20T brake van with axle brake fitted, note brass wire bearing on the axle shaft.
To minimise this I put a brake on the axle of any particularly free running wagon. It’s nothing more than a piece of 0.5mm wire bearing on the wagon axle, this provides sufficient retardation for the wagons so they rarely leave a big enough gap for the loop to re-engage the opposing hook. This was a bit of a culture shock having previously ensured that all stock was running as freely as possible! For the fixing I have used low viscosity super glue, this gives a very quick and reliable fixing, which to date hasn’t caused any issues.
Operation
Initially we tried fixed permanent magnets with variable results, the main problem being trains parting unintentionally as they passed over the magnet.
We now use Gaugemaster (SEEP) EM1 electromagnets. These work very well on 24 volts DC. 12 volts didn’t have enough pull and AC makes the magnetic droppers jerk around, sometimes getting caught up under the vehicle.
When fitted, the top of the electromagnet pole piece should be level with or just above the sleeper tops, but not lower. The 4mm Dinghams are fiddly to make, but once correctly fitted are an ideal auto coupler for layouts where the stock does not need to be turned. The delayed uncoupling feature is invaluable.
Brian used the 7mm versions on his O gauge ‘Llaniog’ layout. Both on this and his previous ‘Chagford’ layout (P4), he experimented with other auto couplers – Sprat and Winkle, DG, Winterley and AJs. All had their good and bad points. Some were obtrusive, some required an unprototypical shuffle in order to uncouple. Others did not take kindly to being transported or being subject to rough shunts and so needed constant tweaking. Opinions are subjective, but on balance he feels that Dingham couplings score highest in terms of all round reliability. Our couplings are not 100% reliable yet – but we’re getting there!
Magnet location hidden beneath darker green foliage.
Like Mark and Brian I’m very pleased with the Dinghams. They do take a bit of effort in their manufacture and fitting. I’ve been very fortunate with Richard Chapman sending me some ready built couplings which worked superbly and helped me get my head around the construction and fitting of them. I’ve used a 15V DC source for my electromagnets, a Scalextric power supply which gives a smooth and efficient operation with a high 90% reliability. I’ve been using switchgear made from press to make, non latching switches which have not been reliable, the contacts have needed cleaning on a few of them. The next step is to build a dedicated switch box with better quality switches from RS components.
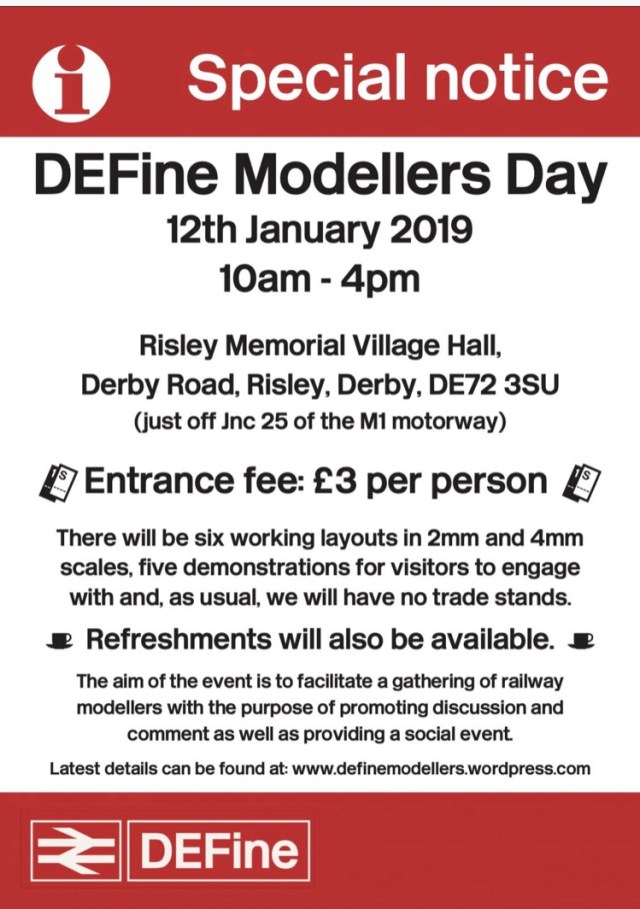
If you’re interested in seeing these ‘at work’ Shelfie 2 will be at the Define Modellers show on the 12th January at Risley, Derbyshire. Define 2019
Once I’d become accustomed to using three link couplings over many years, I didn’t think I’d be so taken by these couplings. All coupling systems have their advantages and disadvantages, these appeal as they are completely hands free and once blackened very discreet in their appearance. One disadvantage is they are ‘handed’ so all stock has to be run facing the same way, so the original idea for a turntable fiddle yard isn’t practical. I’m not sure I’ll use them across other projects at the moment, the uncoupling does require straight or almost straight track, and coupling up on tighter curves occasionally means the loop misses the hook, sliding alongside the latch hook.
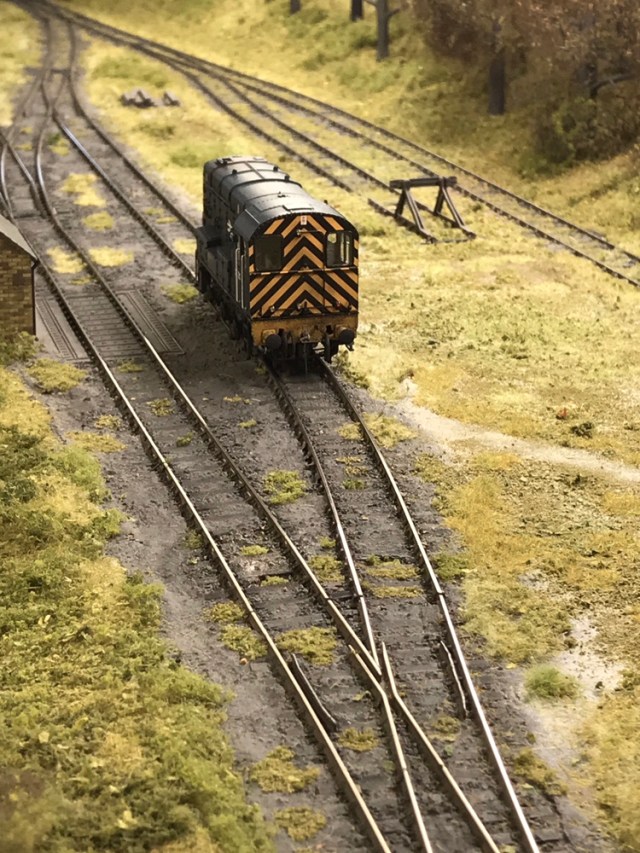
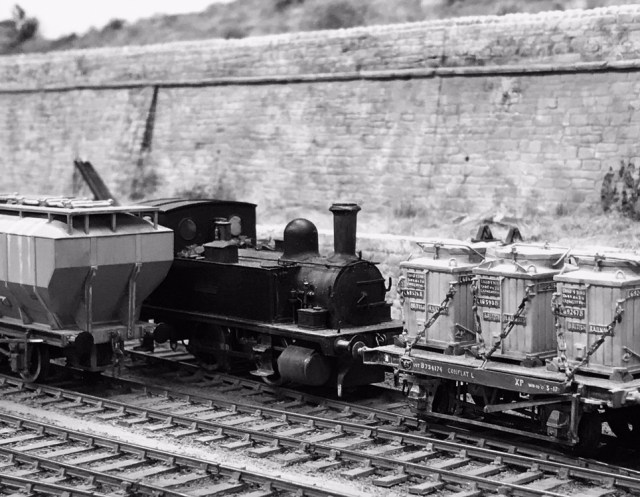
Bachmann 08 fitted with Dingham autocouplings
Locomotive control has to be excellent to allow the couplings to operate reliably, I chose the Bachmann 08, 03, 25, and 57xx pannier for my test fleet, knowing they would have the slow speed consistency required. The real appeal of Dinghams for me is that Shelfie2 is now completely hands free operation. With hand controllers for points and couplings, the operator can walk around the front of the layout enjoying the different views, or at an exhibition, sit out of the way of the viewers, yet still be able to see and operate the layout in effect remotely. If you’re looking for an uncoupling system that is relatively discreet, can be worked hands free and don’t mind a bit of effort in setting up the system, for 4mm scale Dingham are well worth investigating.
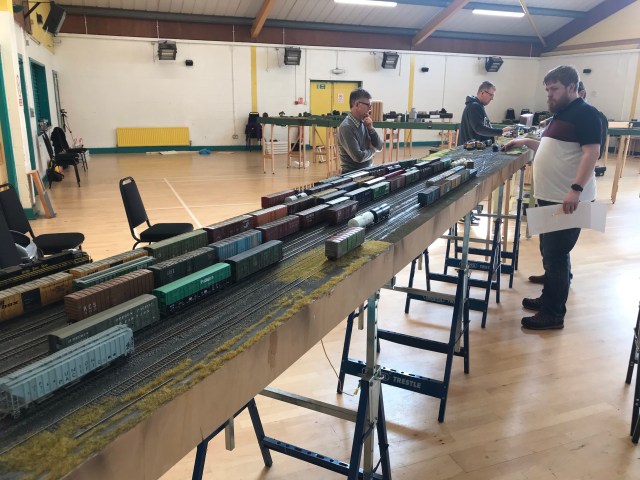
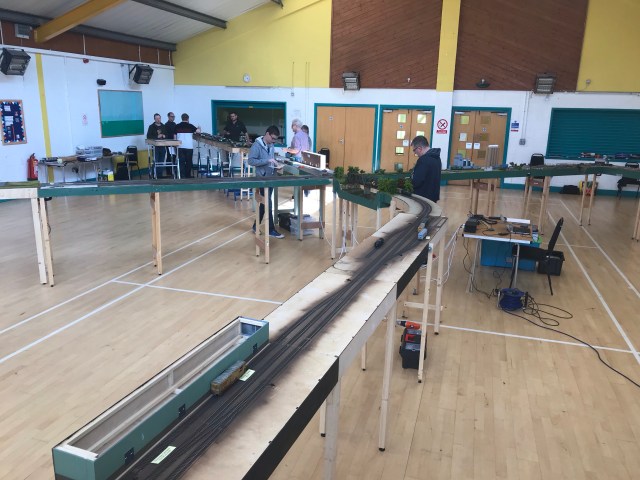
This hobby covers a good spectrum of social aspects, most modellers I know aren’t club members but either work alone or in small groups. ‘Space’ in the UK is often at a premium and frequently costly, so it’s no surprise that there aren’t many large layouts and there’s an emphasis on relatively compact designs. This year I’ve had the opportunity to view and operate on two very different systems which make clever use of space, my first exposure to a Fremo configured layout, and a return visit to see and operate Geoff Taylor’s Cambrian Penmaenpool layout. Two years ago I had the opportunity to visit Geoff’s layout to see how a ‘system’ operates, as well as visiting Buckingham (now in Tony Gee’s care), and that generated or awakened an interest in operating as ‘a railway’.
Albion Yard
Shelfie2 (Guyzance Drift Colliery)
Shelfie1 (Wharfedale Road)
My layouts above have been pretty typical self contained asteroids the trains coming and going as actors with no rationale as such. In this case the train enters the scene and leaves it, it isn’t seen at another location or en route. Buckingham and Penmaenpool have a function that is missing on my and similar single location layouts, and that is the trains act with more of a purpose, they do something rather than pass through one single scene or location.
Armitage Fremo US HO
This spring I was invited by Chris Gilbert to see a Fremo meet using US HO equipment. The group meet regularly and use a village hall which they book and pay for, giving them a significant amount of space to ‘play trains’. Control is DCC using a mobile phone wifi network (wiithrottle) dedicated to the task. I’ve not really embraced DCC, but this system and Penmaenpool are both DCC. Unsurprisingly with Buckingham’s history it’s DC and will remain so, proving DCC is not an essential requirement for a multi location layout. The Fremo concept then worked well, but with a few ‘that’s odd’ moments for me. The layout was configured in an X with the main sorting and marshalling yard on the end of one arm where the trains either departed from, or arrived at.
Across the X were a number of locations requiring a train service, or with trains purely passing through. Some modules were work in progress, and there was a variety in style too, not enough to jar, but on first look, noticeable. Chris had generated switch lists and train consists from records of the stock the group uses, and the previous meet, i.e where specific freight cars ended up across the network of depots and industries.
Track on the layout/modules is HO off the shelf flexible track and commercial pointwork, alignment across boards being covered by the Fremo standards. The trackplan on the boards being up to the builder, but required to comply at baseboard ends. It was interesting to see some industries not having a run round loop, for us making our own standalone layouts, a loop is often a real operating benefit. Out on the open road however, this is a far lesser requirement, due to the locations being operated by trains travelling in the appropriate direction, a real world scenario.
The turnouts are operated using your fingers to throw the blades. Having spent time and effort on my layouts hiding point motors and wiring and maintaining them this getting your hands in there was a real culture shock. Uncoupling of stock was performed using manual picks, rather than electromagnets. Again these felt retrograde steps on first view. Then, we started operating. Myself and Hugh Edgely were allocated train 401, an out and back freight from Trent Yard to Blind River Valley. Very quickly the ‘downside’of the manual point switching was lost. The consist was assembled by shunting the Yard rather than a manual ‘crane shunt’ this form the train. Then we set off to Blind River.
On the way we passed two locations, one where we would switch cars on the return, the other where we would wait and cross an outbound train from Trent. The operation certainly became immersive when you looked up you were aware of the fact you’re done distance across the hall from wherever you started, rather than the 6ft to fiddleyard many of us are used to. Think of a small exhibition hall and driving your train from one layout one end of the hall, to another layout at the opposite end. This, this is different, your locomotive and train has gone somewhere. Because you have a switch list you then have specific moves to make, as well as being conscious of not blocking the main lines for through traffic. Thus the manual point switching and different build styles blend into not being an issue, because you get immersed into operating the railway they cease to jar or be anywhere near as notable.
Coming away from the event I was struck by the teamwork aspects. Not only in the operating the railway, but in the administrative elements too. To make this happen the hall has to be hired, the layouts put up and tested, as well as taken down at end of play. There’s obviously the social side of it too, meeting a group of like minded friends with a collaborative goal in some ways a club without a club.
Shelfie2 seen here is very much a module, part of that being due to spending time with the Trent Valley Fremo group. Even if it only gets joined to another project by myself sometime, the potential is fascinating.
It’s that time of year again! This one seems to have flown past!
So just a quick line to wish you readers a very happy Christmas, and to take a moment or two to think about those whom are by themselves or away from friends and family.
If you’ve got time tomorrow, this years Manchester Show is really worth making the effort. If you like Minories, and BR Blue, Alan Whitehouse’s Hallam Town in 2FS will float your boat,
Geoff Kent’s sublime Black Lion Crossing features EM Gauge and BR steam.
For OO Andy Jones’s Tarring Neville showcases an unusual and highly effective peninsula design, with superb detail touches and buildings, real ‘presentation’ food for thought.
For O gauge Gordon and Maggie Gravett’s Aran Quay oozes atmosphere
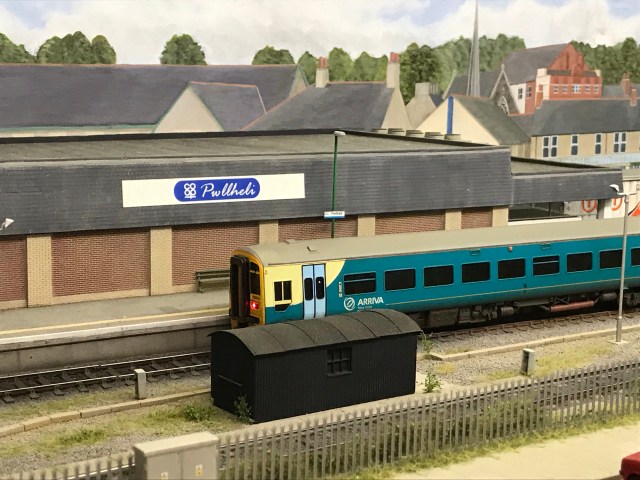
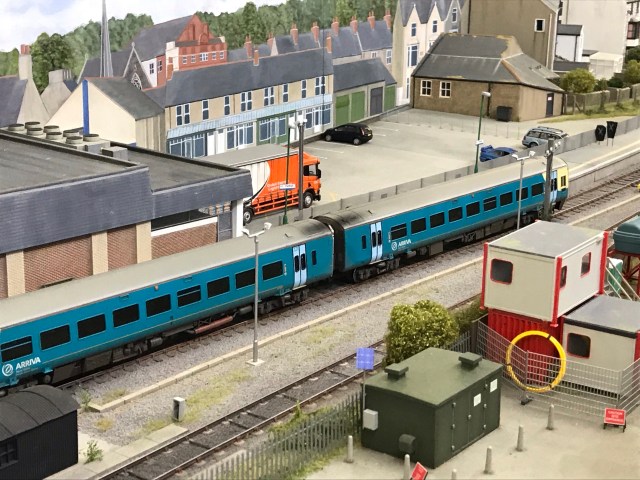
And for me one of the best P4 layouts I’ve seen, Pwllheli from Jonathan Buckie. This sort of attention to detail in a contemporary era layout isn’t common, combined with a recognisable location and brilliant colour balance, Pwllheli is worth searching out!
Manchester 2018 very much in the exhibition Premier League, if you can go, just do it!
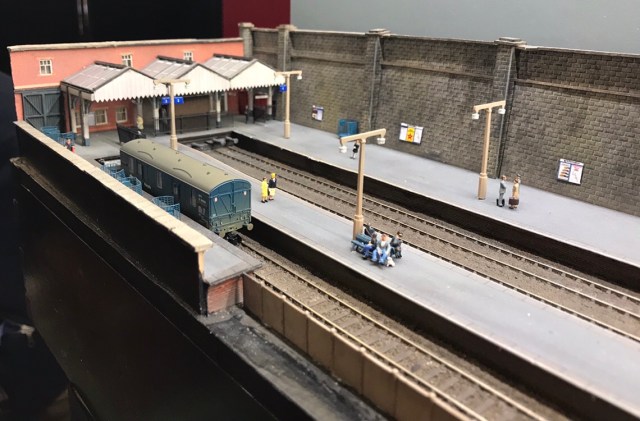
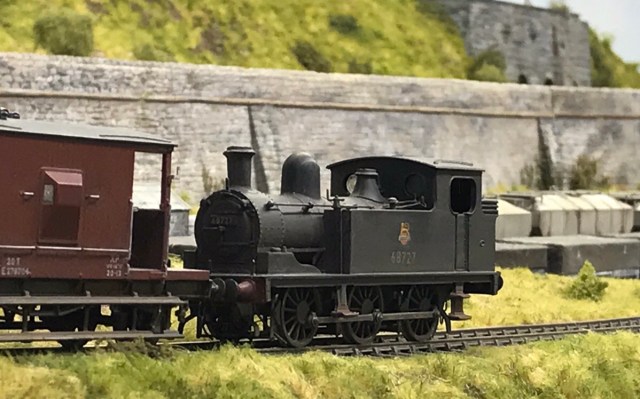
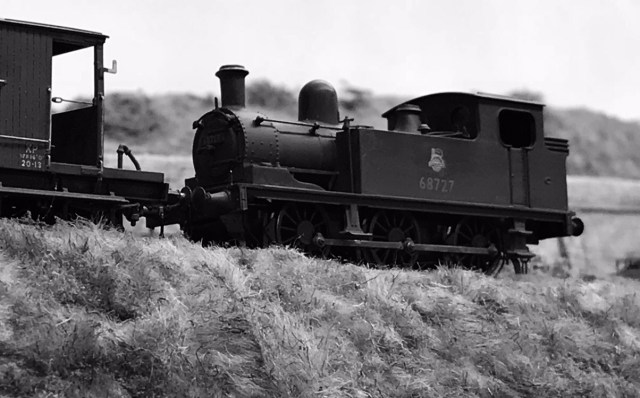
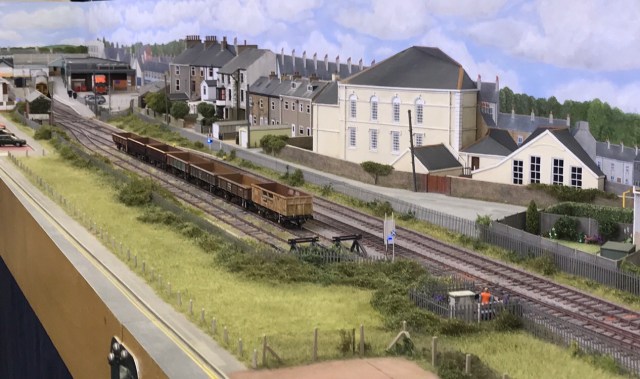
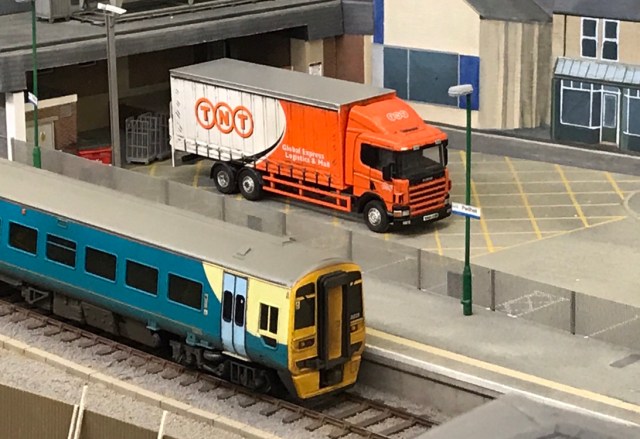
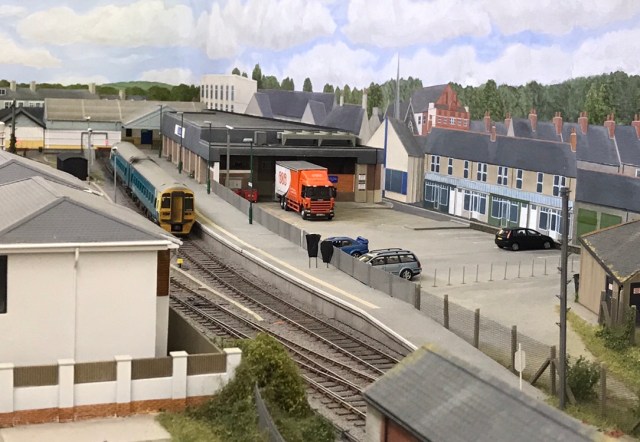
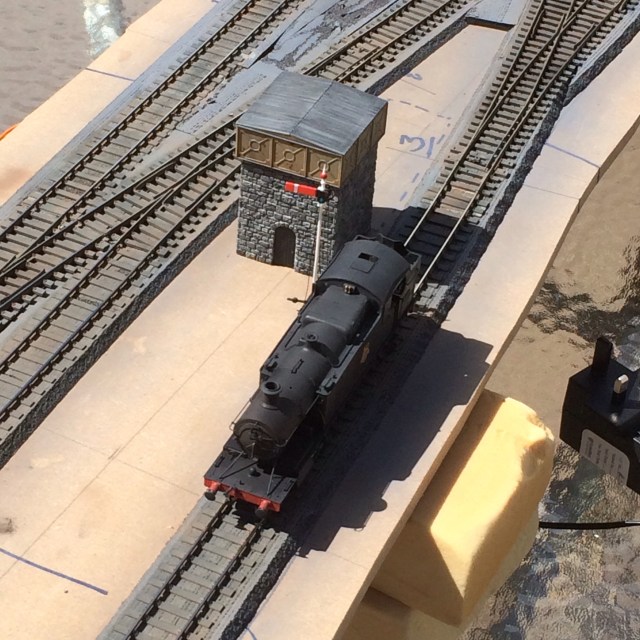
These images are about two years old, I find that surprising because sometimes time seems to stand still with a layout, despite progress being made. Shelfie2 has had a bit of a Byzantine journey, ranging from a North Wales DMU based through station, to Southern electric, Great Central DMU, and land at its final destination, a drift mine loading point off the Whittle colliery branch in Northumberland. Even then that’s not likely to be the end of the tale, part of its design is that it can be used as a module, and there’s still that Forest of Dean system I have on the bucket list. Severn & Dean
For me it’s interesting to look back and see how once I’d settled the final design, how close I got and am getting to my ‘minds eye’ picture of how it should look.
If this looks all a bit ‘Friday afternoon’ it is! Why is there a ski glove sticking out of the layout? Not only is it part of my super new winter range, but it also covers a G clamp, and forms eye and scratch protection. Handling bright lights means stuff sometimes goes unexpectedly into shadow and is easy to miss!, be safe out there kids…
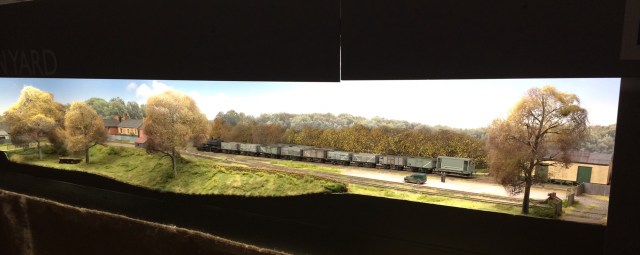
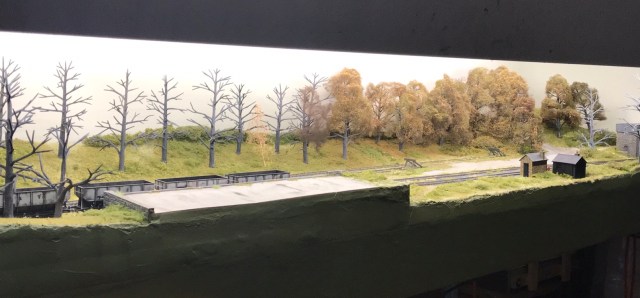
This is the backscene mocked up from wallpaper lining paper, but set in the core framework for the lighting. I can now get a really good feeling about how it’ll look and what it’s like to operate for real. Before it goes out anywhere I’ll know the pro’s and cons of what I’ve built, and if fitting it as a module into the Severn and Dean project is viable. So far, so good!
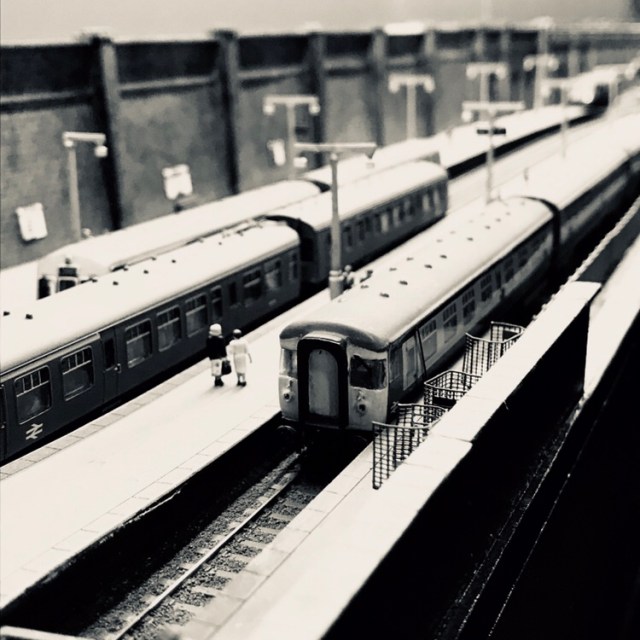
Full Lighting
Without Rear Downwash Lighting
This is the effect Albion Yard used, the blue in Albion’s backdrop bounced cool tones back into the layout. This time I’m using 4000k LED battens, rather than Albion’s traditional fluorescent tubes. The idea here will be to try an overcast sky, heralding an imminent rain shower. So the skies tonal value will be emphasised towards cool greys. I need to play around a bit more with the colours as I want a diffused distant tree covered hill line, which will require opposing warm brown tones for this time of year.
Backlit Downwash Lighting
I’ve also changed a few trees and one foreground building has gone. Just these simple light tests can tell me if something is ‘wrong’ on the scenic side. The additional tree diffusers (from Albion Yard), indicates the rear downwash lighting will minimise shadows falling onto the backscene which is really pleasing. Neither LED lighting batten has a dimmer fitted, this is something I’ll look at to play around with intensity. I already think the rear batten needs to be higher, reducing intensity and increasing the spread. Next step is the pure white background, this lining paper is an off white, in effect giving a cream/yellow cast on the reflected light, (see image four) . Then it’s take a few more forward steps from there, hopefully that’s next week!
Well, back from Warley, and back from this mornings equine lawnmower entrapment scheme, here’s a few more images from the 2018 Warley show.
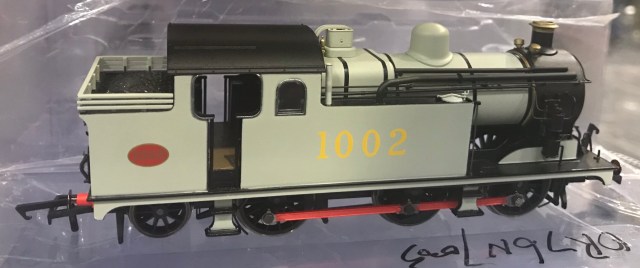
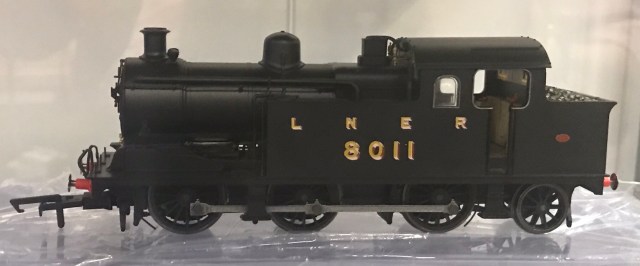
Oxfords OO N7 decorated samples, the announcement was covered earlier here Toy Fair . The appearance looks very well captured and the test models have worked hard hauling large trains without problems including incline work.
BR Mk3 coaches were also shown, these being early livery samples of the ScotRail and Stobart schemes. Not being my thing the blue waist band stands out as too lurid, but as noted, they are samples.
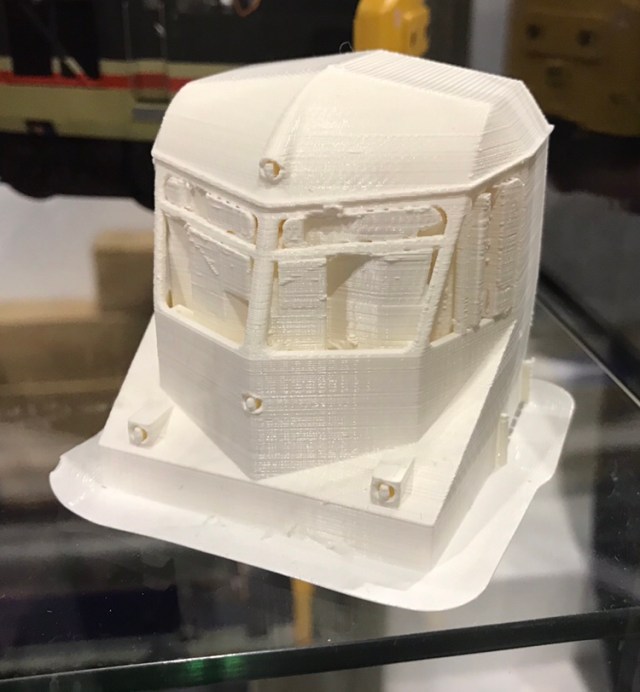
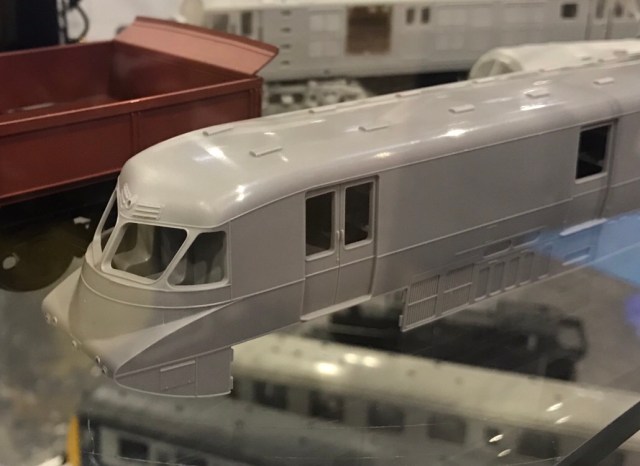
Over on Heljan’s stand the first 3D print of the GWR railcar nose was displayed as well as the review examples for the 43xx GWR moguls.
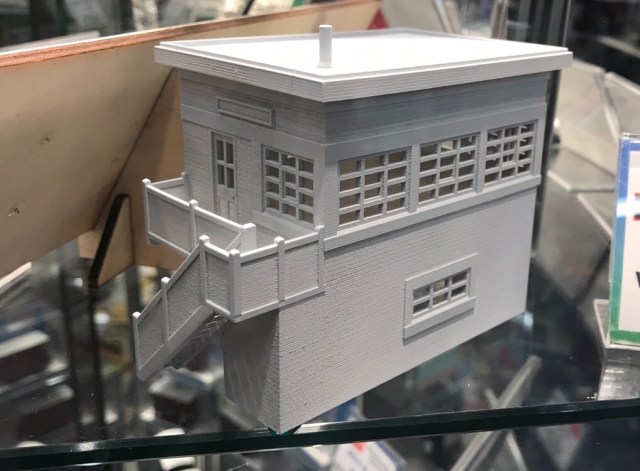
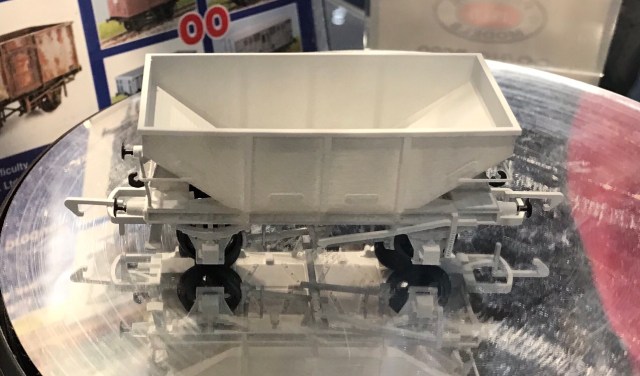
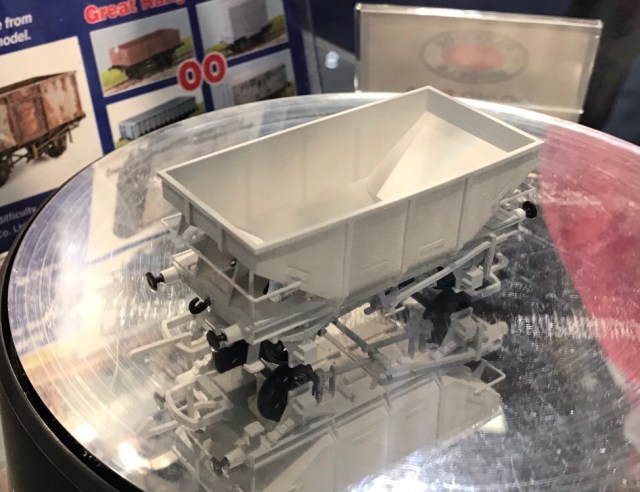
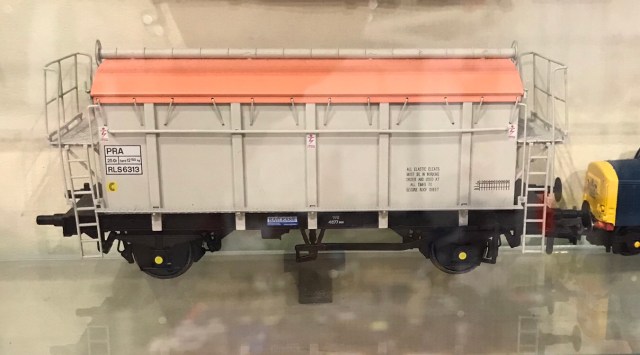
Returning to Peco’s stand two very interesting items for me for future projects, firstly the GWR ARP signal box to be released by Ratio, and the first new 4mm release by Peco Parkside the steel 13t BR hopper wagon.
The EM Gauge society stand also had the EP of the Peco produced B6 left and right hand ready to use points.
I understand these will be supplied as electro frog only, rather than the Unifrog design that is becoming the default standard for Peco’s new, and revised point and crossing work. It’ll be interesting to see if these attract new converts into the gauge, sensibly they are exclusive to the society, and will give a clear head start to track building. A good friend noted today that this is only a part of the battle, arguably the more challenging bit is the chassis building and conversion of some RTR chassis.
Kernow’s OO PRA China clay wagons looked good in decorated samples. I expect these attractive and useful short wagons will be popular within the D&E fraternity.
Next door to Kernow on the DJ Models stand the 3D EP print of the crowd funded GWR King was in evidence.
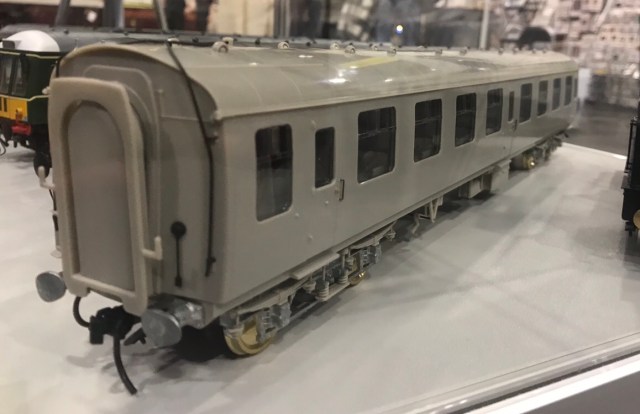
Tottering back across the hall to Dapol EP of one of the O Gauge BR Mk1’s was on show looking to me very promising.
The whole appearance of the coach captures how a Mk1 should look, the sit on the bogies and end/side body profile being more effective than Heljan’s previous releases, and Daersted’s far more basic appearance.
The Dapol 4mm GWR bracket signal was shown, the actuation for the outer arm being a lever action fixed to the outside of the bracket structure.
There’s sound logic to using that method, for simplicity and ease of production assembly, however for me it puts an X in the no thanks box. I feel they’ll do well in the general market, currently they have no real competition and if they prove reliable we’ll see them on everything from GWR BLT’s to Kings Cross!
As with Heljan covering the GWR Railcar (further post to come) Dapol’s 4mm early EP test for their parcels variant was in the showcase. Hopefully the motor which is visible in their passenger model will be more effectively hidden with this one. Certainly an encouraging start though.
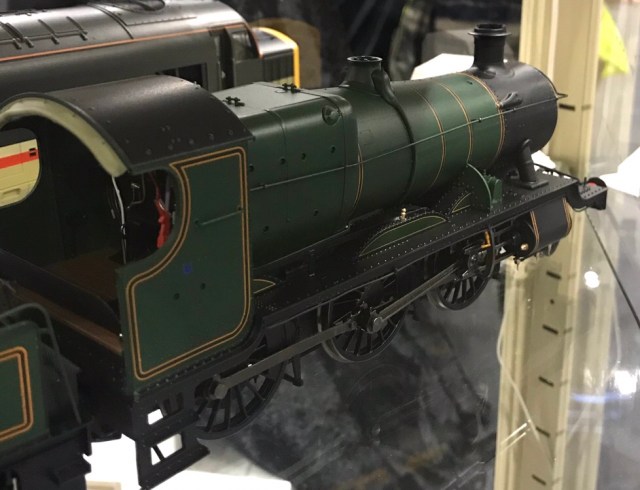
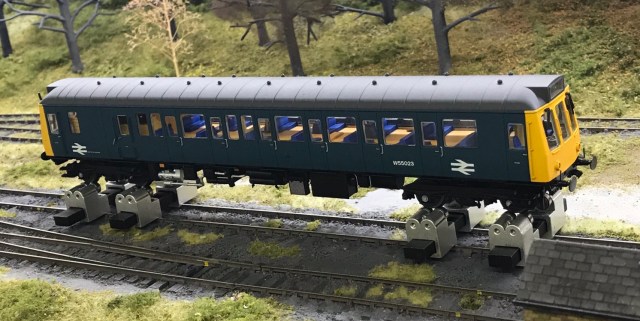
I didn’t get much opportunity to see around the show being busy assisting the Modelu team, However there were some good deals to be had which included Dapol O gauge Panniers and their class 121 BR railcars.
The pannier is a potential first step into O gauge. Leaving it a bit late on the Sunday meant I got the last one, seen above, rather than a BR livery example so there’s a repaint ‘opportunity’ for me at the very least.
The 121 will sit in the stock of Shelfie3, a DMU based layout in the planning. Seen here on test on Shelfie2, it runs very well straight outa da box. Don’t fret, there’s no box opening vid coming at you.. Internal lighting does rather highlight the seats, which look like they’re floating in custard, that’ll be one of the first changes I make!
Overall an interesting show, neither Hornby, Oxford Rail or Bachmann had new product announcements, but will be making them in the new year. Accurascale made headlines as they uncovered their Deltic in 4mm scale, and RevolutioN dropped a cheeky little N gauge 56xx and their 4mm scale MMA/JNA contemporary box wagons into the market. Across the trade there seemed to be a pretty optimistic feeling to this show, it seemed busier than the previous two years have been.
I get the distinct feeling the hobby has a future!
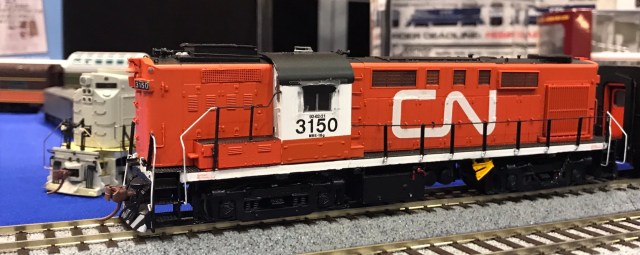
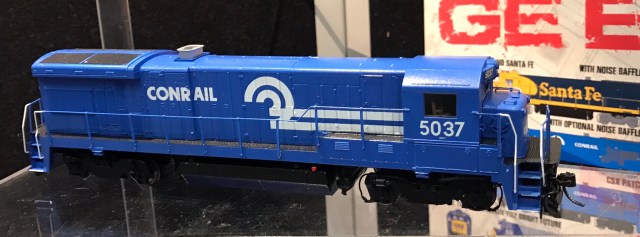
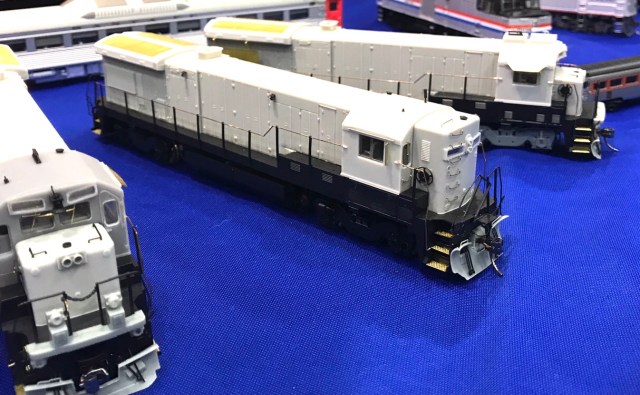
Firstly apologies for lack of narrative with this post, getting a few minutes around the show to grab images is challenging at times! Still here’s the Canuck stuff, and it looks to Rapido’s high standard
The Tempo, I have no need whatsoever for one of these, but in the flesh, difficult not to flash the cash for one!


You must be logged in to post a comment.