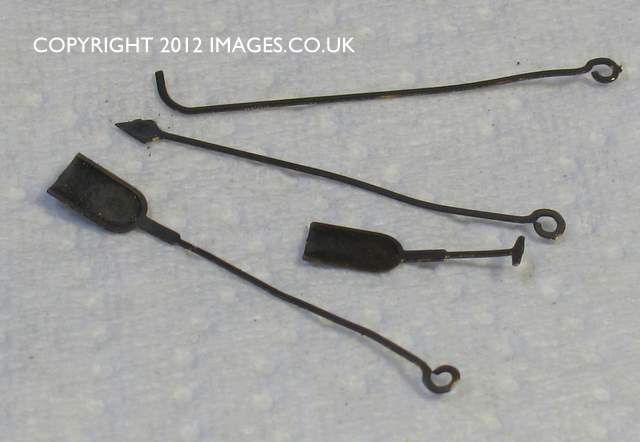
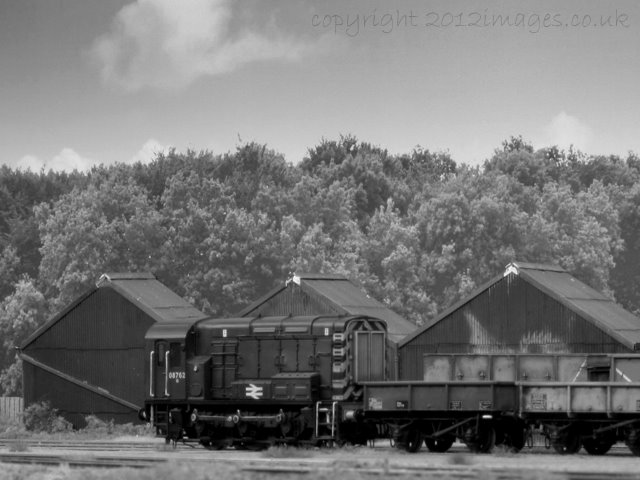
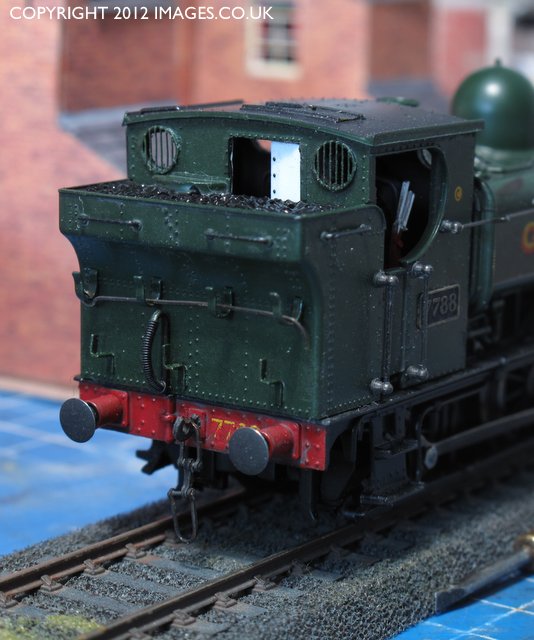
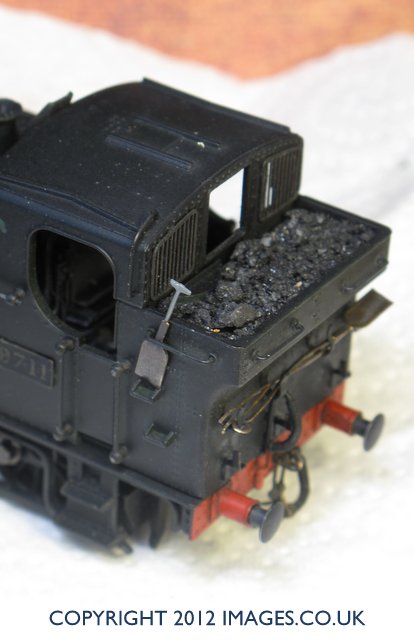
‘Trinity’ 08 Brassmaster Rods

Heres a quick step by step on how to do the conversion. This isn’t the Brassmasters version as they assume a wheelchange too, which if you’re doing EM/S4 is the most likely way forward. I didn’t want the expense of new wheels and bought the rods and Markits/Romford crankpins, (I’m embarrassed to say), years ago. Total conversion time for the first one start to finish was about three to four hours as I was working my way through the techniques, this includes soldering the rods together, finishing them and joining them with a crankpin rivet to give a prototypical knuckle joint. I’m also using a Peco PL-70 loco servicing cradle whilst I do much of the dissasembly. Its simple, cheap and effective.
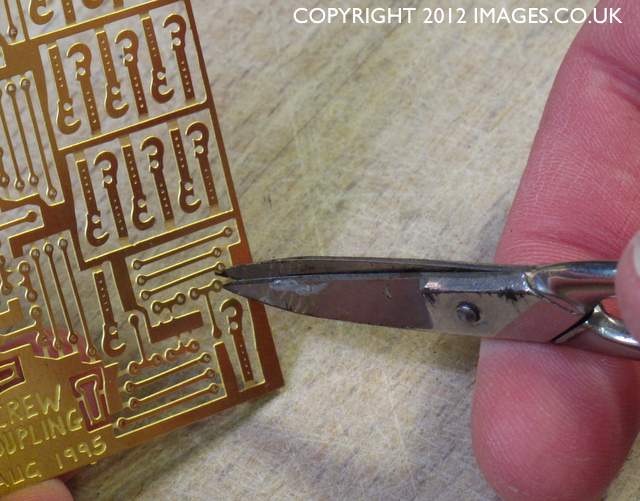
Brake gear removal

Firstly remove the brake gear, this is a simple push fit, the locating pins are at either end and on the central brake shoes. The plastic is pretty flexible so you shouldn’t damage them. Refitting is a simple reversal at the end of the conversion.

Keeper Plate Removal

Keeper/base plate removal is next, one crosshead screw at each end of the plate.

Removing the wheelset, they are easy to remove the whole wheel, gear and axle assembly coming out together. Once I’ve done that I replace the keeper plate, this keeps all the components together whilst you don’t need them and holds the centre sprung axle mount in position too.

Rod & Crank Removal

The cranks and rods need removing, these are held in place by two lugs on the end of the crank molding seen here. You may need to squeeze these with a pair of tweezers to release them, and then pull the crank and rod away from the wheelset, it is a firm fit so expect a bit of resistance as you remove them. Doing it this way keeps the wheels quartered and reduces the workload of the conversion. You can see the left hand pin has already been replaced on this axle set.


This second image above gives a better view of the fittings as they are dissassembled.

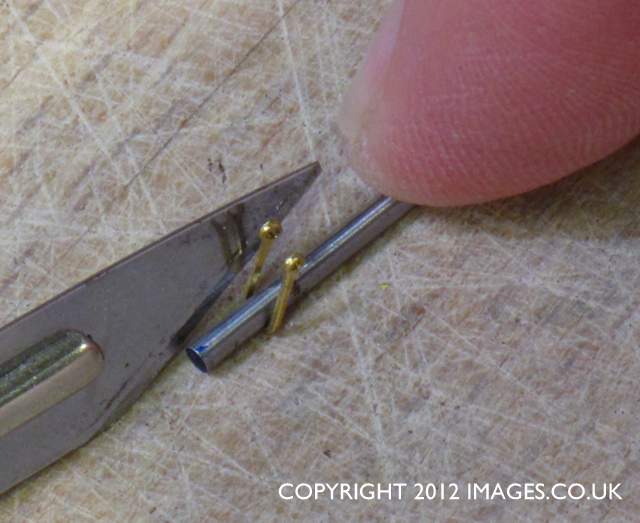
The Bachmann crankpins need to be removed, the easiest way I found, and its a bit crude, was to file the inside end of the crankpin. This allows you to part the crankpin and rods from the molding and if you do it carefully the pins will push outwards, out of the crank from the end you’ve filed.

You need to do this for all six cranks, however I worked on one set of rods or side if you like, at a time. Once the Bachmann crankpins had been removed I replaced them with the Markits/Romford versions.

These were cut to length, again nothing scientific here, but about three threads of the screw was the ‘measure. These were cut one at a time with a fret saw, and then screwed, self tapping into the Bachmann crank. By fortune they are just oversize for the hole left by the original pins so this method fixes the new pins in place too. At this point the rods are made up as per the instructions from the Brassmasters PDF, downloadable from their site. The Markits crankpin diameter is marginally smaller than the etched rod crankpin holes so they fit perfectly. I used the main structure of the rods but omitted the cosmetic bosses as I was using the Markits crankpin washers. I wanted to keep the assembly within the original chassis loading gauge and this ensured that worked. Tapping the knuckle joint rivet through was a little tense, its ages since I’d done one (fifteen plus years), but a couple of gentle taps gives a prototypical joint on the connecting rod.

I made sure that the rods worked well, i.e. they weren’t tight at the knuckle and re-assembled the chassis, leaving off the brakegear. This means replacing the wheelsets only as the rods aren’t fixed yet.

To make sure the chassis ran well I slipped the rods onto the crankpins, and held the rods in place with plastic sleeves. This allowed me to run the chassis and see if there are any tightspots and that the rods are working well.

Once happy the locomotive ran well and slowly with no binding I fitted the brakegear and ran the test again, to make suire there were no clearance issues I’d missed. Satisfied there weren’t it was then time to fix the rods for real. I’d taken the easy option again and decided to solder the crankpin washers to the crankpins, cut them to length and then file flush.

This is a quick method of fixing the rods, but it is permanent, then again the originals were too, so you’re not losing any functionality by doing this. Make sure the rods are on the right way up, and use a barrier paper like I have here. Once they are soldered you can disassemble them and cut the extra length away, I used a fret saw again and filed them flush to the crankpin. The last job is to paint the rods, I did this using enamels and then gave the rods, crankpins and wheels a light weathering using MIG pigments. The loco’s had already been weathered with a mix of acrylics, enamels, MIG pigments and artists pastels, (yes you can mix em all if you’re careful) and were now really coming together.

The final touches, adding Shawplans EEFG0802 08 Laserglaze windows to the cabs and renumbering them using Pressfix transfers, choosing pre TOPS early to middle 1970 liveries. This included removing double arrow logos from the battery box doors on one loco, and replacing them to the bonnet doors. The reason being the bonnet door variety was far more prevalent and having two battery boxed examples, (my Hornby 08 is identical) seemed too much of a cliche. These engines are partly for a 1967-72 era layout that a friend is working on, but they’ve also sparked me off on my first ‘micro layout’, something I didn’t forsee at all!

It’s taken a long while to get these three loco’s to where I want them in terms of appearance, partly because I left stuff on the ‘to do’ pile way too long. I actually like them better than my Hornby 08’s now, and thats because I’ve put something into them, they’re unique, a model with my ‘stamp’ on it, and without me making that effort, they’d each just be another Bachmann 08.

http://brassmasters.co.uk/08_rods.htm

http://shawplan.wordpress.com/2012/02/09/9th-february-2012/

http://shawplan.com/

http://www.btinternet.com/~markits/

Posted in Airfix, Bachmann, Branch Line, brassmasters, British Rail, Canon G10, Chris Nevard, DCC, dcc sound, decals, Eastern Region, Exhibition, Great Western, hobbies, Hornby, Ian Futers, Layout, LMS, LNER, Midland Region, Model Railroad, Model Railway, Model Railway Journal, Modelling, Narrow Gauge, OO Gauge, Scottish Region, Southern Region, Uncategorized, Western Region | Tagged , , , , , , , , | Leave a comment

Bachmann/Brassmasters/Shawplan Trinity 08

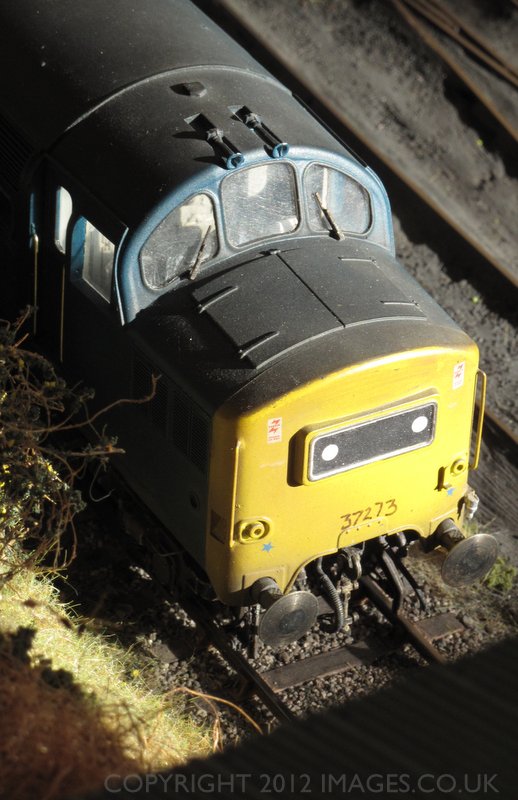
Not quite the holy trinity, but a decent place to start. Many years ago when t’interweb was a bunch of MSN chatrooms and Yahoo groups with people in effect emailing each other abuse, I did a makeover of four Bachmann 08’s, one BR Green, one Departmental Grey, and two BR Blue. These were written up on parchment and presented to the general public through the medium of the Railway Modeller Magazine. At the time the Hornby 08 was the original Triang version, a coarse body on top of the Jinty 3F chassis. The arrival of Bachmanns 08 made us all sit up and take note, clearly there was another significant step forward in Ready to Run fidelity. Previously if you wanted a really good 08 the two versions were the Modern Outline Kits etched kit, or a Lima body on top of an Impetus etched chassis. The Wrenn (nee Hornby Dublo), 08 was also kicking around but was often considered ‘too difficult’ to make a finescale model from. The Bachmann model then, was very good, certainly leagues ahead of its competition with a good mechanism, a good resemblance to the real thing, though I’ve never run a ruler over the real thing or the Bachmann/Hornby models, and a good paint finish. So on the whole we were presented with a good basic model to work on. In the original piece I concentrated on the cosmetic issues.

Scratchbuilt airtanks and cross beam

The airtanks under the front buffer beam were more Kate Moss than Katy Price, and there was none of the pipework around the chassis that is so noticeable on the real thing. New airtanks were made from brass tubing together with the channel section that runs between both pairs of front steps. This is an integral unit, using three link couplings I can afford to reduce the detail compromises needed for ready to run tension lock style couplings.

Scratchbuilt pipework under cab

The pipework was formed from brass straight wire, bent in an approximation of the shapes of the prototype. Pipe sections were shown by using masking tape wound round the wire and painted, and occaisionally a washer or small BA nut was threaded onto the wire to give a similar effect. I hand built four of these assemblies, and older and wiser now I’d have made a simple jig to bend all the wires to the same shape and length. Whilst far from accurate it gave a huge improvement to the chassis areas around the front and rear bufferbeams of the locomotive. This then left me with the opportunity to crack open the cabs and replace the glazing the hard way, by individually hand cutting each window pane. This is a tremendously tedious job, at the time laser cut glazing such as the Shawplan range was just a dream, not even on the horizon. This then left me with four 08’s looking like the following image.

Railway Modeller Article Bachmann 08

Until the arrival of the completely new Hornby model for the 08 seen below, the Bachmann model was the best game in town. With the Hornby release the deficiencies of the Bachmann model, particularly in the appearance stakes were easy to see.

Hornby's 08 Raises the Game

The Bachmann model had a less refined chassis in particular, this was easily seen comparing the two, Hornby and Bachmann, side by side. The Hornby connecting rods were finer rather than Bachmanns stamped variety and there was plenty of Bachmanns missing pipework on the Hornby model. The chassis springs are better defined on the Hornby model, however careful painting and weathering can significantly enhance the Bachmann chassis and can reduce the visual impact of Bachmanns thin springs. In terms of running quality the Bachmann model still scored highly. Some of the early versions of Hornby’s 08’s were nicknamed ‘screamers’ as at least one batch had a fault within the drive train resulting in what can only be described as a screaming sound. One of my Hornby 08’s had this fault which was cured by replacing the wheelesets with an Ultrascale kit. These have different shapes and materials for the axle bearings, so if yours is a ‘screamer’ then this may well be the cure, it certainly was for mine. In the meantime Brassmasters had realised that there was an opportunity to provide etched replacement connecting rods and balance weights for the Bachmann model, these were primarily marketed to modellers changing the Bachmann wheelsets with either Alan Gibson or Ultrascale replacements. I bought a few sets of these rods and as mentioned in the previous post they sat on the ‘to do’ pile. Another key arrival was the Shawplan Laserglaze kits for the Bachmann 08, I now had the final pieces of the jigsaw and three of the original 08’s were taken out of store and given their final makeover.
http://brassmasters.co.uk/08_rods.htm
http://shawplan.wordpress.com/2011/12/08/bachmann-08-laserglaze-kit-released/
http://shawplan.wordpress.com/laserglaze-product-list-20th-february-2012/

I’ll shortly cover in this blog how to fit the Brassmasters rods using the original wheels, and Markits crankpins, which is different from the Brassmasters instructions which involve changing the wheelsets.

Posted in Airfix, Bachmann, book, Branch Line, brassmasters, British Rail, Chris Nevard, decals, Eastern Region, Exhibition, Forest of Dean, Great Western, hobbies, Ian Futers, Industrial, Kalmbach, Layout, life, LMS, LNER, Midland Region, Model Railroad, Model Railway, Model Railway Journal, Modelling, Narrow Gauge, OO Gauge, paint, research, Scottish Region, Southern Region, Uncategorized, waterslide, Western Region | Tagged , , , , , , , , , | 1 Comment

Inspiring Magazine

Yesterday I received a copy of Narrow Gauge and Industrial Railway Modelling Review, from Bob Barlow. Bob has recently taken the editors chair, Roy Link now taking on the role of production editor. The magazine has always been a good quality read, similar to Narrow Gauge and Shortline Gazette with some esoteric items but always backed up with good writing and production. I’ve known Bob for a good few years and like a number of my other friends we like the big mainline stuff, but show us a weed strewn line snaking off between a couple of buildings, and we’re there, like rats up drain pipes ignoring the double headed prototype Deltics charging past on the mainline behind us. The magazine is well laid out, clear color and black and white pictures illustrating the articles and a beautiful set of 4mm line drawings for the War Department Baldwin 4-6-0T. The Baldwin article is an excellent example of the ‘finescale’ mindset, this article taking elements from kits as well as scratchbuilding components to make a sublime representation of the real thing. Whilst the magazine title does what it says on the tin I’ve no doubt that like many of the MRJ’s, the techniques and skills on show will be transferable by those so minded to more mainstream themes. Bob was the original editor of Model Railway Journal (MRJ), and there are some noticeable parallels between NGIR and early MRJ’s which together with Roys skills as a modeller, writer and illustrator bode well for the future. I feel a subscription coming on.

Having spent the morning reading NGIR it relit the actual ‘modelling’ fire, which has been a bit dull of late. I’d recently had the opportunity to fit Shawplans latest Laserglaze set to my Bachmann 08’s however they still looked a bit chunky in the running gear having the original connecting rods, one of then in fact having a set on back to front from the factory. I’d bought a good few years ago a set of Brassmaster rods to replace them, and they’d been sitting there saying ‘fit me’, ‘fit me’, though nowhere near loud enough. Well I rummaged around and thought ‘stuff it’, I’ll fit them. So I did. The power of the written word is extraordinary sometimes.

Brassmasters Rods

Well the first one is done, and theres a second now work in progress, which will be finished later today. The only extras needed were Romford crankpins from bought from 247 Developments, and that its a very simple conversion. Once the pair are done there’s a real danger that there’ll be a industrial shunting plank in OO. That plank is likely to be inspired by Whittle Colliery in Northumberland, in which my late father in law once arranged a shift underground for me. That has always been an abiding memory, something that H&S almost certainly wouldn’t allow these days, and I thought one day I’ll model something like that.

Bachmann 08 / Brassmasters Connecting Rods

And that Barlow chaps not entirely blameless either…

Posted in Bachmann, Branch Line, brassmasters, British Rail, Canon G10, Chris Nevard, Eastern Region, Exhibition, hobbies, Hornby, Ian Futers, Industrial, Kalmbach, Layout, Midland Region, Model Railroad, Model Railway, Model Railway Journal, Modelling, Narrow Gauge, OO Gauge, Scottish Region, Southern Region, Uncategorized, Western Region | Tagged , , , , , , , , , | 1 Comment

3f Jinty

Bachmann/Brassmasters 3F

It’s just about a year ago that I wrote about working over a selection of Bachmann’s very good Fowler 3F Jinties, also known as Jocko’s.

Bachmann's 3F Jinty

Heres the ‘starter for ten’, the best RTR version to date, and a very good reproduction for the market place in terms of accuracy and in coomparison to Hornbys model which dates if I recall from the early 1980’s. To be fair the Hornby model was seen as a pretty good effort for its time, it too benefiting from a little extra work for those so minded.

Well the first conversion is now pretty much complete, not all the Brassmasters components were used, and some extra detail work was undertaken. I also had a look at the practicality of fitting DCC sound discretely into the model. It can be done but it will be very difficult to hide the speaker and the chip. One solution is to take the boiler weight out and part of the bunker assembly, but this will reduce the overall weight of the model. This probably won’t be an issue on East Dursley, the layout the loco’s are destined for, but may be more of an issue for larger layouts with longer trains. There are alternative weight solutions which will be looked at, but I shall resist for the time being ‘finding’ any depleted uranium from Boeing 747 tailplanes lying around at work.

Brassmasters 3F Detailing kit

http://brassmasters.co.uk/

Posted in 3f, Airfix, Bachmann, Branch Line, brassmasters, British Rail, Chris Nevard, DCC, dcc sound, Exhibition, hobbies, Hornby, Ian Futers, Layout, life, LMS, Model Railroad, Model Railway, Modelling, OO Gauge, review, Uncategorized | Leave a comment

Waterslide decal II

Waterslide Decal Application

Many of us at some time have had that moment when we’ve completed the model we’ve been working on and been let down by the decals supplied, often this has been the backing carrier film showing (silvering), or the decals not settling down correctly on the model. Today’s decals are on the whole good quality and in this short article we’ll look at how to get the best from them.

Decal 'silvering' over matt paint

The example here is a standard rib sided shipping container in 4mm scale, and shows how to a set of decals can be applied to get them sitting into the contours, and minimise the carrier films appearance. Silvering occurs when there is air trapped underneath the carrier film. It is particularly noticeable on matt paint finishes, the paint has a ‘rough’ texture and allows air and water to be trapped easier under the film. (See the picture of the 08 bonnet). When I apply decals I use a gloss finish, if I need to get either a satin or matt finish I overcoat the varnish or lacquer with a matt finish.

To start the tools I use are:
Sharp knife and metal ruler (decal cutting)
Sharp scissors (decal cutting)
Good quality paint brush (around OO size is good)
Mineral water (decal realese)
Micro sol (decal softening solvent)
Micro set (decal setting solution)
Varnish or lacquer as required

It is important to have a good smooth finish on the model to work from. You may find some say that you can apply a waterslide decal on to a matt finish with no film showing. I cannot recall seeing this in many years of modelling and the following technique will get you excellent results every time.

Start with a gloss finish, the containers here have been sprayed with gloss red paint over a red oxide primer and left to harden for a couple of hours. Make sure the area you’ll apply the decals is clean from grease or dust, and then give a thin wash of decal softener. If the area has a compound curve or ridges like this container I will use the solvent. This allows the decal to deform and stretch around and over irregular shapes.

High Gloss Finish

I cut the decal close to the edge of the carrier film, or the logo/writing of the subject. Some sheets like Modelmasters or Cambridge Custom transfers are printed on a whole carrier sheet film, in which case I cut to about 1-2mm form the decal edge. The decal is then immersed in the mineral water for about 20-30 seconds. I use cheap supermarket mineral water as this gives good consistent results, tap water is arguably just as good though. Once the decal starts to move transfer it to the model and apply it as close to the final position as possible. If you leave it too long the decal will pull on the backing sheet and can tear or distort.
With a large decal as shown, I get one part of the decal in its final resting place first and then work to the farthest point. The next part is to place a wash of the softener or solvent over the face of the decal. If the surface is irregular, such as these container ribs the Micro Sol is better to use. If the surface is flat like a van or mineral wagon side I’ll use Micro Set. On this example the Micro Sol will be the better product to use. You will note the surface start to become wrinkled, this is ok as when the decal dries they will shrink and disappear. After five minutes or so the decal will sag slightly as it draws into the surface. At this point I use another solvent wash and use the brush to gently press the decal into the surface. You may see some air pockets forming under the decal, these show in a way you’ll readily recognise, ‘silvering’. I use the brush and gently push the air to the edge of the decal. If you get some that won’t respond its ok to leave them until the decal is completely dry. When it is dry pop the air pocket with a sharp point and then wash over the area with the solvent, this will then get under the decal and help it shrink and draw down onto the surface of the model.

I’ve also attached a shot of where I’ve left a decal with softener, but not initially worked it into the ribs. You can see where the decal has split, however it should be noted that this is not a fault of the decal or the solvents, just a faulty application of both. You can see the comparison shot with the correct method, the decals have formed over the ribs and the decal film has all but disappeared. It’s particularly noticeable on the image showing both the container and the 08 body in the set of the decal and the lack of silvering.

Once happy with the final set, I leave them to dry in the ambient room temperature, and then finish them with either a gloss, satin or matt varnish.

Posted in Airfix, Bachmann, DCC, dcc sound, decals, Exhibition, hobbies, Hornby, Kalmbach, Layout, Model Railroad, Model Railway, Modelling, OO Gauge, review, Uncategorized, waterslide | Leave a comment

New Radnor Stepping Stone to ‘Finescale’

New Radnor Station Looking West

Thursday 24th April 1930 isn’t much of a date in the history books, we were a month away to the day from Amy Johnson landing in Darwin for example, and it appears that nothing much happened that day of any real importance, certainly by today’s media hungry, event driven, standards. People went about their daily lives and in some cases as we shall see later, left their mark, unassumingly, for posterity. Many modellers like to take elements of real railways and weave them into their designs, some use a completely freelance template, and others like to model an exact location. The last option is frequently a path trodden by a modeler with a good bit of experience under their belt. With this plan the simplicity allows all three approaches to be followed, but the part that makes the exact location option quite easy is the fact that the main buildings are still extant, and the location relatively small.

Today after all the festivities I often take a few moments to just sit and chill out frequently picking up one of my collection of books and ‘imagineering’ a model railway layout. For many years the Great Western branch line terminus has been seen as a bit of a cliché, of late, modern MPD’s or Scottish BR Blue era branch line termini are also sometimes regarded as a ‘stereotype’ model railway. So then, unashamedly returning to the Great Western branch line terminus, for the same reasons as they, and the above more modern subjects are so popular. Using these ‘cliched’ prototypes, a modeller can often achieve a good, realistic layout in a relatively modest amount of space. This time its not looking at a postcard seaside Devon or Cornwall with Southern running powers, but rural Mid Wales. We will also look at how you can adapt the prototype with readily available scenic items and rolling stock to make your own interpretation of this charming and quintessentially Great Western branch terminus. When I look at such a project I tend to look at some of the social history of the area. This wouldn’t have been a chocolate box type Western terminus, in a pretty thatched village, this was rural mid Wales Marches, well off the beaten track with a harsh rural economic climate too.

New Radnor lies approximately 20 miles west of Leominster, and lies against the eastern foothills of the Cambrian mountains. I first came across the Station buildings on the way back from Llandovery to Hertfordshire, in the late 90’s, and was staggered to find myself driving past a station that seemed to be complete apart from the lack of track. At that time the site was a bit run down and was a caravan site, it still is, but has been upgraded significantly, and the owners have an interest in the history of the site too, which bodes well for the buildings futures.

The site has a natural backdrop of a hill which if you model an early era can be left as upland grazing, or if you bring your era to the 1940’s and later, the backdrop would be Forestry Commission woodland. If you are going to have a go at re-creating this station or one with a similar backdrop, one thing you’ll need to be good at is making trees, and I will add a posting in due course to the blog on how I do mine.

Panniers & Trees

The main station area comprises just two buildings, the goods shed, and the station building itself. Both are relatively simple in design, drawings are available in the Wild Swan book of the branch, and both buildings are still extant. The track plan is simple too so the whole station easily provides that first stepping stone for those wishing to widen their skills into scratch building, replicating an actual location, or interpreting a real location with a high degree of authenticity.

New Radnor Station Looking East

The track plan changed a few times over the years but is in essence a simple run round loop with a couple of sidings. As such it suits all modelers from those using set-track up to those who hand build track from individual components. Again the simplicity of the design lends itself to the stepping stone of building your first track, or a change to a finer scale standard, OO to EM/P4 or N to 2mm. With four turnouts, the wiring for either DC or DCC operation will be very simple. The track layout is interesting in that it looks like a through station, and that was the original builder’s intention, with an extension to Rhayader and then on to Aberystwyth being the somewhat optimistic goal. Alas as with many of the early railway ideas, money and practicality put paid to such grand designs and New Radnor was as far as the line got. The station platform is on what would normally appear to be the run round part of the loop, thus emphasizing the fact that this was a truncated line.

The structures still standing as of late 2009 were the station building and the goods shed. The station was small and even as a terminus there was only a covered ground frame for the signalling. There was a brick built water tower next to a cattle pen, and in keeping with the size of the station these were quite small. The station and goods shed building appear to have been built from local stone, as you can see from the pictures they are very simple straightforward structures to attempt a scratch building project with.

New Radnor Goods Shed

However for the modeler who doesn’t want to go that far there are some easy ways round the buildings. In both the Ratio and Wills ranges of kits there are buildings that could be used to give the flavor of just this sort of terminus. There are of course ready made cast buildings available too which shouldn’t be overlooked, but the beauty of a compact layout like this is the opportunity to make something distinctive and unique by either scratch building or modifying kits to give a model which has your, as the modeller, signature or style. To use current TV talent show vernacular you can ‘make it your own’.

So if we look at what’s available to easily modify in 4mm scale we have from the Wills Kit range
Ground level signal box SS29,
Water tower (stone) SS34,
Station building SS67
Goods Yard Store SS63
Platelayers Hut SS50
Also in the Ratio range you could swap the yard store SS63 for the Provender goods store 513, and cattle docks are available in both OO (502) and N (202). These products listed above are not a definitive purchase list, but give an idea of what is easily available in many model shops throughout the country. The key thing about all of the above items is that built and painted to a consistent standard they will give a believable set of small terminus buildings and set the scene for our Great Western or Western Region terminus. You can do much the same with N gauge, the Ratio, Peco and Kestrel ranges of kits all have suitable buildings which you can use as per the kit, or adapting them to make your own design.

New Radnor Goods Shed

Stock
For the person who wants to run stock straight from the box with a prototypical mix of locos and stock, New Radnor offers a cheap and pragmatic option. In both OO and N gauge ready to run options are readily available.
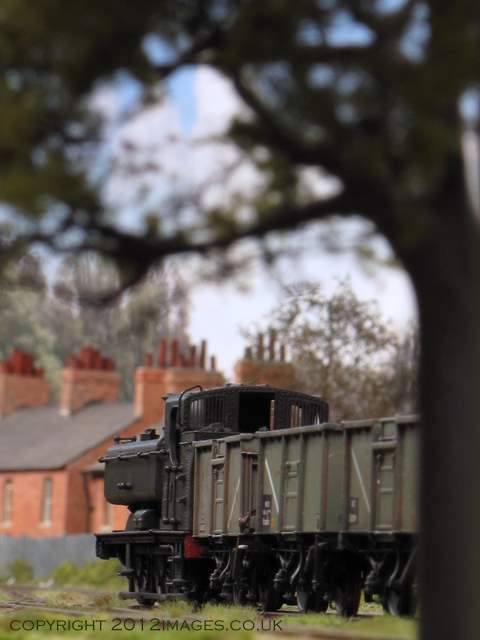
The branch was operated primarily by the GWR class 58XX 0-4-2T, coaching stock was recorded as Worcester Division ‘B’ sets with a typical range of freight wagons, and the classic GWR/WR 20 ton ‘Toad’ brake van. To ring the changes in motive power a 57/37/74XX pannier tank could be used. The 58XX can be easily represented by the Hornby and Dapol 14XX tank models in OO and N gauge respectively, all that’s really required being a number change with 5807 and 5814 being the staple locomotives used on the line. The most notable difference being the 58xx’s were not motor fitted, so wouldn’t be seen with the ubiquitous ‘push-pull’ driving trailers so often associated with a GWR branch line. The coach ‘B’ sets were a high density seating suburban design, frequently coupled in pairs. Both the Hornby and Dapol versions are of similar diagram and can easily be utilized straight from the box. The goods stock can be made up from a wide range of kits, and also from the ready to run ranges. As the branch line was a small and very rural affair then the art of the mundane is what you should look for in terms of stock, so it’s very typical standard freight stock of open wagons and vans. Typically for wooden body opens the RCH six and seven plank private owner as well as Great Western company prototypes, mixed in with some ‘foreign’ company stock. In BR days the RCH wagons would be in tatty condition with them being rapidly replaced by the BR 16 ton steel mineral wagon. To add more variety whilst remaining plausible, a bogie bolster may occasionally turn up to take large tree trunks away felled from the local forestry, and cattle wagons for livestock. On occasion a horsebox could be added to either the passenger or goods train as you desire, Parkside produce a 4mm and 7mm kit of the N13, a typical Great Western design that lasted into BR days, and Hornby in 2011 also brought out a new tooling of the GWR horsebox. If you decide that you’d like to bring it up to BR diesel era, as a line that escaped the Beeching axes that can be modelled using an Heljan (OO) or Dapol (N) Hymek as per the Newcastle Emlyn branch, with the passenger traffic being provided by a Hornby (OO) or Dapol (N) class 121 single car DMU. So the modeller can have a prototypical range of locomotives and stock available off the shelf, and in the overall scheme of things keeping the prototypical flavour can make cost savings as you aren’t tempted by the latest releases from the manufacturers.

Stock readily available in OO
14XX Hornby
57xx Bachmann
B-Set Coaching stock Hornby
Class 35 Hymek Heljan or Hornby
Class 121 DMU Hornby
GWR Toad Hornby or Bachmann

Heljan 'OO' Class 35 Hymek

Stock readily available in N
14xx Dapol
57xx Bachmann Graham Farish
Class 35 Hymek Dapol
Class 121 Dapol (2010 Release)

This quick overview of a long disused rural backwater shows that if you search hard enough, or are just plain lucky like I was, there are some real gems still hidden in the British landscape, even in excess of fifty years after the last train ran, even down to what appears to be on some of the doors GWR light and dark stone colors. For those of you who want a challenge and want to build something with a little more purpose or realism than a rough sketch in the pub it gives a good template to work from. It’s compact enough to be built by one person, and if you wanted to make an accurate portrayal of the station the Wild Swan book and the fact that the real thing is still there gives plenty of inspiration for the project. When I was there the site owners were very interested in my idea to actually build a model of where they live, and they are keen to hear and see any new information regarding the railway. They were kind enough to show me inside the station and goods shed, both of the buildings are being looked at with a mind to convert them for accommodation. Whilst there, I noted painted on the crane that is still inside the goods shed, the date, 24th April 1930. That was presumably a date it was inspected or tested, and was a fascinating link back to the 1930’s when the site was still very much an active station.

New Radnor Station Building

There you have it then, a Great Western Branch Line which isn’t the typical portrayal so frequently seen in the printed media or at exhibitions. If you’d like to see an example of how this type of model can make a plausible layout I can reccommend ‘The Chronicles of Penhydd’ http://thechroniclesofpenhydd.blogspot.com/, which not only covers the layout, but has plenty of valuable ideas on capturing that most elusive element of a layout, ‘atmosphere’.

Further reading
The New Radnor Branch
Wild Swan Publications ISBN 1 874103 06 2

New Radnor Station Campsite http://www.oldstationcaravanpark.co.uk/

Finally many thanks for taking the time to read this blog over the year and wishing you all the compliments of the season.

Posted in Airfix, Bachmann, book, Branch Line, British Rail, canon, Chris Nevard, Exhibition, Great Western, hobbies, Hornby, Kalmbach, Layout, life, Model Railroad, Model Railway, Modelling, Nevard, New Radnor, OO Gauge, paint, Photography, research, Uncategorized, Wales, Welsh Marches, Western Region | Tagged | 4 Comments

Rust & Dirt

I often get asked what mediums I use for my paint finishes, they are really pretty simple, easy to obtain supplies from good quality art and model shops. Firstly I tend not to skimp on the cost of paint/mediums or applicants, eg brushes. This is because in my experience quality products tend to make these tasks easier, because they make the techniques and materials work better. The models shown are by myself and the finishes achieved using the listed products below.

Where thinners are required I will always try to use the same brand, as I they are formulated to work together, so any problems usually lie within the operator error category. The reason why I mention the shade and order is that in a very interesting conversation a while ago, the topic of color blindness came up.

Enamels
Humbrol Matt black No33
Acrylics Airbrush toning on the diesel body and steam locos. What I reffered to as my ‘basic palette’. In descending order of darkness shade, dark at top.
Matt Black Tamiya
Nato Black
German Grey
Flat Earth
And I always use the Tamiya thinner, but isopropyl alchohol works well as a thinner with those too, which a chemist can supply.

Rust patches on wagons in descending order of darkness shade, dark at top
Tamiya Acrylics
XF9 Hull Red
XF10 Flat Brown
XF68 Nato Brown (good basic rail color too, if you remember the painted streamline)
XF52 Flat earth

Mig Pigments again descending order of darkness shade, dark at top
Black Smoke PO23
Standard Rust PO25
Light Rust PO24
Vietnam Earth PO31
Industrial City Dirt PO39
Ashes White PO22

Artists pastels by Rowney and Winsor and Newton
Black/White/ and a WWII RAF Brown earth shade, and two or three others from a bright orange rust color to a reddy orange rust color.

Posted in Airfix, Bachmann, book, canon, Canon G10, Chris Nevard, decals, Exhibition, hobbies, Hornby, Layout, library, life, Manchester, Model Railroad, Modelling, OO Gauge, paint, Photography, review, Uncategorized, waterslide | 7 Comments

The Start Line

We are very fortunate that the history of the British Isles railway system has generally been very well documented through the years. There are exceptions of course, and when you start doing detailed research on well known lines and or stations or locomotives you can find blank areas of information, where you have to make educated guesses, perhaps using known standard practices from an earlier railway company or region.

When embarking on a new project I do enjoy the search through books and maps and going through boxes of pictures at exhibitions looking for data I don’t have. This is all well and good if you have a clear idea of what you want to model, but sometimes there’s ‘modelers block’, where you may have one or two ideas that are germinating but no clear path to follow. This is where the wide range of photo album books can pay huge dividends. Some are quite expensive it has to be said, but it’s still worth remembering that there are Libraries, and are an underutilized resource by many researchers. I have found them a particularly good source for information, especially for their local areas. They will know of local authors, books, museums and societies, who may have those little golden nuggets of information you’re looking for.

Let me give you a couple of examples. I am researching two projects, one of which will almost certainly be built. The two stations are geographically far removed, Ayot, in Hertfordshire, and Meldon, Northumberland. For both of these stations I was familiar with the location, and had found some images through contacts, and books. Where the libraries came into their own was when I asked if they had mapping of the station areas. In both cases they were able to provide at very little cost, copies of Ordnance Survey maps which included the track plans. These gave rise to being able to work out how the station was actually worked, how shunting moves were restricted for example. The internet is another source, the search engines providing quick access to images, these are particularly good for current era modelers, though there are some stunning examples of 50’s and 60’s work now appearing. These will help enormously in determining coloring and weathering for specific eras. Unfortunately the further in time you travel the less is available, and it is a transient data source, if you find info you need, always save it, as one day the site/site owner may be gone.

So returning to books, and the header picture, this image shows three of my favorite rail related subjects, a transition era diesel, a map of Northumberland, one of my preferred areas, and a good photo album book. It’s the book that really for me holds all three items together, and if ever on desert island discs, it’d be my book choice. So what’s so special about this sort of book for me as a modeler? The title is ‘Modern’, in fact it was published in 1980 and reflects the era of the diesel transition, through branch line operations across the UK covering the previous 20 years. The image quality and variation of subject matter is key. There are few ¾ front platform edge shots, as not only does the book reflect the change in motive power and rolling stock, it covers the infrastructure too, showing how that deteriorated and changed too. The book is well laid out and there is a geographic progression through it, in general terms it’s south to north so there’s a logic to how the book flows as you read it. The captioning covers basic train details and a line or two on the branch line in question, enough to get you thinking in more detail about the images, and the history behind them. The book therefore forms the key for me, as you turn the pages its beginning to make me think, ‘that lines of interest’ or I can do that train formation with manufacturer X, Y or Z’s loco, and rolling stock or kits from other manufacturers. The landscape nature of the pictures will tell me a bit about if I’m going to have to consider flat scenery, hills, mountains, urban, rural, industry in the scenic makeup, also can I use kits, what buildings are available, how many do I need to build to capture the flavor of the area?

Ben Ashworth Style Inspired Image

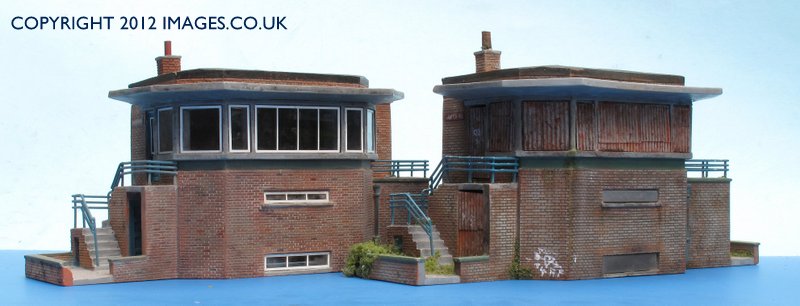
For me some of the most effective models are those where you can look at them without a train on scene, and immediately think, that’s Somerset/London/West Highlands and Scotland in the 1960’s/70’s because the modeler has captured the scene so well. To pick a few examples from recent published layouts would include Saffron Street and South Pimlico for London, Catcott Burtle, Bath Green Park and Engine Wood for Somerset, and Lochside and Burntisland for Scotland. There are of course a good few other layouts that have appeared on line, in magazines and exhibitions that immediately give a ‘time and place’ feel. Two essential elements of the time and place come from the buildings, many regions of the country provided local materials for the construction of the railways and their infrastructure, for example Kings Cross and some of the suburban stations on the Great Northern route out of London were built from London Yellow brick, and are still extant today. To capture the location a modeler should consider how to replicate that, a Great Northern suburban station made from stone for example would look completely out of place. A photo album allows you to look at and absorb detail, sometimes without really being conscious of it. I realized that one day when looking for models of platform barrows, ok perhaps a bit esoteric, but I realized that the Coopercraft GWR trolleys looked ‘wrong’ on a layout that depicted East Anglia.

Bawdsey, closely based on Aldeburgh, Suffolk

It wouldn’t have been the end of the world to leave them, but to me removing them actually made more sense. I subsequently found a set of LNER etched platform barrows from the London Road range and substituted these in place. A more common kind of example is the modern car, in a 1950’s car park. As modelers we are very fortunate that we are now seeing more road vehicles becoming available that are appropriate to different eras.
A further area of research to explore that is extremely useful, is societies that deal with the historical side of railways. Most of the major companies that operated in the UK have a society of some kind, and they vary in their modeling content as they will have members who collect railwayana, academic type study, and those who use the society to make their modeling more accurate. Many of the socities attend exhibitions, and they can be a wonderful resource both of data they hold and publish in their own magazines and web pages, but also providing a link to an expert or authority on particular subjects, be it a particular class of locomotive or the company architecture. The Historical Model Railway Society, is a good place to start, they have a large amount of data themselves and their links through to other societies and model manufacturers is a very useful tool for the researcher.

With the use of the internet increasing, it’s worth remembering that there is still a large amount of analogue data, in the form of books, photographs and maps that is available. For example the maps for Ayot and Meldon mentioned earlier simply weren’t available on line, or in any easily accessible digitized format that I’m aware of. Actually going to the local museums and seeing the maps allowed me to copy them, cross reference and make notes from other maps I didn’t need, and pick the brains of the librarians to see if they knew of any local authors or history groups/societies that may have extra data. It’s these sorts of details that provide a keystone to making a layout that can really capture that elusive quality of atmosphere, and what I’m trying to achieve with Albion Yard. When I make a layout or building or an item of rolling stock that is one of my main criteria to try to achieve, and the background research, from photo album books and other non internet sources is essential in my attempts to reach those goals.

Northumbrian take on a Wills kit

Posted in Airfix, Bachmann, book, Canon G10, Chris Nevard, DCC, Exhibition, Forest of Dean, hobbies, Hornby, Ian Futers, Kalmbach, Layout, library, life, Model Railroad, Model Railway, Modelling, Nevard, OO Gauge, Photography, research, review, Uncategorized | Leave a comment

Thank you

Just a quick line to say thank you to all our friends, whom have been so supportive over the past few weeks.

The calls, messages, emails and cards have all been very much appreciated during this difficult time. We are now starting to make some headway into normal life again.

best regards

Posted in Airfix, Bachmann, book, Canon G10, Exhibition, Forest of Dean, hobbies, Hornby, Layout, life, Manchester, Model Railroad, Model Railway, Modelling, Nevard, OO Gauge | Leave a comment

Manchester Cancellation

'Sandy'

You’ll be missed more than you could ever have imagined.

Posted in Exhibition, Manchester | Leave a comment