Manchester Cancellation

'Sandy'

You’ll be missed more than you could ever have imagined.

Posted in Exhibition, Manchester | Leave a comment

Today’s the day they’re …

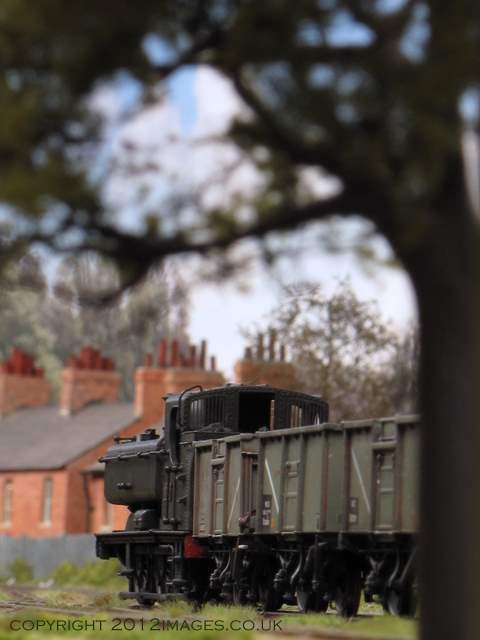
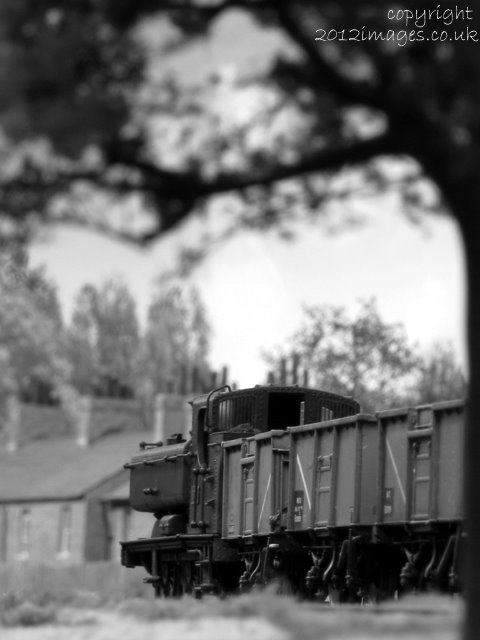
97xx 9711 at Albion Yard

Today will be interesting. I’ll find out if the layout fits in the car. Breaking the layout down was entertaining as the mods listed in yesterdays post were sort of built one on top of the other, I knew how to take it apart when I started, but with the new backscene, fascia, wiring loom, legs, and lighting rig, it’s all ‘a bit different’ as it comes to bits. Today I’ve been scribbling letters and numbers on all the new components as they come off, and making a list of all the bits, new and old.

As the layout is as old as one of my daughters it’ll be intriguing to see if anyone recalls it in its earlier ‘fotopic’ days, the basic core of the layout has never changed, though I’ve been a serial building developer and mover throughout the period. Anyone who has had a layout for a while will know the project stagnates from time to time, this happened with Albion Yard too. With it now being ‘finished’ with the new display, I can see me actually installing it in the back of the garage to play with after the show, I’d assumed I’d bung it into ‘storage’, but the apearance now has made seriously consider using it rather than hiding it away. Also some of the locos like the one above, have had subtle alterations like the Shawplan ‘Heritage’ laser cut cab glazing fitted, all these sorts of modifications make the train set ‘new’ even for an old layout which this one is in my eyes, though this is its first show. What a difference a week can make.

Posted in Airfix, Bachmann, book, canon, Canon G10, Chris Nevard, DCC, dcc sound, Exhibition, Forest of Dean, hobbies, Hornby, Ian Futers, Kalmbach, Layout, Manchester, Model Railroad, Model Railway, Modelling, Nevard, OO Gauge, Photography, review, Uncategorized | Leave a comment

Modification Mungus

Albion Yard in the 80's

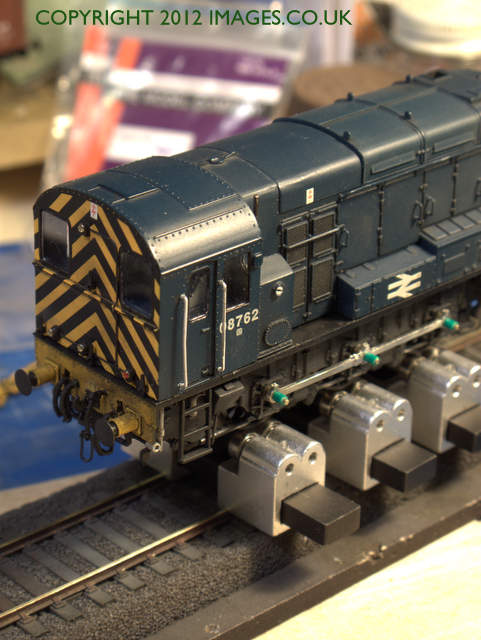
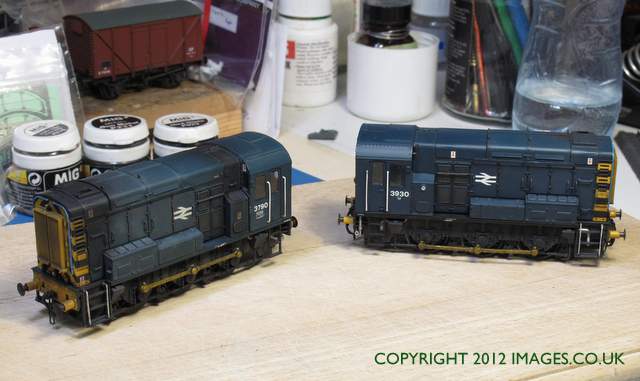
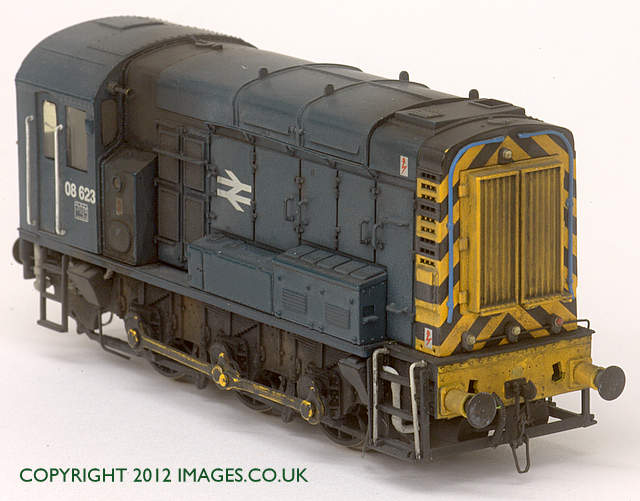
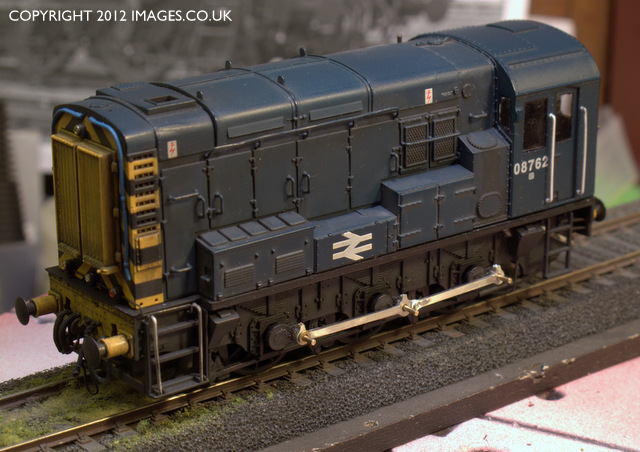
The layout is pretty much complete for the show, but any of those few that have actually visited and seen the layout over it’s life won’t be surprised to know that even today, I’m still moving buildings and changing viewpoints to get the final ‘fix’. I had a visitor last night and even today buildings have been changed to improve the visual look from the arrangement he viewed. I’ve also been a bit naughty with this image, the layout will be operated in its steam era for the whole weekend, this is just a trail shot with a Bachmann 08. The 08’s were tried in the Forest but for some reason, possibly their lack of speed, were not used regularly.

The list of modifications I’ve done over the past few weeks makes it almost a rebuild
New legs and support design
Backscene (it never had one)
Fascia (see Backscene)
Lighting Gantry (see Backscene)
Carry Case/structure (see Backscene)
Curtains to cover legs and supports (see Backscene)
Wiring Loom (Being a home layout it didn’t need to be tidy, exhibiting, it does)
Locomotives (modified to create Forest Of Dean specific engines)
Scenery (Trees, fencing, structures, new grass, teddy bear fur modified, + stuff I’ve forgot)

The big leap forward this week came from the backscene, and the invaluable help and thoughts of Chris Nevard http://nevardmedia.blogspot.com/ , and John Heathcote from J.P. Grafix http://www.jpgrafix.co.uk/ , which has brought a really interesting aspect of the layout to fruition, and theres more to come for Railex next year.

Posted in Airfix, Bachmann, book, Canon G10, Chris Nevard, DCC, dcc sound, Exhibition, Forest of Dean, hobbies, Hornby, Ian Futers, Kalmbach, Layout, life, Manchester, Model Railroad, Model Railway, Modelling, Nevard, OO Gauge, Photography, review | 2 Comments

Pannier Progress

3737 returns to Albion Yard

I make no apologies for another image of 3737, it’s one of my favourite locomotives. It’s basically the Bachmann Branchlines OO model that I’ve re-numbered weathered and today spent an hour opening the rear cab doors and windows. It’s a very simple conversion, but makes such a difference and gives the model a bit more character. There are a few more modifications to come for this loco and it’s being used as a test piece for different products and techniques. A low cab 57xx version of the Pannier is also having similar work done, the amount of light that can now get into the cab interior makes a marked difference and means that the cab interior requires painting to make the best of its appearance.

Revised cab shutter doors and windows 37xx

Yesterday and today I was at Barrow Hill where I had the opportunity to see and privelidge of operating for a short while, Chris Nevards’ “Brewhouse Quay”.
http://nevardmedia.blogspot.com/2011/08/angle-of-bq-you-won-normally-see.html

I spent a good while looking at the lighting and backscene of Chris’s model and found plenty of food for thought on how to achieve an interesting, descrete, and seamless backscene for Albion Yard. If you get the opportunity to see Brewhouse Quay its well worth viewing for the presentation alone, regardless of wheter the subject matter is your thing or not. Two weeks left to go, no pressure then …

Posted in Airfix, Bachmann, canon, Canon G10, Chris Nevard, DCC, dcc sound, Exhibition, Forest of Dean, hobbies, Hornby, Ian Futers, Kalmbach, Layout, life, Model Railroad, Model Railway, Modelling, OO Gauge, Photography, Uncategorized | Leave a comment

Manchester 2011 Preparations

Albion Yard

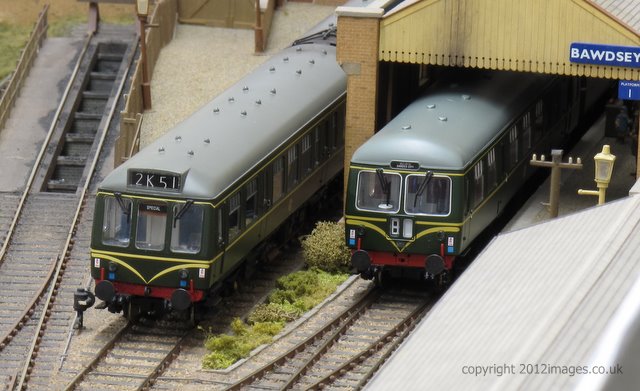
It seems odd that almost a year to the day on the ‘Bawdsey’ blog I was writing about the final preparations for taking that layout to Manchester. A year on I find myself in a similar position. I’m now into the final stages of prepartion for Albion Yard, this has included all elements of the layout, wiring, scenery, the display and stock. The previous post relates to fitting DCC sound to a Bachmann Pannier. Well I did two of them for the Railway Modeller article and DVD, and both have been reverse engineered to remove the DCC fitting to run with other DC stock during the exhibition which is quite unusual. The locomotive roster will feature high and low cab 57xx’s, a 45xx small Prairie and the Iconic class 14 ‘teddy bear’. There will be one or two reserves as well which whilst not strictly Forest of Dean, are plausible substitues. The majority of traffic and roster will be entirely typical of the Forest area.
The layout has also had a quick reversion to photo ‘set’ to picture Shawplans latest release of laser cut windows for the Heljan Class 27, this being some of the primary use for the layout in its earlier days.

Posted in Airfix, Bachmann, canon, Canon G10, DCC, dcc sound, Exhibition, Forest of Dean, hobbies, Hornby, Layout, life, Model Railroad, Model Railway, Modelling, OO Gauge, Photography, review, Uncategorized | Leave a comment

DCC Sound Bachmann Pannier

This article was originally written for the Railway Modeller magazine to look at how easy it was to fit a DCC sound system to a small locomotive and in 2007, was one of the first such installations of its type.

37xx Souls of the Departed
I’ve been following the DCC debate for a while on-line, in face to face discussions, and of course in the printed media. From many of the discussion points I could see that DCC did not have significant amounts to offer me, and I certainly wasn’t bothered if I should fall behind, or if I’d be accused of being a luddite, as being espoused by some of the more evangelical style preaching which I’d read or heard from DCC enthusiasts. Having always had an interest in broadcasting and live music, when I started to read in American magazines of ‘sound’ being available, my interest was significantly raised. I guess in our modeler’s book of dreams we’d want steam, sound and weather too. Well here was the possibility of getting at least one of those, all I needed was living proof that it worked and wasn’t gimmicky. The last thing I wanted to do was spend money on something that didn’t match up to my expectations. I was very fortunate that living close to Lincoln there was a local dealer, Digitrains, who specialized in DCC and had significant experience of it, a working layout to see, and for me, critically, in this leap of faith, to hear.

A visit to them left me in no doubt that sound was worth investigating further. To do this, one step that I had to consider, was going DCC and with what. I wanted a simple to use and set up system with high specification at reasonable cost. Primarily to fit and function test chips once they were installed. My brother coming over from Kansas on a business trip brought an unexpected surprise, an NCE Power Cab DCC controller, as a surprise gift. So I now had my ‘control’, but nothing to run with it! The last thing I wanted to do was convert my layout over to DCC and not be able to run the majority of my locomotives, due to the cost of putting chips in them. Whilst watching a demonstration of programming chips at the shop I was taken by a rolling road they used, and I realized that this would be very useful, for testing and running in locomotives, but would also allow me to play with DCC before committing one way or another to it.

The Bachmann 97xx is an cracking example of current ready to run products, for most modelers the locomotive is excellent straight from the box, and I have to admit until recently, for me, that was the case too. Like many of us I’d do a little more to it to customize it, and then it’d join my stock on the layout whirring backwards and forwards as it went around it’s allotted shunting and branch passenger or local freight services, a real local hero. I’d seen in much of the DCC debate the scales here in the UK were, and at the time of writing early 07, still are tipped firmly in the direction of diesel powered locomotives rather than steam. Because I have a wide range of interests, steam sound was important to me as my layout is operated in one of its phases in the BR steam or transition era, therefore I chose steam as the introduction to DCC sound.

Having looked at DCC sound diesels it was clear that there are usually relatively easy ways of locating a speaker in the locomotive inside them without too much hassle, likewise with a tender loco the task is also relatively easy in terms of finding space. My specific interest was to get sound into a 97/57xx pannier, as I have a couple of them for a latent idea to do a Forest of Dean layout, having been inspired on many an occasion by the photographs of Ben Ashworth in particular. A little bit of research uncovered South West Digital (SWD), whom in their range included a 2-cylinder GWR steam sound chip, recorded on the West Somerset Railway from a Manor. (SWD reference number 520GWR) so I had a chat with them to determine which chip and speaker combination would be the most appropriate for me to try. The chip which we determined to be the best to try was the ESU LokSound Micro, which was duly ordered and arrived very promptly. The loco selected is the ‘DCC ready’ version of the Bachmann pannier. This is subtly different inside to the regular model in that the boiler weight has been reduced in size to allow the easy installation of a DCC chip.
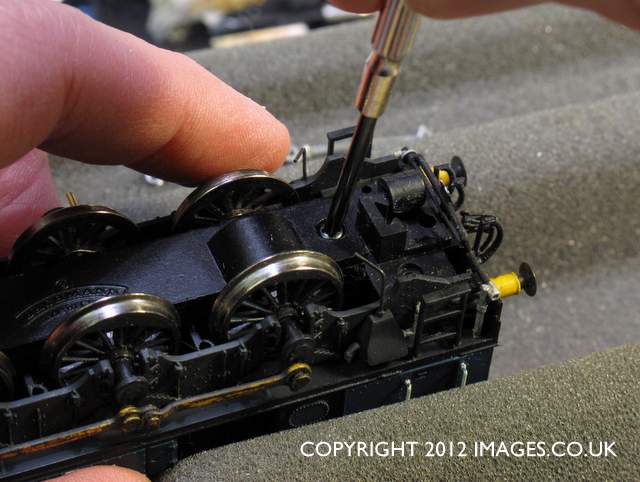
The body is easily removed for access to the chassis, first take the couplings off and unscrew the body from the chassis at either end. On the top of the chassis you will see the DCC blanking plate for analogue operation, this needs to be removed, keep it safe if you need to covert it back at some time in the future.

The chip comes with a comprehensive instruction leaflet, including the fitting instructions. This is a very simple installation as the loco does not have lights, externally or internally, and will be hard wired into the loco. This simply means I’ll attach it directly to the motor pick ups and the motor terminals rather than via a multi pin DCC connector to the DCC board on the chassis. To access the loco pickups there are two screws underneath the loco unscrew these and the keeper plate drops away which has the pick ups attached to it. There is a simple rhyming verse which will help here, in attaching the wires from the chip.
‘Red and Black to the track, orange and grey the other way’.

Chassis cable routing

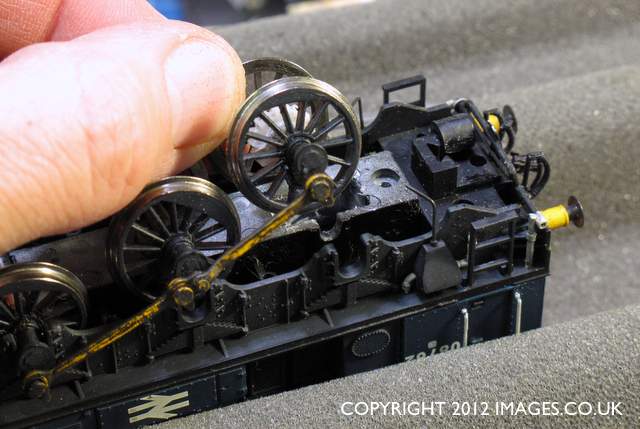
So attach the red and black wires to the pick up strip, red to the right hand side and black to the left hand side. A very quick touch of a soldering iron is all it needs with one wire connected either side of the pick up strip as above. The other two the orange and grey need attaching to the pick up terminal on the motor frame. Not a problem on this loco, but you must always make sure that the orange and grey wires only touch the motor connections.

Chassis side view

If they have electrical contact with the chassis or wheels then you will have big problems and potentially need to replace the chip, which in this instance costs more than the locomotive! There is a yellow capacitor which needs to be removed, this is easily done with a pair of sidecutters. You will now have your loco DCC sound chipped! At this point place it on your programming track and check the functions work. With a rolling road as I have used you can check the ‘moving’ sounds, like chuff rate for this loco or diesel throttle acceleration and deceleration, but I’d suggest leaving getting into that until a little later. Probably one of the next thoughts going through your mind is, ‘this’ll never fit in that’. Well it does, and we will now turn our attention to the body modifications required, which are very few.
The loco is available as a low (early) and high (late) cab variant, the type illustrated is one of the late variants but the process is the same for either. We will be fitting the speaker into the locomotives coal bunker, it can be fitted into the cab, but unfortunately is visible from many normal viewpoints. By undoing the two retaining screw underneath the bunker the back of the bunker and the weight simply lifts out. To make this installation as simple as possible, we won’t get into swapping speakers, I’ll just use the chip as it comes. The weight will have to be discarded which means losing 25g of weight. My loco still pulled six Bachmann Bullied coaches afterwards with no ‘ill effects’, so don’t worry unduly
about losing weight from the loco.

'Pepper pot' bunker

The bunker has a floor which needs to be removed to allow the speaker to fit, I cut this out by scoring around the edge with a Stanley knife, and cutting slits with razor saw until it would break free, the rough edges being dressed with a file. The bunker will still fit on the loco as an interference fit, but as we have removed the mounting holes, when we refit it, it will need to be fixed with PVA glue or similar which will hold it in place but allow removal if need be. At this point test fit the body. The chip will lie on top of the chassis in front of the motor. As you fit the body be careful to thread the speaker wires around the motor so they enter the cab at the bottom of the backhead by the floor. There is sufficient space to do this, even if a little bit fiddly.

Speaker cable routing

At this stage you can press fit the bunker and get a good idea how the speaker fits and indeed run it to see what it sounds like. At this stage the sound will be quite a full sound as in reality the speaker in not enclosed. I wanted to get a better appearance so I made a replacement bunker front out of scraps out of plasticard, and left the coal door open for the wires for the speaker.

Bunker blanking plate

Fitting relacement bunker front

See the photo showing the white bunker front and green bunker, a picture after all speaks a thousand words!

Speaker and bunker fitting

Once I had done this and fitted it, again made as an interference fit the sound changed completely, being less in volume and a considerable amount of the bass sound had gone. Clearly the sound had to escape, and I had to think of a way to do this effectively whilst keeping the speaker hidden. The first thing I did was to drill hole in the coal load in a random pepper pot type of style of 1.5 to 2mm drill size. This had an improvement releasing more bass tone to the noise, and it dawned on me that the original mounting holes for the bunker were not required and these could be opened out too. I did this in stages listening for the change in tone and volume as I did so, using different size drills, increasing them gradually in size and eventually stopping at around 7mm diameter on each side.
Sound holes in rear chassis

This prevents the hole appearing in the cab floor, and retains the original chassis mounting point too. At this point the sound had changed again to a nice ‘full’ sounding noise, with no significant bias to tone or pitch. The sound installation was now complete, a very quick and simple fit for my first DCC sound loco. I was very fortunate in that the ‘chuff’ synchronization was spot on for the loco, the loksound instructions provided with the chip give details on how to synchronize the wheel/chuff rate if you need to.

I was very pleased with the relative simplicity of this installation, whilst not ‘plug and play’ its pretty close and anyone who takes a bit of care with a soldering iron will be able to manage this installation in a couple of hours at most. At this point it is just the final touches to complete. The loco and body can be reassembled and the bunker front attached with a dab of PVA as can the bunker. The speaker will be held in place by these two, and the PVA or similar can be broken easily if access is needed to the speaker or to remove the body from the chassis. The only thing that now ‘jars’ is the pepper pot coal in the bunker. It doesn’t take much effort to place coal around the holes making sure they are not blocked and the loco is ready is ready for traffic!

Final fitting

So now it was installed what is it actually like? Well the running has no noticeable improvement in terms of controllability than my existing DC system, a 20 year old Hammant and Morgan Walkabout. The inertia works well, certainly with my NCE power cab and is easy to configure, and adjust settings.

The sound is, in the main, very pleasing. The volume even at maximum power is not particularly loud, I don’t have a problem with that, it’s sort of scale sound if that makes sense! The recordings are very clear and there’s no noticeable distortion of them in this particular configuration. Having heard it myself I wanted others opinions of it, and to this end took it to a couple of shops and also to a few friends houses for them to hear it too. The reception of it has been very positive, particularly as sound in general has previously only been fitted in larger 4mm locos, for those in the trade and at the small meeting I took it too, had not seen sound in a loco this small. Those that had seen sound in BR Class 08’s commented that it was nice to see that the speaker was hidden. I got the most reaction from my daughters, who were really taken with it, one of whom has insisted on showing dads toy train to her friends. Again her friends too thought it was ‘really cool’, which I’m led to believe, translates to, its good!

This is my first step into DCC, but on my layout apart from the sound, the DCC has no advantage over traditional DC control. This is because my layout is designed for one engine in steam operation, so all tracks are live anyway, and the quality of control that’s available from the Walkabout, some 20 years on, is still remarkable. I can see significant advantages with DCC if you have a layout with double heading, a large MPD, or simultaneous movements, where the ability to move a loco independently or combined then DCC will be a useful tool indeed. It’s certainly been an interesting conversion and experience. The biggest disadvantage at the moment is the cost, which in time may come down if the market increases. This installation with just the locomotive and the sound chip has a cost in early 2007 in the order of £140.00.
On the following comments I’m bearing in mind that the recording are from a Manor, and therefore not a true recording of a small pannier. Within the sound files there are three whistle sounds, a single toot, and two longer whistles. Both of the longer recordings are similar, I’d have preferred to have a longer single tone whistle, and perhaps a double toot. The hisses and gurgles of safety valves and cylinder drain cocks are well captured, as is brake squeal. The brake squeal is only available within the deceleration phase and again it would be nice to have that as a separate sound file to select. I don’t know how much of the capacity of the sound files within the decoder are used, but it’d be nice to see a wider variety of sounds to select. If the decoder is full, of those sounds currently included, I’d be happy to lose the shoveling sound or coupling ‘clank’ in exchange for a different whistle or separate brake or flange squeal sound.

Having said that, the quality of the recordings and the decoder make this a very effective installation, and certainly something different. I wouldn’t change to DCC on the basis of this exercise, I’m fortunate in that my layout as configured works as both DCC and DC by changing the controller over. It has caught my imagination though and I have another steam loco at the moment on the ‘sound’ work bench.

I like to weather my models, and this would be no exception. I had already got an idea from a good number of references as to how this loco should look, in particular ‘Steam in Dean’ from the Lightmoor Press, ISBN ref No. 0 899889 06, a stunning collection of photos from Ben Ashworth, with plenty of atmosphere of that area and era.

All that was needed to complete the loco was for me to choose a replacement number, 3737, which was a loco that worked in the Forest of Dean area. Long since departed, but with sound, something of it’s soul had returned.

Posted in Airfix, Bachmann, DCC, dcc sound, Exhibition, Forest of Dean, hobbies, Hornby, Layout, life, Model Railroad, Model Railway, Modelling, OO Gauge, review, Uncategorized | Tagged , , , , , , , | Leave a comment

Keeping Up Appearances

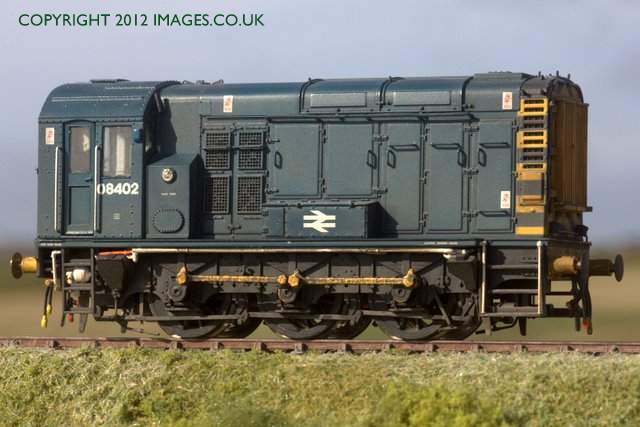
08402 shunts Albion Yard

In the previous post I mentioned the next big thing will be the backscene. Well the photo backscene has arrived and I’ve been trying it out today. The early results are quite promising, though an issue with it is the satin finish of the image, even with one coat of matt varnish in certain light there is still a pronounced shine to the image which I’ll have to get rid of.

The image when placed behind the layout changes the appearance dramatically which is partly what I wanted to achieve, it works better held away from the board edge rather than butted up to the layout frame, so some more thought will be needed on how to mount it effectively. The color isn’t too bright and some of the trees have a late summer early autumn color to them which I quite like. The location on the layout of this shot is the same as the Pannier below, so you can get an idea of what the potential finished application will look like.

Posted in Airfix, Bachmann, canon, Canon G10, Exhibition, Forest of Dean, hobbies, Hornby, Kalmbach, Layout, life, Model Railroad, Model Railway, Modelling, OO Gauge, Uncategorized | Tagged , , , , , , , , | Leave a comment

Work in Progress

3737 arrives in Albion Yard

This 37xx is appropriate for the Forest of Dean area, based on a image from the Ben Ashworth collection. It’s a Bachmann model but has been modified with a South West Digital sound chip and speaker from a standard non-dcc version. I don’t often use DCC, though it’s been interesting as an exercise in getting a chip and speaker into a small locomotive and them remaining hidden. Albion Yard operates as a ‘one engine in steam’ branch, so whilst DCC certainly has its advantages on larger layouts with multiple locomotives, on Albion Yard the benefit is negligable, theres certainly no improvement on ‘control’ over my DC controller.

The buildings in the background are Howard Scenics products from Freestone Accessories. They take a while to make up but are well worth the effort. Theres a few more houseback kits to do in the next week or so. I’ve also been making the screw couplings for a good few items of stock both for Albion Yard and Bawdsey. I’ve now settled on couplings from Masokits, which make up easily and with seven pairs per etched sheet are very good value for money. The next ‘big’ item for the layout is the backscene, and I’m waiting for a printed one to arrive, not sure how it will turn out I’m still in two minds as to whether to hand paint one, that final choice will be made once I’ve got a lighting rig sorted too.

Posted in Airfix, Bachmann, Canon G10, Exhibition, Forest of Dean, hobbies, Hornby, Layout, life, Model Railroad, Model Railway, Modelling, OO Gauge, Photography, Uncategorized | Leave a comment

‘Albion Yard’ Cinderford, Glos.,

Forest of Dean Pannier

In pretty much the first posting on this blog I wrote that work on Albion Yard had stagnated, I’d also had an accident with the layout in storage damaging some of the track, and that has pretty much been the case until today. Having made space in the garage I re-assembled the layout with an idea of make or break. Part of this had come from a visit to Gloucestershire to see a friends new layout in development, based on a large US roundhouse, and chatting to other friends over the weekend at Roy Jacksons ‘Retford’. Two things were apparent, that I’d done a lot of work on Albion Yard and that it was close to being finished, (obvious really, but sometimes you see can’t see the wood for the trees), and secondly that there was still a good amount of useful development and practise to be gained from completeing it, particularly with other projects I have in mind. Seeing the roundhouse and some of the lighting and display ideas we talked over and tried out, fired up the enthusiasm for finishing Albion Yard.

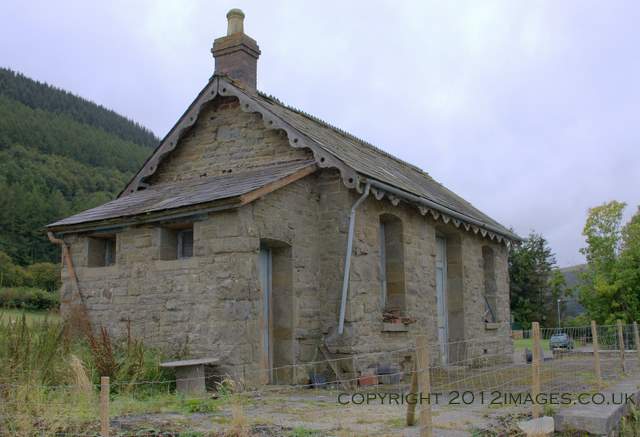
Whilst at Gloucester we drove across the Severn and into the Forest of Dean, and area that has held a considerable amount of interest for a while. I was looking for various bits of the Forest Railways, and it was only today messing around with Albion Yard in the garage that it dawned on me what to do with it. Whilst the layout has not had any ‘focus’ it’s been useful to use it as a photography set, and has been used often to shoot stuff for the interweb and occaisionally magazines. Today the lack of focus snapped into a clear vision of what it should be, and the fact that there was little prototypical direction as such was apparent as part of the reason for the stagnation. It hadn’t mattered if I didn’t do something because there wasnt a need for any regional or specific layout design element to show through, and whilst it was ‘OK’ it didn’t have that spark to work on it. From the field trip and the weekends discussions, I realised that the layout could be ‘placed’ at Cinderford, and therefore I had something to ‘build’ with a clearer idea as to what the final layout should be. At Cinderford there was a flat area at the north end of the town, which is now an industrial area, this is where the layout will sit. I can now have a low backdrop of hills and trees and many of the buildings I’ve built previously will work on the layout as is. There’s scope for run down light industry units and it will be set in the early to mid sixties again giving a specific focus for the stock and locomotives.

Winter ...

I’ve also been fortunate enough to get access to a very good selection of ‘Forest’ images of the era which will help in building the atmosphere. So I now have a clear direction of what I want from the finished product, and it’s taken nearly nine years to get here. However thats not a bad thing, I’ve tried lots of things along the way, and two other projects should also dovetail into this resurection of Albion Yard.

For the first time in a long while theres a very definite path for this layout ahead, and again it’ll serve its purpose as a test piece for me, and I’m quite excited about that!

Posted in Airfix, Bachmann, Canon G10, Exhibition, Forest of Dean, hobbies, Hornby, Layout, life, Model Railroad, Model Railway, Modelling, OO Gauge, Photography, Uncategorized | Tagged , , , , , , , , | Leave a comment

Waterslide transfer or decal application.

08 leaves Bawdsey with short mineral trip train

Of late I’ve had the pleasure of helping out on Roy Jacksons Retford layout. Roy’s vision is to see Retford as it was in the late 1950’s, this includes the trains and their correct formations as well as the scenic side. I started weathering my own stock quite early on in my modelling development, and in the depths of the redundant stock I had some of my own wagons, which I had decided would need a re-work for my own layouts Albion Yard and Bawdsey. Once I’d got happy with the technique I showed it to Roy, as I felt that the mineral wagon trains would benefit from a similar makeover. Roy’s wagons had been built in the very early 1970’s, were in trains of about 30 or so and had previously operated on his Gainsborough Central layout and then the High Dyke and Dunwich projects. To be able to give an individual look to each wagon was an essential element to the project, also to do it efficiently and without any invasive work on the wagons. After all a good proportion had been working without problems for in excess of thirty years, and the last thing we needed was to affect that reliability.

Starting point

The first thing I did was to get the materials for the project, these involved a couple of tools, paint and transfers. A Scalpel with a new C10 blade. A glass fibre pen and plenty of the pen refills, these two are the base starting point on the project. Pairs of surgical gloves to protect hands from glass fibre shards. Assorted enamel and acrylic paints for detail weathering. Aerosol spray cans of Halfords Matt Black, Halfords acrylic laquer and Vallejo matt varnish, together with masking tape.

Number and lining transfers from Cambridge Custom Transfers Sheet BL1 including black backing patches, sheet BL7. MicroSol and MicroSet decal softening solutions.

Many of the wagons still had the Airfix Decals, some of these were removed completely, others which could be saved were scratched or brushed clean, taking care to scratch away the thick Airfix carrier transfer film. As we were looking at trains of thirty or so wagons that pass through the scene, we wanted a ‘mass’ appearance rather than specific individual wagons, so having the same number re-occur occasionally is unlikely to be noticed. For this example we’ll look at taking a heavily weathered wagon back to nearly new. The first shot shows one of the typical starting points, the first job is to remove the Airfix transfers, once that is done then wearing the gloves you can start to cut away the original paint.

Cutting away enamel wash with glass fibre brush

Its a good idea to also have a plastic container underneath the wagon to catch the broken fibres to keep the bench clean and safer, a glass fibre splinter can be very painful and aggravating. Depending on the amount of paint you vary the brush pressure to cut the paint back, and as a rule keep the strokes vertical, this will give a realistic look as the original coat comes away. The brush allows you to get into the corners by the hinges and framework, it also leaves some paint there which adds to the effect. Once I have a bare wagon I repaint the chassis Humbrol 33 matt black by hand, if the wagon inside needs doing I give those a coat too, again remembering to keep brush strokes vertical, so any streaks show the correct orientation. You can also mask the top of the wagon and use the Halfords black spray to do the wagon insides if you have a large number to do, when I was working on a batch of about eight or more that’s the way I usually did it. At this point you should have a wagon with a matt finish from the glass fibre brush and some corrosion left in the corners where the brush can’t reach. You can add to these areas with more patches of rust, hand painted and then cut those back too, if you’re not happy with the result. It takes about half an hour or so to get the wagon to this stage, once you’re comfortable with the technique.
You are now ready to apply the transfers. With waterslide and most other types of transfer they adhere better to a gloss surface and the easiest way to do this is to spray them. If you don’t have a gloss surface then it is very easy to see the carrier film, and ‘silvering’ occurs where you have pockets of air preventing the transfer seating properly and the shiny carrier film shows at most viewing angles. To help minimise this I use the Halfords acrylic laquer, it goes on easily and doesn’t affect the underlying plastic. I make a very simple mask from the tape, to protect the wheels and couplings and then spray the sides from about nine inches with the laquer.

Masked underframes for body lacquer application

I dry this with a hair dryer, and then give another coat and do the same. This gives a hard and gloss finish for the transfers to grip to. Cut as close as you can to the actual writing or logo on the decal to reduce the amount of film you have to hide. For these minerals I used CCT’s black patch transfer sheet (BL7). This is a sheet of plain gloss black that you cut to size which your numbering decals will go on top of. If you’re doing a batch of wagons as I was, then cut enough, plus a couple of spares to do all the wagons you’re working on.

Use a very sharp blade to accurately cut the decals

Applying pre cut number patch

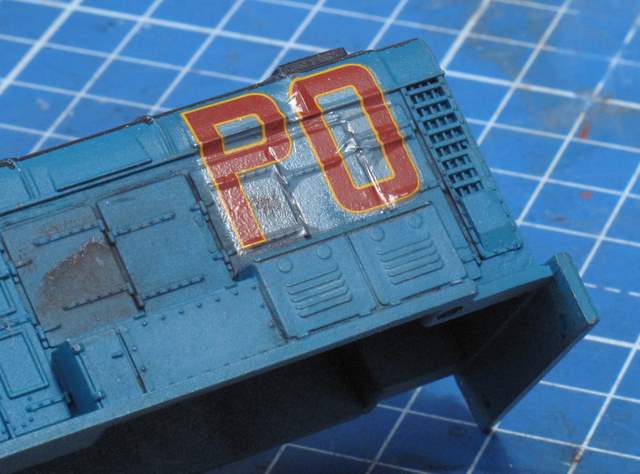
In the best traditional manner, use lukewarm water to dip the transfer in to release it from the backing paper. Once it’s started to slide I put a light wash of Microset decal solution on the area where the transfer will go. This starts to cut the oils in the paints and helps the glue on the transfer grip the surface. This helps the transfer conform to the model surface and minimizes the amount of air that can get trapped underneath. The numbers, wagon weight, tare data and white end stripes are all on CCT sheet BL1, and they are all printed on the same sheet of backing film. I use a scalpel and ruler to cut as near as I can to the markings, leaving a minimum of the backing film surrounding the printed areas.

Applying wagon number over patch

If you are applying a decal across planking, or a compound curve like an HST nose for example, then Microsol works in a similar fashion as it softens the transfer so it’ll conform to highly irregular shapes.

End door indication

Leave the transfers to dry completely. Once they’re dry check for any ‘silvering’, if you find any use a pin to prick the silvered area and dab Microsol on it, that will release the air and allow the transfer to settle on to the model so you lose the silver effect. You will now have a glossy mineral wagon, and the fastest way to give it a matt coat is again by spraying them. Vallejo make a matt varnish that is available in a spray can. This is also an acrylic and will provide you with a good topcoat cover that is a very dull matt crucially will not affect the models plastic, paint, laquer or transfers you have already applied.

Ready for matt varnish and final weathering

This technique has given us the opportunity to quickly change the appearance of many wagons, which in turn has greatly enhanced the effect of a long train of mineral wagons being slowly dragged across Retford’s characteristic GN/GC level crossing by a suitably tired and filthy WD 2-8-0.

Cambridge Custon Transfers
http://www.cctrans.freeserve.co.uk/

Posted in Airfix, Bachmann, decals, Exhibition, hobbies, Hornby, Layout, Model Railroad, Model Railway, Modelling, review, Uncategorized, waterslide | Leave a comment