
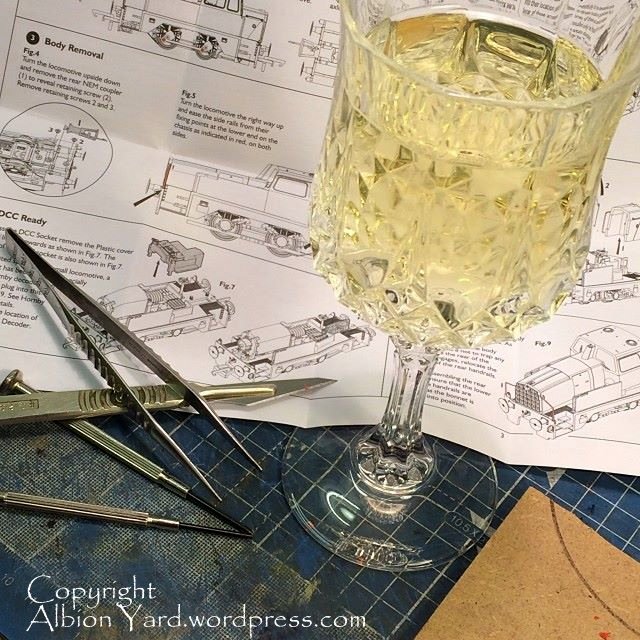
Well with Christmas day out of the way, it was time to give one of Santa’s presents a little run. I’d been fortunate enough to receive one of the new Sentinel shunters from Hornby and with a little time on my hands, I thought it was time to give it a closer look. Packaging is a contemporary red and yellow colorway, with a clear plastic model retaining section, or for those of us used to not talking bollox its in a red box with a vac formed plastic insert. So, its boxing day, I’ve got a glass of wine, a set of screwdrivers, and some instructions …

Instructions, alcohol and sharp tools, what could possibly go wrong?
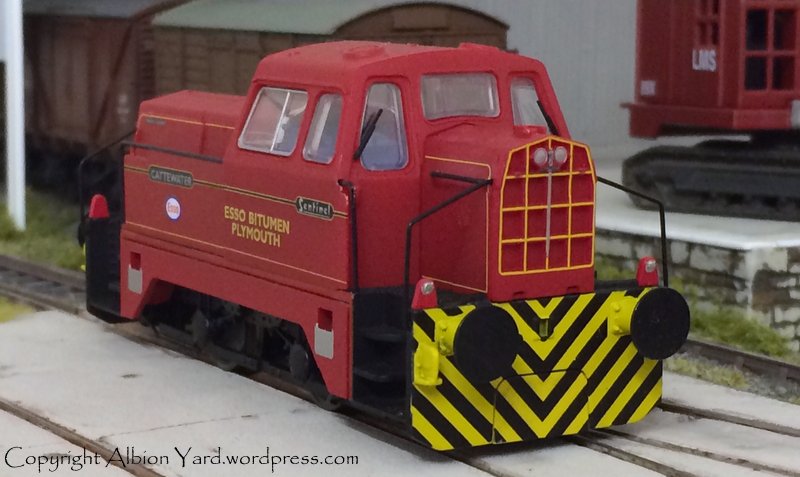
The appearance of the model overall is good and captures the feel of the prototype well. Body is satin finished plastic, how this satin finish lasts with greasy fingerprints remains to be seen, detail is very good and the glazing unfortunately has a chunky prismatic look to parts of it. If the pics aren’t up to the normal standard for this blog I apologise in advance, for this entry, images and text, is coming from the workshop, breaking news styley to see how effective it is from my iphone. The pics have been sent to ‘home’ for copyright and cropping before returning to add to the text written in the man cave.

What does it run like, well mine wasn’t ideal, one direction it was fine, the other it pulsed slightly, and in both directions stopped occaisionally, enough times to be a concern, so that would need looking at. Cosmetics like the body finish are secondary here, theres no point in having the best looking shelf queen, if the model doesn’t work for me its not worth keeping. In the UK of course at this point you could return it to the retailer for refund or replacement, I rarely do this mostly because the quality is such that you don’t need to, and secondly theres very few items I can’t fix. Once you start deviating from normal maintenance all warranty bets can be off, so you need to be confident of what you’re about.

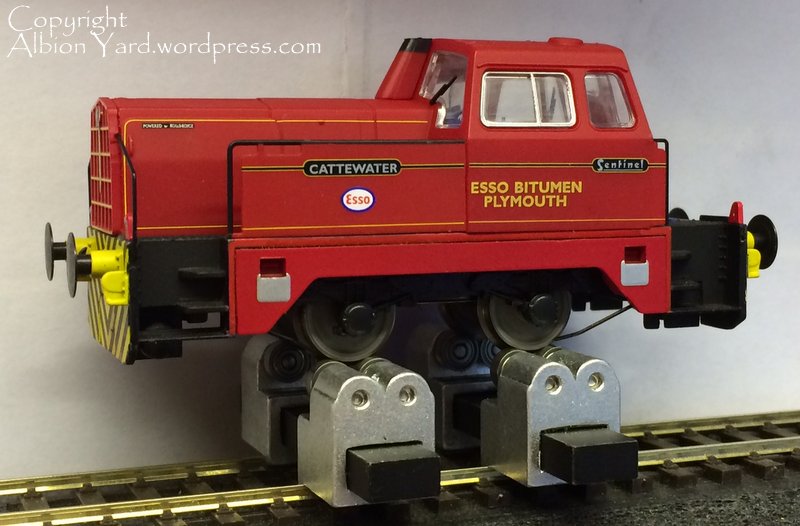
Running in with Bachrus rollers
I first ran the loco on a set of rollers to get the chassis warmed up, before using it on Wharfedale Road, which is a small test/demo layout. The track is made to replicate a small run down yard and is not to mainline standard. The loco, fine on rollers or straight track occaisionally stopped and I suspected pick ups to be part of the problem. The easy way into these would be via the base plate, held on by three screws. These came out easily and sure enough the pick ups are phosphor bronze wipers onto the back of the wheel tyre.
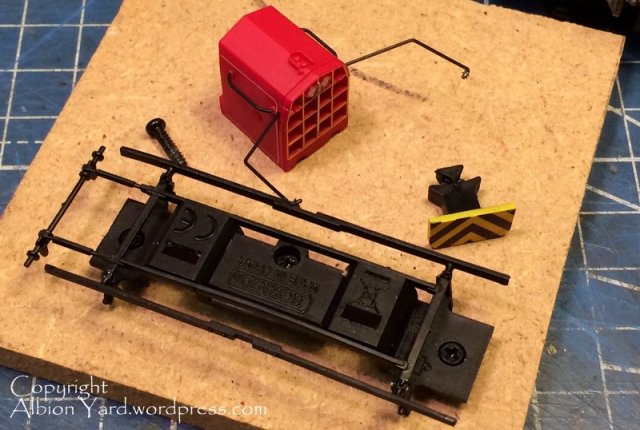
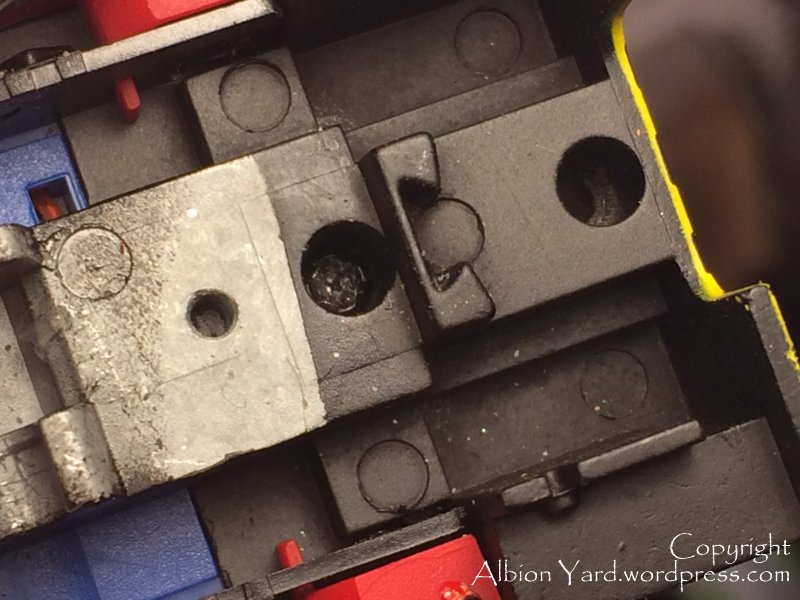
Keeper plate/rear bonnet and buffer beam filler.
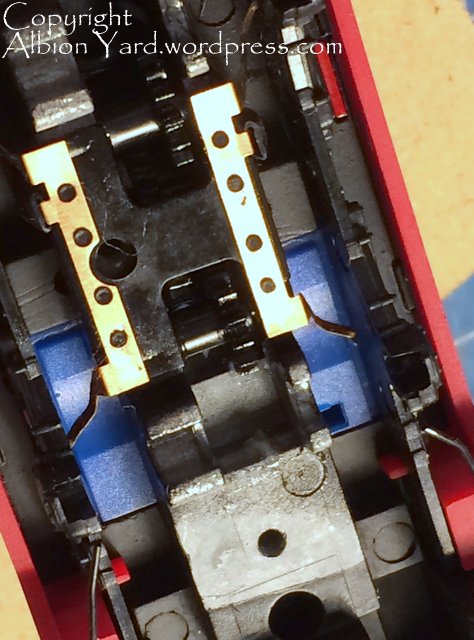
I tweeked mine to ensure that they always touched the back of the wheels, I suspect that the original fit didn’t have enough outward force to remain in contact. I can see these being an issue for some people who can’t/wont do their own maintenance, and if not set up at the factory, some of these aren’t going to run reliably. The next item was to clean the ends of the pickups and wheel treads with IPA (not the beer), and a look at the end of the axles showed that the ends had a slight burr on them, which being plastic, I cut off with a scalpel. This improved the running reliability considerably. It did also highlight some areas where I needed to attend to the track too, which was done and it now runs very well across the whole layout.

Tweeked pickups, note metal cast chassis block and sideframes
The instructions are pretty good and I followed them apart from the instructional bit. That’ll be the ‘Alpha Male’ bit I suppose. Having taken off the couplings the screws that hold the body on can be accessed, thats where my first problem came in. The body attatching screws were, it’s fair to say, secure.

Body retaining screw mounting
The small bonnet screw is the one to undo first, and this took a significant amount of force to break the seal. The body screw was immovable to the point where the head was getting damaged by the screwdriver and the palm of my hand was bruising from the screwdriver handle. I was using the correct size and shape blade for this too, I have little sympathy with those that damage screws using the wrong blade and then say, its the tools/product rather than the binary thought process involved in getting them there. What was noticeable was the screw mount on the body. Close examination showed that there were stress witness marks on the plastic which indicated that the screw had been applied far too tight at manufacture.

Note, plastic stress mark on back of cab body
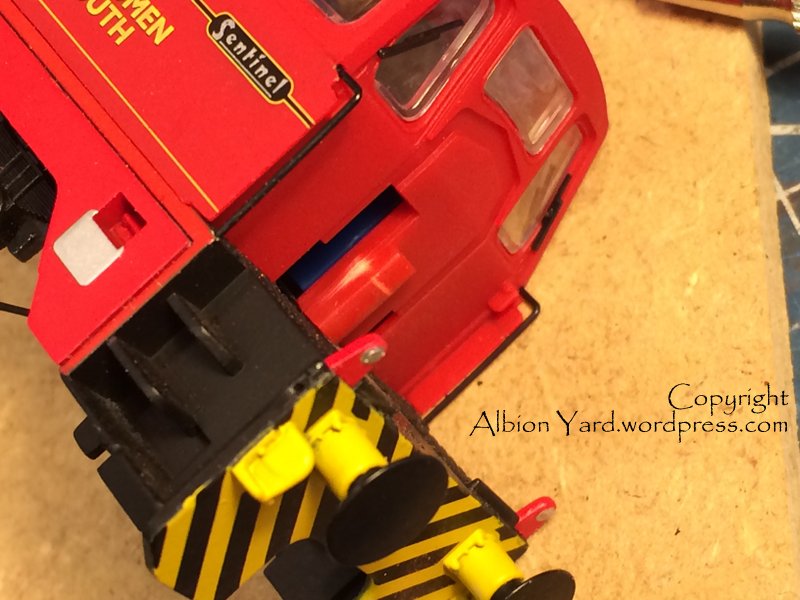
What this meant was there was no way to remove the body easily, the screw was also inside a recessed hole so cutting/drilling the head wasn’t an option, the body of the screw would still be in the chassis and the bodymoulding. Cutting the body would be the only solution, or re-assembling it and giving it back. I could cut the body in two ways, drill a hole and then cut the screw in a keyhole style, but this means not knowing what else you are damaging inside the main body. The easy option is to shave away slivers of the screw mounting to expose part of the screw thread. This will release the pressure on the screw and cause least damage to the body. I had to cut away a far bit of the housing, but this did prove successful and released the screw, which still needed some considerable effort to unscrew it.

Slicing sections from around the screw to release it.
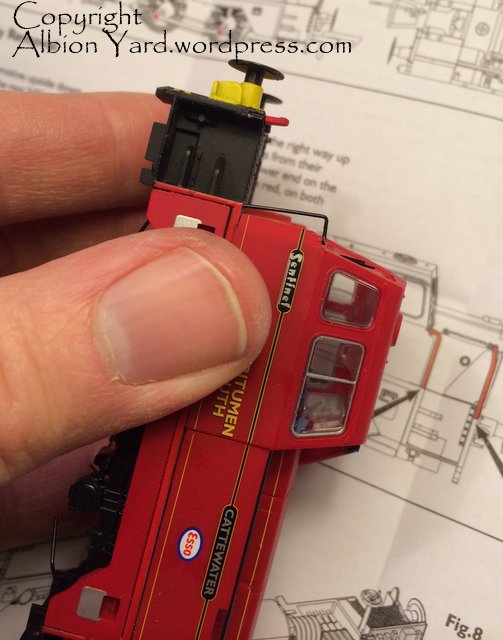
The first job I did then was to cut a few millimetres of the end of the screw so its shorter but still fixes the body as intended. I could now see the top of the chassis and inside the cab. I think the cosmetics can be improved with replacement glazing, so I’ll ask that nice Mr Shawplan if he’s up for it in the new year. The cab internals with a lick of paint will be fine. If you’re looking to fit DCC sound in one, I think it will be difficult, a sugar cube type may fit the rear bonnet or inside the cab with a very small chip, getting the sound ‘out’ will be the challenge.

Chassis top overview
The core of the chassis is metal, for weight, so some quality drilling and fettling will be the order of the day. The long bonnet logically houses the motor, so a speaker won’t go in there.
Remove the top of the handrails rather than the bottom to release the body .. :o)
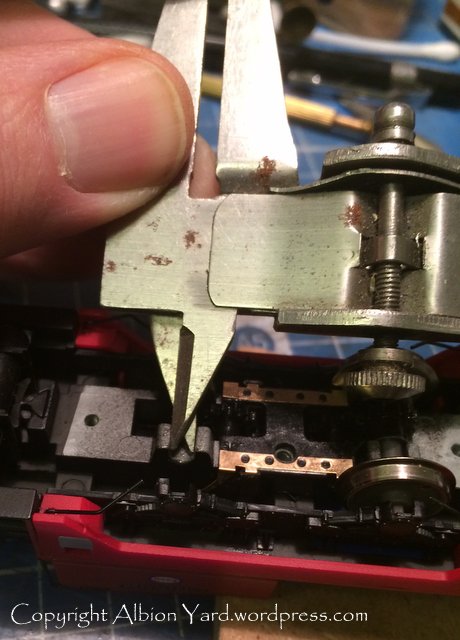
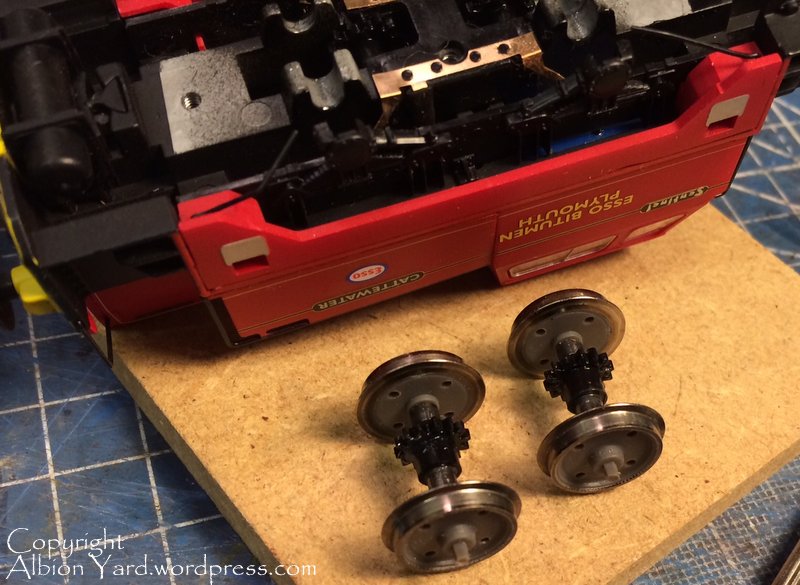
The drive train is a set of plastic gears to both axles. My thoughts on P4/Em conversion are this may not be straightforward. There is little space behind the mainframes/axleboxes this very much being engineered in ‘OO’ and part of the cast chassis block. Axles run in U shaped bearings kept in place by the chassis base plate. The axles are 3mm diameter from a rough measurement with calipers and ruler.

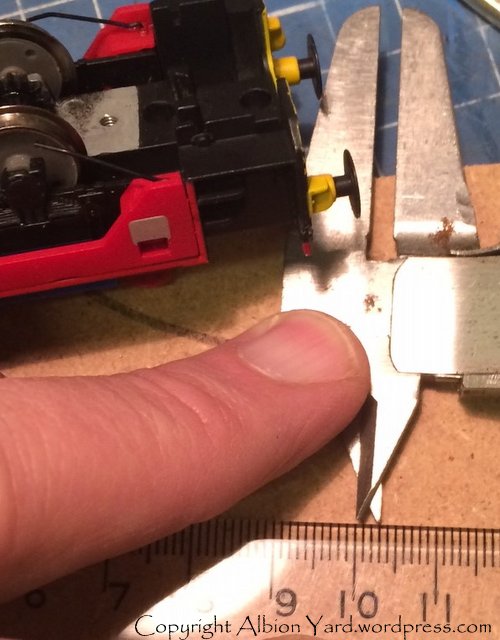
Rough ‘fag packet’ engineering measurement technique
Please excuse the very rough and ready back street engineering approach to measurement.

‘Fag packet’ measurement analysis technique
Finer gauges will have no problem with the drive train however, but anticipate significant thinning of the sideframes, or possibly a replacement etch, but that will need a clever fix to the chassis and significant cutting away of the old one.
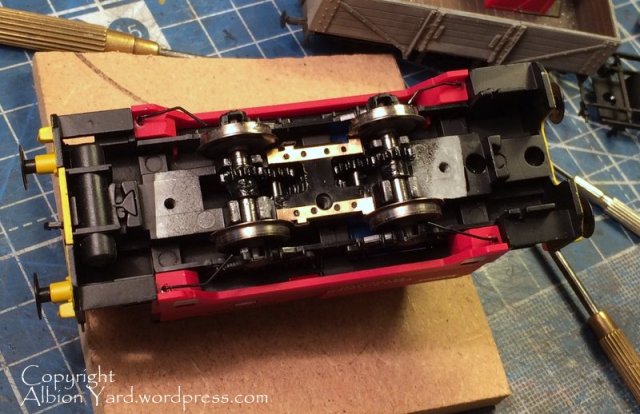
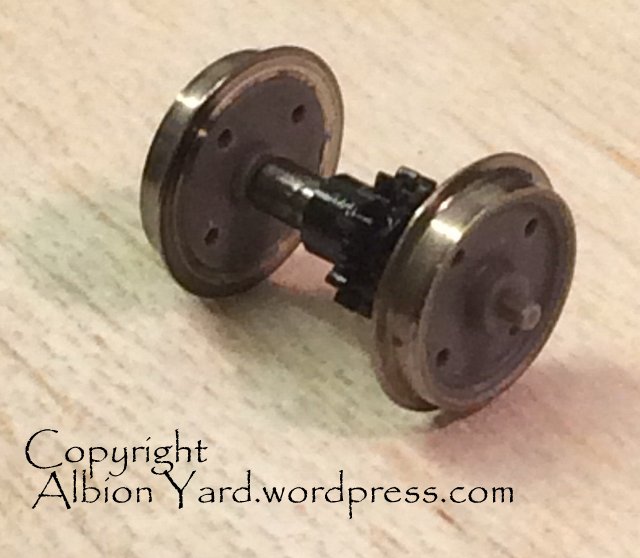
The wheel sets have a metal centre axle with plastic gear set. The wheels are plastic stub ends with metal tyres, which means the chassis block is isolated by the plastic stubs, so again it’s not going to be an easy swap for wider scales, possibly a new centre section will be the easy route with turned tyres for P4, subject to the method of fixing the stubs to the main axle. This centre section could possibly be a plastic/nylon material to prevent shorting of the chassis block, depending on how the actual replacement wheel is fixed.

Sentinel wheelset.
For us not using tension locks the loco comes with buffer beam inserts that fix via the NEM mounting giving the look of a full buffer beam with a panel line. I’m more than happy with this, its better engineered than Bachmann 03/04 blanking plate too, and they’ve even gone as far as engineering removable tanks and brake gear to accomodate this. ‘Design Clever’?, Yup! Is this ‘design clever’ carried out through the model? Yes it is. It deserves to do well, overall it’s well engineered, has the potential to run brilliantly, and launch a thousand box layout, inglenook micro’s all in one fell swoop. The MPD fest is over, the next new thing is micro industrials!, and about time too, I’m going to get a blue one next, for £55 RRP this is real value for money!
The sharper observers will note on the instructions a picture of a model with outside rods and cranks. Don’t be surprised to read strident comments about it being ‘the wrong train in the picture’ I rather doubt that’s a mistake, but the reference to the Shropshire and Monmouthshire Railway, however, very definitely, is. Try, ‘Montgomeryshire’ :0).

Note square end section splined axle stubs. Wonder why? …
You recall I mentioned the burrs on the axle ends?, close examination shows those to be splined axle ends which would allow easy fixing and retention of coupling rods, and a very easy Hornby release for 2015 of an outside crank version. ‘Design Clever’?, that’ll be a yes then.
So remember when the 2015 froth fest starts on your fave interweb foam generator, pile in there with outside cranked Sentinel, no one else will guess it …


You must be logged in to post a comment.