Vitamin ‘C’ for Hornby’s 42XX

IMG_1396

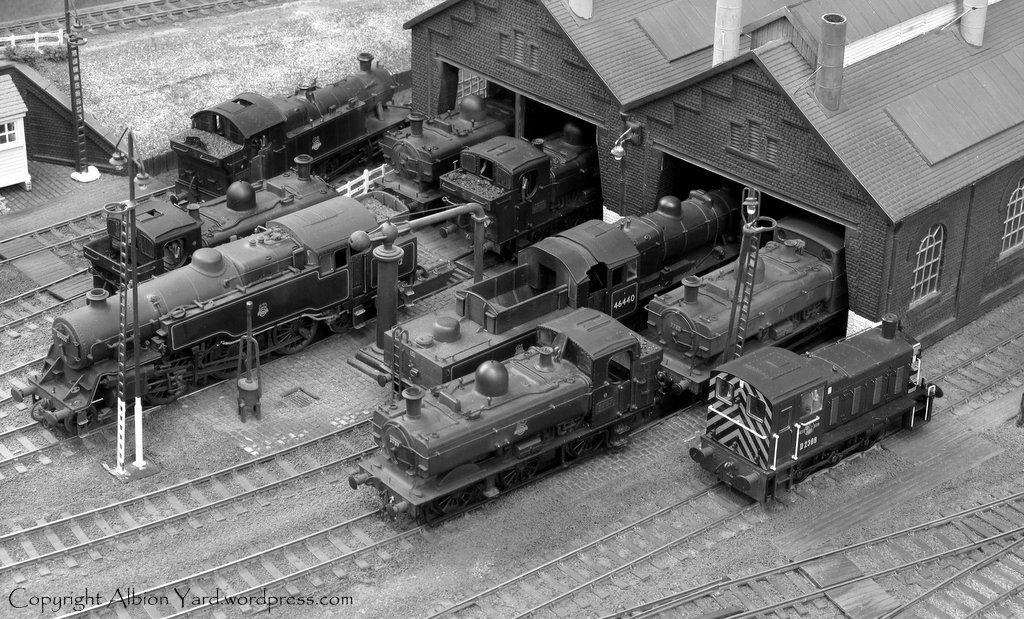
Oranges?, nup, its an easy way to give your ‘sloppy’ chassis a quick boost to stiffen them up, and perform better. Best of all its another fifteen minute hero, it takes no time at all to do this modification. Most RTR is designed (not unreasonably) to go round ‘train set’ curves, which of necessity are pretty tight. So you’ll often find that on some loco chassis and bogie/pony trucks there is what appears to be too much lateral movement on the axles. ‘Too much’ really relates to your own requirements, if using second radii or less this modification isn’t going to be of much use to you as it will prevent the stock working well, particularly through reverse curves. Some of us who have been round the block a bit can easily see a quick fix and sometimes its easy to forget that the old dodges we learnt too long ago to mention, are still relevant to new modellers, and those who simply haven’t come across them before.

Peco R9 Fibre Washer Cut to Circlip

Peco R9 Fibre Washer Cut to Circlip

If you’re using Peco streamline medium radii curves or greater this easy modification will give you better running and in some instances make the ‘sit’ of the locomotive on the track look much better too. On Albion Yard I have some of the medium radii curves on ‘Y’ points and the asymmetric three way point. On my new ‘micro’ layout I have a similar mix including one of the Code 75 curved points. There are three RTR locomotives that I’ve done this modification to that immediately spring to mind. They are the Bachmann 45XX pony trucks, the Heljan class 14 ‘teddy bear’ drive and crank axles, and the Hornby 42xx drive axles.

Fitting Circlips to Heljans Class 14

Fitting Circlips to Heljans Class 14

If you’ve built locomotive chassis kits, at some time you’ll have encountered ‘side play’, the lateral movement of axles and wheels and how to reduce it. Often it can be done with washers of the same internal diameter as the axle. There is an element of trial and error, ideally you can fit the wheels to the chassis and body and move it through pointwork and curves to see if there are any places where wheels and coupling rods foul parts of the chassis or bodywork. With Romfords for example its easy to unscrew the wheels adjust the number washers and replace them. However if your wheelset is pre assembled like on RTR locomotives unless you take the axle assembly apart, you need another process to do this. The simple way is with the fibre washers provided by Peco.

42xx Leading axle with circlips fitted. Note how close the crosshead/crankpin will be without them.

42xx Leading axle with circlips fitted. Note how close the crosshead/crankpin will be without them.

They are coded R-8 and R-9 (R8 = 1.59mm internal diameter and R9 = 3.0mm internal diameter) As they are fibre washers you can cut them with a sharp craft knife. Its also worth colouring them with a black marker pen to help disguise them when fitted, (recent production has been a sky grey color). On the 42xx (and HJ Cl14) the chassis has a very marked lateral movement across all axles. The leading axle and cross heads have the potential to collide if they are mishandled, so I decided that this axle should have minimum movement. Using R9 washers I cut them to a ‘C’.

Its important that the ends of the C look like the C on your keyboard, (see class 14 image), the ends must be close rather than a semi circle. This prevents the washer from falling off. What you’ve now made is a sort of circlip. Using tweezers these circlips can be put onto the axle, I find it easier to do this with the axle removed from the chassis, and remember to keep an equal number either side of the chassis.

Fixing circlips with chassis baseplate removed

Fixing circlips with chassis baseplate removed

It doesn’t matter if the axle diameter is a little less than the internal diameter of the washer/circlip as that allows a little play and prevents binding. If you have too many either side of the chassis they can cause friction between the wheel and chassis so be mindful of that when adding them. I then test run the chassis through the tightest of my curves, if the loco runs smoothly then its right, if not then adjust the number on each axle to suit, (this is the trial and error/gaining experience apprenticeship bit we all go through. Basically look to get a smooth and regular amount of play across the axles, difficult to describe, but you’ll know it when you see it! I’ve set mine up so that the drive axle hasn’t got much play and the leading axle much the same.

Circlips in place on Heljan's Class 14

Circlips in place on Heljan’s Class 14

I did the same with the Class 14 too, this loco as supplied almost waddled on straight track which was noticeable with such a relatively long body. adding the washers sorted this and the loco runs much better too as there is less movement in the chassis, so the drive train works more efficiently.

Bachmann 45xx Pony Truck

Bachmann 45xx
Pony Truck

Pony and bogie trucks can be modified in the same way, axle diameter is usually suitable for the R8’s, what I tend to do is change the original wheels for Alan Gibson equivalents to improve the appearance. I use an Alan Gibson back to back gauge to ensure the wheels are the correct distance apart when fitting them.

Not Everyone
Works For Peanuts …

Posted in Airfix, Bachmann, brassmasters, British Rail, canon, DCC, dcc sound, Eastern Region, Great Western, hobbies, Hornby, Ian Futers, Kalmbach, Layout, LMS, LNER, Midland Region, Model Railroad, Model Railway, Model Railway Journal, Modelling, Narrow Gauge, Nevard, OO Gauge, Scottish Region, Southern Region, Uncategorized, Western Region | Tagged , , , , , , , , , , , , , , , , , , | 4 Comments

Six of the Best

Some more stunning footage from the recently rebuilt Mosquito flying from Hamilton Airport in Canada with the CWH Lancaster, Spitfires, Hurricane and B25 Mitchell. The Mosquito is one of my favourite aircraft and I can remember being allowed access to the BAe photo library at Hatfield a couple of times when I worked there. It was an absolute treasure trove of images, some of them were technically still ‘classified’ even though they were pictures of WWII equipment.

The Canadian Warplane Heritage Museum at Mount Hope (Hamilton) is well worth the visit, last time I was there I nearly came away with an F-86 deal, real ones!

She always gives me that look whenever I’m near this sort of museum, that ‘don’t you even think about it’ one! :0)

Posted in aviation, canada, hobbies, life, media, Photography, travel, Uncategorized | Tagged , , , , , , , , | 2 Comments

Last call for Albion Yard …

Port Albion Ont. ?

Port Albion Ont. ?

As I’ve mentioned before this year is going to be the last shows for Albion Yard. The dates below are the final bookings for the layout, so if you’re attending one of these shows and want to see the layout, come along and say hello. The future for the layout after Warley has not yet been decided, options include moving parts of it on to interested parties or recycling track sections to a US/Canadian project in HO. That final decision will be made in November.

http://www.titfield.co.uk/Camrail/Camindex.htm

http://www.modelraillive.co.uk/

http://www.mmrs.org.uk/exhibition/exhibition.htm

http://www.thewarleyshow.co.uk/

Not Everyone
Works For Peanuts …

Posted in Airfix, Bachmann, Branch Line, British Rail, canada, canon, DCC, dcc sound, Eastern Region, Exhibition, Great Western, hobbies, Hornby, Industrial, Kalmbach, Layout, LMS, LNER, Manchester, Midland Region, Model Railroad, Model Railway, Model Railway Journal, Modelling, Nevard, OO Gauge, Railex, Scottish Region, Southern Region, Uncategorized | Tagged , , , , , , , , , , , , , , , | 3 Comments

Not another MPD, & Parkside’s Mica X7…

IMG_1336

It’s easy to think that sometimes, and I have to admit I’m not the biggest fan of this type of layout as often they are a bit ‘samey’ and it takes a real artistic touch and observational flair in particular to make an MPD layout stand out for me.

Today I was fortunate enough to have a look at one that some friends are selling on behalf of an estate, and take a few snaps with some of Albion Yards motive power on it. It’s a really nice layout, well observed and with scratch built buildings. With a little TLC it could be a show stopper. More details a bit later but the above image gives a bit of the flavour of it.

Parkside PC85 GWR Mica X7

Parkside PC85
GWR Mica X7

This is the ‘first draft’ build of the new Parkside X7 Mica in 4mm scale. Up to their current excellent standard, and just the couplings and final handrails to fit at the left hand end. The tie bar is perfectly straight out of the pack, but unfortunately has stretched and bent due operator error in handling. I do tend to replace them with brass wire anyway for extra rigidity, for this one I’ll simply make one cut and re-glue it which will resolve the stretch for the time being.

Not Everyone
Works For Peanuts …

Posted in 3f, Airfix, Bachmann, Branch Line, brassmasters, British Rail, canon, Chris Nevard, DCC, dcc sound, Eastern Region, Great Western, hobbies, Hornby, Kalmbach, Layout, LMS, LNER, Manchester, Midland Region, Model Railroad, Model Railway, Model Railway Journal, Modelling, Nevard, OO Gauge, Photography, Scottish Region, Southern Region, Wales, Welsh Marches, Western Region | Tagged , , , , , , , , , , , , , , , | Leave a comment

Exhibition Diary 2013

'Tin un's'  in the Forest

‘Tin un’s’ in the Forest

This year is going to be a short season starting next weekend 20th July for Albion Yard at Larkrail 2013
http:Camrail.htm

The exhibition page will be updated in the next week or so with the remaining three shows the layout will do. The line up for Larkrail looks very interesting with plenty of demos and an Expo feel to it, this year will be a smaller show than Camrail which I understand it replaces this year.

As this is going to be Albion Yards last season I’m thinking what I can make or finish in the next week to bring along. Two candidates stand out, Oil Burner 3711 or the 42xx. It will give a spur to finish a few wagons too, the new Parkside Mica X7 is all but complete on the bench, a couple of Z2 gunpowder vans and two Hornby horseboxes that just need couplings and pipes.

Decisions decisions …

Not Everyone
Works For Peanuts …

Posted in Airfix, Bachmann, book, Branch Line, brassmasters, British Rail, canon, DCC, dcc sound, Eastern Region, Exhibition, Forest of Dean, Great Western, hobbies, Hornby, Ian Futers, Industrial, Kalmbach, Layout, life, LMS, LNER, Manchester, Midland Region, Model Railroad, Model Railway, Model Railway Journal, Nevard, OO Gauge, Photography, Scottish Region, Southern Region, Uncategorized, Wales, Welsh Marches, Western Region | Tagged , , , , , , , , , , , , , , | Leave a comment

Hornby 42xx Chassis modifications

IMG_1246

This is a view of the new guard irons that I’ve made for Hornby’s 42xx, which has given an immediate improvement in the locos appearance both from the side and rear view. Its an easy mod to do and I’ll cover that in this posting. Apart from the pony truck, which I will either replace or modify, I’ve now completed the significant modifications to the chassis. In the previous post I referred to the axle side play and fixing that with Peco fibre washers. The chassis has now had a good amount of running on a test bed, and back and forth through a crossover and curved points with no detriment to the running, so the fibre washers are well worth doing. With the reduced side play particularly on the leading axle there is much less opportunity for the crosshead and slide bar to cause problems which was one concern I had. Another benefit of this is improved contact with the pick wipers on the backs of the wheels. I’m of a mind to replace the pickups on mine with top wiping pickups, these will fit easily into the body. The reason I may do this is Albion Yard has significant weed growth particularly in the sidings and there’s clearly the potential for one of the existing pickups to catch. The layout will be up for testing and filming soon so I’ll re-assess the pick ups at that point.

IMG_1240

So how easy is it to make guard irons?, the answer is, very. Above you can see a couple of pieces of scrap etch that have been soldered together to make a sandwich. Once they are soldered together file them to match the shape required from a drawing or good photograph. By having them soldered together you do two things, you save time as you are working on a pair of guard irons at the same time. If I were doing more than one loco I’d just add further layers to suit. The second and important benefit is that you are making a mirrored pair, left and right hand versions of the same shape and dimensions.

IMG_1242

Once you’re happy with the initial shape of the guards unsolder them and form the first one. If using brass like I have, they will bend easily to shape.

IMG_1241

Make sure you check the first one against the chassis and running rail so you have the correct amount of drop, and width from the chassis to the rail. Once happy with the first one, form the second one, make sure you get it the correct way round if they have an uneven taper to them, so check the orientation before making your first bend. It’s simple to make a mirror image of the first guard by checking both of them match visually as above.

IMG_1245

Using either a drawing or photographic references like I did, cut the guard irons to length. The mounting plate fixing to the chassis is actually quite short on the prototype and is noticeable. Rather than relying on superglue I drilled and pinned my guards with a 0.4mm drill and made a rod between the two. This will give added strength to the joint so in the event of a knock on the guard irons they are much less likely to be displaced. Total time for this job was about an hour, definitely an hour well spent. Next up will be the cab area and/or pony truck. The cab area looks to be a easy fix, I’ve already opened up the roof sliding vent throwing more light into the cab. Using detail pictures I took of a 52xx I’ll make the details around the rear cab doors and windows, I don’t see any potential problems with them or replacing the glazing. The final detailing will be replacing the buffers for sprung versions, lamp and fire irons where appropriate, possibly a re-number, for a loco that would have worked regularly through Aberbeeg and weathering.

Again I’m really pleased with the impact these small changes are making, partly because whilst its a Hornby 42xx, its now very definitely my Hornby 42xx. And that’s quite a nice feeling.

Not Everyone
Works For Peanuts …

Posted in Airfix, Bachmann, Branch Line, brassmasters, British Rail, canon, Canon G10, Chris Nevard, DCC, dcc sound, Eastern Region, Exhibition, Great Western, hobbies, Hornby, Kalmbach, Layout, life, LMS, LNER, Midland Region, Model Railroad, Model Railway, Model Railway Journal, Modelling, OO Gauge, Railex, Scottish Region, Southern Region, Uncategorized, Wales, Welsh Marches, Western Region | Tagged , , , , , , , , , , , , , , , | 2 Comments

Is 42 really the answer to everything? …

IMG_1843

Hornby in shock horror steam engine fiasco…. Hornby today released pictures of the ‘new’ 42xx which they claimed was all their own design. We can prove this is a lie and we the ‘foamati’ demand to know why at £119 million each… We took secret sneak pictures of the GWR 52xx which was designed in 1836 by Mr Ian Wright (ex-Arsenal), which has exactly the same number of wheels, cylinders AND a boiler!

You could be forgiven for thinking this way if you’ve scanned the interweb regarding Hornby’s 42xx. It seems to herald the impending death of:
A/ The hobby,
B/ Hornby PLC,
C/ Simon Kohler, (who appears to have his own personal frothwah, thats a bit like fatwah, only foamier)
D/ Life on earth

But it isn’t really the 42xx price that’s preoccupying me, or a belief of aliens in Suffolk. It’s price does work for me. Shock horror again, yes it does!, you did read that right. PDK’s 4mm kit alone costs £110, makes up into a good model, but you have to have the skill to make it, the time to make it and the budget to make it. Don’t forget the wheels and motor too. Comparing the two together that Hornby model actually has a significant edge on detail on the PDK kit, so putting it simply, for a finished model, Hornby is better value for money. You may save money finding a K’s 42xx kit but it’ll be cruder than a short changed Ipswich tart, and you’ll still have the problem of finding a good one that’s not been opened and spread across the kitchen table or made a fist of.

I bought a Hornby model and yes it had some issues. The major one was unique I think, as its not been mentioned on any current foamathon, and it would be noticeable to anyone with eyes. I sent Mr Kohler pictures of it and he immediately offered a replacement, which I declined as I can fix it and am happy overall with it as a starting point.

IMG_0907

I’ve stripped the chassis down and degreased it, I felt there was a bit too much grease out of the box, a not uncommon problem in my experience. Between the motor and the flywheel there is a plastic housing for the worm gear. Once warm there was a small amount of seepage from this housing. I reduced this by making a simple gasket from a film of canopy glue, before replacing the cover which means there has been no subsequent leaks with cold or warm running. One of the interesting design elements is the square axle holes, like others I feel this is not the best way forward, however having recently made over a Railroad Class 40, I noted that too has square axle holes, so the technique clearly works even though it seems odd to say the least. I doubt my loco and the majority of others will see enough use to find these axle mounts an issue in terms of wear, my primary concern is that dirt and dust has an easier access point to the drive train.

IMG_1234

The running of my chassis is good, though like the Heljan Class 14 there was significant lateral movement of each of the driving wheel sets. An easy fix for this is the Peco 1/8 inch fibre washers. By fixing these to the driving axles the sideplay can be minimised with little effect on the radii of the curves that can be used.
I’ve used the following axle washer combination
Leading axle six washers
Second axle four washers
Third axle Nil washers
Fourth axle six washers
The application of these washers has reduced the sideplay and gives better running as a result, the chassis can still negotiate Peco medium radii points with no adverse effect. A very simple, easy improvement and well worth doing.

The next improvement made was fixing the rear guard irons, or rather making some and fixing them. An unusual omission from Hornby, and making/fixing then makes a big visual impact to the model, more on that soon. The front bogie is next on the ‘to do’ list, and a quick makeover of the cab area is another feature that will bring this engine into sharp focus. Looking at the body there are some excellent design elements that in my opinion are very clever. ‘Design Clever’ may partly be PR speak as part of a branding exercise but I was really impressed with the body chassis fit and body assembly, where it will pay dividends versus a kit alternative.

So, what is it about the 42? Well, as a number, it is the answer to the ultimate question of life, the universe and everything. As a toy train, the 42xx from Hornby is a good starting point for something very good indeed. Out of the box if you want a large GWR 42xx tank for a sensible price, its the only game in town, so this ’42’ is the answer..
By the time I’ve completed this makeover within a week or two I’ll have a cheap high quality model of a 42xx,

On the other hand, the foamers will have, well, more foam.

Not Everyone
Works For Peanuts …

Posted in brassmasters, British Rail, canon, DCC, dcc sound, Eastern Region, Exhibition, Forest of Dean, Great Western, hobbies, Hornby, humour, Kalmbach, Layout, life, LMS, LNER, media, Midland Region, Model Railroad, Model Railway, Model Railway Journal, Modelling, Nevard, OO Gauge, Photography, research, Scottish Region, Southern Region, Uncategorized, Wales, Western Region | Tagged , , , , , , , , , , , , , , , , , , , | 15 Comments

SuperQuick Track …

IMG_1190

Superquick? making track? Surely they make railway buildings and des rez in cardboard?, They don’t do track do they …

Well, technically that’s true, but in preparation for a DVD project with Paul Lunn and Chris Walsh of Activity Media http://www.model-railway-dvd.co.uk/ I wanted to get one of the demonstration sections up and built quickly. The following images show some of the work which has only taken a few hours to complete. Now I can already hear some cogs whirring wondering how that layout section could only take a few hours. Obviously its small (and that helps) but if you use different techniques from ‘the usual way’ you can save time and effort.

IMG_1196

Saving time and effort is always one of my key objectives hence the use of C&L Flexitrack, Peco ‘Streamline’ points and Woodland Scenics underlay. The reason for the mix of track types is I wanted to see how the two looked and worked together. The Code 75 range of points I know work well having used them on Albion Yard. I know friends who are very quick at building copper clad points, but part of the remit was to use easily accessible components for speed and partly because they are an element of the story we will be telling. I’d been recommended the Woodland Scenics underlay by two modelling mates, Al Reynolds and Peter Marriot, who both spoke highly of its properties and general usefulness. I’ve used the Peco underlay myself and found that the section I’ve got seems indestructible, but its incompatible with the C&L track. It seemed as good a time as any to try the Woodland underlay, and it was only a small layout so if it went ‘pear shaped’ I could recover it easily or start again.

I used a quick drying no more nails type of adhesive as it dries quickly, allows a little bit of adjustment and has good final strength. The underlay is a dense foam with a ‘ballast’ shoulder cut into the side. The ‘HO’ product I used cut easily with scissors or a knife and can be laid in gentle curves without cutting it to help form the radius. Mine are roughly Peco medium radius curves. Any tighter and I’d cut the strip in half lengthways (there’s a ready made cut line provided) and lay two narrow strips side by side, as they recommend.

IMG_1189

So what made the track ‘SuperQuick’? Well I like taking a risk sometimes and am usually happy to try a new technique or two if I think it has value. What I’ve done with all the track here is to fix it down with low viscosity Super Glue! You do have to have a clear plan of where the track is going to go and have prepared any point motor locations and things like wiring runs. The points here are all powered with the Peco PL10E motor which has the extended pin. These are mounted on the point motor base plates screwed to the underneath of the board. I like the PL10 family, they are cheap, robust and effective particularly when used as designed with the Peco point range. I’d prepared all the separate track components cutting the rail to length and removing some of the webs to vary sleeper spacing. I started with the lead in curved point, gluing it in place and then each new track panel or point was added. The beauty of using superglue is it sets very quickly, so I did have to make sure I wasn’t straying in any of the alignments, which is no different to normal track laying. The C&L panels are fixed using a couple of places along each length to get them in position, and then I return to fix every sleeper.

IMG_1192

The points are fixed in a similar manner. The glue cures very quickly and still retains the acoustic and cushioning properties of the underlay. There is good strength too, you can move the board slightly just holding the track. I also managed to drop the board face down whilst soldering the wiring with no ill effect on the track, so I’m very happy with this method, and in particular with the underlay. You’ll also note the headline image, one of Dave Franks’ new cast whitemetal bufferstops. This is a Midland Railway version, beautifully cast and comes with components that allows either OO or EM/P4 build. This works really well with the C&L components and will give another focal interest point, and will ‘place’ the location to a degree. There are a good range of prototypes available and in progress, well worth a look for something a bit different.

Now I’ll be starting to detail the track prior to paint and ballast, things like point rodding or levers and fishplates. The layout only has a very small footprint which I may widen by a few inches, as its more of a working diorama than a layout. It is I suppose the first ‘micro’ or mini layout I’ve built, which is a challenge in itself to think really compact and bijou! What I’m hoping to capture is something like Albion Yard below, and get a feeling of realism, depth and distance. I’m quietly confident with the way the layout has gone so far, I’ll be able to show that to good effect.

Space, The Final Frontier

Space, The Final Frontier

Woodland Scenics

http://woodlandscenics.TrackBed   http://woodlandscenics./page/1

C&L Track http://www.finescale.org.uk

Peco Products http://www.peco-uk.com/

Lanarkshire Model Supplies http://www.lanarkshiremodels.com

Not Everyone
Works For Peanuts …

Posted in Airfix, Bachmann, Branch Line, brassmasters, British Rail, canon, DCC, dcc sound, Eastern Region, Exhibition, Forest of Dean, Great Western, hobbies, Hornby, Kalmbach, Layout, LMS, LNER, Midland Region, Model Railroad, Model Railway, Model Railway Journal, Modelling, Narrow Gauge, Nevard, OO Gauge, Railex, Scottish Region, Southern Region, Welsh Marches, Western Region | Tagged , , , , , , , , , , , , , , , , , | 2 Comments

The Impressionists IV

Impressionist Brake

Impressionist Brake

Keeping to the theme of making things that look like something else, here’s a part converted Airfix LMS Brake Van. I have three of them two fitted and this one which was unfitted and had been pulled apart for test fitting of Shawplans laser cut glazing. It was one of those ‘one day’ projects to put it back together with a bit of extra detail. Well I decided that I’d ring the changes and make a representation of the Diag.1890 LMS brake van with the veranda entry next to the cabin. The subsequent van as modelled by Airfix was a later variant of this diagram van that I’m representing. So far so good I’m quite pleased with it. I’ve to scribe end planks, fit stantions to either end of the veranda’s lengthen the foot boards, replace handrails and that’s about it. Re paint it and from a normal viewing distance the ‘blagged’ element will not be too visible, but the finished van will look very different.

Before and After

Before and After

The makeover of Hornby’s Railroad Class 40 is now complete, and this shot shows just how much you can transform the appearance with a little bit of effort. There are still a multitude of things wrong with it, but the makeover has masked those errors to a degree that I’m satisfied with. By the time its seen clawing its way across the Settle and Carlisle line on a mix of primarily blue and grey Mk1’s with a couple of Maroon ones thrown in, few people will notice the discrepancies, the overall picture being greater than the separate elements.

D&E Modeller ?

D&E Modeller ?

I don’t know if I am what is sometimes referred to as a D&E modeller, but it was interesting just getting a couple of locos to hand for this image. All of them are Ready To Run (RTR) models but with a significant part of ‘me’ put into them. Many of my mates are the same, RTR is often the starting point to make it better, regardless of if its a 30 year old Airfix Brake van above or the latest Hornby/Bachmann release. Similar to the ‘focus’ of the layout being sharpened, http://albion-yard-cinderford/ I’ve noticed a subconscious tightening up in the era of diesel models I prefer to work on and keep. This has pretty much dropped into 1968 to 1978, with a little latitude of a few years at either end. The new layout I’m working on for a media project sits firmly in that era and will hopefully appeal to both dyed in the wool contemporary ‘D&E’ and historic steam modellers too. The class 40 and the 47 will be part of operating stock on a S&C project a few years away, but in the meantime I’m definitely drawn to this ten to fifteen year period part of it being the era I took most interest in watching trains.

The Oil Burner, 3711

The Oil Burner, 3711

I do have a cross over project too mixing my steam and diesel interests which will involve a certain BR/WR Pannier which I’ll have to have complete by September, as will a makeover of the Hornby 42xx which I think is a pretty good starting point. I’ll post more on those in due course.

In the meantime its back to gluing flexitrack and points down to foam underlay with Superglue. Yes you read that right, and, it works!

Not Everyone
Works For Peanuts …

Posted in Airfix, Bachmann, Branch Line, British Rail, canon, Eastern Region, Exhibition, Great Western, hobbies, Hornby, Industrial, Kalmbach, Layout, library, life, LMS, LNER, Midland Region, Model Railroad, Model Railway Journal, Modelling, Nevard, OO Gauge, Railex, Scottish Region, shades of grey, Southern Region, Uncategorized, Western Region | Tagged , , , , , , , , , , , , , , , | 3 Comments

13, Feeling Lucky ?

IMG_1136

This is Parkside Kit No PC13, and I was feeling lucky. Its an interesting prototype and a visually appealing wagon being a covered hopper. Its taken quite a while to get the kits I’m building together, partly because the layout (Bawdsey) they are destined for hasn’t been out for about a year, and partly because the kits were old. The age didn’t have much to do with it apart from they are some of the earlier kits made by Parkside and are of a standard which Parkside and a good few other manufacturers have long since passed. The same could be said of some Ratio and Cambrian kits too. That doesn’t mean you should discard or disregard them, it just means you’ll be doing more of that ‘modelling’ stuff.

Parkside PC13 LNER Grain Wagon

Parkside PC13 LNER Grain Wagon

Having said that yesterday was a day when I thought, bollox, I’m going to finish something today. There are a few wagon kits lying about and these were the most challenging available as I was in that sort of mindset. Some of the more interesting elements are a two piece floor, solebars that don’t line up opposite each other to give a square setting of the axle. The picture above shows some of the work I’ve done around the chassis, a good deal of it is made up and uses scraps of phosphor bronze and bits of plasticard. It does capture the flavour of what should be underneath the wagon, this aided significantly by the book below.

The 4mm Wagon Pt1 ISBN 1874103038

The 4mm Wagon Pt1
ISBN 1874103038

This is Geoffs first wagon book published by Wild Swan Publications and is part of a trilogy. All three of them are well illustrated and have plenty of hints and tips that work not just for wagons but across other modelling applications too. The chassis solebar fault was one of those indicated in Geoffs text with a timely warning for me about the ‘V’ hangers too. All three of the books are worth getting hold of and they cover a good range of types of wagons. Also worth including in the mix is John Hayes’ The 4mm Coal Wagon.

IMG_1137

I am really pleased I’ve built these three vans. They’d been sitting as just the shells for a couple of years, and all it needed was just getting on with it, nothing more complicated. There are still a few bits to do to them, the buffers are too thin and some of LMS Models replacements will sort that out. They’ve been weighted I use car wheel balance weights. They’re self adhesive and you get a standard weight for all your wagons, I use 20oz per wagon plus whatever the kit and components weighs. Couplings may be Dinghams or three links, I’ve not yet finally decided, and Modelmasters or Cambridge Custom Transfers will provide the decals. Theres a few more older kits sitting in the drawers in the workshop, having broken the back of these three I think a few others may well be seeing the light of day again!

http://www.lanarkshiremodels.com/

Wild Swan Wagon Modelling Books

Geoff Kent
The 4mm Wagon Pt 1
Opens, Minerals & Hoppers ISBN 1874103038

The 4mm Wagon Pt 2
General Merchandise Vans, Special Purpose Vans & Tank Wagons ISBN 1874103240

The 4mm Wagon Pt 3
Conflats/Containers, Long Loads,Steel, Brake Vans, Finishing Touches ISBN 1874103976

John Hayes
The 4mm Coal Wagon ISBN 1874103488

Not Everyone
Works For Peanuts …

Posted in Airfix, Bachmann, book, Branch Line, British Rail, canon, Chris Nevard, Eastern Region, Exhibition, hobbies, Hornby, Kalmbach, Layout, LNER, Midland Region, Model Railroad, Model Railway, Model Railway Journal, Modelling, Photography, research, Scottish Region, Southern Region, Western Region | Tagged , , , , , , , , , , , , , , | 2 Comments